Stop letting long grocery lists and mountain-high piles of dishes steal your evening joy. Many people believe a delicious dinner requires hours of preparation and an overflowing pantry. This collection proves that you only need three quality ingredients to create a meal that tastes like a professional made it.
3-Ingredient Recipes
Simplifying your kitchen routine does not mean you have to sacrifice flavor or nutrition. You can enjoy everything from succulent seafood to hearty stews without the stress of complex techniques. These recipes focus on high-impact combinations that do the hard work for you.
Explore a new way of cooking that prioritizes your time and your sanity. Whether you are a busy professional or a parent on the go, these 45 dishes will transform your routine. Clear your counter and get ready to enjoy the most effortless meals of your life.
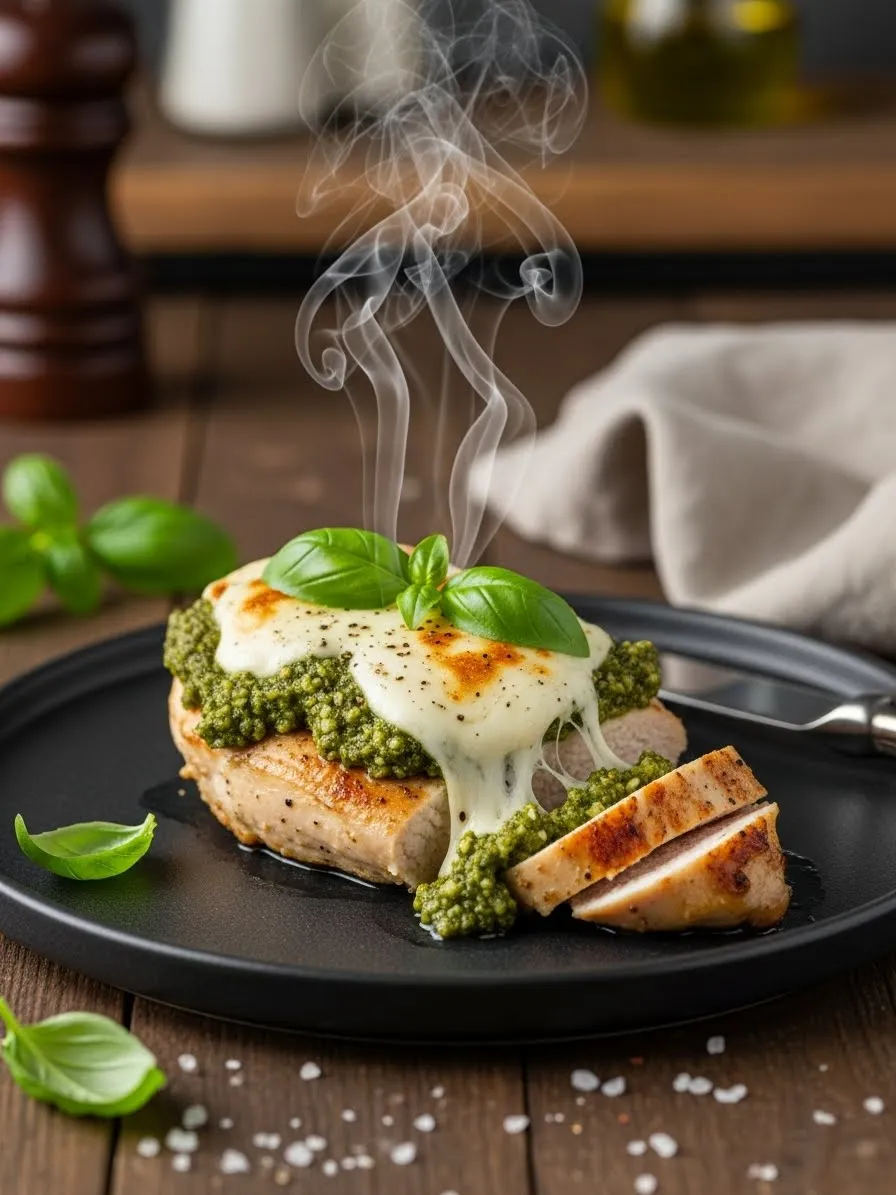
Cooking often feels like a chore when you look at a long list of ingredients. This dish changes that narrative by using only three powerful components. You get juicy protein, herbaceous greens, and melted cheese in every single bite.
The steam rising from the plate shows how fresh and hot this meal remains after cooking. It looks fancy enough for guests but stays simple enough for a tired Tuesday night. You will love how the basil aroma fills your kitchen while the cheese bubbles in the oven.
Forget about complex sauces or hours of chopping. This recipe relies on high quality store bought pesto to do the heavy lifting for you. It provides a burst of flavor that pairs beautifully with the mild, creamy mozzarella.
Required Ingredients
2 large boneless skinless chicken breasts
1/2 cup of basil pesto
4 thick slices of fresh mozzarella cheese
Equipment List
Baking dish
Kitchen knife
Cutting board
Meat thermometer
DIY Instructions
Preheat your oven to 400 degrees Fahrenheit before you start any prep work.
Place the raw chicken breasts on a cutting board and pat them dry with a paper towel.
Lay the chicken flat in your baking dish so they do not overlap each other.
Spoon a generous amount of pesto over the top of each chicken breast.
Spread the pesto with the back of a spoon until the meat is fully covered in green sauce.
Put the baking dish into the oven and cook for about 20 minutes.
Take the dish out safely using oven mitts and place one or two slices of mozzarella on each piece of chicken.
Return the dish to the oven for another 5 minutes or until the cheese is melted and slightly brown.
Check the internal temperature with a thermometer to ensure it reaches 165 degrees Fahrenheit.
Let the meat rest for five minutes before slicing to keep the juices inside.
2. Slow Cooker Salsa Verde Pork
3-Ingredient Recipes
Tender shredded meat often requires a long list of spices and hours of labor. This recipe cuts through the noise by using a vibrant green sauce to provide all the seasoning you need. You get a rich and savory result with almost zero effort.
The image shows a dark pot filled with juicy pulled pork topped with chunky green salsa and fresh white onions. Steam rises from the center to signal a hot and comforting meal. Slices of lime sit on the side to add a bright finish to the heavy flavors.
You will find that the pork shoulder breaks apart with just a fork after a long soak in the salsa. This meal works beautifully for busy families who want a warm dinner waiting for them at home. It proves that simplicity can still offer a deep and complex taste.
Required Ingredients
3 pounds pork shoulder (Boston butt)
1 jar (16 ounces) mild or medium salsa verde
1 large white onion
Equipment List
Slow cooker
Two large forks
Knife
Cutting board
DIY Instructions
Remove the pork from its packaging and trim away any very thick layers of white fat.
Use your knife to chop the white onion into small pieces.
Place the trimmed pork shoulder directly into the bottom of your slow cooker.
Pour the entire jar of salsa verde over the meat until it is well coated.
Scatter the chopped onions on top of the sauce and meat.
Put the lid on tight and set the machine to the low heat setting.
Cook the pork for 8 hours without opening the lid to keep the heat inside.
Lift the meat out once it feels very soft and place it in a large bowl.
Use two forks to pull the meat apart into small shreds by moving the forks in opposite directions.
Pour some of the leftover juices from the pot back over the shredded meat before serving.
3. Sheet Pan Sausage and Peppers
3-Ingredient Recipes
Sheet pan meals save time and reduce the pile of dishes in your sink. This colorful dinner brings together smoky meat and sweet vegetables on a single tray. High heat creates charred edges that pack a massive amount of flavor.
Bright red and yellow peppers surround thick sausages in the photo to create a festive look. Each piece of vegetable looks soft and caramelized from the roasting process. A sprinkle of dried herbs over the top adds a final touch of fragrance.
This recipe is a great choice when you want a hearty meal but lack the energy for complex techniques. The oven does most of the work for you while you relax. It remains a classic way to feed a crowd without any stress.
Required Ingredients
1 package (12 ounces) Italian sausages (sweet or hot)
3 bell peppers (assorted colors)
2 tablespoons olive oil
Equipment List
Large rimmed baking sheet
Kitchen knife
Large mixing bowl
Spatula
DIY Instructions
Turn on your oven and set the temperature to 400 degrees Fahrenheit.
Wash your bell peppers and cut them into long strips about one inch wide.
Throw the pepper strips into a bowl and toss them with olive oil to coat every piece.
Spread the oiled peppers out in a single layer across your baking sheet.
Place the whole sausages in between the pepper strips on the tray.
Slide the tray into the center rack of your hot oven.
Bake for about 25 to 30 minutes until the sausages are brown and the peppers are soft.
Turn the sausages over halfway through the cooking time using a spatula or tongs.
Remove the tray and let it cool for a minute so the juices settle.
Serve the peppers and sausages together on a plate or inside a crusty bread roll.
4. Honey Garlic Glazed Salmon
3-Ingredient Recipes
Fresh fish takes on a whole new life when you add a sticky and sweet coating. This recipe uses honey to create a glossy finish that looks like it came from a professional kitchen. The garlic adds a sharp bite that balances out the sweetness.
A thick stream of amber honey pours over a pink salmon fillet in the image. You can see minced garlic bits and golden slices of garlic resting on the surface. The meat looks flaky and moist under the shimmering glaze.
You can prepare this elegant meal in under twenty minutes from start to finish. It provides a healthy dose of protein without requiring a pantry full of spices. This is an excellent option for a quiet night when you want something special.
Required Ingredients
2 salmon fillets (6 ounces each)
1/4 cup honey
3 cloves fresh garlic
Equipment List
Small frying pan
Garlic press or knife
Small bowl
Spatula
DIY Instructions
Peel your garlic cloves and chop them into very tiny pieces or use a garlic press.
Whisk the honey and chopped garlic together in a small bowl until they are mixed.
Place your frying pan on the stove over medium heat.
Lay the salmon fillets in the pan with the skin side facing down.
Cook the fish for about 5 minutes without moving it so the skin gets crispy.
Flip the fillets over carefully using your spatula.
Pour the honey and garlic mixture over the top of the fish while it is still in the pan.
Let the sauce bubble and thicken for another 3 to 5 minutes.
Spoon the hot glaze from the pan back over the fish several times as it cooks.
Remove the salmon once it flakes easily with a fork and serve immediately.
5. Creamy BBQ Chicken Thighs
3-Ingredient Recipes
Dark meat stays juicy and tender even if you cook it a little longer than usual. This recipe coats chicken thighs in a bold sauce that combines smoke and creaminess. It turns a basic bird into a decadent feast.
Three chicken thighs sit in a wooden bowl with a deep mahogany glaze. White creamy sauce is drizzled across the top in thin lines to create a beautiful contrast. The skin looks crispy and seasoned with cracked black pepper.
This meal feels like a summer barbecue but you can make it any time of year. The thick sauce clings to the meat to ensure every bite is full of flavor. It is a satisfying dish that pairs well with almost any side.
Required Ingredients
4 bone-in skin-on chicken thighs
1/2 cup your favorite BBQ sauce
2 tablespoons heavy cream
Equipment List
Baking dish
Small whisk
Small bowl
Basting brush
DIY Instructions
Preheat your oven to 375 degrees Fahrenheit to get it ready for roasting.
Pat the chicken thighs dry with a paper towel to help the skin get crispy.
Arrange the chicken in a baking dish with the skin side facing up.
Bake the chicken for 30 minutes without any sauce first.
Mix the BBQ sauce and heavy cream together in a small bowl while the chicken cooks.
Take the dish out of the oven and brush the creamy sauce over each piece of meat.
Put the chicken back in the oven for another 10 to 15 minutes.
Wait for the sauce to become bubbly and sticky on the skin.
Check that the meat is no longer pink near the bone before taking it out.
Let the chicken sit for five minutes so the sauce thickens and the meat stays moist.
6. Creamy Spinach Gnocchi
3-Ingredient Recipes
Soft potato dumplings offer a comforting texture that feels like a warm hug. This vegetarian dish uses a simple cream base to tie everything together. Fresh spinach adds a pop of color and a boost of nutrients to the plate.
The bowl shows plump gnocchi floating in a silky white sauce with wilted green leaves. A silver spoon rests on the side of the grey dish, ready to scoop up the meal. The sauce looks light and airy with tiny bubbles on the surface.
This recipe is a lifesaver when you have a busy schedule and need a fast dinner. It feels much more sophisticated than a standard bowl of pasta. You will love how the spinach softens into the warm cream in seconds.
Required Ingredients
1 package (16 ounces) potato gnocchi
1 cup heavy cream
2 cups fresh baby spinach
Equipment List
Large skillet or frying pan
Stirring spoon
Measuring cup
Colander
DIY Instructions
Boil a large pot of water on the stove and add the gnocchi.
Cook the gnocchi until they float to the surface and then drain the water away.
Place a large skillet over medium heat on your stove.
Pour the heavy cream into the skillet and wait for it to start simmering gently.
Add the cooked gnocchi into the hot cream.
Toss the fresh baby spinach leaves into the pan with the other ingredients.
Stir everything slowly until the spinach leaves shrink and turn dark green.
Keep cooking for two more minutes so the sauce can thicken and coat the dumplings.
Turn off the heat once the cream looks thick like a gravy.
Pour the mixture into a bowl and eat it while the sauce is still hot and runny.
7. Garlic Butter Steak Bites
3-Ingredient Recipes
Steak does not always have to be a giant slab of meat that is hard to cook. Creating the beef into smaller pieces allows it to cook quickly and evenly. A rich butter sauce makes the meat feel luxurious and melt in your mouth.
The photo captures pieces of seared steak and bright green vegetables flying through the air above a hot wok. Wisps of steam and oil droplets create a sense of movement and high heat. Red peppers and broccoli add a crunch that contrasts with the tender beef.
This stir fry method ensures that every side of the meat gets a golden brown crust. It is a high energy way to cook that brings a lot of excitement to the kitchen. You get a restaurant quality meal with very little prep time.
Required Ingredients
1 pound sirloin steak
3 tablespoons unsalted butter
1 bag frozen stir fry vegetables
Equipment List
Wok or large heavy skillet
Tongs
Sharp knife
Cutting board
DIY Instructions
Use your sharp knife to cut the steak into bite sized cubes about one inch thick.
Place your wok or skillet on the stove over high heat until it is very hot.
Drop the butter into the pan and let it melt until it starts to foam.
Add the steak cubes to the hot butter in a single layer.
Let the meat sear for two minutes without moving it so it gets a brown crust.
Toss the frozen vegetables into the pan with the steak.
Use your tongs or a spoon to keep the food moving constantly for about five minutes.
Continue cooking until the vegetables are hot and the steak reaches your favorite level of doneness.
Season with a pinch of salt if you wish while the food is still in the pan.
Serve the steak and veggies immediately while the butter sauce is still thin and hot.
8. Butter Poached Cod
3-Ingredient Recipes
White fish is a delicate ingredient that shines when treated with care. Poaching it in butter keeps the flesh moist and adds a rich flavor that oil cannot match. This method prevents the fish from drying out or becoming tough.
Three thick pieces of cod sit in a pool of golden melted butter in the image. Charred lemon slices rest on top of the fish to provide a smoky citrus aroma. A hand squeezes a fresh lemon over the plate to add a final spray of juice.
This dish looks very expensive but uses very basic ingredients from your fridge. It is a light and healthy dinner that still feels like a treat. The butter creates a sauce that you will want to soak up with a piece of bread.
Required Ingredients
2 large cod fillets
4 tablespoons unsalted butter
1 fresh lemon
Equipment List
Small skillet
Spoon
Knife
Spatula
DIY Instructions
Slice your lemon in half and cut a few thin rounds from one side.
Place the skillet on the stove over low heat and add all of the butter.
Wait for the butter to melt completely and start to bubble very softly.
Lay the cod fillets gently into the melted butter.
Put the lemon slices on top of the fish as it cooks in the pan.
Use a spoon to scoop up the hot butter and pour it over the top of the fish repeatedly.
Cook the fish for about 4 to 6 minutes per side depending on how thick it is.
Flip the fillets over very carefully with a spatula halfway through the time.
Remove the fish when the meat turns solid white and flakes apart easily with a fork.
Pour the remaining lemon butter from the pan over the fish on your serving plate.
9. Sweet Potato Black Bean Chili
3-Ingredient Recipes
Chili is the ultimate cold weather food because it stays hot in the bowl for a long time. This version skips the meat and uses hearty beans and root vegetables for texture. It is a filling meal that provides a lot of natural energy.
Steam rises from a green bowl filled with dark black beans and bright orange potato chunks. The thick tomato base holds all the ingredients together in a chunky stew. A wooden spoon rests in the background to show this is a rustic, home cooked meal.
You can make a big batch of this and eat it for several days. The flavors actually get better after they sit together in the fridge. It is a smart way to feed yourself well on a very tight budget.
Required Ingredients
2 large sweet potatoes
2 cans (15 ounces) black beans
1 jar (24 ounces) chunky tomato salsa
Equipment List
Large pot
Vegetable peeler
Knife
Stirring spoon
DIY Instructions
Peel the skin off the sweet potatoes and cut them into small cubes.
Open the cans of black beans and pour them into a colander to rinse them with water.
Place the potato cubes and the rinsed beans into a large pot.
Pour the entire jar of salsa over the potatoes and beans.
Fill the empty salsa jar halfway with water and pour that into the pot too.
Turn the heat to medium high and bring the liquid to a boil.
Lower the heat to a simmer and put a lid on the pot.
Cook the chili for about 20 to 25 minutes until the potatoes are soft when poked with a fork.
Stir the pot every few minutes to make sure nothing sticks to the bottom.
Serve the chili in deep bowls and add a dollop of sour cream if you have some.
10. Garlic Butter Roasted Shrimp
3-Ingredient Recipes
Shrimp is one of the fastest proteins you can cook for dinner. Roasting them on a tray ensures they stay plump and do not get rubbery like they might in a pan. The garlic and oil create a built in sauce that tastes incredible.
The image shows pink curled shrimp scattered across a metal baking sheet. Slices of golden garlic and droplets of oil surround the seafood to show how well they are seasoned. The tails look crispy and the meat looks tender and opaque.
This recipe is a great trick to have up your sleeve for last minute guests. It looks like a gourmet appetizer but functions as a full meal when served over rice or bread. You will be amazed at how much flavor comes from just three items.
Required Ingredients
1 pound large shrimp (peeled and deveined)
4 tablespoons melted butter
4 cloves garlic
Equipment List
Baking sheet
Small bowl
Knife
Tongs
DIY Instructions
Set your oven to 400 degrees Fahrenheit so it is hot when you are ready.
Peel the garlic and slice it into very thin coins using your knife.
Place the raw shrimp in a single layer on your baking sheet.
Whisk the melted butter and the garlic slices together in a small bowl.
Pour the butter mixture over the shrimp and toss them around to coat them well.
Spread the shrimp out so they are not touching each other on the tray.
Slide the tray into the oven and bake for only 6 to 8 minutes.
Watch for the shrimp to turn from grey to a bright pink color.
Remove the tray immediately so the shrimp do not overcook and become small.
Serve the shrimp hot and make sure to pour the garlic butter from the tray over the top.
11. Salt-Crusted Roasted Chicken
3-Ingredient Recipes
Roasting a whole bird can often lead to dry results if you are not careful. This method uses a thick layer of seasoning to trap every drop of moisture inside the meat. You get a result that is incredibly succulent and seasoned from the outside in.
The image shows a cross section of a thick, white chicken breast encased in a golden brown crust. A heavy dusting of red spice sits on the top surface to add a smoky aroma. Wisps of steam rise from the freshly sliced meat to prove how hot and fresh it remains.
You will find the crust acts like a natural oven within your stove. It protects the delicate protein from direct heat while infusing it with flavor. This technique turns a basic dinner into a high-end culinary experience with very little effort.
Required Ingredients
1 whole roasting chicken (about 4 pounds)
3 cups coarse kosher salt
2 tablespoons smoked paprika
Equipment List
Large roasting pan
Sharp carving knife
Large mixing bowl
Meat thermometer
DIY Instructions
Set your oven to 400 degrees Fahrenheit and let it reach full heat.
Remove any items from inside the chicken cavity and pat the skin dry with paper towels.
Mix the coarse salt with a small splash of water in a bowl until it feels like wet sand.
Pack a layer of the salt mixture onto the bottom of your roasting pan.
Place the chicken on top of the salt and cover the rest of the bird with the remaining salt.
Press the salt firmly against the skin so the chicken is completely hidden from view.
Sprinkle the smoked paprika over the top of the salt dome for extra color.
Roast the bird for about 60 to 75 minutes.
Use a thermometer to ensure the thickest part of the meat reaches 165 degrees Fahrenheit.
Crack the hard salt shell with a heavy spoon and peel it away before slicing the meat to serve.
12. Sage Butter Ravioli
3-Ingredient Recipes
Pasta dinner often relies on heavy red sauces that take hours to simmer. This recipe uses a traditional brown butter technique to create a sauce in minutes. The earthiness of the herbs cuts through the richness of the butter beautifully.
Large, round ravioli are arranged on a white plate and glistening with a golden liquid. Two dark green leaves sit right in the center to provide a rustic and elegant look. The edges of the pasta are fluted and look soft and pillowy.
This meal feels very expensive but relies on simple pantry items. You get a nutty flavor from the toasted butter that pairs wonderfully with cheese-filled pasta. It is a great choice for a quiet evening when you want comfort food quickly.
Required Ingredients
1 package (12 ounces) refrigerated cheese ravioli
4 tablespoons unsalted butter
6 fresh sage leaves
Equipment List
Large pot
Small light-colored skillet
Slotted spoon
Colander
DIY Instructions
Fill a large pot with water and bring it to a rolling boil on your stove.
Drop the ravioli into the water and cook according to the package directions.
Drain the pasta in a colander but keep a tiny bit of the cooking water.
Place a small skillet over medium heat and add the chunks of butter.
Wait for the butter to melt and start to foam up.
Toss the whole sage leaves into the bubbling butter.
Watch the butter closely until it turns a light brown color and smells like toasted nuts.
Turn off the heat immediately so the butter does not burn and turn black.
Add the cooked ravioli to the skillet and toss them gently in the herb butter.
Serve the pasta on a warm plate and pour any extra butter from the pan over the top.
13. Buffalo Pulled Chicken Sliders
3-Ingredient Recipes
Sandwiches are a staple for quick meals, but they do not have to be boring. This recipe uses a spicy vinegar-based sauce to give the shredded meat a massive kick. The soft buns soak up the extra moisture for a messy and delicious bite.
The photo shows two tall sliders stacked on top of each other in a red basket. Bright orange sauce drips down the sides of the shredded chicken and onto the checked paper. The buns are golden and shiny with a soft, toasted appearance.
You can feed a whole group of people with this simple three-ingredient combination. It works well for game days or casual weekend lunches. You will love how the heat of the sauce is balanced by the sweetness of the bread.
Required Ingredients
4 boneless chicken breasts
1 bottle (12 ounces) buffalo wing sauce
1 pack of slider buns
Equipment List
Slow cooker or large pot
Two forks
Small knife
Serving basket
DIY Instructions
Place the raw chicken breasts into your slow cooker or a large pot on the stove.
Pour half of the bottle of buffalo sauce over the meat.
Cook on low for 6 hours in a slow cooker or simmer on the stove for 20 minutes until the meat is done.
Remove the chicken and place it in a large bowl.
Use two forks to pull the meat into long, thin shreds.
Pour the rest of the buffalo sauce over the shredded meat and stir well.
Slice your slider buns in half using a small knife.
Pile a large scoop of the spicy chicken onto the bottom half of each bun.
Place the top bun on and press down slightly so the sauce soaks in.
Serve the sliders while the meat is still hot and steaming.
14. Honey Roasted Rainbow Carrots
3-Ingredient Recipes
Vegetables are the stars of the show when you roast them at high temperatures. These carrots develop a deep sweetness that makes them taste almost like candy. The charred tips add a bit of bitterness that keeps the dish balanced.
A pile of orange, yellow, and purple carrots sits on a white platter. They are coated in a glossy glaze that catches the light and looks very appetizing. You can see small flecks of black pepper and salt stuck to the sticky surface.
This side dish is a fantastic way to add color to your dinner table. The different varieties of carrots offer slightly different flavors and textures. It is a healthy and simple way to finish any meal.
Required Ingredients
1 bunch of rainbow carrots (with tops removed)
2 tablespoons honey
1 tablespoon olive oil
Equipment List
Baking sheet
Large bowl
Knife
Spatula
DIY Instructions
Preheat your oven to 425 degrees Fahrenheit.
Wash the carrots well and peel them if the skin looks very thick.
Slice any very large carrots in half lengthwise so they all cook at the same speed.
Whisk the honey and olive oil together in a large bowl.
Add the carrots to the bowl and toss them until they are fully covered in the sticky mix.
Spread the carrots out on a baking sheet in a single layer.
Roast them in the oven for about 20 to 25 minutes.
Use a spatula to turn them over halfway through so they brown on all sides.
Check that they are tender by poking them with a fork.
Slide them onto a serving plate while they are still hot and shiny.
15. Black Bean Cheese Quesadillas
3-Ingredient Recipes
When you need dinner in five minutes, the quesadilla is your best friend. This version uses creamy beans and melted cheese to create a satisfying and protein-packed meal. The tortilla gets a nice crunch that contrasts with the soft filling.
The image shows a stack of triangle-shaped tortillas filled with dark beans and stretchy yellow cheese. A small dollop of white cream sits in the background on a colorful blue plate. The outside of the flour tortilla is toasted to a light golden brown.
This is a wonderful meal for kids or anyone who loves finger food. You can easily customize it with extra spices if you have them in your pantry. It remains a reliable way to stay full without much cleanup.
Required Ingredients
2 large flour tortillas
1/2 cup shredded cheddar cheese
1/2 cup canned black beans (rinsed)
Equipment List
Large non-stick skillet
Spatula
Knife
Cutting board
DIY Instructions
Place your skillet on the stove over medium heat.
Lay one flour tortilla flat in the bottom of the warm pan.
Sprinkle half of the shredded cheese over the entire surface of the tortilla.
Spread the rinsed black beans evenly over the top of the cheese layer.
Add the remaining cheese over the beans to act as a glue.
Place the second tortilla on top to create a sandwich.
Cook for about 3 minutes until the bottom tortilla feels crispy and brown.
Flip the whole thing over carefully using a wide spatula.
Cook the other side for another 2 to 3 minutes until all the cheese is melted.
Slide the quesadilla onto a cutting board and slice it into four triangles.
16. Creamy Chickpea Curry
3-Ingredient Recipes
Warm spices and rich coconut milk make for a very comforting bowl of food. This curry is entirely plant-based but feels very filling thanks to the hearty beans. The bright orange oil on top signals a lot of deep flavor.
A dark stone bowl is filled with a pale, creamy sauce and a cluster of yellow chickpeas in the center. Swirls of red chili oil create a beautiful pattern across the surface of the liquid. It looks like a professional dish from a high-end restaurant.
You will love how the chickpeas soften and soak up the surrounding sauce. This meal is great for meal prepping because the flavors develop further overnight. Serve it in a deep bowl to enjoy every drop of the creamy base.
Required Ingredients
2 cans (15 ounces) chickpeas
1 can (14 ounces) full-fat coconut milk
2 tablespoons red curry paste
Equipment List
Medium saucepot
Stirring spoon
Can opener
Colander
DIY Instructions
Open the cans of chickpeas and drain them into a colander to rinse with cool water.
Place your saucepot on the stove over medium heat.
Add the red curry paste to the bottom of the dry pot and stir for one minute until it smells strong.
Pour in the coconut milk and stir until the paste and milk are completely mixed.
Wait for the liquid to start bubbling gently.
Add the rinsed chickpeas into the pot.
Lower the heat and let the curry simmer for about 10 to 15 minutes.
Stir the pot occasionally to make sure the coconut milk does not burn on the bottom.
Turn off the heat once the sauce has thickened slightly.
Pour the curry into bowls and enjoy it while it is hot.
17. Bacon Wrapped Asparagus
3-Ingredient Recipes
Everything tastes better when it is wrapped in a smoky and salty layer of meat. This side dish turns a simple vegetable into a fancy treat that looks great on any plate. The asparagus stays crisp while the outer layer becomes crunchy.
Three bundles of green stalks are tied together with strips of pink and brown bacon. They sit on a white plate with small droplets of oil and seasoning scattered around. The tips of the vegetables look tender and slightly charred from the heat.
This is a great recipe for parties because it is easy to pick up and eat. It provides a nice balance of fresh greens and savory fat. You can prep these ahead of time and just slide them into the oven when you are ready.
Required Ingredients
1 bunch of fresh asparagus
1/2 pound thin-sliced bacon
1 tablespoon olive oil
Equipment List
Baking sheet
Knife
Tongs
Paper towels
DIY Instructions
Preheat your oven to 400 degrees Fahrenheit.
Wash the asparagus and trim off the woody, tough bottom ends with a knife.
Pat the stalks dry with a paper towel so the oil sticks better.
Group the asparagus into small bundles of three or four stalks.
Take one slice of bacon and wrap it tightly around the middle of each bundle.
Lay the bundles on your baking sheet with the ends of the bacon tucked underneath.
Drizzle a tiny bit of olive oil over the exposed green tips of the vegetables.
Roast in the oven for about 15 to 20 minutes.
Wait for the bacon to look brown and crispy before taking them out.
Use tongs to move the bundles to a plate so the extra grease stays on the tray.
18. Silky Egg Ribbon Soup
3-Ingredient Recipes
Clear broths are wonderful for light dinners or when you feel under the weather. This soup uses a simple technique to create long, elegant strands of cooked egg. It provides a clean and savory taste that is very refreshing.
A clear glass bowl shows a golden broth filled with yellow egg ribbons and sliced green onions. A silver spoon lifts a bright orange egg yolk and a long strand of egg from the liquid. Steam rises from the surface to show how hot the soup is.
This recipe takes almost no time to prepare once your broth is hot. It is a classic way to get a bit of protein into a light meal. You will find the texture of the egg ribbons is very soft and delicate.
Required Ingredients
4 cups chicken or vegetable broth
3 large eggs
2 stalks green onions
Equipment List
Small saucepot
Small bowl
Whisk or fork
Knife
DIY Instructions
Pour the broth into your saucepot and bring it to a boil on the stove.
While the broth heats up, slice the green onions into thin circles.
Crack the eggs into a small bowl and whisk them until they are smooth.
Once the broth is boiling, turn the heat down so it is just simmering.
Use a spoon to stir the broth in one direction to create a slow whirlpool.
Slowly pour the whisked eggs into the moving broth in a very thin stream.
Let the eggs sit for one minute without stirring so they set into long ribbons.
Turn off the heat and gently stir in the sliced green onions.
Ladle the soup into bowls carefully so you do not break the egg strands.
Serve immediately while the broth is steaming.
19. Sausage and Spinach Tortellini
3-Ingredient Recipes
Stuffed pasta is a great way to get a lot of flavor without using many separate ingredients. This dish adds a bit of meat and greens to make a complete and balanced bowl. The cheese inside the pasta provides all the creaminess you need.
The image shows a bowl of yellow tortellini mixed with dark green spinach leaves and browned sausage bits. A fork lifts a single piece of pasta to show the soft and tender texture. Small grains of salt and pepper are visible over the top of the meal.
You can make this entire dinner in the time it takes to boil water. It is a hearty and satisfying option for anyone with a very busy schedule. The sausage provides a smoky depth that makes the dish feel complex.
Required Ingredients
1 package (10 ounces) cheese tortellini
1/2 pound bulk Italian sausage
2 cups fresh spinach
Equipment List
Large skillet
Pot for boiling water
Slotted spoon
Colander
DIY Instructions
Boil a pot of water and cook the tortellini until they are soft.
Drain the pasta in a colander and set it aside for a moment.
Place your skillet over medium heat and add the bulk sausage.
Use a spoon to break the meat into small crumbles as it browns.
Cook the sausage until no pink remains and it looks dark and crispy.
Toss the fresh spinach into the pan with the hot meat.
Stir the greens until they wilt and turn a deep green color.
Add the cooked tortellini into the skillet with the sausage and spinach.
Toss everything together for two minutes so the flavors mix.
Serve the pasta in a bowl while it is still hot and the cheese inside is melted.
20. Peanut Butter Banana Oatmeal
3-Ingredient Recipes
Breakfast for dinner is a great way to save money and stay full. This bowl of warm oats is packed with healthy fats and natural sweetness. The spiral of nut butter on top adds a beautiful visual touch.
A white bowl is filled with thick, creamy oatmeal and topped with a perfect circle of peanut butter. Slices of fresh yellow banana are lined up along the side of the bowl. The background shows a soft linen cloth that adds to the cozy feeling.
This meal is very high in fiber and will keep you satisfied for hours. It is a warm and comforting choice for a rainy or cold evening. You can use any type of nut butter you have on hand to change the flavor.
Required Ingredients
1 cup old fashioned rolled oats
2 tablespoons creamy peanut butter
1 ripe banana
Equipment List
Small saucepot
Measuring cup
Knife
Spoon
DIY Instructions
Add one cup of oats and two cups of water to your small saucepot.
Place the pot on the stove over medium heat and bring it to a boil.
Lower the heat and let the oats simmer for about 5 to 7 minutes.
Stir the pot often so the oats become creamy and do not stick.
Slice your banana into thin rounds while the oatmeal cooks.
Pour the hot oatmeal into a deep cereal bowl.
Place the banana slices in a row along one edge of the bowl.
Warm the peanut butter in the microwave for ten seconds so it is easy to pour.
Drizzle the peanut butter over the top of the oats in a spiral or zig-zag pattern.
Eat the oatmeal while it is warm and the peanut butter is still runny.
21. Skillet Kielbasa and Cabbage
3-Ingredient Recipes
One pan meals are the ultimate solution for a hectic weeknight. This rustic dish combines salty smoked meat with the natural sweetness of roasted greens. You get a deep, savory char on the vegetables that makes the whole house smell amazing.
The photo shows thick rounds of dark red sausage resting on a bed of caramelized cabbage ribbons. A black cast iron skillet sits on the stove while steam curls up from the center. Each piece of meat looks juicy and perfectly seared against the heat.
You will find that the cabbage softens into a buttery texture as it soaks up the juices from the pan. This is a low carb option that still feels incredibly heavy and satisfying. It proves you only need a few basic items to create a restaurant quality feast.
Required Ingredients
1 pound smoked kielbasa sausage
1 medium head of green cabbage
2 tablespoons olive oil
Equipment List
Large cast iron skillet
Sharp chef knife
Large spatula
Cutting board
DIY Instructions
Place your cutting board on a flat surface and slice the kielbasa into half inch thick rounds.
Cut the cabbage head in half and remove the tough white core from the center.
Slice the remaining cabbage into thin ribbons about one inch wide.
Set your large skillet over medium high heat and add the olive oil.
Wait for the oil to shimmer before adding the sausage rounds in a single layer.
Brown the meat for three minutes per side until the edges look dark and crispy.
Remove the sausage from the pan and toss the cabbage ribbons into the hot oil.
Stir the cabbage constantly for about eight minutes until it looks wilted and golden brown.
Add the cooked sausage back into the pan and mix everything together.
Serve the meal directly from the skillet while it is still sizzling and hot.
22. Simple Egg Fried Rice
3-Ingredient Recipes
Takeout is expensive and often arrives cold at your door. This home version uses pantry staples to create a bright and filling bowl of grains. You get a soft texture from the eggs mixed with a nice crunch from the colorful vegetables.
A blue and white bowl holds a mountain of golden brown rice topped with yellow egg clumps. Bright green peas and orange carrot cubes are scattered throughout the dish for a fresh look. A silver spoon lifts a giant bite to show how fluffy the rice remains.
Using cold leftover rice is the secret to getting the right texture in this recipe. Fresh rice can become mushy when fried in a pan. This meal is a great way to use up whatever you have left in the fridge from the night before.
Required Ingredients
3 cups cooked white rice (chilled)
3 large eggs
1 cup frozen peas and carrots mix
Equipment List
Large wok or nonstick pan
Small bowl
Whisk
Wooden spoon
DIY Instructions
Take your chilled rice out of the fridge and break up any large clumps with your fingers.
Crack the eggs into a small bowl and whisk them until the yolks and whites are one color.
Place your pan over medium high heat and add a tiny splash of oil.
Pour the eggs into the pan and scramble them quickly with your spoon.
Remove the cooked eggs and set them aside on a clean plate.
Add the frozen peas and carrots to the hot pan and cook for three minutes.
Toss the cold rice into the pan and stir it vigorously to coat it in the remaining heat.
Press the rice against the bottom of the pan for one minute to give it a slight toast.
Add the scrambled eggs back into the rice and mix well until everything is hot.
Scoop the fried rice into bowls and eat it immediately with a pair of chopsticks.
23. Balsamic Glazed Brussels Sprouts
3-Ingredient Recipes
Many people think they hate this vegetable until they try roasting it properly. High heat removes the bitterness and replaces it with a rich, nutty sweetness. A dark vinegary drizzle adds a sharp finish that wakes up your palate.
The white plate is covered in charred green sprouts that are glistening with a thick black sauce. Small bits of crispy red meat are scattered between the vegetables to add a salty punch. The dark glaze creates beautiful streaks across the bright surface of the dish.
You will love how the outer leaves become as thin and crunchy as potato chips. The inside remains tender and soaks up the sweet balsamic vinegar. This side dish is fancy enough for a holiday table but easy enough for any night.
Required Ingredients
1 pound fresh Brussels sprouts
1/4 cup balsamic glaze
4 slices of bacon
Equipment List
Large rimmed baking sheet
Kitchen knife
Small bowl
Tongs
DIY Instructions
Set your oven to 400 degrees Fahrenheit so it has time to get very hot.
Wash the sprouts and cut off the tiny brown stem at the bottom of each one.
Slice each sprout in half lengthwise and place them in a large bowl.
Use your knife to chop the raw bacon into small half inch pieces.
Mix the sprouts and bacon bits together on your baking sheet.
Spread the mixture out so nothing is overlapping on the tray.
Roast in the oven for 20 to 25 minutes until the sprouts look dark brown.
Check the bacon to make sure it is fully cooked and crispy.
Take the tray out and drizzle the thick balsamic glaze over the hot vegetables.
Toss everything together one last time so the sauce covers every piece before serving.
24. Pesto Pasta with Tomatoes
3-Ingredient Recipes
Green sauce and red fruit create a classic color combination that looks stunning on a plate. This meal relies on the punchy flavor of basil to season every strand of noodles. It is a light and refreshing dinner that requires almost zero actual cooking.
The image features a fork lifting a single spiral of pasta coated in a thick green paste. Bright red cherry tomatoes are nestled between the noodles to provide a burst of acidity. Fresh green leaves sit on top to add a fragrant aroma to the bowl.
This recipe is a lifesaver when you do not want to stand over a hot stove for long. You can serve it hot or even cold as a pasta salad the next day. It is a versatile dish that everyone in the family will enjoy.
Required Ingredients
1 box (16 ounces) rotini pasta
1 jar (8 ounces) basil pesto
1 pint cherry tomatoes
Equipment List
Large pot
Colander
Large mixing bowl
Knife
DIY Instructions
Fill your large pot with water and bring it to a rolling boil.
Add the rotini pasta and cook for about 10 minutes or until it is soft.
Slice the cherry tomatoes in half while you wait for the water to boil.
Drain the cooked pasta into a colander in the sink.
Pour the hot noodles into a large mixing bowl immediately.
Add the entire jar of pesto to the bowl while the pasta is still steaming.
Stir the noodles until they turn a vibrant green color.
Toss in the tomato halves and mix gently so they do not break.
Wait one minute for the heat of the pasta to soften the tomatoes slightly.
Serve the dish in large bowls and top with a few extra basil leaves.
25. BBQ Pulled Pork Sweet Potato
3-Ingredient Recipes
Traditional baked potatoes are great, but using a root vegetable adds a whole new layer of flavor. The natural sugar in the orange flesh pairs beautifully with smoky shredded meat. This is a massive meal that looks like it came from a professional smokehouse.
A giant roasted potato is split open to reveal a bright orange center topped with a mound of pork. Deep red sauce is drizzled over the top in thick, messy lines. A small pot of extra sauce sits in the background to show this is a hearty feast.
You get a wonderful mix of textures from the soft potato and the chewy, bark covered meat. It is a very filling dinner that is packed with vitamins and protein. You will find that one of these is more than enough to satisfy a big appetite.
Required Ingredients
2 large sweet potatoes
1 pound pre cooked pulled pork
1/2 cup BBQ sauce
Equipment List
Baking sheet
Fork
Microwave or oven
Spoon
DIY Instructions
Wash the sweet potatoes and poke them several times with a fork.
Place the potatoes on a baking sheet and roast at 400 degrees for 45 minutes.
Check that the potatoes are soft by squeezing the sides with an oven mitt.
Warm up your pulled pork in a pan or microwave until it is hot.
Slice the hot potatoes down the center but do not cut all the way through.
Use a fork to fluff up the orange insides of the potato.
Pile a large scoop of the warm pork into the center of each potato.
Squeeze a generous amount of BBQ sauce over the top of the meat.
Press the sides of the potato together slightly to hold the filling in place.
Serve on a plate with a fork and plenty of napkins for the sauce.
26. Grilled Cheese Tomato Soup
3-Ingredient Recipes
There is no combination more comforting than a hot bowl of red soup and a toasted sandwich. This version takes the concept and turns it into a single dish for easy eating. You get the crunch of the bread and the creaminess of the broth in every spoonful.
A deep blue bowl is filled with a thick orange liquid and topped with a swirl of white cream. Four square croutons made of grilled cheese float in the center. One crouton is being lifted by a spoon to show the long strings of melted cheese.
This meal is the ultimate cure for a rainy afternoon or a bad day. The soup is rich and smooth while the bread adds a necessary salty crunch. It is a simple way to make a basic canned soup feel like a luxury meal.
Required Ingredients
1 can (18 ounces) tomato bisque
2 slices of white bread
2 slices of American cheese
Equipment List
Small saucepot
Skillet
Spatula
Knife
DIY Instructions
Pour the tomato bisque into a small pot and heat it slowly on the stove.
Place a slice of cheese between two pieces of bread to make a sandwich.
Put your skillet over medium heat and add a tiny bit of butter.
Toast the sandwich for three minutes on each side until it is golden brown.
Wait for the cheese to melt completely before removing the bread from the pan.
Use a sharp knife to cut the sandwich into small one inch squares.
Ladle the hot soup into a deep ceramic bowl.
Drizzle a little bit of heavy cream over the top in a circular pattern.
Place the small grilled cheese squares carefully on top of the liquid.
Serve immediately before the bread gets too soft from the soup.
27. Meatball Marinara Sub
3-Ingredient Recipes
Fast food sandwiches often lack the flavor of a home cooked meal. This sub uses hearty beef spheres and a rich red sauce to create a very satisfying bite. The melted cheese on top acts like a blanket to keep everything in place.
Two large meatballs sit nestled inside a long white roll covered in thick tomato sauce. A layer of white mozzarella is melted over the top until it turns golden brown. The bread is toasted on the edges to provide a nice contrast to the soft filling.
This is a great meal for a busy night when you want something that feels substantial. You can use frozen meatballs to save time without losing any of the taste. It is a classic dish that never goes out of style.
Required Ingredients
6 large frozen meatballs
1 jar (24 ounces) marinara sauce
2 long hoagie rolls
Equipment List
Small pot
Baking sheet
Knife
Spatula
DIY Instructions
Place the frozen meatballs and the marinara sauce into a small pot.
Simmer the sauce over medium heat for about 15 minutes until the meat is hot.
Slice your hoagie rolls open but keep the two halves attached at the back.
Place the open rolls on a baking sheet and toast them in the oven for three minutes.
Use a spoon to place three hot meatballs into each toasted roll.
Pour a little bit of the extra red sauce over the meat.
Top the meatballs with a generous amount of shredded mozzarella or a slice of cheese.
Put the subs back in the oven under the broiler for two minutes.
Watch closely until the cheese is bubbly and has small brown spots.
Remove the sandwiches and let them cool for a minute before taking a bite.
28. Tuna Celery Boats
3-Ingredient Recipes
Light lunches are perfect for staying active during the day. This recipe skips the heavy bread and uses a crunchy green vegetable as a base. You get a fresh and salty filling that is very high in protein.
Six bright green celery stalks are lined up on a white platter. They are filled with a thick pink tuna mixture and topped with a sprinkle of black pepper. A few slices of yellow lemon sit in the background to add a touch of citrus.
This is a wonderful snack or a quick meal for a hot summer day. The celery provides a satisfying snap that pairs well with the soft fish. You will love how easy it is to carry these and eat them on the go.
Required Ingredients
3 large stalks of celery
2 cans (5 ounces) tuna in water
3 tablespoons mayonnaise
Equipment List
Small bowl
Fork
Knife
Cutting board
DIY Instructions
Wash the celery stalks and dry them thoroughly with a paper towel.
Cut off the leafy tops and the white bottoms of the celery with your knife.
Slice each long stalk into two or three smaller pieces about four inches long.
Open the tuna cans and drain away all of the liquid into the sink.
Put the dry tuna into a small bowl and break it up with a fork.
Add the mayonnaise to the bowl and stir until the mixture is smooth.
Use a small spoon to scoop the tuna into the hollow center of each celery piece.
Press the filling down so it stays inside the vegetable boat.
Sprinkle a little bit of black pepper over the top for extra flavor.
Arrange the boats on a plate and serve them cold from the fridge.
29. Pan Seared Steak Bites
3-Ingredient Recipes
Small pieces of meat cook much faster than a whole steak and develop a better crust. This recipe uses high heat to create a savory exterior while the inside stays tender. A final touch of garlic oil makes every bite feel very luxurious.
A black skillet is filled with dark brown cubes of beef topped with golden garlic slices. Droplets of clear oil and grains of white salt are scattered over the meat. Steam rises from the pan to show how hot and fresh the steak is.
This is a great way to enjoy a steak dinner without the high price tag of a whole fillet. You can serve these bites with a side of vegetables or even on their own as a snack. The garlic adds a sharp and savory aroma that is irresistible.
Required Ingredients
1 pound sirloin steak
3 tablespoons olive oil
4 cloves of garlic
Equipment List
Large heavy skillet
Sharp knife
Cutting board
Tongs
DIY Instructions
Use your knife to cut the steak into small one inch cubes.
Slice the garlic cloves into very thin rounds.
Place your skillet over high heat and add the olive oil.
Wait for the oil to start smoking slightly before adding the meat.
Lay the steak cubes in the pan so they are not touching each other.
Let the meat cook for two minutes without moving it so it turns brown.
Toss the garlic slices into the pan with the meat.
Use your tongs to turn the cubes over and cook for another two minutes.
Remove the pan from the heat once the garlic looks golden and the meat is done.
Pour the hot garlic oil from the pan over the steak on your plate.
30. Broccoli Cheese Loaded Potato
3-Ingredient Recipes
A baked potato is the perfect blank canvas for a warm and comforting meal. This version uses a classic duo of green vegetables and melted yellow cheese. It turns a simple side dish into a full and satisfying dinner.
A large brown potato is split open and overflowing with white mashed center and green broccoli. Thick yellow cheese is melting down the sides and onto the white plate. A spoon lifts a giant bite to show the stretchy and gooey texture of the meal.
This is a great way to get some greens into a meal that still feels like a treat. The potato skin gets nice and crispy in the oven while the inside stays soft. It is a reliable favorite for both kids and adults.
Required Ingredients
2 large russet potatoes
2 cups frozen broccoli florets
1 cup shredded cheddar cheese
Equipment List
Baking sheet
Fork
Microwave
Spoon
DIY Instructions
Preheat your oven to 400 degrees and wash the potatoes well.
Poke the potatoes with a fork and roast them on a tray for one hour.
Steam the frozen broccoli in the microwave for three minutes until it is soft.
Slice the hot potatoes down the middle once they are finished roasting.
Use a spoon to scoop out a little bit of the white potato to make a hole.
Stuff the steamed broccoli into the center of the potato.
Top the broccoli with a large handful of shredded cheddar cheese.
Put the potatoes back in the oven for five minutes to melt the cheese.
Wait for the cheese to become bubbly and start to drip down the sides.
Serve the potatoes hot and seasoned with a little salt if you like.
31. Pierogi and Sausage Bake
3-Ingredient Recipes
Dumplings offer a thick and doughy texture that pairs well with savory meats. This dish uses soft potato pockets and salty meat to create a filling mountain of food. You get a nice crunch on the outside of the dough while the center remains fluffy.
The white baking dish features golden brown pierogies mixed with dark red sausage rounds. Thin rings of fried onion are scattered over the top to add a sweet and savory aroma. You can see the steam rising from the hot oil and butter in the pan.
This meal is a great way to feed a large family without much preparation time. You can use frozen dumplings to make the process even faster on a busy night. It is a rustic and comforting meal that stays hot for a long time.
Required Ingredients
1 box (16 ounces) frozen potato pierogies
1 pound smoked kielbasa or summer sausage
1 large yellow onion
Equipment List
Baking dish
Kitchen knife
Cutting board
Spatula
DIY Instructions
Turn on your oven and set it to 400 degrees so it gets hot while you work.
Peel the outer skin off your yellow onion and slice it into thin rings.
Cut your smoked sausage into round coins about half an inch thick.
Open the box of frozen pierogies and dump them into your baking dish.
Add the sausage rounds and onion rings to the dish with the dumplings.
Drizzle a little bit of oil or melted butter over the top of everything.
Toss the ingredients together with a spoon until they are well coated.
Spread everything out into a single flat layer across the bottom of the dish.
Bake in the hot oven for 20 to 25 minutes until the pierogies look golden brown.
Stir the mix halfway through the cooking time to ensure the onions do not burn.
32. Beefy Cheese Dip
3-Ingredient Recipes
Thick sauces are the soul of any good party or casual movie night. This dip combines melted cheese and seasoned meat to create a rich and heavy snack. You get a long string of cheese with every chip you pull from the bowl.
A dark red ceramic pot is filled with bubbling orange cheese and clumps of brown beef. A yellow corn chip is being lifted out to show the thick and stretchy texture of the sauce. Small red spots of oil on the surface signal a deep and spicy flavor.
You can serve this as a main meal by adding more toppings like beans or rice. It is a high energy dish that feels very decadent and satisfying. Your guests will love the way the warm cheese clings to the crunchy chips.
Required Ingredients
1 pound ground beef
1 block (16 ounces) processed cheese
1 bag of corn tortilla chips
Equipment List
Large skillet
Small slow cooker or pot
Wooden spoon
Knife
DIY Instructions
Place your skillet on the stove over medium heat and add the ground beef.
Use your wooden spoon to break the meat into very small bits as it cooks.
Drain the extra grease out of the pan once the beef is brown and fully cooked.
Cut the block of processed cheese into small cubes using a knife.
Put the cheese cubes and the warm beef into a small slow cooker or a heavy pot.
Turn the heat to low and stir the mix every few minutes as the cheese melts.
Wait for the sauce to become completely smooth and free of any lumps.
Keep the dip warm in the pot so it does not become hard or cold.
Place a large bowl of tortilla chips next to the pot for easy dipping.
Scoop the meat and cheese directly onto the chips and eat while the dip is steaming.
33. Frozen Yogurt Berry Bars
3-Ingredient Recipes
Dessert can be light and healthy while still satisfying your sweet tooth. These bars use creamy yogurt and frozen fruit to create a cold and refreshing treat. You get a burst of juice from the berries in every single bite.
The stack of white bars features bright red raspberries and dark blue berries buried inside the cream. A thick stream of golden honey is drizzled over the top and drips down the sides. The background is clean and white to emphasize the fresh colors of the fruit.
This is a wonderful snack for kids during the hot summer months. You can make a large batch and keep them in the freezer for whenever you need a quick treat. It is a much better alternative to sugary store bought ice cream.
Required Ingredients
2 cups plain or vanilla Greek yogurt
1 cup mixed fresh berries (raspberries and blueberries)
1/4 cup honey
Equipment List
Small baking pan
Parchment paper
Mixing bowl
Spoon
DIY Instructions
Line a small square baking pan with a sheet of parchment paper so the yogurt does not stick.
Pour the Greek yogurt into a bowl and stir it until it is smooth and creamy.
Spread the yogurt across the bottom of the lined pan until it is about half an inch thick.
Wash your berries and pat them dry with a paper towel.
Press the berries into the top of the yogurt layer in a random pattern.
Drizzle the honey over the top of the fruit and yogurt in thin lines.
Place the pan flat in your freezer and leave it for at least four hours.
Wait for the yogurt to become completely solid like a block of ice.
Lift the parchment paper out of the pan and place the block on a cutting board.
Use a sharp knife to cut the frozen block into squares or long rectangles.
34. Avocado Fried Egg Toast
3-Ingredient Recipes
Simple breakfasts are often the most satisfying way to start a busy day. This recipe combines creamy fruit and a runny yolk on top of a crunchy slice of bread. You get a rich and buttery flavor that feels very indulgent.
A thick slice of toasted brown bread is topped with a heavy layer of mashed green avocado. A white fried egg sits right on top with a knife cutting into the center of the yolk. The bright yellow liquid flows down the side of the toast like a sauce.
You can finish this dish in under ten minutes with very little effort. It provides a good balance of healthy fats and protein to keep you full until lunch. The crunch of the bread is the perfect base for the soft toppings.
Required Ingredients
1 thick slice of sourdough bread
1 ripe avocado
1 large egg
Equipment List
Toaster
Small nonstick skillet
Fork
Spatula
DIY Instructions
Place your slice of bread into the toaster and cook it until it is golden brown and hard.
Cut the avocado in half and remove the large pit from the center.
Scoop the green flesh into a small bowl and mash it with a fork until it is chunky.
Spread the mashed avocado over the top of your warm piece of toast.
Heat your skillet over medium heat and add a tiny drop of oil or butter.
Crack the egg into the pan and cook it for about three minutes.
Watch for the white part of the egg to become solid while the yolk stays runny.
Use a spatula to lift the egg out of the pan and place it on top of the avocado.
Sprinkle a little bit of black pepper or salt over the egg for extra flavor.
Slice into the center of the egg with a knife so the yolk covers the avocado.
35. Grilled Peach Pork Chop
3-Ingredient Recipes
Fruit and meat create a unique flavor profile that is both sweet and savory. This dish uses the natural sugars in a peach to create a thick glaze for the juicy pork. You get a nice char from the grill that adds a smoky aroma to the plate.
A thick and juicy pork chop sits on a white plate with dark grill marks across the surface. A large slice of grilled orange peach rests right on top of the meat. A thick amber sauce with small mustard seeds is poured over the entire meal.
This recipe is a great way to use up fresh summer fruit in a savory way. The acidity of the peach helps to balance out the richness of the meat. It is a sophisticated dinner that looks like it came from a professional kitchen.
Required Ingredients
2 thick bone-in pork chops
1 large fresh peach
1/2 cup peach preserves or jam
Equipment List
Outdoor grill or grill pan
Tongs
Knife
Small bowl
DIY Instructions
Heat up your grill or a heavy grill pan on the stove until it is very hot.
Pat the pork chops dry with a paper towel and season them with a bit of salt.
Place the meat on the hot grill and cook for about five minutes on the first side.
Cut the fresh peach into thick wedges and remove the stone from the middle.
Flip the pork chops over and place the peach wedges on the grill next to the meat.
Whisk the peach preserves in a small bowl until they are thin and easy to spread.
Brush the sweet jam over the top of the pork chops while they finish cooking.
Grill the peaches for two minutes per side until they have dark brown marks.
Remove the meat once the internal temperature reaches 145 degrees.
Serve the pork chop with a grilled peach wedge on top and a final drizzle of the jam.
36. Honey Drizzled Banana Pancakes
3-Ingredient Recipes
Warm cakes are a classic comfort food that works for any meal of the day. This version uses fruit as a base to keep the texture soft and naturally sweet. You get a light and airy bite that melts in your mouth.
A tall stack of golden brown pancakes sits on a white plate with a thick stream of honey falling from the top. A fork lifts a small piece to show the fluffy and porous inside of the cake. The edges are slightly darker and look very crispy.
You only need three items to make this high energy meal for your family. It is a great way to use up old fruit that has become too soft to eat on its own. The honey adds a final touch of sweetness that ties everything together.
Required Ingredients
2 ripe bananas
2 large eggs
1/2 cup of honey
Equipment List
Large mixing bowl
Nonstick griddle or pan
Whisk or fork
Spatula
DIY Instructions
Peel your bananas and place them into a large mixing bowl.
Mash the fruit with a fork until it becomes a smooth and liquid paste.
Crack the eggs into the bowl and whisk them together with the banana.
Stir the mix until it looks like a thick and yellow batter.
Heat your pan on the stove over medium low heat with a tiny bit of oil.
Pour a small amount of batter into the pan to make a circle about four inches wide.
Wait for small bubbles to form on the surface of the pancake before flipping it.
Cook the other side for two minutes until it is golden brown and solid.
Stack the finished pancakes on a plate and keep them warm.
Pour a generous amount of honey over the top of the stack before serving.
37. Sheet Pan Roasted Chicken and Carrots
3-Ingredient Recipes
One tray dinners are a favorite for anyone who hates cleaning up after a meal. This recipe roasts meat and vegetables together so the juices mix and create a natural sauce. High heat creates a crispy skin on the chicken that is full of flavor.
The metal tray is filled with roasted chicken thighs and long orange and purple carrots. Small brown potatoes are scattered between the meat to soak up the extra oil. A hand holds a silver spoon to show how tender the food has become.
You will love the way the carrots become sweet and soft after a long soak in the oven. This is a very healthy and balanced meal that requires very little work. It is a reliable choice for a cozy Sunday night dinner.
Required Ingredients
4 bone-in skin-on chicken thighs
1 bunch of whole carrots
1 pound baby potatoes
Equipment List
Large baking sheet
Knife
Cutting board
Tongs
DIY Instructions
Set your oven to 425 degrees and let it reach full heat.
Wash your carrots and potatoes and cut the potatoes in half.
Place the chicken thighs on the baking sheet with the skin side facing up.
Scatter the vegetables around the meat so the tray is full but not crowded.
Drizzle a little bit of olive oil over the top of everything on the pan.
Toss the veggies with your hands to make sure they are coated in the oil.
Slide the tray into the oven and roast for about 35 to 40 minutes.
Check that the chicken skin is dark brown and very crispy.
Poke the carrots with a fork to make sure they are soft all the way through.
Serve the meat and vegetables together on a large platter while they are hot.
38. Ham and Cheese Pinwheels
3-Ingredient Recipes
Soft bread rolls are a fun way to serve a classic sandwich combination. These swirls feature salty meat and melted cheese tucked inside a warm dough. You get a savory and buttery bite that is perfect for snacking.
Four round rolls sit on a piece of white paper with long strings of melted cheese dripping from the center. The dough is golden brown and looks very soft and pillowy. You can see the thin layers of pink ham spiraled inside the bread.
This is a great option for a quick lunch or a party appetizer. They are easy to pick up and eat without making a mess. You can prep these in advance and just bake them when you are ready to eat.
Required Ingredients
1 tube of refrigerated pizza dough
1/2 pound thin sliced deli ham
1 cup shredded Swiss cheese
Equipment List
Baking sheet
Knife
Cutting board
Parchment paper
DIY Instructions
Unroll the pizza dough onto a flat cutting board and press it into a large rectangle.
Lay the slices of ham over the top of the dough until it is fully covered.
Sprinkle the shredded cheese evenly over the top of the ham layer.
Start at one long edge and roll the dough up tightly like a sleeping bag.
Use a sharp knife to slice the long log into round pieces about one inch thick.
Place the round pinwheels onto a baking sheet lined with parchment paper.
Preheat your oven to 375 degrees while you finish slicing the rolls.
Bake the pinwheels for about 12 to 15 minutes.
Watch for the cheese to melt and the bread to turn a light golden brown.
Let the rolls cool for two minutes so the cheese sets before you eat them.
39. White Bean Pesto Soup
3-Ingredient Recipes
Clear broths can be transformed into a vibrant and flavorful meal with a single addition. This soup uses creamy beans to provide a thick base for a punchy green sauce. You get a light and herbaceous taste that feels very fresh.
A white ceramic bowl is filled with a pale broth and large white beans. A thick spiral of dark green pesto is swirled across the surface of the liquid. A hand dips a piece of crusty bread into the soup to show the rich texture.
This is a wonderful meal for a quick lunch when you want something healthy. You can use canned beans to make this in under five minutes. It provides a good amount of protein and fiber to keep you energized.
Required Ingredients
2 cans (15 ounces) cannellini beans
4 cups vegetable broth
1/4 cup basil pesto
Equipment List
Medium saucepot
Stirring spoon
Can opener
Ladle
DIY Instructions
Open the cans of beans and pour them into a colander to rinse away the salty liquid.
Pour the vegetable broth into a pot and bring it to a boil on the stove.
Add the rinsed beans to the hot broth and turn the heat down to a simmer.
Cook the beans for about five minutes until they are very hot.
Ladle the soup into deep bowls while it is still steaming.
Spoon a large dollop of pesto right into the center of each bowl.
Use your spoon to gently swirl the green sauce into the white broth.
Wait a moment for the heat of the soup to release the aroma of the basil.
Serve the soup with a side of warm bread for dipping.
Eat the meal while the pesto is still bright green and fragrant.
40. Crispy Glazed Tofu Cubes
3-Ingredient Recipes
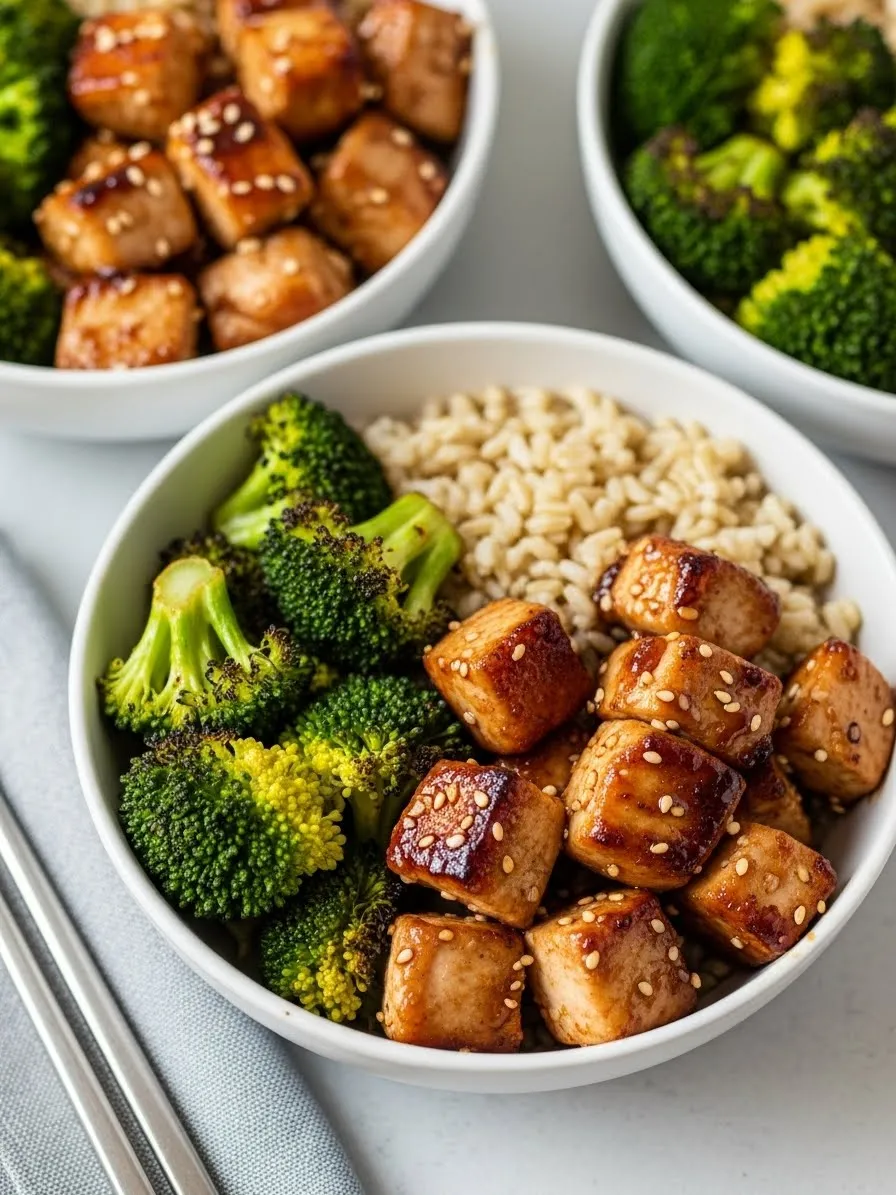
Plant based proteins can be just as satisfying as meat when cooked with high heat. These cubes develop a crunchy outer layer that soaks up a thick and sweet sauce. You get a soft and creamy center that contrasts with the firm exterior.
A stack of golden brown tofu squares sits in a black bowl with a thick dark sauce poured over the top. White sesame seeds are scattered over the sticky glaze to add a tiny bit of crunch. The background is dark to emphasize the bright highlights on the food.
This recipe is a great introduction to tofu for anyone who thinks they do not like it. The high heat of the pan removes the moisture and creates a great texture. You can serve these over rice or eat them on their own as a snack.
Required Ingredients
1 block (14 ounces) extra firm tofu
1/4 cup hoisin sauce
1 tablespoon sesame seeds
Equipment List
Nonstick skillet
Paper towels
Knife
Spatula
DIY Instructions
Take the tofu out of the package and wrap it in several layers of paper towels.
Place a heavy plate on top of the tofu for ten minutes to squeeze out the extra water.
Cut the dry block of tofu into small one inch squares using a sharp knife.
Heat your skillet over medium high heat with a tiny splash of oil.
Place the tofu cubes in the pan and cook them for about five minutes.
Turn the cubes over several times until every side is golden and crispy.
Pour the hoisin sauce into the pan with the hot tofu squares.
Toss the cubes quickly so the thick sauce coats every piece.
Turn off the heat and sprinkle the sesame seeds over the top of the glaze.
Slide the tofu into a bowl and serve it while the sauce is still hot and sticky.
41. Shredded Salsa Chicken
3-Ingredient Recipes
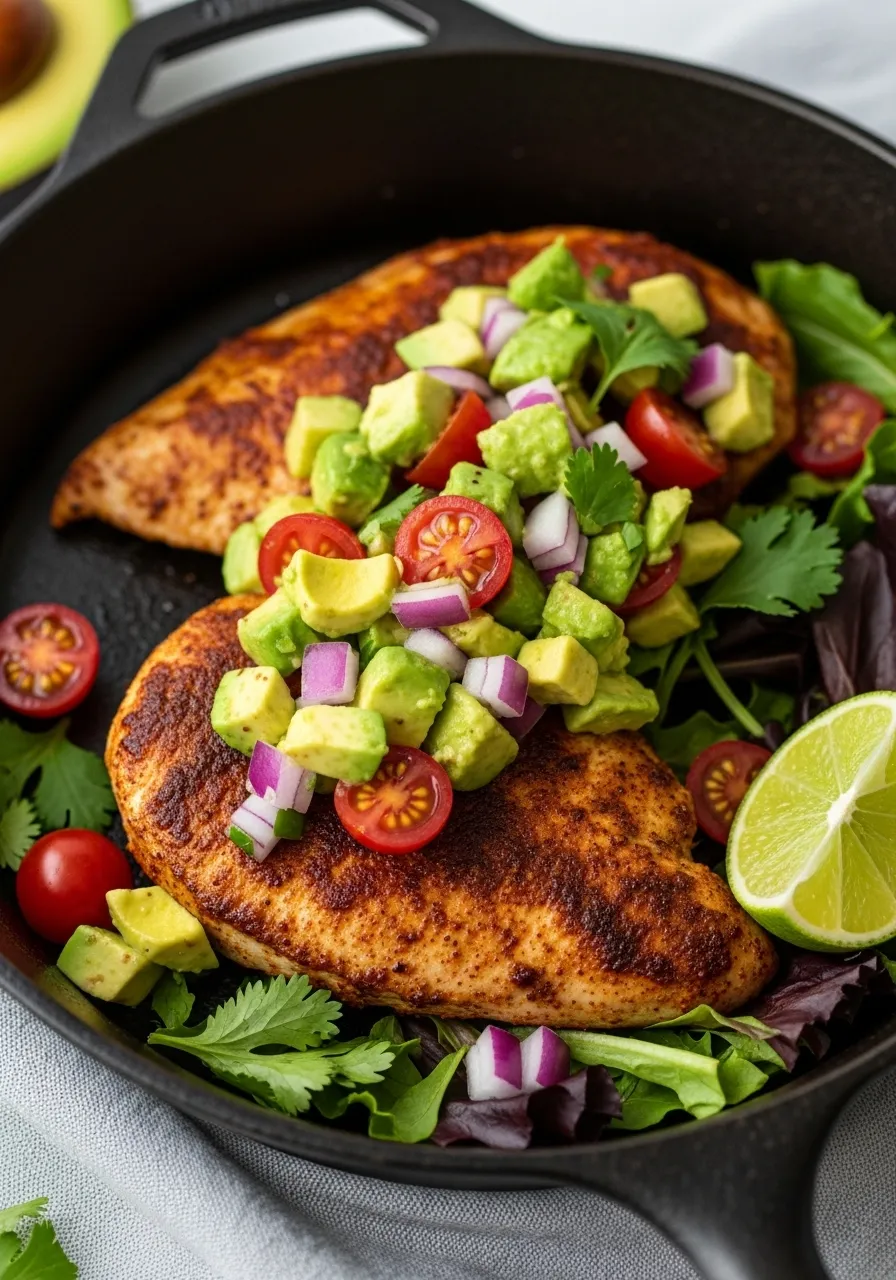
Transforming plain poultry into a zesty feast requires very little work when you use the right sauce. This recipe relies on the moisture and acidity of tomatoes to keep the meat tender. You get a heap of protein that is ready for tacos, salads, or bowls.
The clay bowl is piled high with orange-tinted chicken strands mixed with bright corn and red tomato bits. Fresh green jalapeño rings sit on top to add a spicy kick to every mouthful. Steam curls into the air to show the dish is hot and fresh.
You will love how the flavors meld together over a slow simmer. It is a smart way to prepare lunch for the whole week in one go. This dish proves that simple pantry staples can create a very exciting and colorful meal.
Required Ingredients
3 large boneless chicken breasts
2 cups of your favorite chunky salsa
1 fresh jalapeño
Equipment List
Slow cooker or large heavy pot
Two forks
Kitchen knife
Cutting board
DIY Instructions
Place the raw chicken breasts into the bottom of your slow cooker or pot.
Pour the entire two cups of chunky salsa over the top of the meat.
Slice the jalapeño into thin rings and scatter them over the sauce.
Cover the pot with a tight lid and cook on low for about 6 hours.
Check that the chicken is soft enough to fall apart easily with a fork.
Lift the cooked meat out of the liquid and place it on a large plate.
Use two forks to pull the chicken into thin, long shreds by pulling in opposite directions.
Put the shredded meat back into the pot with the leftover juices.
Stir everything together so the chicken soaks up all the spicy tomato flavor.
Serve the warm chicken inside tortillas or over a bed of rice.
42. Sausage Stuffed Portobellos
3-Ingredient Recipes
Giant mushrooms act like natural bowls that hold savory fillings perfectly. This recipe uses the earthiness of the vegetable to balance out the rich and salty meat. You get a juicy bite that feels like a fancy steakhouse appetizer.
Three dark brown mushroom caps are filled to the brim with browned meat and melted white cheese. A sprinkle of fresh green herbs over the top adds a touch of color and aroma. The cheese is bubbly and has a beautiful golden crust from the oven heat.
This is a great low-carb dinner that feels very heavy and satisfying. You can prepare these in minutes and let the oven do the hard work. It is a clever way to serve a high-protein meal without using any bread.
Required Ingredients
4 large Portobello mushroom caps
1/2 pound ground Italian sausage
1 cup shredded mozzarella cheese
Equipment List
Large baking sheet
Medium skillet
Spoon
Paper towels
DIY Instructions
Preheat your oven to 375 degrees Fahrenheit.
Wipe the mushroom caps with a damp paper towel to remove any dirt.
Pull the stems out of the center of each mushroom to create a hollow space.
Place your skillet on the stove and brown the sausage over medium heat.
Break the meat into small crumbles with a spoon until no pink remains.
Drain the extra grease from the pan before moving to the next step.
Place the mushroom caps on a baking sheet with the open side facing up.
Spoon a large amount of the cooked sausage into the center of each cap.
Top the meat with a generous layer of shredded mozzarella cheese.
Bake for about 15 to 20 minutes until the mushrooms are soft and the cheese is brown.
43. Golden Bagel Pizzas
3-Ingredient Recipes
Lunchtime becomes much more fun when you use a chewy bread base for your favorite toppings. This recipe takes a classic bagel and turns it into a crispy and gooey treat. You get a massive cheese pull that will make your mouth water.
Two bagel halves are covered in thick red sauce and a heavy blanket of white cheese. A hand lifts one half to show long, stretchy lines of mozzarella reaching down to the tray. The crust looks toasted and golden around the edges of the red sauce.
This is a favorite for kids and adults who want a quick snack or a fast dinner. You can use any type of bagel you have in the kitchen. It is a reliable way to get a pizza fix in under fifteen minutes.
Required Ingredients
2 plain bagels
1/2 cup marinara sauce
1 cup shredded mozzarella cheese
Equipment List
Small baking sheet
Bread knife
Spoon
Oven mitts
DIY Instructions
Set your oven to 400 degrees Fahrenheit and let it reach full heat.
Use a bread knife to slice each bagel in half so you have four round pieces.
Place the bagel halves on a baking sheet with the cut side facing up.
Spoon a few tablespoons of marinara sauce onto each piece of bread.
Spread the sauce with the back of the spoon until it reaches the edges.
Sprinkle a thick layer of shredded cheese over the top of the red sauce.
Place the tray in the oven and bake for about 8 to 10 minutes.
Watch for the cheese to melt and start to bubble and brown.
Remove the tray carefully and let the pizzas cool for one minute.
Serve them while the cheese is still hot enough to stretch.
44. Cinnamon Glazed Apple Slices
3-Ingredient Recipes
Warm fruit is a simple way to enjoy a sweet finish to your day without heavy cakes. This recipe uses the natural sugars in the fruit to create a sticky and fragrant syrup. You get a soft texture that reminds you of a fresh apple pie.
Red apple slices are arranged in a small black skillet and covered in a glossy brown glaze. Bubbles of hot syrup surround the fruit to show how well they are poaching. Steam rises from the pan to carry the scent of warm cinnamon through the room.
This is a wonderful healthy snack that feels like a real treat. You can make it in one pan on the stove in less than ten minutes. It is a cozy dish that works perfectly on a cold autumn evening.
Required Ingredients
2 large red apples
2 tablespoons honey
1 teaspoon ground cinnamon
Equipment List
Small nonstick skillet
Kitchen knife
Cutting board
Stirring spoon
DIY Instructions
Wash your apples and cut them into thick wedges about half an inch wide.
Remove the core and any seeds from the center of each slice.
Place your skillet on the stove over medium-low heat.
Add the apple slices to the pan in a single layer if possible.
Drizzle the honey over the top of the fruit and sprinkle the cinnamon evenly.
Stir the apples gently so they are fully coated in the honey and spice.
Cook for about 5 to 7 minutes until the fruit starts to feel soft.
Watch for the honey to turn into a thick and bubbling brown syrup.
Turn the slices over halfway through so they cook evenly on both sides.
Serve the warm apples in a bowl and pour the extra syrup from the pan over them.
45. Creamy Spinach and Feta Scramble
3-Ingredient Recipes
Eggs are a versatile protein that can be dressed up with just a few simple greens and cheese. This recipe creates a soft and fluffy texture that is full of salty and earthy notes. You get a bright and healthy start to your day or a light dinner.
The light blue plate holds a large pile of yellow scrambled eggs filled with dark green spinach. Large clumps of white feta cheese sit on top to add a creamy and sharp finish. A fork has taken a bite out of the center to show how moist the eggs remain.
This meal is a great way to use up a bag of greens before they go bad. The heat of the eggs wilts the leaves in seconds to create a perfect mix. It is a high-protein dish that feels much more sophisticated than a plain omelet.
Required Ingredients
3 large eggs
1 cup fresh baby spinach
1/4 cup crumbled feta cheese
Equipment List
Nonstick frying pan
Small mixing bowl
Whisk or fork
Spatula
DIY Instructions
Crack the three eggs into a small bowl and whisk them until they are one color.
Place your frying pan on the stove over medium heat with a tiny bit of butter.
Toss the fresh spinach into the warm pan and stir for one minute.
Wait for the leaves to shrink and turn a deep green color before adding the eggs.
Pour the whisked eggs directly over the wilted spinach in the pan.
Use a spatula to gently push the eggs from the edges toward the center.
Keep moving the eggs slowly so they stay soft and do not become brown or hard.
Sprinkle the white feta cheese crumbles over the top when the eggs are almost done.
Turn off the heat while the eggs still look a little bit wet so they do not dry out.
Slide the scramble onto a plate and eat it while the cheese is warm and soft.
Key Takeaways
Efficiency: You can prepare a full meal with minimal prep and cleanup time.
Flavor Power: Choosing high-quality ingredients like pesto or salsa provides all the seasoning you need.
Versatility: This list covers every protein from beef and chicken to plant-based tofu and chickpeas.
Layman Friendly: Every step is written for beginners to ensure success in the kitchen every single time.
Cost Effective: Buying fewer items helps reduce your weekly grocery bill significantly.
Dinner should be the highlight of your day rather than a source of anxiety. By stripping away the fluff and focusing on core flavors, you rediscover the true pleasure of eating. You now have a massive library of 45 recipes that guarantee a hot, homemade meal is never out of reach.
Take these ideas and make them your own by swapping a sauce or a vegetable to fit your mood. The beauty of 3-ingredient cooking lies in its flexibility and its speed. You no longer have an excuse to settle for cold cereal or expensive takeout when a gourmet bite is this simple.
Start with one recipe tonight and see how much lighter your evening feels. You deserve a kitchen experience that is as rewarding as the final plate of food. Enjoy your newfound freedom and the delicious results that come with keeping things easy.
Spread the loveAre you stuck in a rut with your seafood routine? Most of us stick to basic seasoning because it is easy, but your dinner plate deserves more excitement. Salmon is incredibly versatile, yet…
Spread the loveStaring at the same bland chicken breast every Sunday can make anyone lose their appetite. It is easy to fall into a rut when you prioritize health over flavor. You want meals that…
Spread the loveThe five o’clock scramble is a common occurrence in households everywhere. You arrive home, exhausted, and suddenly face the age-old question: “What is for dinner?” If you find yourself cycling through the same…