Thanksgiving often feels like a beautiful, chaotic marathon of cooking. While the turkey takes center stage and demands hours of devoted attention, the supporting cast—the side dishes—are what truly make the meal memorable. Yet, time is always the biggest challenge in the kitchen.

It is completely possible to create stunning, flavorful, and holiday-worthy side dishes without spending hours stirring, chopping, and stressing. The secret lies in smart shortcuts, minimal ingredients, and maximum flavor.
This collection of 38 recipes proves that “last-second” does not mean “less delicious.” Every single dish here can be prepped and cooked in 10 minutes or less. From savory glazed vegetables to zesty dips and quick breads, these speedy options ensure your holiday table is abundant, varied, and completely stress-free.
1. Cranberry-Glazed Carrots

🥕 Image Description
The vibrant color of this dish immediately draws the eye, offering a stunning centerpiece for any holiday table. Sweet, tender carrots, uniformly sliced, create a rustic and appealing border around a rich, jewel-toned sauce. These sliced carrots are lightly seasoned, providing a subtle, earthy contrast to the bold flavor profile in the middle.
At the heart of the image sits a generous dollop of homemade cranberry glaze. Whole, deep red cranberries are suspended in a glossy, thick sauce, promising a wonderful balance of tartness and sweetness. Flecks of bright red chili are visible, suggesting a delightful, unexpected warmth that cuts through the richness of the fruit.
This side dish delivers complexity in a simple presentation. It’s a quick, elegant way to incorporate seasonal flavors, guaranteeing that even though it took you minutes to prepare, your guests will think you labored over it for hours. This recipe is a must-try when you need a speedy, flavor-packed vegetable to complement your main course.
📝 Required Ingredients
For the Carrots:
- 1 pound fresh carrots, peeled
- 2 tablespoons olive oil
- $1/4$ teaspoon salt
- $1/8$ teaspoon black pepper
For the Cranberry Glaze:
- $1/2$ cup canned whole berry cranberry sauce (not jellied)
- 1 tablespoon maple syrup or brown sugar
- 1 tablespoon orange juice
- Pinch of red pepper flakes (optional, for a hint of heat)
🥣 Equipment List
- Large skillet (10 or 12-inch) with a lid
- Cutting board
- Sharp knife or vegetable peeler
- Small bowl
- Measuring cups and spoons
🧑🍳 DIY Instructions: Speedy Cranberry-Glazed Carrots
Step 1: Prep the Carrots
- Wash the peeled carrots thoroughly.
- Carefully slice the carrots into coins about $1/4$ inch thick. Keep the slices as uniform as possible so they cook evenly.
- Place the sliced carrots, 1 tablespoon of the olive oil, salt, and pepper into a large skillet. Toss everything gently to make sure the carrots are coated in the seasoning.
Step 2: Start Cooking the Carrots
- Place the skillet over medium-high heat. Let the carrots cook uncovered for 3-4 minutes, stirring occasionally. This helps them get a slight char for extra flavor.
- Add $1/4$ cup of water to the skillet. Immediately cover the skillet with the lid.
- Reduce the heat to medium-low and let the carrots steam for 4-5 minutes. They should be tender-crisp but not mushy. Once tender, remove the lid and let any remaining water evaporate completely.
Step 3: Make the Quick Glaze
- While the carrots are steaming, prepare the glaze in a separate small bowl.
- Combine the whole berry cranberry sauce, maple syrup (or brown sugar), orange juice, and red pepper flakes (if using). Stir these ingredients together until they are well-mixed.
- Set the bowl aside. This simple mixture forms the glossy, flavorful glaze.
Step 4: Combine and Finish
- Once the carrots are done cooking and the water has evaporated, remove the skillet from the heat.
- Pour the prepared cranberry glaze mixture directly over the cooked carrots.
- Use a spoon or spatula to gently stir the carrots, tossing them until they are completely coated in the beautiful, glistening glaze.
- Taste the dish and add a tiny pinch more salt if necessary to balance the sweetness. Serve the carrots immediately while they are still warm.
2. Lemon Dill Snap Peas with Crumbly Cheese

🌿 Image Description
A close-up view showcases the bright, appealing green of freshly prepared snap peas, promising a crisp and refreshing texture. Each pea pod is plump, vibrant, and lightly coated with a subtle sheen, suggesting a quick blanch or sauté that preserved its natural color. This dish brings a welcome burst of freshness to the heavy flavors often found on the holiday table.
The simple preparation is elevated by careful garnishes. Tiny dollops of a soft, crumbly white cheese, likely ricotta or goat cheese, are scattered across the top, adding a creamy, tangy contrast to the sweet peas. A generous sprinkling of freshly cracked black pepper covers the cheese and peas, enhancing the visual texture.
Fresh dill fronds and thin, bright yellow ribbons of lemon zest crown the dish, instantly suggesting a zesty, herbaceous aroma and flavor. This combination of green vegetables, citrus, and fresh herbs makes for an incredibly quick yet sophisticated side. It’s a wonderful, light alternative that proves a stunning side doesn’t require complex steps.
📝 Required Ingredients
- 1 pound sugar snap peas, trimmed
- 2 tablespoons olive oil
- 1 tablespoon fresh lemon juice
- 1 teaspoon lemon zest
- $1/2$ teaspoon salt
- $1/4$ teaspoon black pepper
- $1/4$ cup crumbled fresh ricotta or goat cheese
- 2 tablespoons fresh dill, chopped
🥣 Equipment List
- Large saucepan or pot
- Colander
- Large skillet or serving bowl
- Measuring cups and spoons
- Zester or fine grater
🧑🍳 DIY Instructions: Speedy Lemon Dill Snap Peas
Step 1: Blanch the Peas
- Bring about 4 cups of water to a rolling boil in a large saucepan.
- Carefully add the trimmed snap peas to the boiling water. Let them cook for exactly 2 minutes. This is called blanching and keeps them bright green and crisp.
- Immediately drain the peas using a colander. For the crispiest texture, you can briefly rinse them with cold water to stop the cooking process.
Step 2: Dress the Peas
- Transfer the drained, blanched peas to a large serving bowl or a skillet if you plan to serve it warm.
- Drizzle the 2 tablespoons of olive oil and the 1 tablespoon of fresh lemon juice over the peas.
- Add the salt and black pepper. Gently toss the peas until they are lightly coated with the dressing.
Step 3: Garnish and Serve
- Sprinkle the chopped fresh dill and the lemon zest over the seasoned peas. The fresh aroma of the dill and lemon will be noticeable instantly.
- Next, scatter the crumbled ricotta or goat cheese across the top of the dish.
- Give the dish one final, gentle toss or simply leave the garnishes on top for presentation. Serve immediately.
3. Creamy Corn with Crispy Onion Topping

🌽 Image Description
This hearty side dish presents a rich, comforting base of creamy, golden corn kernels. The corn is suspended in a thick, velvety sauce, suggesting a blend of butter, cream, and possibly cheese, giving it a wonderfully homey appeal. A subtle speckled pattern of black pepper is mixed throughout the creamy corn base.
In the center, a generous dollop of something white and smooth, likely sour cream or a similar cooling dairy component, creates a stark contrast to the golden background. This central element serves as a platform for the main textural component.
Piled high on the white cream is a mound of crispy, fried shallots or onions. These deep, reddish-brown pieces are scattered across the top, providing an intense visual contrast and promising a satisfying crunch. The textural difference between the soft, sweet corn and the crunchy, savory topping is the star of this super-quick holiday recipe.
📝 Required Ingredients
- 2 (15-ounce) cans sweet corn, drained, or 3 cups frozen corn
- 2 tablespoons butter
- $1/4$ cup half-and-half or heavy cream
- 2 ounces cream cheese, softened and cut into small cubes
- $1/2$ teaspoon salt
- $1/4$ teaspoon black pepper
- $1/2$ cup pre-made crispy fried onions (from a container)
- 2 tablespoons sour cream or Greek yogurt (optional, for topping)
🥣 Equipment List
- Large skillet or sauté pan
- Wooden spoon or spatula
- Can opener (if using canned corn)
- Measuring cups and spoons
🧑🍳 DIY Instructions: Creamy Corn with Crispy Onion Topping
Step 1: Melt the Base
- Place a large skillet over medium heat. Add the 2 tablespoons of butter and allow it to fully melt.
- Once the butter is melted and slightly foaming, add the cubes of softened cream cheese to the pan.
- Use your wooden spoon to stir and gently mash the cream cheese into the butter until it starts to dissolve and form a rough, thick base.
Step 2: Heat the Corn and Create the Sauce
- Add the drained corn kernels to the skillet. Stir them well, coating them thoroughly with the butter and cream cheese mixture.
- Pour in the half-and-half or heavy cream.
- Stir the mixture frequently for 3 to 4 minutes. Allow the sauce to thicken slightly and the corn to heat all the way through. The mixture should be bubbling gently.
Step 3: Season and Serve
- Remove the skillet from the heat. Stir in the salt and black pepper. Taste and adjust the seasoning if you feel it needs a bit more.
- To serve, you can spread the optional sour cream or Greek yogurt in the center of the corn mixture for presentation, just like in the picture.
- Immediately pile the crispy fried onions on top of the cream or directly onto the hot corn. Serve this comforting side right away.
4. Marinated Antipasto with Artichokes and Olives

🫒 Image Description
This visually stunning medley of ingredients offers a rich tapestry of colors and textures, making it a lively addition to any holiday appetizer spread. The base is composed of tender, pale yellow artichoke hearts, quartered and showing off their signature layered shape. The artichoke hearts provide a soft, slightly tangy foundation for the other elements.
Deep red sun-dried tomato halves are scattered throughout the mix, adding a concentrated, sweet-tart flavor and a brilliant pop of color. Contrasting the artichokes and tomatoes are plentiful slices of black olives, their dark, salty rings creating a bold visual punctuation.
The entire mixture is generously coated with a savory seasoning blend, visible as flecks of dried herbs, red pepper flakes, and possibly garlic. This simple, no-cook side is an impressive, flavorful combination that requires almost no effort, making it a stress-free yet elegant choice for Thanksgiving.
📝 Required Ingredients
- 1 (13.75-ounce) can quartered artichoke hearts, drained (packed in water, not oil)
- 1 (3.8-ounce) can sliced black olives, drained
- $1/2$ cup sun-dried tomatoes (packed in oil, drained and roughly chopped)
- 3 tablespoons olive oil (use good quality extra virgin)
- 2 tablespoons red wine vinegar
- 1 teaspoon dried oregano
- $1/2$ teaspoon red pepper flakes (optional)
- $1/4$ teaspoon salt
🥣 Equipment List
- Large mixing bowl
- Can opener and strainer (for artichokes and olives)
- Measuring cups and spoons
- Spatula or mixing spoon
🧑🍳 DIY Instructions: Marinated Antipasto
Step 1: Combine the Main Ingredients
- In your large mixing bowl, place the drained artichoke hearts, the drained sliced black olives, and the chopped sun-dried tomatoes.
Step 2: Whisk the Quick Marinade
- In a small cup, combine the 3 tablespoons of olive oil, the red wine vinegar, dried oregano, red pepper flakes (if using), and salt.
- Whisk these ingredients together quickly for about 30 seconds until they are well combined and slightly emulsified.
Step 3: Dress and Marinate
- Pour the prepared vinaigrette marinade directly over the artichoke, olive, and tomato mixture in the large bowl.
- Use a spatula or spoon to gently toss the ingredients. Make sure every piece is coated with the flavorful marinade.
- For the best flavor, allow the mixture to sit at room temperature for at least 10 minutes before serving. This lets the herbs and acid begin to ‘pickle’ and season the vegetables. This vibrant salad is ready to serve!
5. Quick Pickled Red Onion and Jalapeño

🧅 Image Description
A clear glass jar is tightly packed with beautiful, thin rings of vivid red onion, creating a stunning visual pattern. The purple edges and white centers of the onions are suspended in a clear, briny liquid, which promises a quick, tart tang. This side brings both color and an acidic counterpoint to rich holiday foods.
A large, dried bay leaf is tucked in among the onions near the top, its rich, coppery color contrasting sharply with the magenta rings. This addition hints at a depth of savory spice within the brine.
Near the bottom of the jar, a few slices of bright green jalapeño pepper are visible, their seeds exposed. This inclusion signals a lively, subtle heat that will awaken the palate. This simple, crunchy condiment is an excellent make-ahead item that adds necessary texture and brightness to heavy Thanksgiving plates.
📝 Required Ingredients
- 1 large red onion, thinly sliced into rings
- 1 cup hot water
- 1 cup white vinegar (or apple cider vinegar for a softer taste)
- 2 tablespoons granulated sugar
- 1 teaspoon salt
- 1 bay leaf
- 2-3 thin slices of jalapeño (optional, remove seeds for less heat)
🥣 Equipment List
- Medium glass jar with a tight-fitting lid (at least 16 ounces)
- Small saucepan
- Cutting board
- Sharp knife
- Measuring cups and spoons
🧑🍳 DIY Instructions: Quick Pickled Red Onion and Jalapeño
Step 1: Prep the Jar and Onions
- Wash your jar thoroughly. Place the thinly sliced red onion rings and the jalapeño slices (if using) inside the clean jar.
- Tuck the bay leaf down into the onions.
Step 2: Make the Brine
- In a small saucepan, combine the water, white vinegar, sugar, and salt.
- Place the saucepan over medium-high heat. Stir constantly until the sugar and salt are completely dissolved. The mixture should come to a simmer but does not need a hard boil.
Step 3: Pickle the Onions
- Carefully pour the hot brine mixture directly over the onions in the jar. Pour slowly to allow the liquid to flow into all the empty spaces.
- Make sure the brine fully covers all the onion rings. If it doesn’t quite cover them, you can top it off with a tablespoon of extra hot water.
- Seal the jar with the lid and let it sit on the counter for at least 1 hour until the onions soften slightly and turn bright pink. They are ready to enjoy right away, or you can refrigerate them for later.
6. Green Beans with Parmesan and Croutons

🥗 Image Description
A vibrant, healthy side dish is presented, featuring a dense layer of freshly steamed or lightly sautéed green beans. The beans are uniformly bright green, retaining their appealing snap and freshness, providing a beautiful foundation of color and crunch.
The surface of the beans is dusted with a generous blanket of finely grated cheese, which looks like a savory snowdrift. This white dusting, likely Parmesan, suggests a salty, umami kick that perfectly complements the mild green flavor of the beans.
Scattered across the top are golden, perfectly cubed croutons. These small, toasted pieces have a light seasoning and herbs visible on their surface, adding a robust crunch and a buttery flavor. This simple assembly of crunchy beans, salty cheese, and seasoned bread promises a satisfying and quick side dish that uses minimal ingredients for maximum flavor.
📝 Required Ingredients
- 1 pound fresh or thawed frozen green beans, trimmed
- 2 tablespoons butter or olive oil
- 1 teaspoon minced garlic
- $1/4$ teaspoon salt
- $1/8$ teaspoon black pepper
- $1/4$ cup pre-packaged seasoned croutons
- 2 tablespoons grated Parmesan cheese
🥣 Equipment List
- Large skillet or sauté pan
- Colander or steamer basket (if steaming)
- Measuring cups and spoons
🧑🍳 DIY Instructions: Green Beans with Parmesan and Croutons
Step 1: Cook the Green Beans
- Heat 2 inches of water in a large skillet or use a steamer basket in a pot. Once the water is boiling, add the green beans and cover.
- Steam the beans for 4-5 minutes until they are bright green and tender-crisp. Immediately drain the beans and wipe the skillet dry.
- Alternatively, you can skip the steaming. Simply place the butter or oil in the skillet and sauté the beans for 6-8 minutes until tender-crisp.
Step 2: Sauté the Flavor
- Return the drained, cooked beans to the dry skillet. If you steamed them, add the 2 tablespoons of butter or oil now. Place the skillet over medium heat.
- Add the minced garlic, salt, and pepper. Toss and cook the beans for about 1 minute. The goal is to let the garlic become fragrant and coat the beans in the melted butter or oil. Be careful not to let the garlic burn.
Step 3: Finish and Garnish
- Remove the skillet from the heat.
- Transfer the hot, seasoned green beans to a serving platter.
- Immediately sprinkle the grated Parmesan cheese over the top. The heat from the beans will help the cheese adhere slightly.
- Finally, scatter the seasoned croutons over the cheese just before serving to ensure they remain crunchy. Serve this dish warm.
7. Peanut Noodle Salad with Colorful Slaw

🍜 Image Description
This vibrant, Asian-inspired salad is an exciting, colorful departure from traditional holiday sides. A large white bowl is filled with a generous amount of cooked, curly ramen or thin egg noodles, providing a neutral, springy base.
Mixed among the noodles are thin, shredded strips of white and purple cabbage, along with bright orange carrot matchsticks. This slaw mixture adds both crunch and a beautiful, multicolored visual effect, giving the dish a fresh, lively appeal. Scattered peanuts provide an additional crunch throughout the noodles.
At the center of the salad sits a small, white dipping bowl containing the key flavor components. A thick swirl of creamy peanut butter sits next to a dollop of deep red chili garlic sauce (like sriracha or sambal oelek), and a pool of dark, glossy soy sauce or hoisin. A sprinkling of brown sugar or ground ginger powder completes the dressing mix, highlighting the sweet, spicy, and savory profile.
📝 Required Ingredients
- 1 block of ramen noodles (toss the seasoning packet) or 4 oz thin spaghetti
- 2 cups pre-shredded coleslaw mix (white and purple cabbage, carrots)
- $1/4$ cup chopped peanuts
- 3 tablespoons creamy peanut butter
- 2 tablespoons soy sauce
- 1 tablespoon sesame oil
- 1 tablespoon rice vinegar
- 1 teaspoon brown sugar
- $1/2$ teaspoon chili garlic sauce (adjust to taste)
🥣 Equipment List
- Medium pot for boiling water
- Colander
- Large mixing bowl
- Small bowl for whisking dressing
- Measuring cups and spoons
🧑🍳 DIY Instructions: Peanut Noodle Salad
Step 1: Cook the Noodles
- Bring a medium pot of water to a boil.
- Add the ramen noodles (discard the seasoning packet) or the thin spaghetti and cook according to the package directions until they are tender.
- Drain the noodles immediately using a colander. Rinse them briefly with cold water to stop them from cooking and keep them from sticking together. Transfer the cooled noodles to the large mixing bowl.
Step 2: Whisk the Dressing
- In the small bowl, combine the peanut butter, soy sauce, sesame oil, rice vinegar, brown sugar, and chili garlic sauce.
- Whisk the mixture vigorously until it is smooth and creamy. If the dressing is too thick, add a teaspoon of hot water at a time until it reaches a pourable consistency.
Step 3: Combine the Salad
- Add the pre-shredded coleslaw mix to the large bowl with the cooked noodles.
- Pour the prepared peanut dressing over the noodles and slaw.
- Toss everything gently but thoroughly until the noodles and vegetables are evenly coated in the dressing.
- Stir in the chopped peanuts. This salad is excellent served immediately or chilled for a short time.
8. Cinnamon Apple and Raisin Compote

🍎 Image Description
This comforting, sweet side dish features large, tender chunks of cooked apple submerged in a rich, dark liquid. The apples are a beautiful golden color, hinting at a soft, spoonable texture that melts in your mouth. This rustic compote offers classic holiday flavor.
The dish is generously studded with dark, plump raisins, adding chewy bursts of sweetness that complement the apples. The thick liquid surrounding the fruit is a deep, autumnal reddish-brown, suggesting a mixture of spiced cider, brown sugar, and cinnamon.
At the center of the compote, a large pile of dry ingredients is visible, waiting to be stirred in. This pile includes a mound of warm, deep brown cinnamon powder and a smaller mound of granulated light brown sugar. This side is a delightful, warm alternative to cranberry sauce or a simple topping for turkey and stuffing.
📝 Required Ingredients
- 4 medium apples (like Fuji, Gala, or Honeycrisp), peeled, cored, and chopped into 1-inch pieces
- $1/2$ cup raisins
- $1/4$ cup apple cider or water
- 2 tablespoons brown sugar, packed
- 1 tablespoon butter
- 1 teaspoon ground cinnamon
- $1/4$ teaspoon ground nutmeg
🥣 Equipment List
- Medium saucepan with a lid
- Wooden spoon or spatula
- Cutting board and sharp knife
- Measuring cups and spoons
🧑🍳 DIY Instructions: Cinnamon Apple and Raisin Compote
Step 1: Sauté the Apples
- Melt the 1 tablespoon of butter in the medium saucepan over medium heat.
- Add the chopped apple pieces and sauté them for 2-3 minutes, stirring constantly. This starts the cooking process and adds a layer of buttery flavor.
Step 2: Build the Compote
- Pour the apple cider or water into the saucepan with the apples.
- Add the raisins, packed brown sugar, ground cinnamon, and ground nutmeg. Stir all the ingredients together until they are well combined and the spices are mixed into the liquid.
Step 3: Simmer and Finish
- Bring the mixture to a gentle simmer. Reduce the heat to low, cover the saucepan with a lid, and let it cook for 5 to 7 minutes.
- The apples should become tender and soft, and the sauce should thicken into a syrupy consistency.
- Remove the lid and stir well. If the mixture is too wet, cook uncovered for an additional 1-2 minutes. This sweet and tangy compote is ready to serve warm alongside your main meal.
9. Wild Rice with Pecans and Walnuts

🌰 Image Description
This visually interesting side dish features a rich, dark base of cooked wild rice, providing a deep, earthy texture and color. The grains of the wild rice are slender and slightly chewy, giving the dish a sophisticated, complex foundation. This simple recipe adds much-needed color and heft to the plate.
The dark rice is brightly contrasted by a generous sprinkling of toasted pecans and walnuts. The large, reddish-brown pecan halves and the smaller, irregularly shaped walnut pieces are scattered across the surface, providing a substantial crunch and nutty flavor.
Centered on the rice is a small, diamond-shaped pat of butter, garnished with tiny flecks of chopped green herbs, likely parsley or chives. The melting butter adds a glossy sheen to the grains and promises a savory richness as it melts into the warm rice. This flavorful, quick side makes a hearty alternative to traditional stuffing.
📝 Required Ingredients
- 1 (8.8-ounce) pouch of pre-cooked wild rice (or multi-grain blend)
- 2 tablespoons butter
- 2 tablespoons chopped yellow onion or shallot
- $1/4$ cup pecan halves
- $1/4$ cup chopped walnuts
- $1/4$ teaspoon salt
- 1 tablespoon fresh parsley or chives, chopped
🥣 Equipment List
- Large non-stick skillet
- Wooden spoon or spatula
- Measuring cups and spoons
🧑🍳 DIY Instructions: Wild Rice with Pecans and Walnuts
Step 1: Toast the Nuts
- Place the large skillet over medium heat. Add the pecan halves and chopped walnuts.
- Toast the nuts for 2-3 minutes, stirring them constantly until they become fragrant and slightly darker. This step truly enhances their flavor.
- Remove the toasted nuts from the skillet and set them aside.
Step 2: Sauté the Aromatics
- Add the 2 tablespoons of butter to the same skillet and let it melt.
- Add the chopped onion or shallot to the melted butter and sauté for 2-3 minutes until the pieces are soft and translucent.
Step 3: Finish the Rice
- Open the pre-cooked wild rice pouch and pour the contents directly into the skillet with the sautéed onion.
- Stir the rice continuously for about 2 minutes to heat it all the way through and coat the grains in the buttery mixture.
- Remove the skillet from the heat. Stir in the salt and the toasted nuts, reserving a few for garnish.
- Transfer the rice to a serving bowl. Top with the reserved nuts and the chopped fresh parsley or chives.
10. Arugula Salad with Cranberries and Parmesan Shavings

🌿 Image Description
This beautiful, vibrant salad provides a much-needed bitter and zesty contrast to a rich holiday meal. The base is a fluffy bed of dark green arugula leaves, known for their slightly peppery, sharp flavor.
The green is broken up by contrasting textures and colors scattered generously throughout the bowl. Bright red, chewy dried cranberries provide sweet-tart bursts of flavor. Whole and halved almonds are mixed in, contributing a delightful, nutty crunch to the soft greens.
Thin, wide shavings of Parmesan cheese are placed across the top. These white ribbons of salty cheese instantly elevate the visual appeal and provide a strong savory, umami note. The entire salad appears lightly dressed with a simple vinaigrette, which adds a subtle sheen to the leaves. This effortlessly elegant dish is a wonderful, zesty starter or side.
📝 Required Ingredients
- 5 ounces (about 5 cups) baby arugula
- $1/4$ cup dried cranberries
- $1/4$ cup sliced or whole almonds
- 4-6 thin shavings of Parmesan cheese (use a vegetable peeler)
- 2 tablespoons olive oil (good quality extra virgin)
- 1 tablespoon balsamic vinegar or white wine vinegar
- $1/2$ teaspoon sugar or maple syrup
- Pinch of salt and black pepper
🥣 Equipment List
- Large serving bowl
- Small bowl or jar for whisking dressing
- Measuring cups and spoons
- Vegetable peeler (for cheese)
🧑🍳 DIY Instructions: Arugula Salad
Step 1: Prepare the Dressing
- In the small bowl or a jar, combine the 2 tablespoons of olive oil, the 1 tablespoon of balsamic or white wine vinegar, the sugar or maple syrup, and the pinch of salt and pepper.
- Whisk the ingredients together vigorously until they are well emulsified (or shake the jar well). Taste the dressing and adjust the sweetness or acidity as you prefer.
Step 2: Assemble the Salad
- Place the baby arugula leaves into the large serving bowl.
- Sprinkle the dried cranberries and the almonds over the bed of greens.
Step 3: Dress and Garnish
- Just before serving, drizzle the prepared vinaigrette over the arugula and other ingredients.
- Gently toss the salad with a large spoon and fork until the leaves are lightly coated. Do not over-toss, as it can bruise the arugula.
- Transfer the salad to a clean serving bowl if desired, or serve it directly from the mixing bowl. Top with the large, thin shavings of Parmesan cheese.
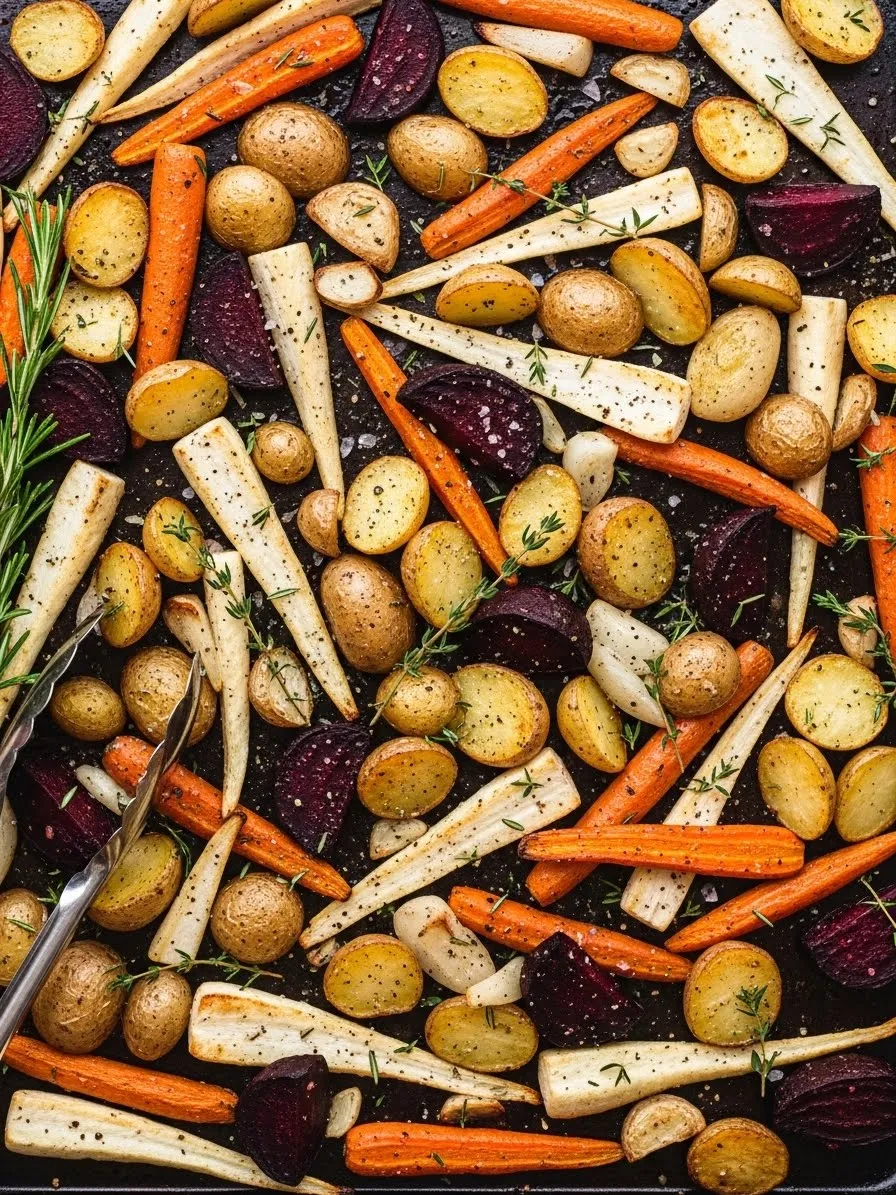
11. Roasted Butternut Squash Cubes

🎃 Image Description
This image features a hearty pile of small, uniformly cubed pieces of butternut squash, promising a soft interior and slightly caramelized edges. The intense orange color of the squash provides a bright, warm visual element that is seasonally appropriate and appealing. These simple cubes make a sweet, savory, and satisfying side dish.
Each square is generously coated with coarse black pepper and what appears to be sea salt, demonstrating a simple yet powerful seasoning approach. The spices adhere nicely to the surface of the squash, suggesting they were tossed in a light coat of olive oil before roasting.
This preparation highlights the natural sweetness of the squash, creating an earthy flavor that complements the richness of a Thanksgiving meal. Since the squash is cut into small, equal-sized pieces, it guarantees a quick cooking time, making this a smart option when time is short.
📝 Required Ingredients
- 1 small butternut squash, peeled and seeded
- 2 tablespoons olive oil
- $1/2$ teaspoon salt
- $1/4$ teaspoon black pepper
- Optional: 1 teaspoon dried thyme or sage
🥣 Equipment List
- Cutting board
- Sharp chef’s knife or vegetable peeler
- Large bowl
- Baking sheet (though for a fast 10-minute side, we will use a skillet)
- Large non-stick skillet
🧑🍳 DIY Instructions: Speedy Butternut Squash Cubes
Step 1: Prep the Squash
- Peel the butternut squash using a sharp vegetable peeler. Cut the squash in half lengthwise and scoop out the seeds with a spoon.
- Carefully cut the squash into small cubes, aiming for pieces about $1/2$ inch in size. Keeping them small is the secret to a quick cook time.
Step 2: Season and Start Cooking
- Place the squash cubes in the large bowl. Drizzle the 2 tablespoons of olive oil over them.
- Sprinkle with the salt, black pepper, and any optional herbs you are using (thyme or sage). Toss everything well until the cubes are evenly coated.
- Place the large non-stick skillet over medium-high heat. Add the seasoned squash cubes in a single layer if possible.
Step 3: Sauté to Tender
- Sauté the squash for 6 to 8 minutes. You must stir them frequently to prevent burning and to ensure all sides cook evenly.
- Once the squash is fork-tender and has developed a slight browning or caramelization on the edges, remove the skillet from the heat. This quick method mimics roasting, yielding a tender, sweet result in minutes. Serve immediately.
12. Creamy White Bean Dip with Herb Oil

🫘 Image Description
This elegant appetizer or side dip is centered in a white bowl, displaying a smooth, creamy base of pureed white beans. The dip itself is a light beige color with a wonderfully thick, velvety texture, suggesting it has been whipped to airy smoothness. This dish offers a lovely, savory alternative to traditional mashed potatoes.
The center of the dip is intentionally pushed down to create a shallow moat, which is filled with a bright, luminous green-gold olive oil. Floating in this oil are thinly sliced garlic pieces and fresh, bright green sage leaves, indicating a rich, aromatic infusion. A few whole white beans are sprinkled around the edge, providing a visual cue about the main ingredient.
Thin slices of toasted baguette are visible next to the bowl, confirming this is designed to be a spread or dip. This beautiful, herb-infused presentation shows that a simple, wholesome bean puree can be effortlessly sophisticated.
📝 Required Ingredients
- 1 (15-ounce) can cannellini (white kidney) beans, rinsed and drained
- 2 tablespoons olive oil (plus more for drizzling)
- 1 clove garlic, minced
- 1 tablespoon fresh lemon juice
- $1/4$ teaspoon salt
- 3 tablespoons water or vegetable broth
- 4-6 fresh sage leaves
🥣 Equipment List
- Food processor or blender
- Small saucepan (for heating oil)
- Serving bowl
- Measuring cups and spoons
🧑🍳 DIY Instructions: Speedy White Bean Dip
Step 1: Make the Bean Base
- Place the rinsed and drained cannellini beans, 2 tablespoons of olive oil, minced garlic, lemon juice, salt, and water (or broth) into a food processor or blender.
- Process the ingredients until the mixture becomes completely smooth and creamy. Stop periodically to scrape down the sides. If the dip seems too thick, add another tablespoon of water or broth until you reach a smooth, spreadable consistency.
Step 2: Create the Sage Oil Topping
- Pour 2 tablespoons of extra olive oil into a small saucepan. Place it over medium-low heat.
- Add the whole fresh sage leaves to the oil. Cook them for about 1 minute until they turn slightly crisp and the oil is infused with their aroma. Remove the saucepan from the heat.
Step 3: Assemble and Serve
- Spoon the prepared white bean dip into your serving bowl. Use the back of the spoon to create a slight well or indent in the center.
- Carefully pour the warm sage-infused oil (including the crisp sage leaves) into the well in the center of the dip.
- You may garnish with a few extra beans or a sprinkle of pepper around the edges. Serve immediately with crusty bread or crackers.
13. Jewel-Toned Holiday Couscous

🍚 Image Description
This vibrant, textural side dish features a fluffy mound of perfectly cooked couscous, instantly recognizable by its tiny, grainy texture. The couscous forms a soft, pale yellow base for the colorful toppings, making it a simple foundation for bold flavors.
The surface is lavishly decorated with brilliant red jewels of pomegranate seeds, which add a sweet-tart burst and a beautiful, festive color. Light green pistachio pieces are scattered amongst the seeds, providing a salty, buttery crunch that contrasts with the soft couscous.
In the center, a dusting of warm brown cinnamon powder sits next to a few fresh mint leaves, promising an aromatic, Middle Eastern-inspired flavor profile. A liquid, possibly warm stock or a light vinaigrette, is being poured from a glass, suggesting the dish is being dressed or fluffed for serving.
📝 Required Ingredients
- 1 cup rapid-cooking couscous
- 1 cup chicken or vegetable broth (warm)
- 1 tablespoon olive oil
- $1/4$ teaspoon salt
- $1/4$ cup pomegranate seeds (arils)
- 2 tablespoons pistachios, chopped
- $1/2$ teaspoon ground cinnamon
- 1 tablespoon fresh mint, chopped
🥣 Equipment List
- Small saucepan (for heating broth)
- Large mixing bowl with a tight-fitting lid or plastic wrap
- Measuring cups and spoons
🧑🍳 DIY Instructions: Jewel-Toned Holiday Couscous
Step 1: Prepare the Couscous Base
- In the small saucepan, heat the chicken or vegetable broth until it is hot but not boiling.
- Pour the dry couscous into the large mixing bowl. Add the olive oil and salt to the bowl.
- Pour the warm broth directly over the couscous mixture. Immediately cover the bowl tightly with the lid or plastic wrap.
Step 2: Allow to Steam
- Let the couscous sit, undisturbed, for exactly 5 minutes. The steam will cook the couscous and make it light and fluffy.
- After 5 minutes, remove the lid. Use a fork to gently fluff the couscous, separating all the grains.
Step 3: Mix and Garnish
- Stir the ground cinnamon into the fluffed couscous.
- Gently fold in the pomegranate seeds, chopped pistachios, and chopped fresh mint.
- Taste the couscous and add another small pinch of salt if needed. Serve this warm, aromatic side dish immediately.
14. Balsamic-Glazed Brussels Sprouts

💚 Image Description
This visually striking side showcases small, whole Brussels sprouts, a classic holiday vegetable, elevated with a dark, glossy coating. The sprouts are a vibrant green, with many cut in half to show off their pale yellow interior and layered texture. A few have visible dark char marks, indicating a quick sauté or roast that enhances their flavor.
The dish is generously drizzled with a thick, dark, syrupy glaze that snakes across the sprouts in appealing, swirling patterns. This reduction, likely a balsamic glaze, promises a complex flavor balance of sweet, tangy, and savory notes. The shine on the sprouts makes the dish look rich and appetizing.
Finally, small, bright flecks of orange zest are scattered over the dark glaze. This citrus element suggests a refreshing counterpoint to the deep, heavy flavors of the balsamic vinegar. This simple recipe adds both crunch and a sophisticated flavor to the holiday plate.
📝 Required Ingredients
- 1 pound Brussels sprouts, trimmed
- 1 tablespoon olive oil
- $1/4$ teaspoon salt
- 3 tablespoons thick balsamic glaze (pre-made)
- $1/2$ teaspoon orange zest (optional)
🥣 Equipment List
- Cutting board and knife
- Large skillet with a lid
- Measuring spoons
🧑🍳 DIY Instructions: Speedy Balsamic-Glazed Brussels Sprouts
Step 1: Prep the Sprouts
- Trim the tough ends off the Brussels sprouts. Cut each sprout in half lengthwise.
- Place the large skillet over medium-high heat. Add the olive oil.
Step 2: Sauté and Tenderize
- Add the halved Brussels sprouts and the salt to the hot skillet. Sauté, stirring occasionally, for 4 minutes. Allow the cut sides to get a nice brown color.
- Add 2 tablespoons of water to the skillet and quickly cover it with the lid. Reduce the heat to medium-low and steam the sprouts for 3-4 minutes. This ensures the centers become tender.
Step 3: Glaze and Finish
- Remove the lid and increase the heat back to medium-high to evaporate any remaining water.
- Remove the skillet from the heat. Drizzle the 3 tablespoons of thick balsamic glaze over the hot sprouts.
- Toss the sprouts gently to coat them completely in the glossy, dark glaze.
- Garnish with the orange zest, if using, for a bright aroma. Serve this beautiful side right away.
15. Herbed Ricotta with Honey Drizzle

🧀 Image Description
This inviting side or appetizer features a generous, cloud-like mound of fresh ricotta cheese, scooped into a small white bowl. The ricotta has a distinctively creamy, yet slightly lumpy, texture, suggesting it is rich and airy. This light, versatile element can be served as a dip or a spread.
The pale white cheese is decorated with a vibrant, glossy topping. Thin rivulets of golden, translucent honey are drizzled over the ricotta, creating a beautiful contrast and promising a touch of sweetness.
A generous amount of freshly cracked black pepper is sprinkled over the honey, adding a visual pop and a subtle spicy edge. Finally, small, bright green sprigs of fresh thyme leaves are scattered across the top, providing a savory, herbaceous aroma that balances the sweet honey. Slices of rustic bread are blurred in the background, confirming this is an excellent spread.
📝 Required Ingredients
- 1 cup fresh ricotta cheese (whole milk preferred)
- 1 tablespoon good quality olive oil
- $1/2$ teaspoon salt
- $1/4$ teaspoon fresh black pepper
- 1 tablespoon honey
- 1 teaspoon fresh thyme leaves, whole
🥣 Equipment List
- Small mixing bowl
- Serving bowl
- Measuring cups and spoons
🧑🍳 DIY Instructions: Herbed Ricotta with Honey Drizzle
Step 1: Whip the Ricotta
- Place the fresh ricotta cheese into the small mixing bowl.
- Drizzle the 1 tablespoon of olive oil over the ricotta. Add the salt and half of the black pepper.
- Use a spoon or whisk to gently stir and whip the mixture for about 1 minute. This simple step lightens the texture and incorporates the seasoning.
Step 2: Garnish and Serve
- Transfer the whipped ricotta mixture to your serving bowl, shaping it into a pleasant mound.
- Drizzle the 1 tablespoon of honey evenly over the surface of the ricotta.
- Sprinkle the remaining black pepper and the fresh thyme leaves over the top of the honey and cheese.
- Serve this versatile, elegant spread immediately with toasted bread, crackers, or alongside roasted vegetables.
16. Warm Kale Salad with Bacon Vinaigrette

🥓 Image Description
A large white bowl holds a generous amount of deeply colored, chopped curly kale. The leaves are vibrant green, indicating they are either fresh or have been lightly massaged to tenderize them. A few scattered pieces of chopped hard-boiled egg are visible on the greens.
Above the kale sits a small black saucepan containing the key to this side dish: a warm, rich dressing. The sauce is a savory, brown liquid, clearly thickened and flavored by small, cubed pieces of crispy bacon that are suspended in it. A mound of light brown sugar is visible in the center of the saucepan, about to be mixed into the warm liquid.
This preparation suggests a classic Southern-style warm vinaigrette, where the bacon grease provides a savory base and the sugar balances the acidity. This quick dressing, poured warm over the hearty kale, softens the leaves and makes for a robust, satisfying holiday salad.
📝 Required Ingredients
- 4 cups curly kale, ribs removed and torn into small pieces
- 2 slices thick-cut bacon, cut into small pieces
- 2 tablespoons red wine vinegar
- 1 tablespoon brown sugar, packed
- $1/4$ teaspoon salt
- Optional: 1 hard-boiled egg, chopped (pre-made)
🥣 Equipment List
- Large mixing bowl
- Small saucepan
- Measuring cups and spoons
🧑🍳 DIY Instructions: Warm Kale Salad with Bacon Vinaigrette
Step 1: Prep the Kale
- Place the torn kale pieces into the large mixing bowl. If your kale is tough, you can gently massage it for 30 seconds with a teaspoon of olive oil to tenderize it.
Step 2: Cook the Bacon
- Place the small saucepan over medium heat. Add the cut bacon pieces.
- Cook the bacon for 3-4 minutes, stirring often, until the pieces are crispy and the fat has rendered (turned to liquid). Do not drain the fat.
Step 3: Make the Warm Dressing
- Remove the saucepan from the heat. Immediately stir in the red wine vinegar. It will bubble briefly.
- Stir in the packed brown sugar and salt until the sugar is completely dissolved. Taste the dressing and adjust the salt or sugar if necessary.
Step 4: Dress and Serve
- Pour the warm bacon and dressing mixture directly over the kale in the large bowl.
- Toss the salad gently but thoroughly. The heat from the dressing will slightly wilt the kale, softening its texture.
- If using, sprinkle the chopped hard-boiled egg over the top for garnish. Serve immediately while the dressing is still warm.
17. Spicy Peach Chutney

🍑 Image Description
This colorful, sweet, and savory chutney is shown simmering in a saucepan, displaying large chunks of soft, vibrant orange fruit. The primary fruit appears to be sliced peaches, visible within a thick, glossy brown liquid. This sauce is a unique, zesty condiment for holiday meats.
The peaches are mixed with small, pale white pieces of minced onion and tiny, vivid red bits of bell pepper or chili pepper, suggesting a complex, savory base to the sweetness. This combination hints at a strong depth of flavor that goes far beyond a simple jam.
In the center, a spoonful of light brown sugar is poised over the simmering mixture, indicating the final sweetening step. This simple addition will balance the heat and acidity, creating a wonderful, syrupy consistency for the quick chutney.
📝 Required Ingredients
- 1 (15-ounce) can sliced peaches, drained and roughly chopped
- $1/4$ cup finely chopped onion
- 1 small red bell pepper or a few slices of red chili, finely chopped
- 2 tablespoons apple cider vinegar
- 2 tablespoons brown sugar, packed
- $1/2$ teaspoon ground ginger (or cinnamon)
🥣 Equipment List
- Small saucepan
- Wooden spoon or spatula
- Cutting board and knife
- Can opener
🧑🍳 DIY Instructions: Speedy Spicy Peach Chutney
Step 1: Sauté the Base
- Place the small saucepan over medium heat. Add a teaspoon of oil (not listed in ingredients, as it’s optional, but helpful for sautéing).
- Add the finely chopped onion and red bell pepper (or chili) to the saucepan. Sauté them for 3-4 minutes until the onion is soft and translucent.
Step 2: Add the Fruit and Seasoning
- Add the roughly chopped, drained peaches to the saucepan.
- Stir in the apple cider vinegar, packed brown sugar, and ground ginger (or cinnamon). Mix everything well.
Step 3: Simmer and Thicken
- Bring the mixture to a gentle simmer. Reduce the heat to low, cover the saucepan with a lid, and let it cook for 5 to 7 minutes.
- The apples should become tender and soft, and the sauce should thicken into a syrupy consistency.
- Remove the lid and stir well. If the mixture is too wet, cook uncovered for an additional 1-2 minutes. This flavorful chutney is ready to serve warm or at room temperature alongside turkey or ham.
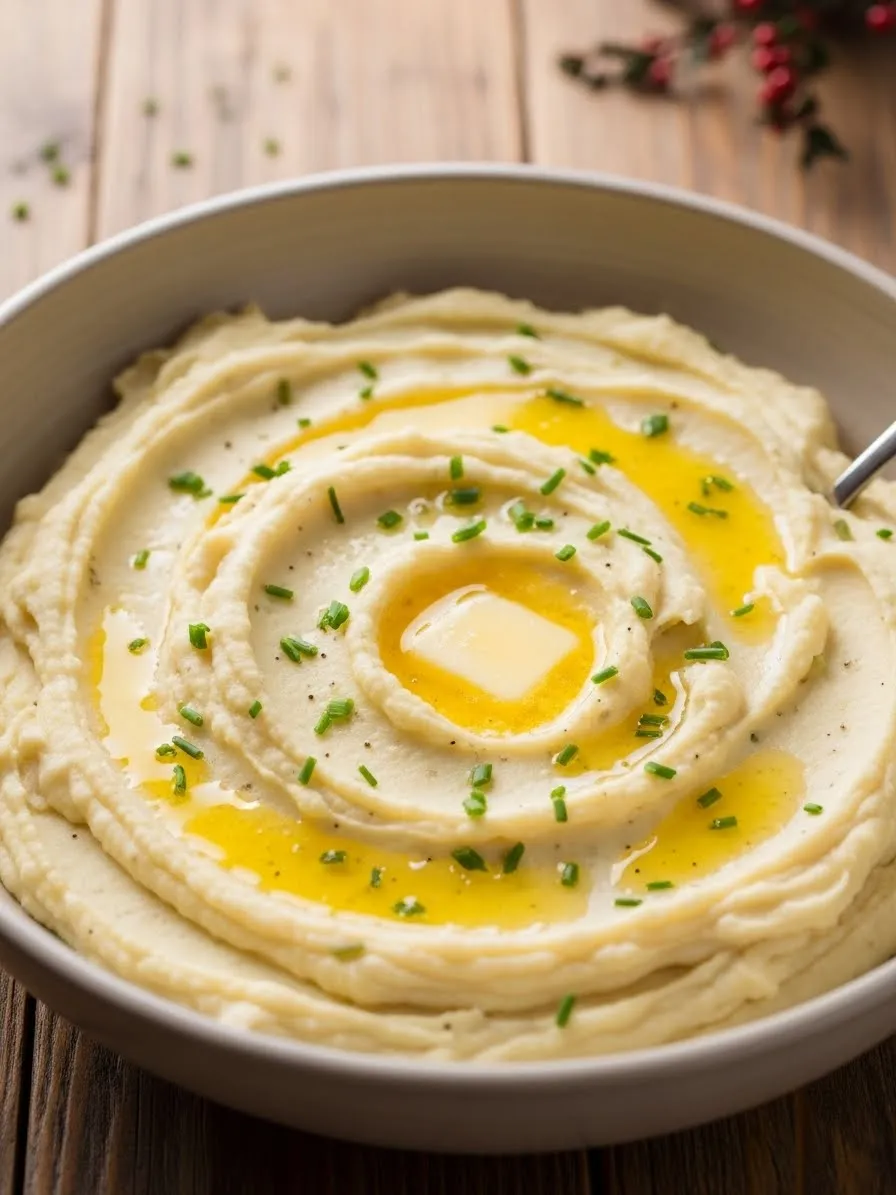
18. Creamy Chive Mashed Potatoes

🥔 Image Description
This beautiful, comforting side dish showcases a mound of velvety smooth mashed potatoes, presented in a crisp white bowl. The potatoes are a pale, creamy white color, indicating they have been whipped thoroughly with butter and cream or milk for a light, fluffy texture. This simple dish is a staple of holiday meals.
The surface of the potatoes is swirled, creating a nice visual texture that draws the eye toward the center. Flecks of finely chopped, bright green chives are visible throughout the mash, adding a subtle oniony flavor and a great visual contrast.
In the center, a generous pile of finely minced fresh garlic and more chopped chives provides a final, intense garnish. This central mound promises a savory punch, ensuring this speedy side is flavorful and not bland.
📝 Required Ingredients
- 3 medium russet or Yukon Gold potatoes (about 1.5 pounds)
- $1/4$ cup heavy cream or milk, warmed
- 2 tablespoons butter, melted
- $1/2$ teaspoon salt
- $1/4$ teaspoon black pepper
- 2 tablespoons fresh chives, chopped
- 1 clove garlic, minced (optional, for topping)
🥣 Equipment List
- Large pot
- Potato masher or hand mixer
- Measuring cups and spoons
- Serving bowl
🧑🍳 DIY Instructions: Speedy Creamy Chive Mashed Potatoes
Step 1: Quick Cook the Potatoes
- Peel the potatoes and chop them into very small, uniform cubes, about 1 inch in size. The smaller the cubes, the faster they cook.
- Place the potato cubes in the large pot and cover them with cold water. Add a generous pinch of salt to the water.
- Bring the water to a rolling boil. Boil the potatoes for 8-10 minutes. They should be easily pierced with a fork.
Step 2: Mash and Season
- Drain the potatoes well in a colander. Return the hot, drained potatoes to the empty pot.
- Immediately add the warm cream or milk, melted butter, salt, and pepper.
- Mash the potatoes until they are mostly smooth. For extra creamy mash, use a hand mixer for 30 seconds.
Step 3: Finish and Serve
- Stir in the chopped fresh chives until they are evenly distributed throughout the mash.
- Spoon the potatoes into a serving bowl. Garnish the center with the minced garlic and a few extra chives. Serve piping hot.
19. Velvety Creamed Spinach

🥬 Image Description
A rich, indulgent side dish fills the skillet, showing a generous amount of cooked spinach swimming in a thick, velvety cream sauce. The spinach leaves retain their deep green color, suggesting they were blanched or sautéed just long enough to wilt without losing their color. This rich side is a welcome classic.
The cream sauce is a pale beige color, thick and clinging closely to the spinach leaves, indicating a rich base of milk, cream, and possibly butter and cheese. Bits of white, perhaps minced onion or garlic, are visible in the sauce, hinting at the savory aromatics used.
A silver spoon rests in the center, scooping up a portion of the creamy mixture. The texture is luscious, showing that this quick recipe delivers comfort food quality in minutes. This dish is an excellent way to get greens onto the holiday plate in a crowd-pleasing form.
📝 Required Ingredients
- 1 (10-ounce) box frozen chopped spinach, thawed and squeezed very dry (or 10 oz fresh)
- 1 tablespoon butter
- 1 tablespoon finely minced onion or shallot
- 1 clove garlic, minced
- $1/4$ cup heavy cream
- 2 tablespoons cream cheese, cut into small cubes
- $1/4$ teaspoon salt
- Pinch of nutmeg (optional)
🥣 Equipment List
- Large skillet or saucepan
- Wooden spoon or spatula
- Measuring cups and spoons
🧑🍳 DIY Instructions: Speedy Velvety Creamed Spinach
Step 1: Sauté the Aromatics
- Place the large skillet over medium heat. Add the 1 tablespoon of butter and allow it to melt.
- Add the minced onion or shallot and sauté for 2-3 minutes until the pieces are soft.
- Add the minced garlic and cook for 30 seconds until it is fragrant.
Step 2: Build the Cream Sauce
- Reduce the heat to low. Add the heavy cream and the small cubes of cream cheese to the skillet.
- Stir continuously until the cream cheese is fully melted and incorporated into the cream, forming a thick, smooth sauce.
Step 3: Add Spinach and Finish
- Add the thawed and thoroughly squeezed dry spinach to the cream sauce. Stir well to coat all the leaves with the thick sauce.
- Season the spinach with the salt and a pinch of nutmeg, if using.
- Stir the mixture frequently for 2-3 minutes until the spinach is piping hot and the mixture is bubbling gently. Serve this warm, comforting side immediately.
20. Spiced Chickpea Dip with Yogurt

🥣 Image Description
A creamy, thick white base of yogurt or Greek yogurt fills a white bowl, displaying its rich, smooth texture. The yogurt serves as a cooling, tangy foundation for the colorful spices and toppings. This simple side or condiment offers a refreshing palate cleanser.
The outer ring of the bowl is filled with plump, soft whole chickpeas, creating a lovely textural border around the creamy center. The center of the yogurt is piled with a variety of seasoned, roasted chickpeas, split into two distinct color groups. One side is dusted with a reddish-brown seasoning (like chili or paprika), and the other with a green seasoning (like za’atar or ground herbs).
The entire dip is generously dusted with dark cumin seeds and a reddish spice powder, creating a strong, savory aroma. Fresh chopped parsley is tucked in next to the seasoned chickpeas, adding a final burst of green. This fast appetizer or side brings incredible flavor complexity and color to the table.
📝 Required Ingredients
- 1 cup plain Greek yogurt or labneh
- 1 (15-ounce) can chickpeas, rinsed and drained (reserve $1/4$ cup for garnish)
- 1 tablespoon olive oil
- $1/2$ teaspoon smoked paprika
- $1/4$ teaspoon ground cumin (plus a pinch for garnish)
- $1/4$ teaspoon salt
- 2 tablespoons fresh parsley, chopped
🥣 Equipment List
- Small bowl
- Large serving bowl
- Measuring cups and spoons
🧑🍳 DIY Instructions: Speedy Spiced Chickpea Dip
Step 1: Season the Chickpeas
- Preheat your oven to 400°F (200°C) OR place the chickpeas in an air fryer. (If time is extremely limited, skip roasting and just use them as-is).
- Toss the drained chickpeas (except for the reserved $1/4$ cup) with the olive oil, smoked paprika, ground cumin, and salt.
- If roasting: Spread them on a baking sheet and bake for 7-10 minutes until slightly crunchy. If using an air fryer: cook for 5-7 minutes. If skipping: simply move to Step 2.
Step 2: Prepare the Dip Base
- Spread the Greek yogurt or labneh evenly in the large serving bowl to create a smooth layer.
- Arrange the reserved, unseasoned chickpeas around the outer edge of the yogurt to form a border.
Step 3: Assemble and Garnish
- Pile the seasoned/roasted chickpeas in the center of the yogurt.
- Sprinkle a pinch of cumin over the yogurt.
- Place the chopped fresh parsley next to the center pile of chickpeas. Serve immediately with pita chips, raw vegetables, or bread.
21. Mediterranean Rotini Salad

🍝 Image Description
A close-up view captures a vibrant, textural pasta salad centered around spiraled rotini pasta. The pasta has a lovely pale yellow color and its helical shape holds the dressing and seasonings wonderfully. This dish offers a light, bright contrast to the heavy mains on the Thanksgiving table.
Tucked into the spirals are deep red pieces of oil-packed sun-dried tomatoes, sliced black olives, and briny capers. These bold additions provide Mediterranean flavor and rich visual complexity. A light coating of herbs, likely oregano and parsley, is dusted over the pasta, indicating a simple vinaigrette dressing.
The combination of salty olives, savory tomatoes, and tangy capers creates an instant flavor bomb. Since the pasta is pre-cooked, assembling this substantial side takes mere minutes, making it a stress-free and crowd-pleasing option.
📝 Required Ingredients
- 1 (8-ounce) package pre-cooked rotini pasta (or rapid cook pasta, cooked and cooled)
- $1/2$ cup sun-dried tomatoes, drained and chopped
- $1/4$ cup sliced black olives
- 2 tablespoons capers, drained
- 2 tablespoons olive oil
- 1 tablespoon red wine vinegar
- 1 teaspoon dried oregano
- $1/4$ teaspoon salt
🥣 Equipment List
- Large mixing bowl
- Measuring cups and spoons
🧑🍳 DIY Instructions: Speedy Mediterranean Rotini Salad
Step 1: Prep the Pasta
- If not using pre-cooked, rapidly cook the rotini pasta according to the package directions, then drain it immediately and rinse with cold water to stop the cooking.
- Place the cool, cooked rotini pasta into the large mixing bowl.
Step 2: Combine the Mix-ins
- Add the chopped sun-dried tomatoes, sliced black olives, and drained capers to the bowl with the pasta.
Step 3: Dress and Serve
- In a separate small cup, whisk together the olive oil, red wine vinegar, dried oregano, and salt.
- Pour the dressing over the pasta mixture.
- Toss the salad gently but thoroughly until all the ingredients and pasta are coated with the simple vinaigrette. Taste and add a pinch more salt if necessary. Serve at room temperature or slightly chilled.
22. Whipped Feta and Roasted Pepper Crostini

🍅 Image Description
A bright appetizer platter features small, golden brown crostini slices, each topped with a rich red spread. The toasts provide a necessary crunch and firm base for the generous toppings. The red spread, which appears to be a roasted bell pepper or tomato relish, is thick and chunky, offering a slightly sweet and savory profile.
A large glass bowl filled with white, crumbly cheese sits in the background, serving as the central cheese component. This cheese, likely feta or goat cheese, is crumbled and soft, promising a salty, tangy kick. Thin slivers of fresh green basil garnish both the central bowl and the finished crostini.
The individual crostini pieces are crowned with a small dollop of the crumbled white cheese, contrasting beautifully with the deep red base. This quick, elegant finger food is a simple assembly that provides bold, memorable flavors.
📝 Required Ingredients
- 1 baguette, sliced into $1/2$ inch thick pieces (or 10 pre-made crostini)
- 1 (12-ounce) jar roasted red peppers, drained
- 1 cup crumbled feta cheese (whipped or regular)
- 2 tablespoons olive oil (plus more for toasting)
- $1/4$ cup fresh basil leaves, sliced thinly
🥣 Equipment List
- Blender or food processor
- Baking sheet (if toasting bread)
- Small mixing bowl
- Serving platter
🧑🍳 DIY Instructions: Feta and Roasted Pepper Crostini
Step 1: Toast the Bread
- Preheat your oven to 350°F (175°C). Place the baguette slices on a baking sheet.
- Brush the tops lightly with olive oil. Bake for 5-7 minutes until they are lightly golden and crisp. Remove and let cool slightly.
Step 2: Make the Pepper Topping
- Place the drained roasted red peppers into a blender or food processor. Add 1 tablespoon of olive oil and a small pinch of salt.
- Pulse until the peppers form a thick, slightly chunky relish. Do not over-process; you want some texture.
Step 3: Assemble and Garnish
- Spread a generous teaspoon of the roasted pepper relish onto each cooled crostini slice.
- If you have time, pulse $1/2$ cup of the feta with 1 tablespoon of olive oil until creamy; otherwise, just use the plain crumbled feta.
- Top each crostini with a small spoonful of the crumbled or whipped feta.
- Garnish each finished piece with a few slivers of fresh basil. Arrange the crostini on the serving platter.
23. Sticky Edamame with Soy Glaze

💚 Image Description
A generous pile of bright green, shell-on edamame forms the base of this savory side dish, providing a wholesome, crunchy texture. The edamame is lightly glossy, suggesting a simple steaming or boiling before seasoning. This Asian-inspired side offers a simple, healthy counterpoint to heavy holiday food.
A small black saucepan sits atop the edamame, containing a dark, thick glaze. The glaze is glossy black, appearing to be a reduction of soy sauce or tamari, possibly mixed with sweeteners and aromatics. Sliced green onions are suspended in the dark liquid, adding a sharp, fresh flavor.
A mound of light brown sugar is visible in the center of the glaze, emphasizing the sweet and sticky nature of the sauce. Once poured over the beans, this glaze will create a wonderfully sweet and savory coating. The scattered slices of fresh green onion on the finished dish provide a final aromatic garnish.
📝 Required Ingredients
- 1 (12-ounce) bag frozen shell-on edamame
- 2 tablespoons soy sauce or tamari
- 1 tablespoon brown sugar, packed
- 1 teaspoon sesame oil
- 2 scallions (green onions), thinly sliced
🥣 Equipment List
- Large pot or steamer basket
- Small saucepan
- Large serving bowl
- Measuring cups and spoons
🧑🍳 DIY Instructions: Sticky Edamame with Soy Glaze
Step 1: Cook the Edamame
- Bring a large pot of water to a boil. Add the frozen edamame and cook for 5-7 minutes until the beans are tender.
- Drain the edamame immediately in a colander. Transfer the hot edamame to the large serving bowl.
Step 2: Make the Sticky Glaze
- While the edamame is cooking, prepare the glaze. Combine the soy sauce, brown sugar, and sesame oil in the small saucepan.
- Place the saucepan over medium-low heat. Stir constantly for 1-2 minutes until the brown sugar is completely dissolved and the sauce is bubbling and slightly thickened. Stir in half of the sliced scallions.
Step 3: Glaze and Serve
- Pour the warm, sticky glaze directly over the hot edamame in the bowl.
- Toss the edamame thoroughly until every pod is coated in the glossy sauce.
- Sprinkle the remaining sliced scallions over the top for garnish. Serve immediately as a warm snack or side.
24. Pear Halves with Blue Cheese and Walnuts

🍐 Image Description
This elegant, no-cook appetizer features halved pears as the serving vessel, displaying their pale yellow flesh and firm texture. The pears are arranged on a platter, cut-side up, providing a sweet, crisp base for the savory filling. This simple assembly is an impressive contrast of textures and flavors.
A generous spoonful of crumbly, white and blue-veined cheese is nestled into the hollow of each pear half. This blue cheese promises a strong, tangy, and salty bite that complements the subtle sweetness of the pear beautifully.
A whole, rich brown walnut half is pressed onto the top of the blue cheese, providing a crunchy, earthy texture and visual appeal. Finally, a thick, dark, syrupy glaze, likely a balsamic reduction, is drizzled over the entire arrangement. This quick side requires only assembling, making it a stress-free yet sophisticated offering.
📝 Required Ingredients
- 2 ripe but firm pears (e.g., Anjou or Bartlett)
- $1/3$ cup crumbled blue cheese (e.g., Gorgonzola or Roquefort)
- 8 whole walnut halves
- 2 tablespoons thick balsamic glaze (pre-made)
🥣 Equipment List
- Sharp knife
- Serving platter
🧑🍳 DIY Instructions: Pear Halves with Blue Cheese and Walnuts
Step 1: Prepare the Pears
- Wash the pears. Use a sharp knife to carefully cut each pear in half lengthwise, right through the stem.
- Use a small spoon or melon baller to scoop out the core and seeds from the center of each pear half, creating a small well for the filling.
Step 2: Assemble the Filling
- Lay the pear halves cut-side up on your serving platter.
- Divide the crumbled blue cheese evenly among the pear halves, filling the scooped-out well of each one.
Step 3: Garnish and Glaze
- Gently press a whole walnut half onto the top of the blue cheese filling in each pear.
- Just before serving, drizzle the thick balsamic glaze over the cheese and pear halves. Serve immediately.
25. Everything Bagel Potato Salad

🥔 Image Description
This modern take on a classic side dish features soft, cubed pieces of yellow potato coated in a creamy dressing. The potatoes are surrounded by small pieces of bright green scallions and perhaps some chopped pickle relish, promising a satisfyingly rich and tangy flavor.
A large, dark mound of Everything Bagel Seasoning dominates the center of the dish. This mix includes toasted sesame seeds (both black and white), poppy seeds, garlic flakes, and onion flakes, providing an intense visual and textural crunch.
The creamy white dressing is drizzled over the potato cubes, creating an appealing contrast with the dark seasoning. This seasoning blend suggests an umami-rich flavor profile, making this quick salad a fresh and savory addition to the holiday table.
📝 Required Ingredients
- 1.5 pounds pre-cooked small yellow potatoes, cooled and diced (or rapid cook, diced)
- $1/4$ cup mayonnaise or Greek yogurt
- 1 tablespoon Dijon mustard
- 1 tablespoon chopped fresh chives or scallions
- 1 tablespoon Everything Bagel Seasoning (plus more for topping)
- $1/2$ teaspoon salt
🥣 Equipment List
- Large mixing bowl
- Measuring cups and spoons
🧑🍳 DIY Instructions: Everything Bagel Potato Salad
Step 1: Prep the Potatoes
- If not pre-cooked, dice the potatoes into small cubes and boil them for 8-10 minutes until tender. Drain and let them cool completely.
- Place the cooled, diced potatoes into the large mixing bowl.
Step 2: Make the Dressing
- In a separate small bowl, whisk together the mayonnaise (or yogurt), Dijon mustard, chopped chives/scallions, and salt.
- Stir in 1 tablespoon of the Everything Bagel Seasoning into the dressing.
Step 3: Combine and Finish
- Pour the dressing over the potatoes in the mixing bowl.
- Gently fold the ingredients together until all the potato pieces are coated with the creamy dressing. Be careful not to mash the potatoes.
- Transfer the potato salad to a serving dish. Sprinkle a generous amount of extra Everything Bagel Seasoning over the top for garnish. Serve chilled or at room temperature.
26. Sesame-Glazed Bok Choy

🥬 Image Description
A dark, shallow pan holds a vibrant array of glossy bok choy halves, arranged cut-side up. The color contrast is striking: dark green, tender leaves transition to thick, pale white stems. The quick cooking method used preserves the color and shape of this simple Asian green.
Each piece of bok choy is lightly coated with a thin, clear glaze, suggesting a quick mix of soy sauce, sesame oil, and perhaps a touch of sugar. This thin coating makes the leaves glisten. This fast preparation ensures maximum flavor with minimum fuss.
The dish is liberally dusted with light-colored sesame seeds, which are scattered over the leaves and stems. The sesame seeds provide a subtle nutty crunch and a visual accent, completing this effortlessly healthy and flavorful side dish.
📝 Required Ingredients
- 1 pound baby bok choy, trimmed and halved lengthwise
- 2 tablespoons olive oil
- 1 tablespoon soy sauce or tamari
- 1 teaspoon sesame oil
- 1 clove garlic, minced
- 1 tablespoon sesame seeds
🥣 Equipment List
- Large skillet (12-inch)
- Measuring spoons
🧑🍳 DIY Instructions: Speedy Sesame-Glazed Bok Choy
Step 1: Sauté the Bok Choy
- Place the large skillet over medium-high heat. Add the 2 tablespoons of olive oil.
- Once the oil is hot, add the bok choy halves, cut-side down, to the skillet.
- Sauté for 3 minutes without stirring. This allows the cut side to get a nice brown sear.
Step 2: Steam and Soften
- Add 2 tablespoons of water to the skillet. Immediately cover the skillet with a lid.
- Reduce the heat to medium and let the bok choy steam for 3-4 minutes until the greens are slightly wilted and the stems are tender-crisp.
Step 3: Glaze and Finish
- Remove the lid and add the minced garlic, soy sauce, and sesame oil.
- Toss everything gently for 30 seconds until the bok choy is coated in the glaze and the garlic is fragrant.
- Remove from the heat. Transfer to a serving platter and sprinkle generously with the sesame seeds. Serve immediately.
27. Creamy Carrot and Dill Slaw

🥕 Image Description
This refreshing, quick salad is a vibrant mixture of finely shredded carrots and perhaps a few slivers of green apple or cucumber. The intense orange of the carrots dominates the bowl, providing a naturally sweet base and a beautiful pop of color. This side brings a welcome crunch and freshness to the table.
The shredded vegetables are coated in a creamy, pale white dressing, which looks rich and smooth. This light coating suggests a simple blend of mayonnaise, yogurt, or sour cream, perhaps with a hint of vinegar or lemon.
A dense mound of freshly chopped bright green dill crowns the center of the salad. The powerful, aromatic flavor of the dill is a necessary counterpoint to the sweetness of the carrots and the richness of the creamy dressing. A sprinkling of coarse salt highlights the seasoning, proving that simplicity can be incredibly appealing.
📝 Required Ingredients
- 3 cups shredded carrots (pre-shredded is great for speed)
- $1/2$ cup pre-shredded green apple or cucumber (optional)
- $1/4$ cup mayonnaise or Greek yogurt
- 1 tablespoon apple cider vinegar
- 1 tablespoon honey or sugar
- $1/4$ teaspoon salt
- 3 tablespoons fresh dill, chopped
🥣 Equipment List
- Large mixing bowl
- Measuring cups and spoons
🧑🍳 DIY Instructions: Speedy Creamy Carrot and Dill Slaw
Step 1: Prep the Dressing
- In the large mixing bowl, combine the mayonnaise (or Greek yogurt), apple cider vinegar, honey (or sugar), and salt.
- Whisk these ingredients together until the dressing is smooth and evenly combined.
Step 2: Mix the Slaw
- Add the shredded carrots and the optional shredded apple or cucumber to the mixing bowl with the dressing.
- Add 2 tablespoons of the chopped fresh dill to the bowl.
- Fold the mixture gently until all the shredded vegetables are thoroughly coated in the creamy dressing.
Step 3: Garnish and Serve
- Transfer the carrot slaw to a serving dish.
- Garnish the top generously with the remaining 1 tablespoon of fresh dill. This slaw tastes best served immediately or after chilling briefly.
28. Burst Cherry Tomatoes with Herbs

🍅 Image Description
This beautiful, rustic side dish features plump, round cherry tomatoes submerged in a shallow layer of shimmering oil. The tomatoes are a vibrant, intense red and show signs of having been gently blistered or warmed, causing some of the skins to split, or “burst.” This process releases their sweet, concentrated juices.
Thinly sliced, pale yellow garlic cloves are scattered throughout the oil, clearly infusing the dish with a savory aroma. Visible throughout the oil are dried green and brown herbs, likely rosemary and thyme, clinging to the tomatoes.
A single, small white piece of garlic sits atop one of the central tomatoes, providing a bright visual accent. This simple cooking technique elevates the natural sweetness of the tomatoes, creating a delicious, quick, and light accompaniment for turkey or bread.
📝 Required Ingredients
- 1 pint cherry or grape tomatoes
- $1/4$ cup olive oil
- 3 cloves garlic, thinly sliced
- 1 teaspoon dried rosemary or thyme
- $1/4$ teaspoon salt
- Pinch of red pepper flakes (optional)
🥣 Equipment List
- Large skillet or oven-safe dish
- Wooden spoon or spatula
- Cutting board and knife
🧑🍳 DIY Instructions: Burst Cherry Tomatoes with Herbs
Step 1: Infuse the Oil
- Place the large skillet over medium-low heat. Add the olive oil and the thinly sliced garlic cloves.
- Cook the garlic for 2 minutes, stirring gently, until it becomes fragrant. Do not let the garlic brown or burn.
- Remove the skillet from the heat momentarily.
Step 2: Cook the Tomatoes
- Add the cherry tomatoes, dried rosemary (or thyme), salt, and optional red pepper flakes to the skillet. Stir gently.
- Return the skillet to medium heat. Cook the tomatoes for 5-7 minutes, stirring occasionally. As they cook, the tomatoes will soften and the skins will begin to wrinkle and burst, releasing their flavorful juices into the oil.
Step 3: Serve
- Once most of the tomatoes have softened and burst, remove the skillet from the heat.
- The resulting warm, herbed oil and tomatoes are wonderful served with crusty bread or spooned over grilled meat. Serve immediately while warm.
29. Spicy Cheese Spread (Pimiento-Style)

🧀 Image Description
This image captures a close-up of a thick, creamy, pale orange spread filling a dark saucepan. The texture is whipped and smooth, suggesting a base of softened cream cheese or a mix of cheeses. This rich, quick dip is an immediate crowd-plaser.
A vibrant, rich red sauce has been swirled into the center of the spread, creating a beautiful spiral pattern. This red element is likely ketchup, hot sauce, or a pre-made pimiento paste, hinting at a tangy, savory, and possibly spicy flavor profile.
Two small whisk attachments rest in the bowl, indicating the spread is in the process of being mixed and whipped to achieve its smooth consistency. This recipe requires minimal cooking and can be quickly assembled using a few simple ingredients.
📝 Required Ingredients
- 4 ounces cream cheese, softened
- $1/2$ cup shredded cheddar cheese, aged for strong flavor
- 2 tablespoons mayonnaise
- 1 tablespoon hot sauce (like Sriracha or Frank’s)
- 1 teaspoon smoked paprika
- $1/4$ teaspoon garlic powder
🥣 Equipment List
- Mixing bowl or food processor
- Hand mixer or whisk
- Measuring cups and spoons
🧑🍳 DIY Instructions: Speedy Spicy Cheese Spread
Step 1: Soften the Base
- Ensure the cream cheese is fully softened. This step is crucial for achieving a smooth, whipped consistency. Place the softened cream cheese in your mixing bowl.
Step 2: Mix the Spread
- Add the shredded cheddar cheese, mayonnaise, hot sauce, smoked paprika, and garlic powder to the cream cheese.
- Use a hand mixer or whisk to beat the ingredients together for 2-3 minutes. Stop and scrape down the sides of the bowl often. The goal is to make the mixture light, fluffy, and completely smooth.
Step 3: Chill or Serve
- Once the mixture is smooth and evenly colored, transfer the spicy cheese spread to a serving dish.
- For a firmer texture, cover and chill for at least 15 minutes. For a soft, quick spread, serve immediately with crackers, celery sticks, or crostini.
30. Cucumber Raita (Indian-Inspired Yogurt Dip)

🥒 Image Description
A creamy, thick white base of yogurt or Greek yogurt fills a white bowl, displaying its rich, smooth texture. The yogurt serves as a cooling, tangy foundation for the colorful vegetables and spices. This simple side or condiment offers a refreshing palate cleanser.
Piled high in the center is a mound of finely julienned or shredded cucumber, its light green color contrasting beautifully with the white yogurt. The cucumber adds a necessary, watery crunch to the dip. Fresh, dark green mint leaves are scattered over the cucumber, suggesting a cooling, herbaceous aroma.
Scattered throughout the cucumber and around the edges of the yogurt are dark, reddish-brown cumin seeds and a dusting of black pepper. The presence of cumin instantly signals an Indian or Middle Eastern influence, adding a warm, savory depth to the cool dip.
📝 Required Ingredients
- 1 cup plain Greek yogurt (full-fat is great)
- $1/2$ cup cucumber, peeled, seeded, and finely grated or julienned
- 2 tablespoons fresh mint, chopped
- $1/2$ teaspoon ground cumin
- $1/4$ teaspoon salt
- Optional: pinch of sugar or lemon juice
🥣 Equipment List
- Medium mixing bowl
- Grater or julienne peeler
- Measuring cups and spoons
🧑🍳 DIY Instructions: Speedy Cucumber Raita
Step 1: Prep the Cucumber
- After peeling and seeding the cucumber, either grate it coarsely or cut it into fine julienne strips.
- For a less watery raita, gently squeeze the excess liquid out of the shredded cucumber using your hands or a paper towel.
Step 2: Combine the Ingredients
- Place the Greek yogurt into the medium mixing bowl.
- Add the prepared cucumber, chopped fresh mint, ground cumin, and salt. Add the optional pinch of sugar or lemon juice if you desire more brightness.
Step 3: Mix and Serve
- Use a spoon to gently stir all the ingredients together until they are evenly combined.
- Transfer the raita to a serving bowl. Garnish the top with a few extra mint leaves and a sprinkle of whole cumin seeds. Serve immediately alongside spicy dishes or as a cooling side.
31. Curried Carrot and Raisin Salad

🥕 Image Description
This vibrant, colorful salad features an abundance of finely shredded orange carrots, providing a naturally sweet and crisp foundation. The light cream sauce coating the carrots is a pale yellow-gold color, suggesting the addition of a spice like curry powder or turmeric. This creamy, spiced slaw offers a unique flavor twist on a classic side.
Dark, shriveled raisins are scattered throughout the shredded carrot mixture. The sweet, chewy raisins provide a nice textural contrast to the crisp carrots and balance the savory, earthy notes of the spice.
The salad appears to be thoroughly mixed, ensuring every shred of carrot is coated in the flavorful dressing. This side dish is simple to assemble using pre-shredded carrots, resulting in a complex flavor profile in very little time. It is a wonderful, unexpected way to introduce warmth and spice to the holiday meal.
📝 Required Ingredients
- 3 cups shredded carrots (pre-shredded for speed)
- $1/4$ cup mayonnaise or Greek yogurt
- 1 tablespoon apple cider vinegar
- 1 tablespoon honey or sugar
- 1 teaspoon curry powder
- $1/4$ cup raisins
- $1/4$ teaspoon salt
🥣 Equipment List
- Large mixing bowl
- Measuring cups and spoons
🧑🍳 DIY Instructions: Speedy Curried Carrot and Raisin Salad
Step 1: Prep the Dressing
- In the large mixing bowl, combine the mayonnaise (or Greek yogurt), apple cider vinegar, honey (or sugar), curry powder, and salt.
- Whisk these ingredients until the dressing is smooth and the curry powder is evenly distributed, giving it that characteristic yellow color.
Step 2: Combine the Slaw
- Add the shredded carrots and the raisins to the mixing bowl with the dressing.
- Use a spatula or large spoon to gently fold the mixture together. Make sure all the carrots and raisins are coated with the creamy dressing.
Step 3: Chill or Serve
- Taste the salad and adjust the salt or sweetness as necessary.
- Transfer the carrot salad to a serving dish. This dish can be served immediately for a speedy side or chilled for about 15 minutes to allow the flavors to meld further.
32. Warm Turnip Salad with Bacon and Blue Cheese

🥓 Image Description
This savory, earthy side features round, coin-shaped slices of cooked white turnip or daikon radish, providing a substantial base. The slices are uniformly pale white and lightly glossy, suggesting a quick boil or steam that left them tender but still firm. This dish introduces a welcome root vegetable alternative to the typical potato.
Scattered generously over the turnip coins are large, irregular pieces of crumbled blue cheese. The strong, salty, and tangy cheese provides a bold flavor contrast to the mild, sweet turnip.
Dark red, crispy pieces of cooked bacon are distributed throughout the dish, adding a smoky, salty crunch and richness. Finally, the entire dish is lightly dusted with finely chopped green chives, which add an oniony freshness. This warm salad is quick to assemble and is a guaranteed hit for lovers of bold, savory flavors.
📝 Required Ingredients
- 1.5 pounds turnips (or large radishes), peeled
- 2 tablespoons red wine vinegar
- 2 tablespoons olive oil
- 2 slices thick-cut bacon, cooked crisp and crumbled
- $1/4$ cup crumbled blue cheese
- 2 tablespoons fresh chives, chopped
- $1/4$ teaspoon salt
🥣 Equipment List
- Large pot
- Cutting board and knife
- Large mixing bowl
- Strainer
🧑🍳 DIY Instructions: Warm Turnip Salad
Step 1: Cook the Turnips
- Peel the turnips thoroughly. Slice them into $1/4$ inch thick coins, keeping them uniform for even cooking.
- Place the turnip coins in a large pot and cover them with cold water. Add a pinch of salt.
- Bring the water to a boil and cook the turnip slices for 6-8 minutes until they are tender when pierced with a fork but not mushy. Drain the turnips well in a strainer.
Step 2: Dress the Warm Turnips
- Place the warm, drained turnip coins into the large mixing bowl.
- Drizzle the red wine vinegar and olive oil over the warm turnips. Toss them gently to coat. The warmth helps the flavors absorb.
Step 3: Garnish and Serve
- Gently fold in most of the crumbled crispy bacon and most of the chopped chives.
- Transfer the warm salad to a serving dish. Sprinkle the crumbled blue cheese and the remaining bacon and chives over the top. Serve immediately while the turnips are still warm.
33. Tangy Slaw with Cumin and Pepper

🥗 Image Description
This vibrant, colorful slaw is composed of finely shredded green and purple cabbage, creating a beautiful blend of light and dark colors. The mixed cabbage provides a crunchy, fresh texture that serves as a cleansing counterpoint to rich holiday dishes.
Thin, bright green rings of bell pepper or jalapeño are mixed into the shredded cabbage, adding a clean, vegetal flavor and color contrast. The entire salad is drizzled with a thin, glossy orange dressing, suggesting a mix of citrus, mustard, and perhaps a touch of honey.
The most unique element is the generous sprinkling of whole dark brown cumin seeds over the top. These seeds signal a smoky, earthy flavor that elevates the simple dressing. This quick, crunchy slaw is ready in minutes and offers a satisfying mix of textures and unexpected spice.
📝 Required Ingredients
- 4 cups pre-shredded coleslaw mix (green and purple cabbage)
- $1/2$ cup green bell pepper, thinly sliced into rings
- 2 tablespoons olive oil
- 1 tablespoon apple cider vinegar
- 1 teaspoon honey or sugar
- $1/2$ teaspoon ground mustard (or Dijon)
- $1/2$ teaspoon whole cumin seeds (plus more for topping)
- $1/4$ teaspoon salt
🥣 Equipment List
- Large mixing bowl
- Small jar or cup with a lid
- Measuring cups and spoons
🧑🍳 DIY Instructions: Tangy Cumin Slaw
Step 1: Combine Slaw Ingredients
- Place the pre-shredded coleslaw mix and the thin green bell pepper slices into the large mixing bowl.
Step 2: Prepare the Dressing
- In a small jar or cup, combine the olive oil, apple cider vinegar, honey (or sugar), ground mustard, $1/2$ teaspoon of whole cumin seeds, and salt.
- Seal the jar tightly and shake vigorously for 30 seconds until the dressing is well combined and slightly thickened.
Step 3: Dress and Serve
- Pour the prepared dressing over the cabbage and pepper mixture.
- Toss the slaw gently until all the vegetables are coated with the tangy dressing.
- Transfer the slaw to a serving dish and sprinkle a few extra whole cumin seeds over the top for garnish. Serve immediately for maximum crunch.
34. Lemon Herb Peas with Parmesan Topping

💚 Image Description
This simple, inviting vegetable side dish features a dense layer of cooked, bright green peas. The peas are plump and glossy, indicating they have been quickly steamed or warmed to retain their intense color and tenderness. This vibrant green offers a necessary color contrast to the other holiday components.
Scattered generously over the peas are small, seasoned crumbs that appear to be a mix of breadcrumbs and herbs, promising a welcome crunchy texture. A generous pile of white, shredded Parmesan cheese sits directly in the center of the dish.
The cheese provides a salty, savory umami punch. Small flecks of red pepper flakes and possibly dried parsley are visible in the crumb mixture, adding a touch of heat and color. This speedy preparation makes a humble vegetable feel special and satisfying.
📝 Required Ingredients
- 1 (10-ounce) bag frozen peas
- 1 tablespoon butter
- 1 clove garlic, minced
- 1 tablespoon pre-made seasoned breadcrumbs
- 2 tablespoons shredded Parmesan cheese
- $1/2$ teaspoon lemon zest (optional)
- Pinch of red pepper flakes
🥣 Equipment List
- Medium saucepan or skillet
- Measuring cups and spoons
🧑🍳 DIY Instructions: Lemon Herb Peas
Step 1: Cook the Peas
- Place the frozen peas in the medium saucepan. Add 2 tablespoons of water and cover with a lid.
- Bring to a boil and steam the peas for 3-4 minutes until they are tender and bright green. Drain the peas immediately and return them to the empty saucepan.
Step 2: Add Flavor
- Add the butter and minced garlic to the warm peas. Place the saucepan back over low heat for 1 minute, stirring until the butter is melted and the garlic is fragrant.
Step 3: Garnish and Serve
- Remove the saucepan from the heat. Stir in the seasoned breadcrumbs, red pepper flakes, and the optional lemon zest.
- Pour the peas into a small serving bowl. Top the dish immediately with the shredded Parmesan cheese. Serve while the peas are still hot.
35. Spicy Kimchi and Tofu Stir-Fry

🌶️ Image Description
This unique and flavorful side dish features a rich, dense base of spicy red kimchi, providing a fermented, crunchy texture and a deep, fiery color. The strands of cabbage are well-coated in a glossy, dark red seasoning, suggesting a mix of gochugaru (chili powder) and possibly soy sauce.
Uniform, white cubes of firm tofu are scattered throughout the kimchi mixture. The tofu cubes are pressed and retain their shape, providing a creamy, mild contrast to the intense heat and crunch of the kimchi. The simple preparation highlights the balance between the soft, mild protein and the sharp, spicy vegetable.
The entire dish is visible in a dark skillet, indicating a quick sauté that melds the flavors together. This speedy side offers a vibrant, unexpected flavor profile and a healthy, fast alternative to traditional recipes.
📝 Required Ingredients
- 1 cup well-fermented kimchi, roughly chopped
- 4 ounces extra-firm tofu, pressed and cut into $1/2$ inch cubes
- 1 tablespoon sesame oil
- 1 tablespoon soy sauce or tamari
- 1 teaspoon maple syrup or brown sugar
🥣 Equipment List
- Large non-stick skillet
- Cutting board and knife
- Measuring spoons
🧑🍳 DIY Instructions: Speedy Kimchi and Tofu Stir-Fry
Step 1: Heat the Oil
- Place the large non-stick skillet over medium-high heat. Add the 1 tablespoon of sesame oil.
- Once the oil is shimmering, add the cubed tofu pieces. Sauté the tofu for 2 minutes, turning them gently, until they are lightly browned on a few sides.
Step 2: Add Kimchi and Flavor
- Add the roughly chopped kimchi and the soy sauce (or tamari) to the skillet.
- Stir the mixture gently, making sure the tofu and kimchi are mixed. Cook for 2-3 minutes, allowing the liquid to bubble and reduce slightly.
Step 3: Finish the Glaze
- Stir in the maple syrup (or brown sugar). Cook for 1 minute, stirring constantly, until the ingredients are coated in a glossy, slightly sweet glaze.
- Remove from the heat and serve this spicy, savory side immediately.
36. Whipped Herb Ranch Dip and Crudités

🥗 Image Description
This inviting appetizer or side is centered around a creamy, thick dip presented in a small white bowl. The dip is a pale beige color and appears airy and smooth, suggesting it has been whipped or blended. Thin flecks of green herbs, likely chives or parsley, are suspended in the dip.
The dip sits in the center of a large platter, surrounded by an organized array of fresh, vibrant crudités. Crisp, bright orange carrot sticks, pale green celery stalks, white and red radishes, and red bell pepper strips fan out from the center, creating a colorful wheel of fresh vegetables.
The simple, elegant presentation highlights the freshness of the vegetables and the rich texture of the dip. This side is effortless to assemble and provides a refreshing crunch and color contrast to the traditional, heavy Thanksgiving menu.
📝 Required Ingredients
- $1/2$ cup mayonnaise
- $1/4$ cup sour cream or Greek yogurt
- 1 teaspoon dried dill or 1 tablespoon fresh chives, chopped
- $1/2$ teaspoon garlic powder
- 1 tablespoon lemon juice
- $1/4$ teaspoon salt
- Assortment of chopped fresh vegetables (carrots, celery, radishes, peppers)
🥣 Equipment List
- Small mixing bowl
- Whisk
- Serving bowl for the dip
- Serving platter for crudités
🧑🍳 DIY Instructions: Speedy Whipped Herb Ranch Dip
Step 1: Combine the Base
- In the small mixing bowl, place the mayonnaise and sour cream (or Greek yogurt).
- Add the dried dill (or fresh chives), garlic powder, lemon juice, and salt.
Step 2: Whip and Chill
- Use a whisk to mix and whip the ingredients together for 1 minute until the dip is completely smooth, airy, and creamy.
- Taste the dip and add a tiny splash more lemon juice or salt if needed.
- Spoon the dip into the small serving bowl.
Step 3: Assemble the Platter
- Arrange the fresh, washed, and chopped vegetables neatly around the dip bowl on the large platter.
- This dip is best served immediately alongside the colorful crudités.
37. Cranberry Topped Sweet Biscuits

🍒 Image Description
This beautiful, rustic side features several small, round, homemade biscuits arranged on a dark metal baking sheet. The biscuits have a pale golden top, a slightly flaky, layered texture, and are dusted with coarse sugar. This quick bread element provides a satisfying, buttery addition to the table.
The central biscuits are crowned with a generous dollop of bright, glossy cranberry relish or sauce. The deep red, jewel-toned sauce is thick and rich, signaling the classic holiday flavor. Thin strips of bright orange citrus zest are curled artfully over the cranberry topping.
This preparation shows a quick way to serve a bread and a cranberry sauce combined. The bright red and orange garnish against the pale gold biscuit is festive and appealing.
📝 Required Ingredients
- 1 tube refrigerated sweet or buttermilk biscuits (8 count)
- $1/2$ cup canned whole berry cranberry sauce (not jellied)
- 1 tablespoon orange juice
- 1 teaspoon orange zest, cut into thin strips
- Optional: 1 tablespoon melted butter for brushing
🥣 Equipment List
- Baking sheet
- Small bowl
- Zester or small knife
- Serving platter
🧑🍳 DIY Instructions: Cranberry Topped Sweet Biscuits
Step 1: Bake the Biscuits
- Preheat your oven according to the directions on the biscuit tube (usually around 375°F/190°C).
- Place the biscuits on the baking sheet and bake for 9-12 minutes until they are golden brown and cooked through.
- Remove the hot biscuits from the oven and let them cool slightly.
Step 2: Prep the Topping
- While the biscuits are cooling, combine the whole berry cranberry sauce and the orange juice in the small bowl. Stir them gently to loosen the sauce slightly.
- Cut the orange zest into small, thin strips for an attractive garnish.
Step 3: Assemble and Serve
- Place the slightly cooled biscuits on your serving platter.
- Spoon about 1 teaspoon of the cranberry sauce mixture onto the top center of each biscuit.
- Garnish each topped biscuit with a few thin strips of fresh orange zest. Serve this warm, sweet, and tart side.
38. French Onion Fried Onions

🧅 Image Description
This creative, super-fast side dish features a bowl heaped high with golden brown, crunchy fried onions, the kind commonly used for green bean casserole. The crisp, thin rings of onion provide an intense textural crunch.
A generous layer of shredded white and orange cheese (likely Swiss and Cheddar blend) covers the center of the fried onions. A thick, dark brown sauce, which appears to be a reduced French onion broth, is drizzled heavily over the cheese and onions. A gold ladle pours more of the rich liquid over the top.
The overall appearance is reminiscent of French onion soup, with the fried onions standing in for the crouton and the broth providing a deep, savory flavor. This is a wonderfully rich and comforting recipe that uses pantry shortcuts for an incredibly fast and flavorful side.
📝 Required Ingredients
- 1 (6-ounce) container pre-made crispy fried onions
- $1/2$ cup shredded cheese blend (Swiss, Gruyère, or Mozzarella)
- $1/2$ cup condensed French onion soup (or concentrated beef broth)
- $1/2$ teaspoon dried thyme or rosemary
🥣 Equipment List
- Small saucepan
- Small microwave-safe bowl (for serving)
- Measuring cups and spoons
🧑🍳 DIY Instructions: French Onion Fried Onions
Step 1: Prep the Sauce
- Pour the condensed French onion soup (or concentrated beef broth) into the small saucepan.
- Place the saucepan over medium heat. Bring the liquid to a simmer and let it cook for 3-4 minutes, stirring occasionally, until the sauce has thickened slightly. Remove from the heat.
Step 2: Assemble the Dish
- Place the crispy fried onions into your serving bowl.
- Create a small well in the center of the onions and fill it with the shredded cheese blend.
- Sprinkle the dried thyme or rosemary over the cheese.
Step 3: Melt and Serve
- Carefully pour the hot, thickened French onion sauce over the cheese and onions. The heat from the sauce will begin to melt the cheese.
- Alternatively, for a fully melted cheese top, microwave the assembled dish for 30-45 seconds. Serve this savory, crunchy side immediately while it is still hot.
Key Takeaways
- Speed is Possible: All 38 recipes are designed to be completed from start to finish in 10 minutes or less, utilizing smart shortcuts like pre-cooked ingredients or rapid-cooking methods.
- Balance the Meal: Quick side dishes are essential for balancing the heavy flavors and long cooking times of a traditional Thanksgiving main course. They provide color, texture, and brightness.
- Minimal Ingredients: These recipes focus on maximizing flavor with fewer than ten ingredients each, reducing prep time and grocery list complexity.
- Prep Ahead: Many of these dishes, such as the slaws, dips, and marinated options, can be fully prepared or assembled hours ahead of time, freeing up your stovetop and oven on the big day.
Preparing a generous holiday feast should be a joy, not a burden. By focusing on these 38 10-Minute Thanksgiving Side Dishes, you equip yourself with an arsenal of stress-free, speedy, and deeply satisfying recipes.
Remember, the warmth and flavor you bring to the table are more important than the hours you spend in the kitchen. Use these smart shortcuts to reclaim your time, enjoy your company, and serve a spectacular, abundant Thanksgiving meal that everyone will remember. Go ahead, fill your plate!