Many kitchens house this wonderful machine, often sitting quietly on the countertop. It promised so much speed and crispy deliciousness when you first brought it home. Unfortunately, maybe you only use it for frozen french fries, or perhaps it has become merely a shiny collector of dust. We say it is time to change that reality today!
This appliance is actually a rapid heating convection oven that deserves to do much more than reheat leftovers. It can transform simple ingredients into flavorful meals in a fraction of the time required by a traditional oven. We have compiled an extensive collection of forty-eight recipes designed to prove the true versatility of this machine.
You will find quick breakfast bites, satisfying weeknight dinners, and even wonderfully warm desserts within these pages. These recipes are all straightforward, requiring minimal prep and yielding maximum crunch. Let us stop letting this powerhouse gather dust and start creating quick, delicious meals right now!
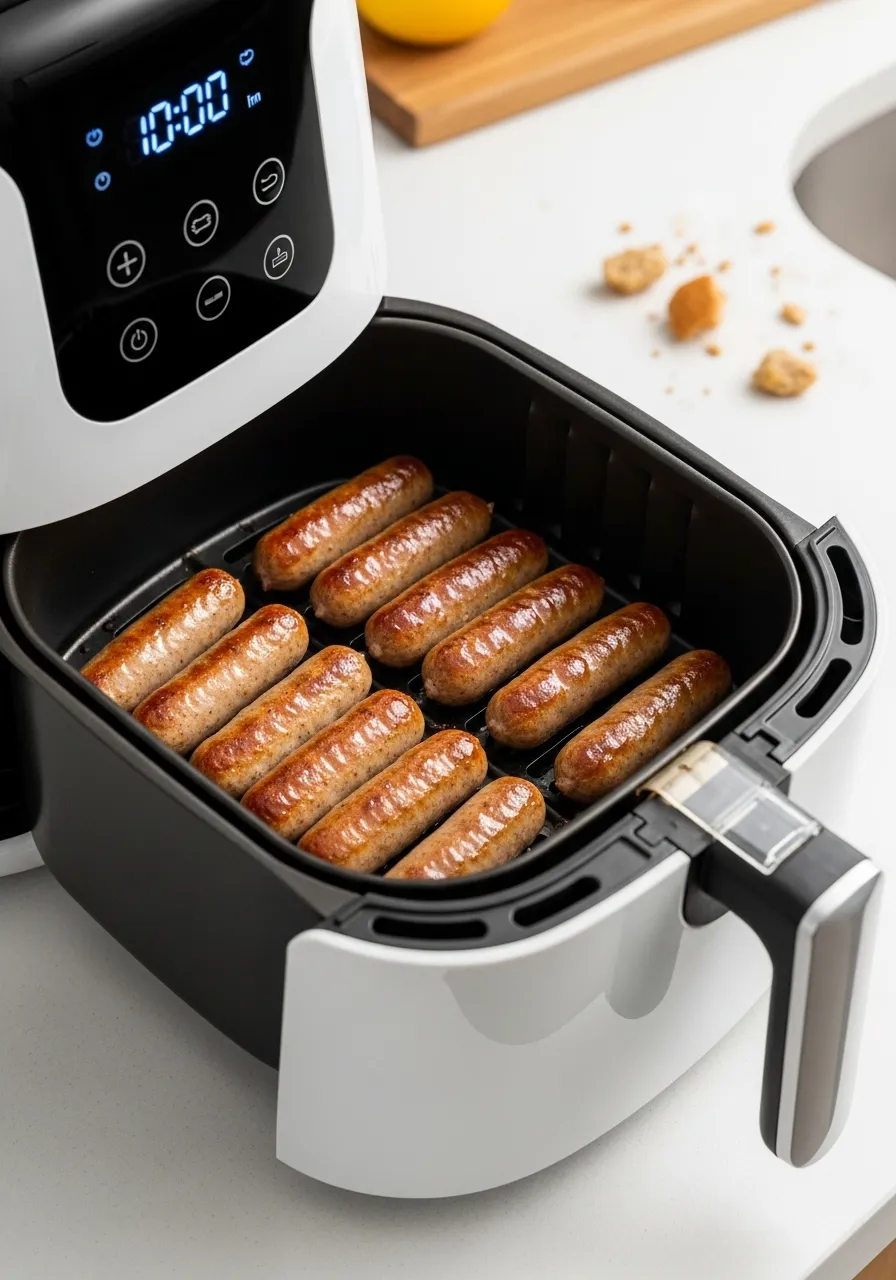
These golden brown sausages are a morning game changer. Instead of standing over a skillet, you can achieve amazing results with almost no effort. The air fryer basket allows the hot air to circulate completely around each link, leading to a wonderfully crisp exterior and a juicy, cooked interior every single time. This quick preparation method means you spend less time cooking and more time enjoying your meal. It’s a truly effortless way to prepare a family favorite for breakfast or even a simple dinner.
Ingredients and Equipment
Required Ingredients
1 pound (450g) of raw breakfast sausage links (pork, chicken, or turkey)
A very small amount of vegetable oil or cooking spray (optional, but helps with browning)
Required Equipment
Air Fryer (basket or oven style)
Tongs
Meat thermometer (to ensure food safety)
Step-by-Step DIY Instruction
Getting these links done right is very straightforward, even if you are just starting out with your air fryer.
Preparation is Key (Preheat): Begin by warming up your air fryer. Set the temperature to 375°F (190°C) and let it preheat for about five minutes. This quick step ensures the food starts cooking immediately and consistently.
Lightly Coat the Links: Take your raw sausage links. If you want a slightly darker, crispier crust, lightly mist the links with cooking spray or toss them gently with a teaspoon of oil in a small bowl. This step is optional but enhances color.
Load the Basket Properly: Carefully place the sausage links into the air fryer basket. It is very important that you do not overlap them. Each link needs its own space so the air can circulate freely all around it. Cook them in batches if necessary to prevent overcrowding.
Initial Cooking Phase: Close the air fryer and set the timer for 10 minutes. The sausages will begin cooking evenly and browning nicely.
Flip for Evenness: When the timer goes off, pause the air fryer. Using your tongs, gently flip every single sausage link over. This ensures both sides get that beautiful, uniform golden color and texture.
Second Cooking Phase: Close the air fryer again and continue cooking for another 3 to 5 minutes. The exact time depends on how thick your links are and how well your specific air fryer holds heat.
Check for Safety: After the time is up, use a meat thermometer to check the internal temperature of a couple of the thickest links. For safety, the temperature must read 160°F (71°C) or higher. If it is lower, return them to the air fryer for another minute or two.
Serve and Enjoy: Once fully cooked, immediately remove the links from the basket using tongs. Plate them up and enjoy your incredibly quick, easy, and delicious meal.
2. Crunchy Pretzel-Crusted Chicken Breast
Easy Air Fryer Recipes
This chicken breast delivers a wonderful crunch without needing deep frying. The pretzel coating seals in the chicken’s natural moisture, creating a remarkably tender piece of meat inside. Drizzled with honey mustard and served alongside salty pretzels, this dish elevates a simple weeknight meal into something special. You can easily prepare this recipe in just minutes, making it a powerful tool for quick dinners. The air fryer quickly transforms the coating into a deeply golden, savory shell.
Ingredients and Equipment
Required Ingredients
1 large boneless, skinless chicken breast (about 8 oz), pounded to an even thickness
1 cup pretzels (crushed fine)
1 large egg (lightly beaten)
1 tablespoon all-purpose flour
1 teaspoon onion powder
1/2 teaspoon garlic powder
Salt and pepper to taste
Cooking spray or 1 teaspoon vegetable oil
Honey mustard for serving (optional)
Required Equipment
Air Fryer (basket or oven style)
Three shallow dishes or plates for the breading station
Meat pounder (or a rolling pin)
Tongs
Meat thermometer
Step-by-Step DIY Instruction
Follow these steps precisely to achieve a restaurant-quality crunch.
Prepare the Chicken: Take your chicken breast and place it between two sheets of plastic wrap. Gently pound it until it reaches a uniform thickness of about one inch. This ensures even cooking.
Set Up the Breading Station: You will need three separate dishes. In the first dish, place the flour mixed with salt and pepper. In the second dish, pour the lightly beaten egg. In the third dish, combine the finely crushed pretzels, onion powder, and garlic powder.
The Coating Process: Start by dipping the chicken completely into the flour mixture, shaking off any excess. Next, transfer the floured chicken to the egg wash, ensuring it is fully coated. Finally, press the chicken firmly into the crushed pretzel mix. Make certain the entire surface is covered.
Preheat and Spray: Preheat your air fryer to 380°F (195°C) for five minutes. Lightly spray the inside of the air fryer basket with cooking oil to prevent sticking.
Cook the Chicken: Carefully place the pretzel-coated chicken breast into the prepared air fryer basket. Lightly mist the top surface of the chicken with cooking spray.
The Initial Cook Time: Set the air fryer for 12 minutes. After six minutes, stop the machine. Use your tongs to flip the chicken breast over. This helps both sides get beautifully crispy.
Final Check: Continue cooking for the remaining six minutes. Once the time is up, insert your meat thermometer into the thickest part of the breast. The internal temperature must register at least 165°F (74°C) to be safe.
Rest and Serve: Allow the chicken to rest for five minutes after removing it from the air fryer. Slice it into medallions, drizzle with honey mustard, and enjoy the amazing texture.
3. Savory Golden Crab Cakes
Easy Air Fryer Recipes
These small patties are seasoned wonderfully and cook quickly to a stunning golden-brown exterior. The air fryer cooks them rapidly, locking in the fresh flavors of the crab and herbs. Unlike traditional frying, this method requires almost no oil, resulting in a lighter and less greasy cake that tastes truly authentic. The compact shape and uniform cooking of the crab cakes make them an excellent appetizer or a light, sophisticated main course.
Ingredients and Equipment
Required Ingredients
1 pound lump crab meat (drained and picked over for shells)
1/2 cup panko breadcrumbs
1/4 cup mayonnaise
1 large egg (lightly beaten)
2 tablespoons chopped fresh parsley
1 teaspoon Old Bay seasoning (or a similar blend)
1 teaspoon lemon juice
1/4 teaspoon Worcestershire sauce
Pinch of salt and pepper
Cooking spray or vegetable oil
Required Equipment
Air Fryer (basket or oven style)
One large mixing bowl
Measuring cups and spoons
Spatula
Step-by-Step DIY Instruction
Creating and cooking these moist crab cakes is simpler than you might think.
Mix the Binding Agents: In your large mixing bowl, combine the mayonnaise, beaten egg, fresh parsley, Old Bay seasoning, lemon juice, Worcestershire sauce, salt, and pepper. Whisk these ingredients together until the mixture is smooth.
Add the Dry Ingredients: Gently stir in the panko breadcrumbs. Let this mixture sit for two minutes so the breadcrumbs can absorb some of the moisture.
Fold in the Crab: Now, carefully fold in the lump crab meat. The goal is to combine the ingredients without shredding the crab pieces. Use a rubber spatula and mix lightly. You want visible pieces of crab in the finished product.
Shape the Cakes: Form the mixture into six to eight evenly sized patties, about one inch thick. Place them on a plate and cover them with plastic wrap. Chill them in the refrigerator for at least 30 minutes. This cooling period helps them hold their shape during cooking.
Preheat and Prepare: Preheat your air fryer to 370°F (185°C) for five minutes. Lightly coat the air fryer basket with cooking spray.
Air Fry: Carefully place the crab cakes in the air fryer basket, ensuring they do not touch. Lightly mist the tops of the crab cakes with cooking spray.
Cook and Turn: Cook for 8 minutes. Open the air fryer and use a spatula to gently flip the crab cakes. Cook for an additional 3 to 5 minutes, or until they are heated through and the exterior is deep golden brown. The filling should feel firm when touched.
Serve and Enjoy: Remove the crab cakes and serve them right away with a squeeze of fresh lemon or tartar sauce.
4. Spiced Grilled Tofu Steaks
Easy Air Fryer Recipes
This is a fantastic recipe for achieving a deeply savory and firm texture in tofu. The air fryer mimics a grill’s searing ability, giving these protein blocks attractive char lines and a chewy exterior. The bold seasoning mix penetrates the tofu, delivering flavor in every bite. This preparation method transforms a simple ingredient into a satisfying, flavor-packed meal or side dish.
Ingredients and Equipment
Required Ingredients
1 block (14-16 oz) of extra-firm tofu
2 tablespoons soy sauce (or tamari for gluten-free)
1 tablespoon sesame oil
1 tablespoon rice vinegar
1 teaspoon smoked paprika
1/2 teaspoon garlic powder
1/4 teaspoon ground black pepper
Cooking spray
Chopped green onions for garnish
Required Equipment
Air Fryer (basket or oven style)
Tofu press (highly recommended) or paper towels and heavy weights
Shallow marinating dish
Tongs
Step-by-Step DIY Instruction
A firm texture is essential for this recipe; proper draining is the first important step.
Press the Tofu: Remove the tofu from its package and drain any water. You must press the water out. Use a dedicated tofu press, or wrap the block in several layers of paper towels and place something heavy on top (like a cast-iron skillet or heavy books). Press for at least 30 minutes.
Slice the Tofu: After pressing, slice the tofu block into four even “steaks,” about 3/4 inch thick.
Prepare the Marinade: In the shallow marinating dish, whisk together the soy sauce, sesame oil, rice vinegar, smoked paprika, garlic powder, and black pepper.
Marinate: Place the tofu steaks into the marinade. Ensure both sides of each steak are coated. Let them marinate for at least 15 minutes. Longer marinating (up to an hour) in the refrigerator will deepen the flavor.
Preheat and Load: Preheat your air fryer to 400°F (200°C) for five minutes. Lightly spray the basket. Remove the tofu from the marinade, letting any excess liquid drip off.
Air Fry and Flip: Place the tofu steaks into the basket in a single layer. Air fry for 10 minutes. Open the air fryer, flip the steaks using tongs, and cook for another 8 to 10 minutes until they are deeply browned and firm.
Serve: Remove the steaks from the air fryer and sprinkle them generously with fresh chopped green onions. Enjoy them with your favorite dipping sauce.
5. Creamy Apple Crumble Parfait
Easy Air Fryer Recipes
This recipe showcases how the air fryer can create amazing dessert components. The crispy crumble topping and the tender, caramelized apples are both cooked effortlessly with dry heat. Layered with a cold, creamy base, the warm apples and crisp topping create a fantastic contrast in temperature and texture. This makes for a stunning, quick dessert that looks far more complicated than the effort required.
Ingredients and Equipment
Required Ingredients
2 medium apples (peeled, cored, and diced small; Granny Smith or Fuji work well)
2 tablespoons brown sugar
1/2 teaspoon ground cinnamon
1/4 cup oats (rolled or quick-cooking)
1/4 cup all-purpose flour
2 tablespoons cold unsalted butter (cut into small cubes)
1 cup prepared whipped cream or vanilla yogurt
A few small serving jars or glasses
Required Equipment
Air Fryer (basket or oven style)
Two small mixing bowls
Small baking dish or aluminum foil pan (must fit in air fryer)
Spoon or fork
Step-by-Step DIY Instruction
Here is how you can create this amazing layered dessert with your air fryer.
Prepare the Apples: In your first small bowl, toss the diced apples with one tablespoon of the brown sugar and 1/4 teaspoon of the cinnamon. Place the mixture into a small baking dish or a foil pan that fits easily inside the air fryer.
Prepare the Crumble: In the second bowl, combine the remaining one tablespoon of brown sugar, the remaining 1/4 teaspoon of cinnamon, the oats, and the flour. Add the cold butter cubes. Use your fingertips or a fork to quickly work the butter into the dry mixture until it resembles coarse, wet sand. Do not overmix.
Cook the Apples: Place the dish of seasoned apples into the air fryer. Set the temperature to 350°F (175°C) and cook for 5 minutes, until they begin to soften. Remove the dish from the air fryer.
Cook the Crumble: Spread the crumble mixture evenly onto a piece of aluminum foil or parchment paper that fits in the air fryer basket. Cook the crumble at 350°F (175°C) for 5 to 7 minutes, stirring halfway through, until it is golden brown and deeply crunchy. Remove it immediately to cool.
Layer the Parfaits: To assemble the desserts, start with a layer of cold whipped cream or yogurt in the bottom of your serving jar.
Add Warm Apples: Spoon a layer of the warm, air-fried apple mixture directly onto the cream layer.
Top with Crumble: Finish by generously sprinkling the crunchy air-fried crumble topping over the apples.
Serve: Serve the parfaits immediately to enjoy the warmth of the apple and crumble against the cold cream.
6. Zesty Seasoned Steak Strips and Veggies
Easy Air Fryer Recipes
This recipe proves you can create a sizzling meal with minimal effort. Thinly sliced steak strips cook incredibly quickly, achieving a nice sear that locks in the savory flavor. When combined with colorful bell peppers and onions, this becomes a complete and flavorful dish in one air fryer basket. The air fryer circulates heat perfectly, cooking the meat and vegetables simultaneously for a delightful texture contrast. This is a wonderfully efficient way to prepare dinner on a busy weeknight.
Ingredients and Equipment
Required Ingredients
1 pound steak (sirloin or flank, thinly sliced across the grain)
1 large bell pepper (sliced; use a mix of colors)
1/2 medium onion (sliced)
2 tablespoons olive oil
1 tablespoon taco or fajita seasoning (low sodium is best)
1/2 teaspoon salt
Cooking spray
Required Equipment
Air Fryer (basket or oven style)
One large mixing bowl
Tongs
Step-by-Step DIY Instruction
Achieving tender steak and crisp-tender veggies is simple when you follow these steps.
Slice the Ingredients: Slice the steak thinly against the grain. This makes the meat more tender. Slice the bell peppers and onions into uniform strips that are similar in size to the steak strips.
Season Everything: Place all the steak, pepper, and onion slices into the large mixing bowl. Drizzle them with the olive oil, then sprinkle generously with the fajita seasoning and salt. Toss the ingredients gently until everything is evenly coated in the spice mix.
Preheat the Machine: Preheat your air fryer to a high heat of 400°F (200°C) for five minutes. This hot air is essential for a proper sear on the steak.
Cook in Batches: Place half of the steak and vegetable mixture into the air fryer basket. Do not overcrowd the basket. Everything must be in a single layer to cook correctly.
Initial Cook and Shake: Air fry the first batch for 5 minutes. Halfway through the cooking time, give the basket a good shake or use tongs to toss the ingredients.
Check for Doneness: Continue cooking until the steak reaches your desired doneness, usually only an additional 2 to 3 minutes for medium-well. Remove the first batch immediately and set it aside to rest.
Cook the Second Batch: Repeat steps 4 through 6 with the remaining seasoned ingredients.
Serve: Combine both batches of hot steak and veggies and serve them wrapped in tortillas or over rice.
7. Mediterranean-Spiced Air Fryer Meatballs
Easy Air Fryer Recipes
These savory meatballs are juicy on the inside, thanks to the controlled heat of the air fryer. The addition of fresh herbs and feta cheese gives them a distinctly Mediterranean flavor that is simply irresistible. You can serve them in a light tomato sauce, next to a fresh Greek salad, or with warm pita bread. The air fryer makes short work of cooking them through while preventing them from drying out, a common problem with oven baking.
Ingredients and Equipment
Required Ingredients
1 pound ground beef, lamb, or a combination
1/2 cup finely crumbled feta cheese
1/4 cup finely chopped fresh parsley
1 large egg (lightly beaten)
1/4 cup bread crumbs (panko or plain)
1 teaspoon dried oregano
1/2 teaspoon garlic powder
1/2 teaspoon salt
Cooking spray or olive oil
Required Equipment
Air Fryer (basket or oven style)
One large mixing bowl
Measuring spoons
Tongs
Meat thermometer
Step-by-Step DIY Instruction
Mixing these by hand ensures they stay moist, so don’t be afraid to get your hands messy.
Prepare the Mixture: In the large mixing bowl, gently combine the ground meat, crumbled feta cheese, parsley, beaten egg, bread crumbs, oregano, garlic powder, and salt. Use your hands to mix everything, taking care not to overwork the meat. Overmixing leads to tough meatballs.
Form the Balls: Roll the mixture into uniform balls, about 1 1/2 inches in diameter. You should get about 16 to 18 meatballs.
Preheat: Set your air fryer to 370°F (185°C) and allow it to preheat for five minutes. Lightly coat the basket with cooking spray.
Load the Basket: Place the meatballs into the prepared air fryer basket. You must leave a small space between each one to allow the hot air to circulate. Cook them in two batches if needed.
Cook and Rotate: Air fry for 10 minutes. Open the basket and gently turn the meatballs with your tongs to ensure even browning on all sides.
Finish Cooking: Continue to cook for an additional 3 to 5 minutes. The surface should be beautifully browned and crisp.
Check Internal Temperature: Use a meat thermometer to check the center of a meatball. The internal temperature must reach 165°F (74°C) for safety.
Serve: Toss the hot meatballs in your favorite tomato sauce or serve them with a dollop of tzatziki and a fresh salad.
8. Golden Shredded Zucchini Fritters
Easy Air Fryer Recipes
Say goodbye to oily, heavy vegetable patties! The air fryer creates these delicious fritters with only a light misting of oil, resulting in a perfectly crispy edge and a tender, flavorful center. Zucchini is a wonderful vegetable for this method because the intense heat quickly removes any remaining moisture, helping the fritters set beautifully. These make a great light lunch, appetizer, or quick side dish for any meal.
Ingredients and Equipment
Required Ingredients
2 medium zucchinis (about 1 pound total)
1 large egg (lightly beaten)
1/4 cup all-purpose flour
1/4 cup finely grated Parmesan cheese
1/4 teaspoon salt
Pinch of black pepper
Cooking spray
Sour cream and chives for serving
Required Equipment
Air Fryer (basket or oven style)
Box grater or food processor
Clean kitchen towel or paper towels
Two mixing bowls
Spoon
Step-by-Step DIY Instruction
The secret to a crisp fritter is removing excess moisture from the zucchini before mixing the batter.
Grate the Zucchini: Use a box grater or a food processor attachment to shred the zucchinis. Place the shredded zucchini into a mixing bowl.
Remove Moisture (The Essential Step): Transfer the shredded zucchini onto the center of a clean, thick kitchen towel or several layers of sturdy paper towels. Gather the edges of the towel and twist it tightly over the sink. Squeeze out as much liquid as you possibly can. This step is critical for fritters that hold their shape.
Prepare the Batter: Place the dried zucchini back into the bowl. Add the lightly beaten egg, flour, grated Parmesan cheese, salt, and pepper. Stir the mixture until everything is just combined.
Preheat and Shape: Preheat your air fryer to 380°F (195°C) for five minutes. Lightly spray the basket with cooking oil. Using a large spoon, scoop the mixture and form it into small, flat patties (about 2-3 inches wide).
Load and Mist: Carefully place the patties into the prepared air fryer basket. Do not let them touch. Gently mist the top of each fritter with cooking spray.
Cook and Flip: Air fry for 8 minutes. Use a spatula to carefully flip the fritters over. Mist the second side with cooking spray.
Finish Cooking: Continue cooking for another 5 to 7 minutes, until the fritters are deep golden brown and crispy on the edges.
Serve Hot: Remove the fritters and serve them right away with a dollop of sour cream and a sprinkle of fresh chives.
9. Extra Crispy Homemade Chicken Pieces
Easy Air Fryer Recipes
Craving that classic crunch? This method gives you incredibly crispy fried chicken pieces without the mess or guilt of deep fat frying. The triple-dredging technique creates a thick, textured coating that gets wonderfully crunchy under the air fryer’s intense heat. A final mist of cooking oil ensures the crust turns a rich, appetizing color. This recipe results in moist meat and a truly satisfying bite every single time.
Ingredients and Equipment
Required Ingredients
4 chicken pieces (mixed thighs and drumsticks, bone-in, skin-on)
1 cup all-purpose flour
1 teaspoon paprika (smoked or sweet)
1/2 teaspoon garlic powder
1/2 teaspoon onion powder
1/2 teaspoon cayenne pepper (optional for heat)
1 teaspoon salt
1/2 teaspoon black pepper
2 large eggs (lightly beaten)
Cooking oil spray
Required Equipment
Air Fryer (basket or oven style)
Three wide, shallow dishes
Tongs
Meat thermometer
Step-by-Step DIY Instruction
This process requires a little patience during the coating stage, but the results are completely worth the effort.
Dry the Chicken: Pat the chicken pieces very dry with paper towels. This helps the coating adhere properly.
Set Up the Breading: Use your three shallow dishes. In the first dish, place half a cup of flour seasoned with salt and pepper. In the second dish, pour the beaten eggs. In the third dish, combine the remaining half cup of flour, paprika, garlic powder, onion powder, cayenne pepper, and the remaining salt and pepper.
The Triple Dredge: Take one chicken piece and roll it thoroughly in the first flour mix. Shake off any excess. Next, completely coat the chicken in the egg wash. Finally, press the chicken firmly into the seasoned flour mix. Make sure the entire surface is covered completely. Repeat this process for all four chicken pieces.
Preheat and Spray: Preheat your air fryer to 380°F (195°C) for five minutes. Lightly spray the inside of the basket to prevent sticking.
Load the Basket: Place the coated chicken pieces into the basket. They should not touch. Now, generously mist the top of each piece with cooking oil spray. The oil is what gives the crust its rich color and crispy texture.
Cook and Flip: Air fry for 15 minutes. Use your tongs to carefully flip each chicken piece over. Generously mist the second side with cooking spray.
Finish Cooking: Continue cooking for another 10 to 15 minutes. Total time will vary based on the size of the pieces.
Check for Safety: The internal temperature of the meat must reach 165°F (74°C). Remove them from the air fryer and let them rest for five minutes before serving.
10. Herb-Crusted Middle Eastern Chicken
Easy Air Fryer Recipes
This simple preparation yields incredibly flavorful and juicy chicken, thanks to a robust blend of Mediterranean spices. The air fryer crisps the skin beautifully, creating an aromatic crust that seals in the moisture of the meat below. The blend of herbs and spices, often including sesame seeds and thyme, transforms a simple chicken meal into an exotic dinner. Serving this with a squeeze of fresh lemon completes the rich flavor profile.
Fresh oregano or thyme sprigs for garnish (optional)
Required Equipment
Air Fryer (basket or oven style)
Small mixing bowl
Paper towels
Tongs
Meat thermometer
Step-by-Step DIY Instruction
Achieving a deep, herb-crusted flavor starts with making sure the chicken is completely dry.
Dry and Prepare the Chicken: Use paper towels to pat the skin of the chicken pieces as dry as possible. Excess moisture prevents the skin from crisping up.
Create the Rub: In the small mixing bowl, combine the Za’atar spice blend, olive oil, and salt. Stir this mixture until a thick paste forms.
Coat the Chicken: Rub the spice paste generously all over the surface of each chicken piece, paying attention to get the rub under the skin and into any crevices.
Preheat: Preheat your air fryer to 375°F (190°C) for five minutes.
Load the Basket: Carefully place the chicken pieces, skin side up, into the air fryer basket. You must ensure they are in a single layer without touching.
The Initial Cook: Set the air fryer for 20 minutes. Do not open or flip the chicken during this time, allowing the skin to set.
Check and Finish: After 20 minutes, check the skin’s color. If it looks golden and crisp, flip the chicken pieces. Continue cooking for another 5 to 10 minutes to ensure the internal temperature is correct.
Verify Safety: The internal temperature of the chicken needs to reach 165°F (74°C) in the thickest part of the meat (not touching bone).
Serve: Remove the chicken and squeeze fresh lemon juice over the top just before serving for an extra pop of flavor.
11. Golden Halloumi Fries and Chips
Easy Air Fryer Recipes
Fried cheese is one of life’s true pleasures, and the air fryer makes it wonderfully accessible. This method yields a crispy, golden-brown crust on the outside of the Halloumi sticks while the salty, chewy interior remains satisfyingly warm. Paired with perfectly crisp, golden potato wedges, this creates a savory appetizer or a fun main course. The high heat achieves a texture that tastes rich and fried, but without the heaviness of excessive oil.
Ingredients and Equipment
Required Ingredients
1 block (8 oz) of Halloumi cheese (patted dry)
1 large russet potato (cut into uniform wedges)
1 tablespoon olive oil (divided)
1/2 teaspoon salt
1/4 teaspoon black pepper
Plain yogurt or tzatziki for dipping
Fresh mint or parsley (chopped for garnish)
Required Equipment
Air Fryer (basket or oven style)
Two medium mixing bowls
Sharp knife and cutting board
Tongs
Step-by-Step DIY Instruction
Cutting the Halloumi into uniform sticks helps everything cook simultaneously and evenly.
Prepare the Chips: Place the potato wedges in a medium bowl. Toss them with half of the olive oil, salt, and pepper.
Cook the Chips First: Preheat your air fryer to 380°F (195°C) for five minutes. Place the seasoned potato wedges into the air fryer basket in a single layer. Air fry for 15 minutes.
Prepare the Halloumi: While the chips cook, cut the Halloumi block into sticks approximately half an inch thick and two inches long. Toss the Halloumi sticks in the remaining half of the olive oil.
Add the Cheese: After the initial 15 minutes, pause the air fryer. Add the Halloumi sticks into the basket with the partially cooked chips. Give the basket a gentle shake to mix the contents slightly.
Finish Cooking: Resume air frying for another 5 to 8 minutes. The cheese should be soft on the inside and deep golden on the outside.
Check and Serve: The chips should be fork-tender and deeply golden. Remove the contents from the air fryer, sprinkle with fresh herbs, and serve immediately with a cooling yogurt dip.
12. Quick Lemon Herb Chicken Bites
Easy Air Fryer Recipes
These small chicken pieces are ready in a flash, making them a perfect meal prep item or a quick snack. The air fryer excels at cooking these uniform cubes quickly, ensuring they remain wonderfully juicy inside. The lemon and herb coating gives them a bright, zesty flavor. Serve them over a salad, in a wrap, or alongside roasted vegetables for a light, healthy meal.
Ingredients and Equipment
Required Ingredients
1 pound boneless, skinless chicken breast (cut into 1-inch cubes)
1 tablespoon olive oil
1 tablespoon dried Italian seasoning
1/2 teaspoon salt
1/4 teaspoon black pepper
1 tablespoon fresh lemon juice
1 clove garlic (minced)
Fresh basil leaves for garnish
Required Equipment
Air Fryer (basket or oven style)
Medium mixing bowl
Tongs
Meat thermometer
Step-by-Step DIY Instruction
Cutting the chicken into even cubes is the most important step for uniform cooking.
Prepare the Seasoning: In the mixing bowl, whisk together the olive oil, Italian seasoning, salt, pepper, lemon juice, and minced garlic.
Coat the Chicken: Add the cubed chicken to the bowl. Toss the pieces thoroughly until every cube is coated in the seasoning mix.
Preheat and Spray: Preheat your air fryer to 400°F (200°C) for five minutes. Lightly coat the basket with cooking spray.
Cook the Bites: Place the seasoned chicken cubes into the air fryer basket in a single layer. Do not let the pieces touch. You may need to cook in two separate batches.
Shake the Basket: Air fry for 8 minutes. Stop the machine and vigorously shake the basket to turn the chicken pieces and promote even browning.
Finish Cooking: Continue cooking for an additional 2 to 4 minutes. The exterior should look nicely browned and caramelized.
Check for Safety: Use a meat thermometer to ensure the internal temperature of the chicken reaches 165°F (74°C). Garnish with fresh basil before serving.
13. Crispy Southwestern Avocado Rolls
Easy Air Fryer Recipes
These golden, crunchy rolls are packed with creamy avocado, sweet corn, and savory black beans. The air fryer makes them incredibly crispy on the outside without requiring a full oil bath. These make a truly satisfying appetizer or a great party snack. Serve them sliced on an angle with a cool dipping sauce for a great presentation. The texture combination of the crisp shell and the warm, creamy filling is simply delightful.
Ingredients and Equipment
Required Ingredients
1 large, ripe avocado (diced)
1/2 cup canned black beans (rinsed and drained)
1/2 cup frozen corn (thawed)
1/4 cup finely chopped red onion
1 tablespoon fresh lime juice
1/4 teaspoon salt
8 egg roll wrappers (found in the refrigerated section)
Cooking oil spray
Yogurt or sour cream dip (for serving)
Required Equipment
Air Fryer (basket or oven style)
Mixing bowl
Small bowl of water
Spoon or tongs
Step-by-Step DIY Instruction
Careful wrapping is key here to keep the creamy filling from leaking out during cooking.
Prepare the Filling: In the mixing bowl, gently combine the diced avocado, black beans, thawed corn, red onion, lime juice, and salt. Stir carefully to keep the avocado chunky.
Assemble the Rolls: Lay one egg roll wrapper on a clean surface with a corner pointing toward you (like a diamond). Spoon about two tablespoons of the filling just below the center.
Wrap Securely: Fold the bottom corner over the filling. Fold the left and right corners inward, resembling an envelope. Brush the top corner with water, then roll the entire wrapper tightly upward to seal it completely. Repeat for all rolls.
Preheat and Spray: Preheat your air fryer to 370°F (185°C) for five minutes. Lightly coat the basket with cooking spray.
Cook the Rolls: Place the rolls seam side down in the air fryer basket. You may need to cook them in two batches. Generously mist the tops of the rolls with cooking oil spray.
Flip for Evenness: Air fry for 6 minutes. Carefully flip the rolls over and mist the second side with spray.
Finish Cooking: Continue cooking for another 4 to 6 minutes until the wrappers are deep golden brown and completely crisp. Serve warm with your favorite dip.
14. Sweet and Spicy Korean Rice Cakes with Beef
Easy Air Fryer Recipes
This dish combines chewy rice cakes and savory sliced beef with a fiery Korean-style sauce. While traditionally stir-fried, the air fryer can cook the beef and rice cakes separately to ensure optimal texture before they are combined with a flavorful sauce. This makes a quick, hearty meal with an exciting flavor profile. The vibrant kimchi topping adds a wonderful sour and crunchy contrast to the rich meat and soft rice cakes.
Proper preparation of the rice cakes ensures they become soft and chewy during the cooking process.
Soak the Rice Cakes: Place the rice cakes in a bowl of hot water for about 15 minutes to soften them up before cooking. Drain them well afterward.
Preheat: Preheat your air fryer to 380°F (195°C) for five minutes.
Cook the Beef and Rice Cakes: In a mixing bowl, toss the sliced beef and the soaked rice cakes together with the sesame oil. Place the mixture in the air fryer basket. You must ensure it is in a single, uncrowded layer.
Air Fry and Stir: Air fry for 7 minutes. Remove the basket and toss the contents vigorously. This ensures the meat cooks evenly and the rice cakes soften consistently.
Finish Cooking: Cook for another 5 to 8 minutes. The beef should be fully cooked, and the rice cakes should feel soft and slightly puffed.
Combine with Sauce: While the beef and rice cakes cook, gently warm your gochujang sauce in a small saucepan over low heat.
Serve: Transfer the hot beef and rice cakes to a serving bowl. Pour the warm sauce over the top and stir to coat everything. Top the dish generously with kimchi and sliced green onions.
15. Sesame Glazed Teriyaki Tofu Cubes
Easy Air Fryer Recipes
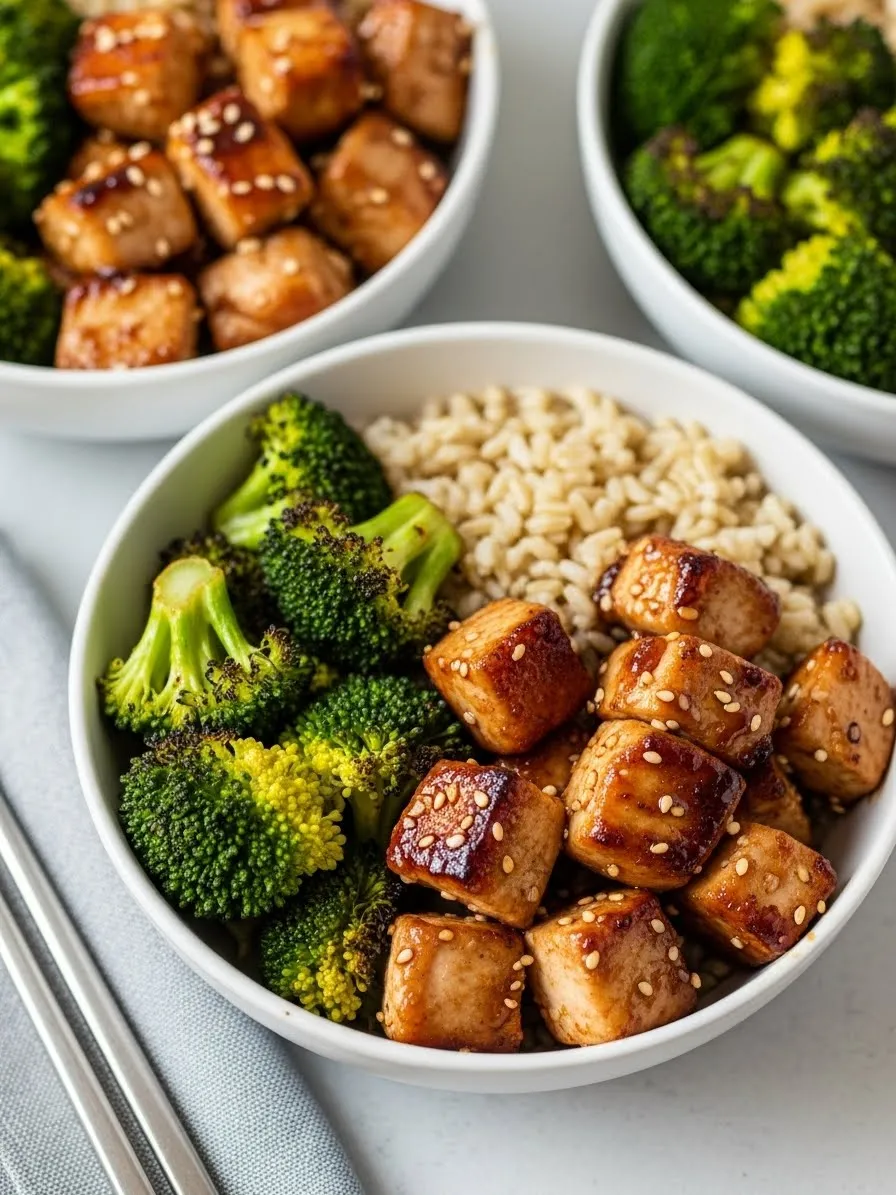
These flavorful cubes are wonderfully crispy on the outside and warm on the inside, making a great vegetarian main course. The intense heat of the air fryer gives the tofu a firm texture that absorbs the sticky teriyaki sauce beautifully. Drizzled with a thick sauce and sprinkled with sesame seeds, these bite-sized squares are quick to prepare. This recipe transforms bland tofu into something truly exciting and savory.
Ingredients and Equipment
Required Ingredients
1 block (14-16 oz) of extra-firm tofu (pressed and cut into 1-inch cubes)
1 tablespoon cornstarch
1 tablespoon oil
1/2 cup teriyaki glaze or sauce (store-bought or homemade)
Sesame seeds for garnish
Sliced green onions for garnish
Required Equipment
Air Fryer (basket or oven style)
Tofu press (or paper towels and weights)
Two mixing bowls
Tongs
Step-by-Step DIY Instruction
Pressing the tofu is a necessary step to achieve the desired crispy, chewy texture.
Press the Tofu: The tofu must be pressed thoroughly to remove excess moisture. Use a press or wrap the block and place something heavy on top for at least 30 minutes.
Coat the Tofu: Once pressed, cut the tofu into uniform 1-inch cubes. Place the cubes in a mixing bowl. Drizzle them with oil and then sprinkle them with cornstarch. Toss gently until every cube is lightly dusted. The cornstarch is the secret to a crispy exterior.
Preheat and Load: Preheat your air fryer to 400°F (200°C) for five minutes. Place the coated tofu cubes in the basket in a single layer, ensuring they do not touch.
Air Fry and Shake: Air fry for 10 minutes. Stop the machine and shake the basket vigorously to turn the cubes.
Finish Cooking: Continue cooking for another 5 to 8 minutes. The tofu should be dark golden brown and wonderfully crisp on all sides.
Glaze the Tofu: Transfer the hot, crispy tofu to a clean mixing bowl. Pour the teriyaki sauce over the top. Gently toss the cubes until they are fully coated in the thick, shiny glaze.
Serve: Plate the glazed tofu cubes and sprinkle them immediately with sesame seeds and sliced green onions. Serve hot as a side dish or main course.
16. Glazed Sweet and Sour Chicken Skewers
Easy Air Fryer Recipes
These skewers feature tender chicken, sweet peppers, and onion, all coated in a gorgeous, sticky glaze. The air fryer cooks the chicken cubes perfectly while giving the vegetable edges a pleasant char. This presentation is fun and makes portion control very easy. The intense heat quickly caramelizes the glaze, creating a glossy, appealing finish.
Ingredients and Equipment
Required Ingredients
1 pound boneless, skinless chicken breast (cut into 1-inch cubes)
1 medium bell pepper (cubed; red, green, and yellow)
1/2 red onion (cut into 1-inch pieces)
1/2 cup teriyaki or BBQ sauce
1 tablespoon oil
1/2 teaspoon salt
Sesame seeds and green onions for garnish
8 wooden or metal skewers
Required Equipment
Air Fryer (basket or oven style)
Two mixing bowls
Tongs
Step-by-Step DIY Instruction
If you use wooden skewers, remember to soak them completely before threading the ingredients.
Soak the Skewers: If using wooden skewers, place them in water for at least 30 minutes. This prevents them from burning in the air fryer.
Prepare and Season: Place the cubed chicken, bell peppers, and red onion pieces in a mixing bowl. Drizzle with oil and sprinkle with salt. Toss them gently.
Thread the Skewers: Thread the chicken and vegetables onto the skewers, alternating the ingredients. Try to keep the pieces spaced evenly.
Preheat and Load: Preheat your air fryer to 400°F (200°C) for five minutes. Place the skewers into the basket, ensuring the ends do not stick out. Cook in two batches if needed.
Initial Cook: Air fry the skewers for 10 minutes.
Glaze and Turn: After 10 minutes, open the air fryer. Brush the skewers generously with the teriyaki or BBQ sauce. Flip the skewers and brush the other side with sauce.
Finish Cooking: Continue air frying for another 5 to 8 minutes, until the chicken is fully cooked (165°F) and the glaze is wonderfully sticky and caramelized.
Serve: Remove the hot skewers and sprinkle them with sesame seeds and chopped green onions.
17. Sizzling Smoked Sausage and Pepper Rings
Easy Air Fryer Recipes
This brightly colored meal is prepared incredibly fast, making it a great last-minute dinner. Slices of savory smoked sausage pair beautifully with sweet bell pepper rings and onion. The air fryer heats the sausage through and gives the edges of the vegetables a pleasant, slightly charred texture. This simple, hearty combination is satisfying and full of flavor.
2 large bell peppers (sliced into rings; mixed colors)
1/2 large onion (sliced into rings)
1 tablespoon olive oil
1/2 teaspoon dried Italian herbs
1/4 teaspoon salt
Garlic cloves (sliced, optional)
Required Equipment
Air Fryer (basket or oven style)
Large mixing bowl
Tongs
Step-by-Step DIY Instruction
Uniform slices ensure the peppers, onions, and sausage all finish cooking at the same time.
Slice the Ingredients: Slice the smoked sausage into half-inch-thick rounds. Core the bell peppers and slice them into rings. Slice the onion into rings as well.
Season Everything: Place all the sausage, pepper, and onion rings into the large mixing bowl. Drizzle them with olive oil, then sprinkle with the Italian herbs and salt. Toss the ingredients gently to coat.
Preheat and Load: Preheat your air fryer to 375°F (190°C) for five minutes. Place the seasoned mixture into the air fryer basket in a single layer. You must avoid stacking the pieces.
Air Fry and Toss: Air fry for 7 minutes. Stop the machine and toss the contents of the basket with tongs. This promotes even cooking and browning.
Finish Cooking: Continue cooking for another 5 to 7 minutes. The sausage should be warmed through, and the pepper edges should look slightly softened and caramelized.
Serve: Remove the hot mixture from the air fryer and serve it immediately, perhaps alongside rice or on a sub roll.
18. Cheesy Nutritional Yeast Broccoli Florets
Easy Air Fryer Recipes
This quick side dish transforms plain broccoli into an intensely flavorful and slightly crisp vegetable. Tossing the florets in oil and then coating them with nutritional yeast creates a savory, “cheesy” crust that the air fryer crisps up beautifully. The high heat of the machine gives the broccoli a nice tender-crisp texture. Even picky eaters love this incredibly easy and nutritious side dish.
Ingredients and Equipment
Required Ingredients
1 large head of broccoli (cut into small florets)
1 tablespoon olive oil
2 tablespoons nutritional yeast
1/2 teaspoon garlic powder
1/4 teaspoon salt
Cooking spray
Required Equipment
Air Fryer (basket or oven style)
Medium mixing bowl
Tongs
Step-by-Step DIY Instruction
Make sure the florets are very dry before you begin, which helps them crisp up.
Prepare the Broccoli: Wash the broccoli florets and pat them completely dry with paper towels. Place the dry florets in the mixing bowl.
Season the Oil: Drizzle the olive oil over the florets and toss them until they are lightly coated.
Add the Coating: In the same bowl, sprinkle the nutritional yeast, garlic powder, and salt over the florets. Toss the mixture until the “cheesy” seasoning is completely adhered to the oiled surface of the broccoli.
Preheat and Load: Preheat your air fryer to 380°F (195°C) for five minutes. Lightly coat the basket with cooking spray. Place the seasoned broccoli into the basket.
Cook and Shake: Air fry for 5 minutes. Stop the air fryer and shake the basket vigorously to toss the florets and ensure even crisping.
Finish Cooking: Continue cooking for another 3 to 5 minutes. The tips of the florets should look slightly charred, and the stems should be tender-crisp.
Serve: Remove the broccoli immediately and serve while the coating is still crunchy.
19. Cinnamon Sugar Donut Bites
Easy Air Fryer Recipes
These fluffy, warm dough pieces are coated in a sweet cinnamon sugar mixture. Using the air fryer lets you achieve a soft, light texture that rivals a deep-fried donut, but with minimal fuss. The coating adheres beautifully to the warm surface of the dough, creating a truly comforting dessert. They cook incredibly fast, making them a wonderful last-minute treat.
Ingredients and Equipment
Required Ingredients
1 can refrigerated biscuit dough (8 pieces, cut into quarters)
3 tablespoons unsalted butter (melted)
1/4 cup granulated sugar
1 teaspoon ground cinnamon
Chocolate sauce or caramel for dipping
Required Equipment
Air Fryer (basket or oven style)
Small bowl (for melted butter)
Shallow dish (for cinnamon sugar)
Tongs
Step-by-Step DIY Instruction
Working quickly after the donut bites come out of the fryer is essential for the coating to stick.
Prepare the Dough: Open the can of biscuit dough. Use a sharp knife to cut each biscuit into four equal pieces. This should give you 32 small pieces.
Prepare the Coating: In the shallow dish, whisk together the granulated sugar and ground cinnamon until they are well combined. Place the melted butter in the small bowl.
Preheat and Load: Preheat your air fryer to 350°F (175°C) for five minutes. Place a single layer of the dough pieces into the air fryer basket. Cook them in batches.
Air Fry: Air fry the bites for 4 to 6 minutes. They should look golden brown and feel soft and springy.
Coat Immediately: As soon as a batch is done, transfer the hot bites to the bowl of melted butter using tongs. Toss them quickly to coat. Then, immediately transfer the buttered bites to the cinnamon sugar mixture and toss until they are completely covered.
Serve: Repeat the process for all remaining batches. Serve the donut bites warm with a side of chocolate or caramel sauce.
20. Sweet Cinnamon Sugar Sweet Potato Sticks
Easy Air Fryer Recipes
These sweet potato wedges are coated in cinnamon sugar, making them a delightful dessert or side dish. The air fryer cooks the potatoes until they are wonderfully tender inside and slightly caramelized on the outside. The sugar coating crisps up in the heat, creating a slight crunch that contrasts beautifully with the soft potato. This is a simple, satisfying way to enjoy sweet potatoes.
Ingredients and Equipment
Required Ingredients
2 medium sweet potatoes (peeled and cut into sticks/wedges)
1 tablespoon oil (coconut or vegetable)
2 tablespoons brown sugar
1 teaspoon ground cinnamon
Pinch of salt
Required Equipment
Air Fryer (basket or oven style)
Two mixing bowls
Tongs
Step-by-Step DIY Instruction
Cutting the sweet potatoes into uniform sticks is crucial for even cooking results.
Prepare the Potatoes: Peel the sweet potatoes and cut them into uniform sticks, about half an inch thick.
Coat with Oil: Place the sticks in a mixing bowl. Drizzle them with the oil and a pinch of salt. Toss until all the pieces are coated lightly.
Prepare the Sugar Mix: In the second mixing bowl, combine the brown sugar and ground cinnamon.
Preheat and Load: Preheat your air fryer to 380°F (195°C) for five minutes. Place the oiled potato sticks into the air fryer basket in a single layer. You must work in batches.
Air Fry and Turn: Air fry for 10 minutes. Stop the air fryer, use tongs to turn the sticks, and cook for another 5 to 8 minutes. The potatoes should be tender and the edges slightly browned.
Add the Sugar Coating: Once fully cooked, transfer the hot potato sticks to the bowl with the cinnamon sugar mixture. Toss them quickly and gently until they are thoroughly coated.
Serve: Serve the sticks immediately while they are still warm and the sugar is melted slightly onto the surface.
21. Sweet Iced Cinnamon Rolls
Easy Air Fryer Recipes
Imagine warm, gooey cinnamon rolls, fresh from the oven, without heating up your entire kitchen. The air fryer delivers beautifully soft and tender rolls with a lightly golden exterior. A generous drizzle of creamy icing melts into every swirl, creating a truly comforting treat. This method is incredibly fast, allowing you to enjoy a classic bakery item in a fraction of the usual time.
Ingredients and Equipment
Required Ingredients
1 can (8 count) refrigerated cinnamon rolls (with icing)
Non-stick cooking spray
Required Equipment
Air Fryer (basket or oven style)
Small plate or tongs
Step-by-Step DIY Instruction
Ensuring proper spacing is important so the rolls cook evenly and become fluffy.
Prepare the Air Fryer: Lightly spray the inside of your air fryer basket with non-stick cooking spray.
Arrange the Rolls: Carefully place the cinnamon rolls into the prepared air fryer basket. Arrange them in a single layer, ensuring there is a little space between each one. Do not overcrowd the basket; cook in batches if necessary.
Air Fry: Close the air fryer and set the temperature to 330°F (165°C). Air fry for 7 to 9 minutes. The exact cooking time can vary based on your particular air fryer and the thickness of the rolls.
Check for Doneness: The rolls should be golden brown on top and feel soft and springy when gently pressed. They will likely be slightly lighter than oven-baked rolls.
Apply Icing: As soon as the rolls are done, remove them from the air fryer. Open the packet of icing that came with the rolls. Drizzle the icing generously over the warm cinnamon rolls. The heat will melt the icing beautifully.
Serve Warm: Allow the icing to set for a minute or two, then serve the warm, sweet rolls right away for the best experience.
22. Ultra-Crispy Onion Rings
Easy Air Fryer Recipes
These onion rings deliver maximum crunch and flavor without the heavy grease of deep-frying. A thick, savory coating becomes wonderfully golden and crisp in the air fryer, encasing a sweet, tender onion center. They make a fantastic side for burgers, a fun appetizer, or a simple snack. This efficient cooking method means you can enjoy a classic comfort food quickly and easily.
Ingredients and Equipment
Required Ingredients
1 large onion (sliced into 1/2-inch rings)
1 cup all-purpose flour
1 cup panko breadcrumbs
1/2 cup milk
1 large egg (beaten)
1 teaspoon garlic powder
1/2 teaspoon salt
Cooking oil spray
Ketchup or chili sauce for dipping
Required Equipment
Air Fryer (basket or oven style)
Three shallow dishes
Tongs
Step-by-Step DIY Instruction
Getting the coating to stick evenly is important for that ultimate crunch.
Prepare the Onion: Separate the onion slices into individual rings.
Set Up Breading Station: In the first shallow dish, combine the flour, garlic powder, and salt. In the second dish, whisk together the milk and beaten egg. In the third dish, place the panko breadcrumbs.
Coat the Rings: Dredge each onion ring first in the flour mixture, shaking off excess. Next, dip it fully in the egg mixture. Finally, press it into the panko breadcrumbs, ensuring complete coverage. Place the coated rings on a wire rack or plate.
Preheat and Spray: Preheat your air fryer to 375°F (190°C) for five minutes. Lightly coat the air fryer basket with cooking oil spray.
Cook in Batches: Place a single layer of coated onion rings into the prepared basket. Do not overcrowd. Generously mist the tops of the onion rings with cooking spray.
Air Fry and Flip: Air fry for 8 minutes. Open the air fryer and carefully flip the onion rings with tongs. Mist the second side with cooking spray.
Finish Cooking: Continue cooking for another 5 to 7 minutes, until the rings are deep golden brown and wonderfully crispy.
Serve Hot: Remove the rings and serve them immediately with your favorite dipping sauce. Repeat for remaining batches.
23. Zesty Garlic Parmesan Croutons
Easy Air Fryer Recipes
Transform stale bread into incredibly flavorful, crisp croutons with a wonderful golden hue. The air fryer toasts them quickly, creating a crunchy texture that enhances any soup or salad. Infused with garlic and Parmesan, these homemade croutons are far superior to store-bought versions. This simple recipe adds a gourmet touch to everyday meals.
Ingredients and Equipment
Required Ingredients
4 cups day-old bread (cut into 1-inch cubes; sourdough, French, or Italian bread works well)
Using slightly stale bread ensures the croutons get extra crispy and don’t become chewy.
Prepare the Bread: Cut your day-old bread into uniform 1-inch cubes.
Season the Cubes: In the large mixing bowl, toss the bread cubes with the olive oil, garlic powder (or minced fresh garlic), salt, and red pepper flakes (if using). Ensure every cube is lightly coated.
Preheat: Preheat your air fryer to 350°F (175°C) for five minutes.
Air Fry in Batches: Place a single layer of seasoned bread cubes into the air fryer basket. Avoid overcrowding. Cook them in two or more batches.
Shake Regularly: Air fry for 5 minutes. Open the air fryer and shake the basket vigorously to toss the croutons.
Add Cheese and Finish: Continue cooking for another 3 to 5 minutes, shaking the basket every two minutes, until the croutons are deep golden brown and crunchy. During the last minute of cooking, add the grated Parmesan cheese and parsley, giving the basket another quick shake.
Cool and Store: Remove the croutons from the air fryer and let them cool completely on a plate. They will become even crispier as they cool. Store in an airtight container for up to a week.
24. Crunchy Garlic Herb Chickpeas
Easy Air Fryer Recipes
These savory chickpeas are a fantastic, healthy snack or a wonderful crunchy topping for salads and soups. The air fryer transforms soft canned chickpeas into crispy, bite-sized delights with a flavorful garlic and herb coating. They are surprisingly satisfying and quick to prepare, offering a satisfying crunch without any deep-frying.
Ingredients and Equipment
Required Ingredients
1 can (15 oz) chickpeas (rinsed, drained, and thoroughly patted dry)
1 tablespoon olive oil
1 teaspoon garlic powder
1 teaspoon dried herbs (like oregano or Italian seasoning)
1/2 teaspoon salt
Cooking spray
Thinly sliced fresh garlic for garnish (optional)
Required Equipment
Air Fryer (basket or oven style)
Medium mixing bowl
Paper towels
Step-by-Step DIY Instruction
Thoroughly drying the chickpeas is the most crucial step for achieving maximum crispiness.
Dry the Chickpeas: Rinse the canned chickpeas under cold water and drain them very well. Spread them out on several layers of paper towels and pat them until they are completely dry. This prevents them from steaming in the air fryer.
Season the Chickpeas: In the mixing bowl, toss the dried chickpeas with the olive oil, garlic powder, dried herbs, and salt. Ensure they are evenly coated.
Preheat and Spray: Preheat your air fryer to 375°F (190°C) for five minutes. Lightly coat the basket with cooking spray.
Air Fry in Batches: Place the seasoned chickpeas in a single layer in the air fryer basket. Do not overcrowd. Cook in two or more batches.
Shake for Crispness: Air fry for 15 minutes. Stop the machine and shake the basket every 5 minutes during cooking. This helps them crisp up evenly on all sides.
Check for Doneness: Continue cooking until the chickpeas are golden brown and wonderfully crunchy. They will become even crispier as they cool.
Serve: Remove the chickpeas and let them cool slightly. Serve them as a snack or as a topping for your favorite dishes.
25. Italian-Style Pesto Chicken Pinwheels
Easy Air Fryer Recipes
These visually appealing chicken pinwheels are packed with vibrant Italian flavors from pesto, sun-dried tomatoes, and fresh basil. The air fryer cooks them thoroughly, resulting in tender, moist chicken and a beautiful spiral presentation. They make an impressive appetizer or a light, elegant main course. The minimal cooking time makes them surprisingly simple to prepare for any occasion.
Ingredients and Equipment
Required Ingredients
2 boneless, skinless chicken breasts (about 6-8 oz each)
1/4 cup prepared basil pesto
1/4 cup finely chopped sun-dried tomatoes (drained)
1/4 cup fresh spinach leaves
2 tablespoons grated Parmesan cheese
Salt and black pepper to taste
Cooking spray
Fresh basil leaves and pine nuts for garnish
Required Equipment
Air Fryer (basket or oven style)
Meat pounder (or rolling pin)
Plastic wrap
Sharp knife
Toothpicks (optional, for securing)
Meat thermometer
Step-by-Step DIY Instruction
Pounding the chicken to an even thickness ensures uniform cooking and easier rolling.
Prepare the Chicken: Place each chicken breast between two sheets of plastic wrap. Use a meat pounder or rolling pin to flatten the chicken to about 1/4 inch thickness.
Assemble the Filling: Spread the basil pesto evenly over the flattened chicken breasts. Leave about a half-inch border on one of the long edges. Sprinkle the chopped sun-dried tomatoes, fresh spinach leaves, and Parmesan cheese over the pesto. Season with a pinch of salt and pepper.
Roll and Secure: Starting from the long edge opposite the border, carefully roll each chicken breast tightly into a log. If needed, secure the roll with a few toothpicks.
Slice the Pinwheels: Use a very sharp knife to cut each log into 1-inch thick pinwheels. You should get 4-5 pinwheels per chicken breast.
Preheat and Spray: Preheat your air fryer to 370°F (185°C) for five minutes. Lightly coat the air fryer basket with cooking spray.
Air Fry: Place the pinwheels into the basket in a single layer, making sure they do not touch. Cook them in batches if necessary.
Cook and Check: Air fry for 10 to 12 minutes. The chicken should be cooked through, and the internal temperature must reach 165°F (74°C).
Serve: Remove the pinwheels, garnish with fresh basil and pine nuts, and serve immediately.
26. Flavorful Roasted Spiced Pecans
Easy Air Fryer Recipes
These warm, savory pecans are a delightful snack, a welcome addition to salads, or a crunchy topping for desserts. The air fryer roasts them quickly and evenly, bringing out their natural nutty flavor while a hint of rosemary adds an aromatic touch. They are much healthier than store-bought varieties and so easy to prepare.
Ingredients and Equipment
Required Ingredients
1 cup pecan halves
1 tablespoon olive oil
1/2 teaspoon fresh rosemary (finely chopped)
1/4 teaspoon salt
Pinch of cayenne pepper (optional, for a kick)
Required Equipment
Air Fryer (basket or oven style)
Small mixing bowl
Tongs
Step-by-Step DIY Instruction
Tossing the pecans evenly with the oil and spices ensures every nut is coated for maximum flavor.
Season the Pecans: In the small mixing bowl, toss the pecan halves with the olive oil, chopped rosemary, salt, and cayenne pepper (if using). Ensure the pecans are evenly coated.
Preheat: Preheat your air fryer to 300°F (150°C) for three minutes.
Load the Basket: Place the seasoned pecans into the air fryer basket in a single layer.
Air Fry and Shake: Air fry for 5 minutes. Stop the air fryer and shake the basket vigorously to toss the pecans.
Finish Roasting: Continue cooking for another 3 to 5 minutes, shaking the basket every couple of minutes, until the pecans are fragrant and lightly toasted. Keep a close watch to prevent burning.
Cool and Store: Remove the pecans from the air fryer and spread them on a plate to cool completely. They will become crispier as they cool. Store in an airtight container for up to a week.
27. Crisp Dill Salmon Cakes
Easy Air Fryer Recipes
These golden-brown salmon cakes are a lighter, healthier alternative to traditional fried fish patties. The air fryer cooks them to a beautiful crispness on the outside while keeping the salmon moist and flavorful on the inside. Fresh dill and chives add a bright, herbaceous note that complements the fish wonderfully. Serve them with a creamy dill sauce for a refreshing and satisfying meal.
Ingredients and Equipment
Required Ingredients
1 (14.75 oz) can canned salmon (drained and flaked, bones removed if present)
1/2 cup panko breadcrumbs
1 large egg (lightly beaten)
1/4 cup mayonnaise
2 tablespoons fresh dill (chopped)
1 tablespoon fresh chives (chopped)
1 teaspoon lemon juice
1/4 teaspoon salt
Cooking spray
Required Equipment
Air Fryer (basket or oven style)
Large mixing bowl
Spatula
Tongs
Step-by-Step DIY Instruction
Gently mixing the ingredients prevents the salmon from becoming overly shredded.
Prepare the Salmon: Drain the canned salmon very well. Flake it into a large mixing bowl, removing any skin or bones if you prefer.
Combine Ingredients: Add the panko breadcrumbs, beaten egg, mayonnaise, chopped dill, chopped chives, lemon juice, and salt to the salmon. Use a spatula to gently mix all the ingredients until they are just combined. Do not overmix.
Shape the Cakes: Form the mixture into six to eight evenly sized patties, about one inch thick. Place them on a plate and chill them in the refrigerator for at least 15 minutes. This helps them firm up and hold their shape during cooking.
Preheat and Spray: Preheat your air fryer to 370°F (185°C) for five minutes. Lightly coat the air fryer basket with cooking spray.
Load the Basket: Carefully place the salmon cakes into the prepared air fryer basket. You must ensure there is space between each cake. Cook them in two batches if necessary.
Air Fry and Flip: Air fry for 8 minutes. Open the air fryer and use a spatula to carefully flip the salmon cakes.
Finish Cooking: Continue cooking for an additional 3 to 5 minutes, until they are deep golden brown and heated through.
Serve: Remove the hot salmon cakes and serve them immediately with a squeeze of fresh lemon or a creamy dill sauce.
28. Quick Air Fryer S’mores
Easy Air Fryer Recipes
Enjoy the classic campfire treat without the fire! The air fryer creates beautifully toasted marshmallows with a gooey center and melted chocolate, all nestled on a crispy graham cracker base. This method is incredibly fast and mess-free, making it easy to satisfy a sweet craving anytime. These warm, melty delights are a guaranteed crowd-pleaser.
Ingredients and Equipment
Required Ingredients
4 graham cracker squares (broken in half to make 8 rectangles)
4 squares milk chocolate (or chocolate bar pieces)
8 large marshmallows
Required Equipment
Air Fryer (basket or oven style)
Parchment paper or aluminum foil (cut to fit basket)
Tongs
Step-by-Step DIY Instruction
Using parchment paper is essential to prevent melted marshmallow from sticking to your air fryer.
Prepare the Base: Line your air fryer basket with parchment paper or aluminum foil.
Assemble the S’mores: Place eight graham cracker halves on the prepared lining. On top of each graham cracker, place one square of chocolate. On top of the chocolate, place one large marshmallow.
Preheat and Load: Preheat your air fryer to 350°F (175°C) for three minutes. Carefully place the assembled s’mores into the air fryer basket. Ensure they are not touching. You may need to cook in two batches.
Air Fry for Toasting: Air fry for 3 to 5 minutes. Keep a very close eye on them, as marshmallows can burn quickly. You want the marshmallows to be golden brown and puffed, and the chocolate to be melted.
Serve Immediately: Use tongs to carefully remove the hot s’mores from the air fryer. Top each with the remaining graham cracker half and serve right away while everything is warm and gooey.
29. Caprese Air Fryer Skewers
Easy Air Fryer Recipes
These vibrant skewers offer a sophisticated blend of flavors and textures, with crispy mozzarella balls, juicy cherry tomatoes, and fresh basil leaves. The air fryer cooks the breaded mozzarella to a beautiful golden crispness. Drizzled with a rich balsamic glaze, these make a stunning and quick appetizer that impresses guests.
Ingredients and Equipment
Required Ingredients
10-12 small fresh mozzarella balls (bocconcini or similar, patted dry)
10-12 cherry tomatoes
10-12 fresh basil leaves
1/2 cup panko breadcrumbs
1/4 cup all-purpose flour
1 large egg (beaten)
1 tablespoon olive oil
Balsamic glaze for drizzling
Salt and black pepper to taste
Small wooden skewers
Required Equipment
Air Fryer (basket or oven style)
Three shallow dishes
Tongs
Step-by-Step DIY Instruction
Ensuring the mozzarella is dry before coating helps the breading adhere properly.
Prepare Mozzarella: Pat the fresh mozzarella balls completely dry with paper towels.
Set Up Breading Station: In the first shallow dish, place the flour seasoned with a pinch of salt and pepper. In the second dish, place the beaten egg. In the third dish, place the panko breadcrumbs.
Coat the Mozzarella: Roll each mozzarella ball first in the flour, shaking off excess. Next, dip it fully in the egg. Finally, press it firmly into the panko breadcrumbs, ensuring complete coverage. Place the coated mozzarella balls on a plate and chill for 15 minutes.
Preheat and Spray: Preheat your air fryer to 380°F (195°C) for five minutes. Lightly coat the basket with cooking spray.
Air Fry Mozzarella: Place the breaded mozzarella balls into the air fryer basket in a single layer. Do not overcrowd. Air fry for 5 to 7 minutes, until golden brown and slightly softened.
Assemble Skewers: While the mozzarella cooks, thread the cherry tomatoes and basil leaves onto the wooden skewers.
Combine and Serve: Once the mozzarella is done, carefully slide one warm, crispy mozzarella ball onto each skewer, alternating with tomatoes and basil. Drizzle generously with balsamic glaze before serving immediately.
30. Crispy Salted Air Fryer Banana Chips
Easy Air Fryer Recipes
These naturally sweet and crispy banana chips are a healthy, satisfying snack. The air fryer dehydrates them gently, concentrating their flavor and creating a delicate crunch. A sprinkle of sea salt balances the sweetness of the banana. This homemade version is far superior in taste and texture to store-bought varieties, and it’s free of unnecessary additives.
Ingredients and Equipment
Required Ingredients
2 ripe, but firm bananas
1 teaspoon lemon juice
Pinch of sea salt
Cooking spray (optional, for extra crispness)
Required Equipment
Air Fryer (basket or oven style)
Sharp knife
Small bowl
Paper towels
Tongs
Step-by-Step DIY Instruction
Slicing the bananas thinly and evenly is crucial for uniform drying and crisping.
Slice the Bananas: Peel the bananas and slice them into very thin, uniform rounds, about 1/8 inch thick. Thicker slices will take longer to crisp.
Prevent Browning: Place the banana slices in a small bowl. Drizzle with lemon juice and toss gently. This prevents them from browning too much. Pat them dry with paper towels.
Preheat and Load: Preheat your air fryer to 300°F (150°C) for three minutes. Lightly spray the air fryer basket with cooking spray if desired. Arrange the banana slices in a single layer in the basket, ensuring they do not overlap. Cook in several batches.
Air Fry and Flip: Air fry for 8 minutes. Stop the air fryer and carefully flip each banana slice.
Finish Drying: Continue cooking for another 5 to 10 minutes, checking frequently after the first five minutes. The slices should be golden brown and feel dry and crisp. They will crisp up further as they cool.
Salt and Serve: Remove the banana chips from the air fryer and immediately sprinkle them with a pinch of sea salt. Let them cool completely before storing in an airtight container.
31. Golden Curried Chicken Drumsticks
Easy Air Fryer Recipes
These chicken drumsticks are coated in a vibrant, aromatic curry blend, creating a flavorful and visually stunning meal. The air fryer cooks them to a beautiful golden crisp on the outside, while ensuring the meat remains incredibly juicy and tender. This method allows the spices to bloom, infusing every bite with warmth. It’s an effortless way to bring exciting global flavors to your dinner table.
Ingredients and Equipment
Required Ingredients
8 chicken drumsticks (skin-on, bone-in)
2 tablespoons olive oil
1 tablespoon curry powder
1 teaspoon garlic powder
1/2 teaspoon ginger powder
1/2 teaspoon salt
1/4 teaspoon black pepper
Fresh cilantro for garnish (optional)
Required Equipment
Air Fryer (basket or oven style)
Large mixing bowl
Paper towels
Tongs
Meat thermometer
Step-by-Step DIY Instruction
Drying the chicken skin completely before seasoning helps it crisp up beautifully in the air fryer.
Prepare the Chicken: Pat the chicken drumsticks thoroughly dry with paper towels. This crucial step promotes a crispy skin.
Season the Chicken: In the large mixing bowl, drizzle the olive oil over the dry drumsticks. Sprinkle the curry powder, garlic powder, ginger powder, salt, and black pepper over them. Use your hands to rub the spices evenly all over each drumstick, ensuring a good coating.
Preheat and Load: Preheat your air fryer to 380°F (195°C) for five minutes. Carefully place the seasoned drumsticks into the air fryer basket. Arrange them in a single layer, making sure they do not touch. Cook in two batches if necessary.
Initial Air Fry: Air fry for 15 minutes.
Flip and Finish: After 15 minutes, open the air fryer and use tongs to flip each drumstick over. Continue air frying for another 10 to 15 minutes, or until the skin is deep golden brown and wonderfully crispy.
Check for Safety: Always use a meat thermometer to ensure the internal temperature of the thickest part of the drumstick (not touching bone) reaches 165°F (74°C).
Serve: Remove the drumsticks from the air fryer, let them rest for a few minutes, and garnish with fresh cilantro before serving.
32. Savory Steak and Cheese Quesadillas
Easy Air Fryer Recipes
These satisfying quesadillas feature tender, seasoned steak and gooey melted cheese, all crisped to a golden finish in the air fryer. This method creates a wonderfully crunchy exterior and a hot, cheesy interior without a greasy skillet. Served with fresh salsa and creamy guacamole, these make a hearty and exciting meal that comes together very quickly.
Ingredients and Equipment
Required Ingredients
1 cup cooked, shredded steak (leftover or pre-cooked)
4 (8-inch) flour tortillas
1 cup shredded cheddar or Monterey Jack cheese
1 tablespoon taco seasoning (optional, for extra flavor)
Cooking oil spray
Salsa and guacamole for serving
Required Equipment
Air Fryer (basket or oven style)
Cutting board
Tongs
Step-by-Step DIY Instruction
Do not overfill the tortillas, or the cheese will melt out of the sides during cooking.
Prepare the Steak: If using cold or plain steak, gently warm it in a skillet for a few minutes and toss with taco seasoning for added flavor.
Assemble the Quesadillas: Lay one flour tortilla flat. Sprinkle a quarter of the cheese over half of the tortilla. Top with a quarter of the shredded steak. Fold the other half of the tortilla over the filling to create a crescent shape. Gently press down. Repeat for all four tortillas.
Preheat and Spray: Preheat your air fryer to 375°F (190°C) for five minutes. Lightly coat the air fryer basket with cooking spray.
Air Fry: Place one or two quesadillas into the air fryer basket, ensuring they do not overlap. Lightly mist the tops of the quesadillas with cooking oil spray.
Cook and Flip: Air fry for 4 minutes. Open the air fryer and carefully flip the quesadillas. Mist the second side with cooking spray.
Finish Cooking: Continue air frying for another 3 to 5 minutes, or until the tortillas are golden brown and crisp, and the cheese is completely melted and bubbly.
Serve: Remove the hot quesadillas from the air fryer. Slice them into wedges and serve immediately with fresh salsa and guacamole. Repeat for any remaining quesadillas.
33. Crispy Air Fryer Fish Tacos
Easy Air Fryer Recipes
These fish tacos feature flaky, seasoned white fish with a wonderfully crispy coating, all cooked to perfection in the air fryer. They offer a healthier alternative to deep-fried fish, yet deliver all the flavor and satisfying texture. Served in warm tortillas with crunchy cabbage and a creamy sauce, these are incredibly fresh and vibrant. This recipe brings a taste of the coast right to your kitchen.
Ingredients and Equipment
Required Ingredients
1 pound cod or tilapia fillets (about 1-inch thick, cut into 4-inch pieces)
1 tablespoon olive oil
1 tablespoon taco seasoning
8 small corn or flour tortillas
1 cup shredded cabbage (green or red)
Avocado crema or white sauce for topping
Fresh lime wedges and cilantro for serving
Required Equipment
Air Fryer (basket or oven style)
Medium mixing bowl
Tongs
Meat thermometer (optional)
Step-by-Step DIY Instruction
Patting the fish dry helps the seasoning adhere better and promotes a crispier exterior.
Prepare the Fish: Pat the fish fillets completely dry with paper towels. Cut the fillets into pieces that will fit easily into your tortillas.
Season the Fish: In the mixing bowl, drizzle the fish pieces with olive oil. Sprinkle generously with taco seasoning, ensuring all sides are coated.
Preheat and Spray: Preheat your air fryer to 380°F (195°C) for five minutes. Lightly coat the air fryer basket with cooking spray.
Air Fry the Fish: Place the seasoned fish pieces into the air fryer basket in a single layer. Do not let them touch. Cook in two batches if necessary.
Cook and Check: Air fry for 8 to 12 minutes, depending on the thickness of your fish. The fish should flake easily with a fork and reach an internal temperature of 145°F (63°C).
Warm Tortillas: While the fish cooks, warm your tortillas in a separate dry skillet or microwave.
Assemble Tacos: Once the fish is cooked, immediately remove it from the air fryer. Assemble your tacos by placing a piece of fish in each warm tortilla, topping with shredded cabbage, a drizzle of avocado crema, fresh cilantro, and a squeeze of lime juice.
34. Zesty Buffalo Chicken Taquitos
Easy Air Fryer Recipes
These crispy taquitos are bursting with a spicy, creamy buffalo chicken filling, all rolled in a crunchy tortilla shell. The air fryer cooks them to a beautiful golden crisp without the need for deep fat frying, making them a lighter option. Drizzled with extra buffalo sauce and served with cool ranch or blue cheese dip, these are an amazing party snack or appetizer.
Ingredients and Equipment
Required Ingredients
1 cup cooked, shredded chicken breast
1/4 cup cream cheese (softened)
1/4 cup buffalo sauce (plus more for drizzling)
1/4 teaspoon garlic powder
8 small corn tortillas
Cooking oil spray
Ranch or blue cheese dressing and celery sticks for serving
Required Equipment
Air Fryer (basket or oven style)
Mixing bowl
Spoon
Microwave (optional, for softening tortillas)
Toothpicks (optional, for securing)
Tongs
Step-by-Step DIY Instruction
Warming corn tortillas slightly makes them much easier to roll without tearing.
Prepare the Filling: In the mixing bowl, combine the shredded chicken, softened cream cheese, 1/4 cup buffalo sauce, and garlic powder. Stir until everything is well mixed.
Warm Tortillas: If using corn tortillas, warm them slightly in the microwave (about 15-20 seconds for a stack of 4) to make them more pliable and prevent cracking when rolled.
Fill and Roll: Spoon about two tablespoons of the chicken mixture onto one edge of a tortilla. Roll the tortilla tightly around the filling. If needed, secure the taquito with a toothpick. Repeat for all tortillas.
Preheat and Spray: Preheat your air fryer to 380°F (195°C) for five minutes. Lightly coat the air fryer basket with cooking spray.
Load the Basket: Place the taquitos seam side down in the air fryer basket. You must ensure they are in a single layer. Cook in two batches if necessary. Generously mist the tops of the taquitos with cooking oil spray.
Air Fry and Flip: Air fry for 6 minutes. Open the air fryer and carefully flip the taquitos. Mist the second side with cooking spray.
Finish Cooking: Continue cooking for another 4 to 6 minutes, until they are golden brown and wonderfully crispy.
Serve: Remove the hot taquitos from the air fryer. Drizzle with extra buffalo sauce, if desired, and serve immediately with ranch or blue cheese dressing and crisp celery sticks.
35. Sweet Chili Lime Glazed Salmon Fillets
Easy Air Fryer Recipes
These salmon fillets boast a beautiful, sweet and spicy glaze with a bright hint of lime. The air fryer cooks the salmon to flaky perfection, ensuring a moist interior while the glaze caramelizes beautifully on the surface. This rapid cooking method makes it easy to prepare a restaurant-quality fish dish in minutes. It’s a healthy, flavorful meal that looks as impressive as it tastes.
Ingredients and Equipment
Required Ingredients
2 (6 oz) salmon fillets (skin-on or off)
2 tablespoons sweet chili sauce
1 tablespoon fresh lime juice
1 teaspoon soy sauce (or tamari)
1/2 teaspoon garlic powder
Cooking spray
Lime wedges and thinly sliced red chilies for garnish
Required Equipment
Air Fryer (basket or oven style)
Small mixing bowl
Pastry brush
Tongs
Meat thermometer
Step-by-Step DIY Instruction
Do not overcrowd the air fryer basket, as this can steam the fish instead of searing it.
Prepare the Sauce: In the small mixing bowl, whisk together the sweet chili sauce, lime juice, soy sauce, and garlic powder.
Season the Salmon: Pat the salmon fillets dry with paper towels. Lightly season both sides with salt and pepper.
Preheat and Spray: Preheat your air fryer to 380°F (195°C) for five minutes. Lightly coat the air fryer basket with cooking spray.
Air Fry Initial Cook: Place the salmon fillets in the basket, skin side down if present. Air fry for 8 minutes.
Glaze and Finish: After 8 minutes, open the air fryer. Use a pastry brush to generously coat the top of each salmon fillet with the sweet chili lime glaze.
Continue Cooking: Close the air fryer and continue cooking for another 3 to 5 minutes, or until the salmon is cooked through and flakes easily with a fork. The glaze should look slightly caramelized.
Check for Doneness: The internal temperature of the thickest part of the salmon should reach 145°F (63°C).
Serve: Remove the salmon from the air fryer. Garnish with fresh lime wedges and sliced red chilies for an extra kick.
36. Crispy Coconut Shrimp with Sweet Chili Dip
Easy Air Fryer Recipes
These golden, crunchy shrimp are coated in a flavorful mixture of panko and shredded coconut, then cooked to crispy perfection in the air fryer. They offer a taste of the tropics without the need for messy deep-frying. Served with a vibrant sweet chili dipping sauce, these make a truly impressive appetizer or a fun main course. The contrasting textures are wonderfully satisfying.
Ingredients and Equipment
Required Ingredients
1 pound large shrimp (peeled, deveined, tails on)
1/2 cup panko breadcrumbs
1/2 cup shredded sweetened coconut
1/4 cup all-purpose flour
1 large egg (beaten with 1 tablespoon water)
Cooking oil spray
Sweet chili sauce for dipping
Sliced green onions and sesame seeds for garnish
Required Equipment
Air Fryer (basket or oven style)
Three shallow dishes
Tongs
Step-by-Step DIY Instruction
Ensure the shrimp are completely dry before dredging; this helps the coating adhere well.
Prepare the Shrimp: Pat the shrimp very dry with paper towels.
Set Up Breading Station: In the first shallow dish, place the flour. In the second dish, place the beaten egg mixture. In the third dish, combine the panko breadcrumbs and shredded coconut.
Coat the Shrimp: Take one shrimp and dredge it first in the flour, shaking off excess. Next, dip it fully in the egg mixture. Finally, press it firmly into the panko-coconut mixture, ensuring complete coverage. Place the coated shrimp on a plate. Repeat for all shrimp.
Preheat and Spray: Preheat your air fryer to 375°F (190°C) for five minutes. Lightly coat the air fryer basket with cooking spray.
Air Fry in Batches: Place a single layer of coated shrimp into the prepared basket. Do not overcrowd. Generously mist the tops of the shrimp with cooking oil spray.
Cook and Flip: Air fry for 6 minutes. Open the air fryer and carefully flip the shrimp with tongs. Mist the second side with cooking spray.
Finish Cooking: Continue cooking for another 2 to 4 minutes, until the shrimp are golden brown and cooked through. They will turn pink and opaque.
Serve: Remove the hot shrimp from the air fryer. Garnish with sliced green onions and sesame seeds. Serve immediately with sweet chili sauce for dipping.
37. Flavorful Chickpea and Cauliflower Warm Salad
Easy Air Fryer Recipes
This vibrant, nutritious dish features tender cauliflower florets and hearty chickpeas, all seasoned with warm spices. The air fryer roasts the vegetables to a lovely tenderness with slight caramelization on the edges. Red onions add a zesty bite, and fresh cilantro brings a bright finish. This makes a wonderfully satisfying vegetarian meal or a robust side dish.
Ingredients and Equipment
Required Ingredients
1 head cauliflower (cut into small florets)
1 can (15 oz) chickpeas (rinsed, drained, and patted dry)
1/2 small red onion (thinly sliced)
2 tablespoons olive oil
1 teaspoon cumin
1 teaspoon smoked paprika
1/2 teaspoon turmeric powder
1/2 teaspoon salt
Fresh cilantro for garnish
Lime wedges for serving
Required Equipment
Air Fryer (basket or oven style)
Large mixing bowl
Tongs
Step-by-Step DIY Instruction
Ensuring the chickpeas are very dry is crucial for them to crisp up properly alongside the cauliflower.
Prepare the Vegetables: Cut the cauliflower into uniform, bite-sized florets. Rinse and thoroughly pat dry the chickpeas. Thinly slice the red onion.
Season Everything: In the large mixing bowl, combine the cauliflower, chickpeas, and red onion. Drizzle with olive oil, then sprinkle with cumin, smoked paprika, turmeric powder, and salt. Toss the ingredients well until everything is evenly coated.
Preheat: Preheat your air fryer to 380°F (195°C) for five minutes.
Air Fry in Batches: Place half of the seasoned vegetable mixture into the air fryer basket in a single layer. Do not overcrowd.
Cook and Shake: Air fry for 10 minutes. Stop the air fryer and shake the basket vigorously to toss the vegetables.
Finish Roasting: Continue cooking for another 5 to 8 minutes, or until the cauliflower is tender and slightly caramelized on the edges, and the chickpeas are slightly crispy.
Combine and Serve: Remove the first batch and repeat steps 4-6 with the remaining vegetables. Combine both batches. Garnish with fresh cilantro and serve with lime wedges.
38. Zesty Lime Crema Pork Bites
Easy Air Fryer Recipes
These succulent pork bites are wonderfully seasoned and cooked to a beautiful golden-brown exterior. The air fryer achieves a tender interior with a slight crispness on the outside. Drizzled with a refreshing lime crema and garnished with fresh cilantro, these make a flavorful appetizer or a satisfying protein component for tacos and bowls.
Ingredients and Equipment
Required Ingredients
1 pound pork tenderloin (cut into 1-inch cubes)
1 tablespoon olive oil
1 tablespoon chili powder
1/2 teaspoon cumin
1/2 teaspoon salt
1/4 teaspoon black pepper
1/2 cup sour cream or Greek yogurt
1 tablespoon fresh lime juice
1 tablespoon chopped fresh cilantro (plus more for garnish)
Cooking spray
Required Equipment
Air Fryer (basket or oven style)
Two mixing bowls
Tongs
Meat thermometer
Step-by-Step DIY Instruction
Cutting the pork into even cubes ensures uniform cooking and prevents some pieces from drying out.
Season the Pork: Pat the pork cubes dry with paper towels. In a mixing bowl, toss the pork with olive oil, chili powder, cumin, salt, and black pepper. Ensure every cube is evenly coated.
Prepare the Crema: In a separate small mixing bowl, whisk together the sour cream (or Greek yogurt), lime juice, and chopped cilantro until smooth. Set aside.
Preheat and Spray: Preheat your air fryer to 400°F (200°C) for five minutes. Lightly coat the air fryer basket with cooking spray.
Air Fry in Batches: Place the seasoned pork cubes into the air fryer basket in a single layer. Do not overcrowd. Cook them in two batches if necessary.
Cook and Shake: Air fry for 8 minutes. Stop the air fryer and shake the basket vigorously to turn the pork cubes.
Finish Cooking: Continue cooking for another 4 to 6 minutes, until the pork is golden brown and cooked through.
Check for Safety: The internal temperature of the pork should reach 145°F (63°C).
Serve: Remove the hot pork bites from the air fryer. Drizzle generously with the lime crema and garnish with extra fresh cilantro. Serve immediately.
39. Crispy Herb-Crusted White Fish Fillet
Easy Air Fryer Recipes
This white fish fillet features a savory herb crust that becomes wonderfully golden and crisp in the air fryer. The fish remains tender and flaky inside, creating a healthy and satisfying meal. Served with a fresh lemon wedge and a creamy sauce, this makes a light yet flavorful dinner. This method cooks fish quickly and efficiently, preventing it from drying out.
Ingredients and Equipment
Required Ingredients
2 (6 oz) white fish fillets (cod, tilapia, or halibut; about 1-inch thick)
1/2 cup panko breadcrumbs
2 tablespoons chopped fresh parsley
1 teaspoon dried dill (or 1 tablespoon fresh)
1/2 teaspoon garlic powder
1/4 cup mayonnaise
1 tablespoon lemon juice
1/2 teaspoon salt
Cooking spray
Lemon wedges for serving
Required Equipment
Air Fryer (basket or oven style)
Two shallow dishes
Tongs
Meat thermometer
Step-by-Step DIY Instruction
Patting the fish dry is important to help the mayonnaise and breading adhere properly.
Prepare the Fish: Pat the fish fillets thoroughly dry with paper towels.
Prepare the Coating: In one shallow dish, combine the panko breadcrumbs, parsley, dill, garlic powder, and salt. In the second shallow dish, whisk together the mayonnaise and lemon juice.
Coat the Fish: First, spread a thin, even layer of the mayonnaise mixture over both sides of each fish fillet. Then, press each mayonnaise-coated fillet firmly into the panko mixture, ensuring it is completely covered with the seasoned breadcrumbs.
Preheat and Spray: Preheat your air fryer to 380°F (195°C) for five minutes. Lightly coat the air fryer basket with cooking spray.
Air Fry: Carefully place the coated fish fillets into the air fryer basket in a single layer. Do not overcrowd. You may need to cook in two batches.
Cook and Check: Air fry for 10 to 15 minutes, depending on the thickness of the fish. The crust should be golden brown and crispy, and the fish should flake easily with a fork. The internal temperature must reach 145°F (63°C).
Serve: Remove the hot fish from the air fryer. Serve immediately with fresh lemon wedges and your favorite side salad.
40. Mushroom Cap Pizzas
Easy Air Fryer Recipes
These personal pizzas use large mushroom caps as a flavorful, low-carb base, topped with classic pizza ingredients. The air fryer cooks them quickly, melting the cheese to gooey perfection and warming the toppings. These are a great option for a quick snack, a light lunch, or a customizable dinner. The natural umami of the mushrooms adds depth to the pizza flavors.
Ingredients and Equipment
Required Ingredients
4 large portobello mushroom caps (stems removed, gills scraped out)
1/2 cup pizza sauce
1 cup shredded mozzarella cheese
Pizza toppings of choice (mini pepperoni, diced bell peppers, sliced olives, fresh basil)
Cooking spray
Pinch of salt and pepper
Required Equipment
Air Fryer (basket or oven style)
Spoon
Tongs
Step-by-Step DIY Instruction
Scraping out the mushroom gills prevents too much moisture from being released during cooking.
Prepare the Mushrooms: Gently wipe the mushroom caps clean. Carefully remove the stems and use a spoon to lightly scrape out the dark gills from the underside of each cap. Pat the caps dry with a paper towel. Lightly sprinkle the inside of the caps with salt and pepper.
Assemble the Pizzas: Spread two tablespoons of pizza sauce evenly inside each mushroom cap. Sprinkle a generous quarter cup of mozzarella cheese over the sauce. Arrange your chosen toppings on top of the cheese.
Preheat and Spray: Preheat your air fryer to 370°F (185°C) for five minutes. Lightly coat the air fryer basket with cooking spray.
Air Fry in Batches: Carefully place two mushroom pizzas into the air fryer basket. Ensure they fit without touching. Cook in two batches.
Cook Until Golden: Air fry for 8 to 12 minutes. The cheese should be melted and bubbly, and the mushroom caps should be tender. The edges of any pepperoni should be slightly crisped.
Garnish and Serve: Remove the hot mushroom pizzas from the air fryer. Garnish with fresh basil leaves if desired, and serve immediately.
41. Sticky Garlic Chili Air Fryer Wings
Easy Air Fryer Recipes
These incredibly flavorful chicken wings are tossed in a sweet and spicy garlic chili glaze, achieving a beautiful stickiness and a satisfying crispness. The air fryer renders the fat from the skin, ensuring each wing is wonderfully crunchy without being greasy. Garnished with fresh chilies and cilantro, these are perfect for game day or any gathering where you want a truly irresistible appetizer.
Ingredients and Equipment
Required Ingredients
1.5 pounds chicken wings (flats and drumettes, patted very dry)
1 tablespoon oil (vegetable or canola)
1/2 teaspoon salt
1/4 teaspoon black pepper
1/2 cup sweet chili sauce
2 cloves garlic (minced)
1 tablespoon soy sauce
1 tablespoon honey or brown sugar
Sesame seeds, sliced red chilies, and fresh cilantro for garnish
Required Equipment
Air Fryer (basket or oven style)
Two mixing bowls
Tongs
Meat thermometer
Step-by-Step DIY Instruction
Ensuring the wings are completely dry is the secret to a super crispy skin.
Prepare the Wings: Pat the chicken wings thoroughly dry with paper towels. This crucial step promotes a crispy skin. Place them in a large mixing bowl.
Season the Wings: Drizzle the wings with oil, then sprinkle with salt and black pepper. Toss well to coat every wing.
Preheat and Load: Preheat your air fryer to 400°F (200°C) for five minutes. Arrange the seasoned wings in a single layer in the air fryer basket. Do not overcrowd; cook in two or more batches if necessary.
Air Fry for Crispness: Air fry for 20 minutes. Halfway through (at 10 minutes), open the air fryer and shake the basket vigorously to turn the wings.
Prepare the Glaze: While the wings cook, combine the sweet chili sauce, minced garlic, soy sauce, and honey (or brown sugar) in a separate small mixing bowl. Whisk until well combined.
Glaze and Finish: After 20 minutes, remove the wings from the air fryer and place them in the bowl with the glaze. Toss the wings until they are completely coated. Return the glazed wings to the air fryer basket in a single layer.
Final Cook: Air fry for an additional 5 to 8 minutes, or until the glaze is caramelized and sticky, and the internal temperature of the thickest part of the wing reaches 165°F (74°C).
Serve: Remove the wings immediately. Garnish generously with sesame seeds, sliced red chilies, and fresh cilantro before serving.
42. Crispy Pork and Vegetable Egg Rolls
Easy Air Fryer Recipes
These savory egg rolls are packed with a delicious filling of seasoned pork and crisp vegetables, all encased in a golden, crunchy wrapper. The air fryer cooks them to crispy perfection without the need for deep-frying, offering a lighter take on a classic. Served with a sweet chili dipping sauce, these make an excellent appetizer or a satisfying snack.
Ingredients and Equipment
Required Ingredients
1 pound ground pork or chicken
1 cup finely shredded cabbage or coleslaw mix
1/2 cup finely chopped mushrooms
1/4 cup finely shredded carrots
2 cloves garlic (minced)
1 tablespoon soy sauce
1 teaspoon fresh ginger (grated)
1/2 teaspoon sesame oil
12 egg roll wrappers
Cooking oil spray
Sweet chili sauce for dipping
Required Equipment
Air Fryer (basket or oven style)
Large skillet
Mixing bowl
Small bowl of water
Tongs
Step-by-Step DIY Instruction
Allowing the filling to cool slightly before rolling helps prevent the wrappers from tearing.
Cook the Filling: In a large skillet, brown the ground pork or chicken over medium-high heat, breaking it up as it cooks. Drain any excess fat. Add the shredded cabbage, mushrooms, carrots, minced garlic, and grated ginger to the skillet. Cook for 5-7 minutes, until the vegetables are tender-crisp.
Season the Filling: Stir in the soy sauce and sesame oil. Remove the skillet from the heat and let the filling cool slightly.
Assemble the Egg Rolls: Lay one egg roll wrapper on a clean surface with a corner pointing toward you (like a diamond). Place about 1/4 cup of filling just below the center.
Roll Securely: Fold the bottom corner over the filling. Fold the left and right corners inward. Brush the top corner with a little water, then roll the entire wrapper tightly upward to seal it completely. Repeat for all egg rolls.
Preheat and Spray: Preheat your air fryer to 375°F (190°C) for five minutes. Lightly coat the air fryer basket with cooking oil spray.
Air Fry in Batches: Place the egg rolls seam side down in the air fryer basket. Do not overcrowd. Generously mist the tops of the egg rolls with cooking oil spray.
Cook and Flip: Air fry for 8 minutes. Open the air fryer and carefully flip the egg rolls with tongs. Mist the second side with cooking spray.
Finish Cooking: Continue cooking for another 5 to 7 minutes, until the egg rolls are deep golden brown and wonderfully crispy.
Serve: Remove the hot egg rolls and serve immediately with sweet chili sauce.
43. Classic Crispy Calamari Rings
Easy Air Fryer Recipes
Enjoy perfectly crisp calamari rings without the mess and heavy oil of deep-frying. The air fryer cooks these tender rings to a beautiful golden brown, creating a light, crunchy coating that’s incredibly satisfying. Served with a squeeze of fresh lemon and a creamy aioli, this makes a fantastic appetizer that feels both elegant and easy.
Ingredients and Equipment
Required Ingredients
1 pound frozen calamari rings (thawed and patted very dry)
1/2 cup all-purpose flour
1/2 cup panko breadcrumbs
1/4 cup grated Parmesan cheese (optional, for flavor)
1 large egg (beaten with 1 tablespoon milk)
1/2 teaspoon salt
1/4 teaspoon black pepper
Cooking oil spray
Lemon wedges and aioli (garlic mayonnaise) for serving
Required Equipment
Air Fryer (basket or oven style)
Three shallow dishes
Tongs
Step-by-Step DIY Instruction
Thoroughly drying the calamari prevents a soggy coating and helps achieve maximum crispness.
Prepare the Calamari: Thaw the frozen calamari rings if necessary. Pat them extremely dry with paper towels. Excess moisture will prevent them from crisping.
Set Up Breading Station: In the first shallow dish, combine the flour, salt, and pepper. In the second dish, place the beaten egg and milk mixture. In the third dish, combine the panko breadcrumbs and grated Parmesan cheese (if using).
Coat the Calamari: Dredge each calamari ring first in the seasoned flour, shaking off excess. Next, dip it fully in the egg mixture. Finally, press it firmly into the panko-Parmesan mixture, ensuring complete coverage. Place the coated rings on a plate. Repeat for all rings.
Preheat and Spray: Preheat your air fryer to 375°F (190°C) for five minutes. Lightly coat the air fryer basket with cooking oil spray.
Air Fry in Batches: Place a single layer of coated calamari rings into the prepared basket. Do not overcrowd. Generously mist the tops of the rings with cooking oil spray.
Cook and Flip: Air fry for 6 minutes. Open the air fryer and carefully flip the calamari rings with tongs. Mist the second side with cooking spray.
Finish Cooking: Continue cooking for another 2 to 4 minutes, until the calamari is deep golden brown and wonderfully crispy. Be careful not to overcook, or it can become rubbery.
Serve: Remove the hot calamari rings immediately. Serve with fresh lemon wedges and a side of creamy aioli.
44. Zesty Garlic Butter Shrimp
Easy Air Fryer Recipes
These succulent shrimp are infused with vibrant garlic and lemon, cooked to tender perfection in the air fryer. The high heat creates a beautiful sear on the shrimp while keeping them incredibly juicy. This rapid cooking method means a flavorful seafood dish is ready in minutes, perfect for a quick weeknight meal or an elegant appetizer.
Ingredients and Equipment
Required Ingredients
1 pound large shrimp (peeled, deveined, tails on or off)
2 tablespoons butter (melted)
3 cloves garlic (minced)
1 tablespoon fresh lemon juice
1 tablespoon fresh parsley (chopped)
1/4 teaspoon red pepper flakes (optional)
Salt and black pepper to taste
Lemon wedges for serving
Required Equipment
Air Fryer (basket or oven style)
Small mixing bowl
Large mixing bowl
Tongs
Step-by-Step DIY Instruction
Do not overcrowd the air fryer basket, as this can steam the shrimp instead of searing it.
Prepare the Garlic Butter: In a small mixing bowl, combine the melted butter, minced garlic, lemon juice, chopped parsley, red pepper flakes (if using), salt, and black pepper. Stir well.
Season the Shrimp: Pat the shrimp very dry with paper towels. Place them in a large mixing bowl. Pour the garlic butter mixture over the shrimp and toss until every piece is evenly coated.
Preheat and Load: Preheat your air fryer to 380°F (195°C) for five minutes. Carefully place the seasoned shrimp into the air fryer basket in a single layer. Do not overcrowd; cook in two batches if necessary.
Air Fry: Air fry for 8 to 12 minutes, depending on the size of the shrimp.
Shake and Check: Halfway through cooking (at about 4 minutes), open the air fryer and shake the basket to turn the shrimp. Continue cooking until the shrimp are pink, opaque, and cooked through.
Serve: Remove the hot shrimp immediately from the air fryer. Serve with fresh lemon wedges and a sprinkle of extra parsley if desired.
45. Glazed Air Fryer Donut Holes
Easy Air Fryer Recipes
These sweet, airy donut holes are wonderfully golden and coated in a simple sugar glaze, offering a delightful treat with minimal effort. Using canned biscuit dough makes them incredibly easy to prepare in the air fryer, which cooks them to a perfect puffy texture. They are a quick way to satisfy a craving for fresh, warm donuts without deep-frying.
Ingredients and Equipment
Required Ingredients
1 can (8 count) refrigerated biscuit dough
1/2 cup powdered sugar
2 tablespoons milk
1/2 teaspoon vanilla extract
Cooking spray
Required Equipment
Air Fryer (basket or oven style)
Small mixing bowl
Tongs
Paper bag or bowl for glazing
Step-by-Step DIY Instruction
Working in small batches ensures the donut holes cook evenly and maintain their round shape.
Prepare the Dough: Open the can of biscuit dough. Cut each biscuit into four equal pieces. Gently roll each piece into a small ball.
Preheat and Spray: Preheat your air fryer to 350°F (175°C) for five minutes. Lightly coat the air fryer basket with cooking spray.
Air Fry in Batches: Place a single layer of the dough balls into the prepared basket, ensuring they do not touch. Cook them in batches.
Cook and Turn: Air fry for 5 to 7 minutes. The donut holes should be golden brown and puffed. Halfway through, gently turn them with tongs to ensure even cooking.
Prepare the Glaze: While the donut holes cook, whisk together the powdered sugar, milk, and vanilla extract in a small mixing bowl until a smooth glaze forms.
Glaze Immediately: As soon as a batch of donut holes is done, transfer them to a paper bag or a bowl. Pour a portion of the glaze over them. Gently shake the bag or toss the bowl until the donut holes are completely coated.
Serve: Remove the glazed donut holes and repeat the process for any remaining batches. Serve warm for the best taste.
46. Flavorful Roasted Spiced Pineapple Rings
Easy Air Fryer Recipes
These caramelized pineapple rings offer a sweet and tangy treat with a delightful hint of spice. The air fryer roasts them beautifully, bringing out their natural sweetness and creating a slight char that adds depth of flavor. A sprinkle of red pepper flakes and fresh thyme elevates this simple fruit into an exciting side dish or dessert.
Ingredients and Equipment
Required Ingredients
1 fresh pineapple (peeled, cored, and sliced into 1/2-inch rings)
1 tablespoon olive oil
1/2 teaspoon chili powder or red pepper flakes
1/4 teaspoon salt
Fresh thyme sprigs for garnish
Lime wedges for serving
Required Equipment
Air Fryer (basket or oven style)
Large mixing bowl
Tongs
Step-by-Step DIY Instruction
Cutting the pineapple into uniform rings ensures even roasting and caramelization.
Prepare the Pineapple: Peel and core the fresh pineapple. Slice it into half-inch thick rings.
Season the Pineapple: In the large mixing bowl, toss the pineapple rings with the olive oil, chili powder (or red pepper flakes), and salt. Ensure all sides are lightly coated.
Preheat: Preheat your air fryer to 375°F (190°C) for five minutes.
Air Fry in Batches: Place a single layer of seasoned pineapple rings into the air fryer basket. Do not overcrowd. Cook in two or more batches.
Cook and Flip: Air fry for 8 minutes. Open the air fryer and use tongs to carefully flip the pineapple rings.
Finish Roasting: Continue cooking for another 5 to 7 minutes, or until the pineapple is tender, lightly caramelized, and has slight grill marks.
Serve: Remove the roasted pineapple rings from the air fryer. Garnish with fresh thyme and serve immediately, perhaps with a squeeze of fresh lime juice.
47. Hearty Black Bean and Corn Veggie Burgers
Easy Air Fryer Recipes
These robust veggie burgers are packed with savory black beans and sweet corn, creating a satisfying and flavorful alternative to meat. The air fryer cooks them to a beautiful golden crisp on the outside, while keeping the interior moist and tender. Served on a bun with your favorite toppings, these make a delicious and healthy meal that cooks up quickly.
Ingredients and Equipment
Required Ingredients
1 can (15 oz) black beans (rinsed, drained, and mashed)
1/2 cup frozen corn (thawed)
1/4 cup finely diced red onion
1/4 cup panko breadcrumbs
1 large egg (lightly beaten)
1 tablespoon taco seasoning
Cooking oil spray
Burger buns and toppings for serving
Required Equipment
Air Fryer (basket or oven style)
Large mixing bowl
Spatula
Step-by-Step DIY Instruction
Chilling the patties before cooking helps them hold their shape better in the air fryer.
Prepare the Bean Mixture: In a large mixing bowl, thoroughly mash the rinsed and drained black beans. Leave some chunks for texture.
Combine Ingredients: Add the thawed corn, diced red onion, panko breadcrumbs, beaten egg, and taco seasoning to the mashed beans. Mix everything gently until just combined.
Form Patties: Divide the mixture into four equal portions and form them into burger patties, about 3/4 inch thick. Place them on a plate and chill in the refrigerator for at least 15 minutes.
Preheat and Spray: Preheat your air fryer to 370°F (185°C) for five minutes. Lightly coat the air fryer basket with cooking spray.
Air Fry: Carefully place two veggie burger patties into the air fryer basket. Do not overcrowd. Lightly mist the tops of the patties with cooking oil spray.
Cook and Flip: Air fry for 8 minutes. Open the air fryer and carefully flip the patties with a spatula. Mist the second side with cooking spray.
Finish Cooking: Continue cooking for another 5 to 7 minutes, until the burgers are golden brown and heated through.
Serve: Remove the hot veggie burgers from the air fryer. Serve them immediately on toasted buns with your favorite toppings like lettuce, tomato, and a zesty sauce.
48. Savory Tuna and Asparagus Patties
Easy Air Fryer Recipes
These flavorful patties combine flaky tuna with tender asparagus, creating a healthy and satisfying meal. The air fryer cooks them to a beautiful golden crispness on the outside while keeping the interior wonderfully moist. A creamy dill sauce perfectly complements the fresh taste of the asparagus and tuna. These make a great light lunch or a quick dinner.
Ingredients and Equipment
Required Ingredients
2 (5 oz) cans tuna in water (drained very well)
1/2 cup finely chopped cooked asparagus
1/2 cup panko breadcrumbs
1 large egg (lightly beaten)
1/4 cup mayonnaise
1 tablespoon fresh dill (chopped)
1 tablespoon fresh chives (chopped)
1 teaspoon lemon juice
1/2 teaspoon salt
Cooking spray
Dill sauce and lemon wedges for serving
Required Equipment
Air Fryer (basket or oven style)
Large mixing bowl
Spatula
Tongs
Step-by-Step DIY Instruction
Thoroughly draining the tuna and ensuring the asparagus is cooked and cooled helps the patties hold their shape.
Prepare the Tuna: Drain the canned tuna very well, pressing out as much liquid as possible. Flake it into a large mixing bowl.
Combine Ingredients: Add the finely chopped cooked asparagus, panko breadcrumbs, beaten egg, mayonnaise, chopped dill, chopped chives, lemon juice, and salt to the tuna. Use a spatula to gently mix all the ingredients until they are just combined. Do not overmix.
Shape the Patties: Form the mixture into six to eight evenly sized patties, about one inch thick. Place them on a plate and chill them in the refrigerator for at least 15 minutes. This helps them firm up and hold their shape during cooking.
Preheat and Spray: Preheat your air fryer to 370°F (185°C) for five minutes. Lightly coat the air fryer basket with cooking spray.
Load the Basket: Carefully place the tuna patties into the prepared air fryer basket. You must ensure there is space between each cake. Cook them in two batches if necessary.
Air Fry and Flip: Air fry for 8 minutes. Open the air fryer and use a spatula to carefully flip the patties.
Finish Cooking: Continue cooking for an additional 3 to 5 minutes, until they are deep golden brown and heated through.
Serve: Remove the hot tuna patties from the air fryer. Serve them immediately with a creamy dill sauce and fresh lemon wedges.
You now hold the key to simplifying your cooking life in a substantial way. We have traveled through forty-eight remarkable recipes together, covering everything from savory appetizers and light lunches to comforting desserts and hearty dinners. These powerful examples show the incredible potential your air fryer offers.
You can now confidently turn this versatile appliance into the most used tool in your entire kitchen. Remember a few important things for continued success. Always keep the basket uncrowded for maximum crispiness and ensure you pat your protein and vegetables thoroughly dry before cooking.
These small, easy actions guarantee fantastic results and quicker cleanup times. Go ahead and start experimenting tonight. Reclaim your evening mealtime and enjoy truly amazing food!
Spread the loveWorking from home offers fantastic flexibility, yet somehow, the midday lunch hour often becomes the most chaotic part of the day. You might find yourself frantically scrolling through delivery apps or worse, grabbing…
Spread the loveThe five o’clock scramble is a common occurrence in households everywhere. You arrive home, exhausted, and suddenly face the age-old question: “What is for dinner?” If you find yourself cycling through the same…
Spread the loveStaring at the same bland chicken breast every Sunday can make anyone lose their appetite. It is easy to fall into a rut when you prioritize health over flavor. You want meals that…