There is nothing quite like a traditional pecan pie, with its buttery crust and sweet, nutty filling. This classic dessert is a hallmark of holiday tables and celebratory gatherings. However, many home bakers face the frustrating challenge of a filling that refuses to set.

Instead of a cleanly sliced wedge, they are left with a messy, runny syrup that oozes across the plate. This structural failure often leads to disappointment, turning a labor of love into a sticky situation. The problem usually boils down to a delicate balance of moisture, heat, and binding agents.
This comprehensive guide is here to solve that issue permanently. We have gathered 36 reliable, expert-approved hacks to transform your pie game. These techniques cover everything from ingredient swaps and precise temperatures to advanced baking methods.
Prepare to banish the wobbly center and the soggy bottom forever. By implementing these straightforward tips, you will achieve a magnificent, slice-worthy pecan pie that holds its shape beautifully every single time.
1. The Essential Egg and Starch Solution

Image Description: Thicker Pie Filling Secret
That glistening, rich amber filling tells a story of delicious success. Nobody wants a runny dessert when they slice into a beautiful pie. A common pitfall for many home bakers is not using enough thickening agents. You can see the powerful duo right here: fresh eggs and a measure of cornstarch. These simple additions are the secret weapon against a soupy texture.
Look closely at the slice; the filling is set, firm, and holds its shape exceptionally well. This stability comes from the proteins in the eggs and the starch granules working together during the baking process. A well-set custard filling ensures every piece maintains its structure on the plate. Getting the ratio correct is key to achieving this truly marvelous consistency.
Foolproof Hack 1: Boost Your Binder (The Egg/Starch Ratio)
A simple adjustment to your thickening agents makes all the difference for a silky, set filling. This hack prevents that dreaded sloshing texture by reinforcing the custard base.
Required Ingredients
- 1 extra large egg yolk (in addition to your recipe’s required whole eggs)
- 1 tablespoon of cornstarch or all-purpose flour
- Your standard pecan pie filling ingredients (syrup, sugar, butter, etc.)
Equipment List
- Small mixing bowl
- Whisk or fork
- Measuring spoons
- Standard 9-inch pie dish
DIY Instruction Steps
- Prepare the Starch: Take the measured cornstarch or flour and place it in your small mixing bowl.
- Temper the Starch: Before adding it to the whole batch, whisk in about 2 tablespoons of the liquid sweetener (syrup) from your main pie filling mixture into the starch. Keep mixing until you have a smooth paste with no lumps. This is known as a slurry.
- Add the Yolk: Separate an extra large egg, saving only the yolk. Whisk this additional yolk directly into the slurry you just created. The yolk provides extra fat and protein, acting as a strong binder.
- Combine Fully: Pour the complete slurry mixture back into your main bowl of pie filling. Whisk everything together thoroughly for at least one minute, making sure the new binder is distributed evenly throughout the entire filling.
- Pour and Bake: Proceed with your recipe by pouring the fortified filling into your prepared crust and baking as usual. The added starch and yolk will set the filling firm and slice-worthy.
2. Incorporating Heated Syrup for Better Binding

Image Description: Tempering the Egg Base
This image captures a crucial moment in achieving a silky, custard-like filling: tempering the eggs. Notice the dark, rich liquid pouring from the small saucepan, mixing vigorously with the yellow, beaten eggs. This liquid represents the heated syrup and butter mixture from the pie recipe. Adding warm liquid slowly while constantly whisking prevents the eggs from scrambling, which would ruin the smooth texture.
The rapid whisking helps the eggs gradually increase in temperature, allowing them to bind the finished pie filling more effectively during baking. Surrounding the bowl are the telltale signs of a baking project in motion—a rolling pin, flour dust on the countertop, and a fully baked pie shell waiting in the background. Mastering this simple technique ensures a thick, unified texture that won’t leak when sliced.
Foolproof Hack 2: Tempering the Eggs with Warm Syrup
Scrambled egg bits in your filling will never yield a smooth pie. This hack ensures the high-sugar syrup and delicate eggs blend seamlessly to form a consistent, sturdy base.
Required Ingredients
- Your recipe’s required amount of light or dark corn syrup (or preferred sweetener)
- Your recipe’s required amount of butter
- Your recipe’s required amount of eggs (whisked)
Equipment List
- Small saucepan
- Whisk
- Medium mixing bowl (for eggs)
- Spatula
DIY Instruction Steps
- Heat the Syrup: Combine the syrup and butter in the small saucepan. Place this over medium-low heat. Stir gently until the butter is completely melted and the syrup is warm to the touch. You want it warm, not hot or boiling.
- Whisk the Eggs: In your medium mixing bowl, lightly whisk the required eggs until the yolks and whites are just combined and slightly frothy.
- Start the Tempering: This step requires care and focus. Slowly, in a thin stream, begin pouring the warm syrup mixture from the saucepan into the bowl of whisked eggs.
- Continuous Movement: While pouring the syrup, you must vigorously and continuously whisk the eggs. The constant motion ensures the warm syrup blends gradually without cooking any part of the egg mixture. If you stop whisking, you risk creating chunks of cooked egg.
- Finish Combining: Once you have poured all the warm syrup into the eggs, continue whisking for another 30 seconds to make sure the base is completely emulsified and smooth. You can now add the remaining ingredients (vanilla, nuts, etc.) and proceed with your recipe.
3. The Power of Dairy Concentration

Image Description: Using Evaporated Milk for Creaminess
The smooth, dense slice of pie featured here speaks volumes about moisture control and rich ingredients. An open can of evaporated milk and a measuring cup of fresh milk are visible, highlighting the choice of dairy. Evaporated milk is simply milk where 60% of the water has been removed. This concentration results in a thicker, creamier texture and a richer flavor for custard-based fillings.
By substituting some or all of the regular milk or cream with the evaporated version, you introduce less free water into the filling mixture. Less water translates directly into less runniness and a more velvety texture when the pie is fully baked and cooled. A thick filling that slices cleanly is certainly a rewarding result of this simple ingredient swap.
Foolproof Hack 3: Swap Watery Dairy for Evaporated Milk
Excess water in dairy is a sneaky culprit behind a weeping or runny filling. Using a concentrated dairy product adds necessary fat and richness without the excess moisture.
Required Ingredients
- 1/2 cup of evaporated milk (unsweetened)
- Your recipe’s required amount of whole milk or heavy cream
Equipment List
- Can opener
- Liquid measuring cup
- Standard mixing bowls
DIY Instruction Steps
- Review the Recipe: Look at your existing recipe and identify the total amount of whole milk or heavy cream it calls for.
- Make the Swap: Replace half of the required liquid dairy with the evaporated milk. For example, if your recipe calls for 1 cup of whole milk, use 1/2 cup of whole milk and 1/2 cup of evaporated milk.
- Prepare the Filling: Mix the evaporated milk along with all the other wet ingredients (syrup, eggs, butter) as instructed in your recipe.
- Notice the Difference: You will immediately feel a slight difference in the thickness of the unbaked filling. This is the desired effect.
- Bake and Rest: Bake the pie as usual. The evaporated milk will help the filling set up much firmer and lend a beautiful, creamy depth to the finished product after it has fully cooled.
4. Pre-Bake for a Solid Foundation

Image Description: Close-Up of a Stable Baked Custard
This close-up view of a baked custard showcases a beautifully stable, firm texture. While this appears to be a basic custard or cheesecake, the structure is exactly what we aim for in a set pecan pie filling. Notice the even, sponge-like crumb and the slightly golden, appealing surface. This uniformity indicates a correct ratio of binders (eggs, starch) and proper baking technique.
The stability means the pie will hold its shape elegantly on the plate, rather than collapsing or oozing out when cut. Achieving this kind of structure requires precise measurement and patient baking. It’s a reminder that a well-executed custard base is the foundation for avoiding a runny final product, even before the pecans are added.
Foolproof Hack 4: Blind Baking the Pie Crust
A soggy bottom is often the first sign of a runny pie. Preventing the crust from absorbing moisture is essential for a sturdy final slice. Blind baking creates a waterproof base.
Required Ingredients
- Pie dough (enough for one 9-inch crust)
- Parchment paper or aluminum foil
- Pie weights, dried beans, or uncooked rice (about 2 cups)
Equipment List
- 9-inch pie dish
- Rolling pin
- Fork
- Baking sheet
DIY Instruction Steps
- Prepare the Dough: Roll out your pie dough and fit it into the 9-inch pie dish. Crimp the edges decoratively.
- Chill and Dock: Place the prepared crust in the freezer for 30 minutes. Once cold, use a fork to prick the bottom and sides of the crust several times. This is called ‘docking’ and prevents steam from building up.
- The Blind Bake Setup: Place a piece of parchment paper or aluminum foil into the frozen shell, gently pressing it against the sides. Fill the paper/foil with your pie weights (or dried beans/rice). The weights keep the crust from shrinking or puffing up.
- Initial Bake: Place the dish on a baking sheet. Bake in a preheated oven (usually $375^{\circ}\text{F}$ or $190^{\circ}\text{C}$) for 15 minutes.
- Finish the Blind Bake: Carefully lift out the parchment and weights. Return the empty crust to the oven and bake for another 5 to 10 minutes until the bottom looks dry and lightly golden.
- Cool and Fill: Remove the crust and let it cool completely on a wire rack before pouring in your pecan pie filling. This fully baked, sealed crust will not allow the wet filling to make it soggy, ensuring a crisp base.
5. Controlling Moisture with Proper Cooling

Image Description: The Oozing Slice (What to Avoid)
This image, although depicting a berry pie, perfectly illustrates the problem of excessive moisture and a failed set—exactly what we want to avoid with pecan pie. Notice the vivid red liquid pooling at the bottom and oozing down the side of the cut slice. This liquid represents the excess water or unbonded syrup that causes a pecan pie to be overly runny.
A key factor here is the impatience of cutting the pie while it is still too warm. When custard fillings are warm, they are naturally softer and less stable. Cutting them prematurely guarantees a leaky, messy presentation. This picture serves as a visual warning: proper cooling and setting time is absolutely non-negotiable for a structurally sound slice.
Foolproof Hack 5: The Essential Slow Cool-Down
Rushing the cooling process is the single biggest mistake after baking. The filling sets fully only as it cools. Patience is a critical ingredient!
Required Ingredients
- Your freshly baked pecan pie (removed from the oven)
Equipment List
- Cooling rack
- Timer
- Spatula or knife
DIY Instruction Steps
- The Wire Rack: Immediately after removing the pie from the oven, place the entire pie dish onto a wire cooling rack. Do not cover it. The rack allows air to circulate around the bottom, preventing steam from condensing and making the bottom crust soggy.
- Initial Room Temperature Cool: Allow the pie to cool on the counter at room temperature for a minimum of 2 hours. This slow, gradual cooling helps the sugars and proteins in the filling solidify naturally and evenly. Do not touch or move the pie unnecessarily during this time.
- The Refrigeration Finish: Once the pie is cool to the touch (after the initial 2 hours), cover it loosely with plastic wrap or foil. Transfer the pie to the refrigerator for an additional 4 to 6 hours, or preferably, overnight. The cold temperature will ensure the filling achieves its maximum possible firmness.
- Slice and Serve: Only slice and serve the pie once it has been fully refrigerated. Cutting a warm pie releases the liquid centers and guarantees a runny result. A cold, fully set pie will give you a clean, elegant slice every time.
6. Incorporating Heated Syrup for Better Binding

Image Description: Tempering the Egg Base
This image captures a crucial moment in achieving a silky, custard-like filling: tempering the eggs. Notice the dark, rich liquid pouring from the small saucepan, mixing vigorously with the yellow, beaten eggs. This liquid represents the heated syrup and butter mixture from the pie recipe. Adding warm liquid slowly while constantly whisking prevents the eggs from scrambling, which would ruin the smooth texture.
The rapid whisking helps the eggs gradually increase in temperature, allowing them to bind the finished pie filling more effectively during baking. Surrounding the bowl are the telltale signs of a baking project in motion—a rolling pin, flour dust on the countertop, and a fully baked pie shell waiting in the background. Mastering this simple technique ensures a thick, unified texture that won’t leak when sliced.
Foolproof Hack 6: Maximize the Yolks for Extra Firmness
The yolk is the setting star of the egg. By replacing a portion of the whole eggs with yolks, you increase the fat and emulsifiers, resulting in a significantly sturdier and creamier filling.
Required Ingredients
- 1 whole egg (reduce your recipe’s egg count by one)
- 2 extra large egg yolks
Equipment List
- Egg separator or small measuring cup
- Medium mixing bowl
- Whisk or electric mixer
DIY Instruction Steps
- Adjust the Egg Count: Determine how many whole eggs your recipe calls for. You will use one fewer whole egg than specified.
- Separate the Yolks: Take two eggs and carefully separate the whites from the yolks. Discard the whites or save them for another use.
- Combine the Yolks: Add the two separated yolks to the remaining whole eggs required by your recipe. For example, if your recipe needed four whole eggs, you will now use three whole eggs plus two extra yolks.
- Whisk into Syrup: Whisk this intensified egg mixture into your prepared syrup and butter blend. Ensure they are fully combined and the mixture is homogenous.
- Enjoy the Stability: The higher concentration of fat from the yolks will react during baking to form a much stronger gel structure, guaranteeing a slice that stands tall.
7. Controlling Sweetener Density

Image Description: Sugar and Consistency Factors
Displayed here are various components contributing to pie consistency, featuring a significant amount of granulated sugar. While this image showcases elements for a smooth, cheesecake-like slice, it reinforces the crucial role of sweeteners. Syrup is the major source of moisture in pecan pie, and its density must be right. Sugars, when properly dissolved, help bind water.
The size of the sugar granules—from coarse to fine—can influence the final texture of the custard. If you use too much watery syrup or insufficient sugar, the mixture remains too loose. Using slightly less watery syrup and ensuring the granulated sugar is completely dissolved before baking helps create a denser, more viscous filling that will set properly.
Foolproof Hack 7: The Brown Sugar Advantage
If your filling remains runny despite adding extra starch, the syrup ratio might be too high. Substituting some liquid syrup with solid, packed brown sugar provides sweetness while reducing the total liquid volume.
Required Ingredients
- 1/4 cup of the recipe’s liquid corn syrup (reduce this amount)
- 1/4 cup of firmly packed light or dark brown sugar
Equipment List
- Dry measuring cup
- Large mixing bowl
- Sturdy whisk
DIY Instruction Steps
- Reduce Liquid: Measure out the corn syrup needed for your recipe, but remove 1/4 cup of that quantity.
- Add Brown Sugar: Measure 1/4 cup of firmly packed brown sugar into your filling mixture. Brown sugar contains molasses, which adds flavor complexity and texture.
- Mix Thoroughly: Add the brown sugar to the eggs, butter, and remaining syrup. Whisk the mixture well. You need to mix until the sugar is mostly dissolved, creating a very viscous, thick mixture.
- Slightly Denser Filling: The partial swap reduces the overall free liquid while maintaining the necessary sweetness. The resulting filling will be naturally thicker even before it goes into the oven.
8. Ensuring Full Custard Setting

Image Description: The Smooth Filling Pour
A smooth, viscous, light-yellow filling streams gracefully into a waiting, unbaked crust, demonstrating an important step in pie assembly. This visual confirms that the filling itself is already thick and lump-free before baking even starts. Achieving this pourable yet weighty consistency is essential for a beautiful final result.
The uniform flow suggests all ingredients, including binders like eggs and starch, have been fully incorporated. The crimped edge of the crust, ready to receive the filling, has been carefully prepared. This pre-baking appearance of the filling is your best indicator that the liquid is properly emulsified and prepared to solidify into a structured custard once heated.
Foolproof Hack 8: The Hot Water Bath Method (Bain-Marie)
Custards (which includes pecan pie filling) need gentle, even heat to set properly without curdling or cracking. Baking the pie in a hot water bath prevents the edges from overcooking before the center sets, reducing the chance of a runny middle.
Required Ingredients
- Your unbaked pecan pie in its dish
- Boiling hot water
Equipment List
- Standard 9-inch pie dish
- Large, high-sided roasting pan (big enough to fit the pie dish)
- Kettle or saucepan (for heating water)
DIY Instruction Steps
- Wrap the Dish: Take your prepared pie dish filled with the pecan mixture. Carefully wrap the bottom and sides of the dish with two layers of heavy-duty aluminum foil. This prevents water from seeping into the crust.
- Prepare the Bath: Place the foil-wrapped pie dish inside the large roasting pan.
- Add Water: Place the roasting pan into the oven. Using a kettle or saucepan, carefully pour boiling hot water into the roasting pan, making sure the water level comes about halfway up the sides of the pie dish. Be careful not to splash water into the pie filling.
- Bake Gently: Bake the pie as instructed in your recipe. The water bath ensures the temperature around the pie remains constant and gentle. This allows the eggs to set slowly and evenly throughout the filling, eliminating a watery center.
- Remove with Care: Once baked, carefully remove the roasting pan from the oven. Let the pie sit in the hot water bath for 10 minutes before carefully lifting the pie dish out of the water. Proceed with the standard cooling steps (Hack 5).
9. Assessing Doneness Accurately

Image Description: The Finished, Set Pie
This overhead shot captures a beautifully baked, golden-brown pie. The filling is fully set, exhibiting a rich, caramelized edge that transitions into a lighter, firm center. The surface is smooth, with no cracks or visible liquid separation. Achieving this coloring and texture signifies that the protein and sugar matrix has fully gelled.
The dark edges show where the sugars have caramelized intensely, a sign of thorough baking. When checking for doneness, you look for this overall uniformity and set. Even if the very center has a slight wobble, a baked appearance like this indicates success. Knowing precisely when to pull the pie is the final step to avoid a runny texture.
Foolproof Hack 9: The Toothpick Test is Out—Use the Jiggle Test
Baking pecan pie to the correct point is critical. Baking too little leaves it runny; baking too much makes it dry. Forget the unreliable toothpick test; rely on the subtle visual cues.
Required Ingredients
- Your pecan pie (baking in the oven)
Equipment List
- Oven mitts
- Oven light
- Timer
DIY Instruction Steps
- Monitor the Time: Begin checking the pie about 10 minutes before the recipe suggests it should be done.
- The Gentle Jiggle: Put on an oven mitt. Gently open the oven door and carefully reach in and gently tap the side of the pie dish. Do not pull the pie out.
- Observe the Center: Watch the filling closely. The pie is done when the edges look completely set (firm and slightly domed), but the very center (a spot about the size of a quarter) still has a very slight, quick jiggle, like gelatin. It should not look watery or wavy.
- Carryover Cooking: Immediately remove the pie when you see the “jiggle.” The residual heat will continue to set that slightly wobbly center during the cooling process. If you wait until the center is completely firm in the oven, you will have an overbaked, dry pie.
10. The Pecan Arrangement Factor

Image Description: Arranging the Pecans
A hand sprinkles or places plump pecans onto a viscous, dark filling in an unbaked pie shell. The pecans are evenly distributed, some floating on the surface while others sink slightly into the thick syrup. While pecans don’t technically thicken the pie, their placement and temperature heavily influence how the filling sets around them.
When nuts are added, they displace the liquid. Using room-temperature nuts prevents them from rapidly cooling the filling, which can interfere with the custard setting. A visually appealing and well-distributed nut layer also keeps the filling from having large, unsupported liquid pockets, contributing to overall stability.
Foolproof Hack 10: Pre-Toast and Rest the Pecans
Cold or raw pecans can cool down the liquid filling, hindering the initial setting process. Pre-toasting also enhances flavor and reduces the nuts’ tendency to float.
Required Ingredients
- 1 to 1.5 cups of pecans (halves or pieces)
- Small amount of melted butter or neutral oil (optional)
Equipment List
- Baking sheet
- Parchment paper
- Small bowl
DIY Instruction Steps
- Toast the Pecans: Preheat your oven to $350^{\circ}\text{F}$ ($175^{\circ}\text{C}$). Spread the pecans in a single layer on a parchment-lined baking sheet. Toast them for 7 to 10 minutes, checking often, until they are fragrant and lightly darkened.
- Cool Down: Immediately remove the pecans from the oven and transfer them to a small bowl. Let them cool down to room temperature completely before adding them to your pie filling. Do not use warm nuts.
- Mix or Layer: You can either stir the cooled pecans gently into the prepared filling before pouring, or you can pour the filling into the crust first and then arrange the pecans artfully on top.
- Final Result: Using room-temperature, toasted nuts ensures they do not interrupt the warmth or structure of the unbaked filling, allowing the custard to set evenly.
11. The Power of Salt in Setting Custard

Image Description: Salt’s Molecular Role
This visually striking image highlights the inclusion of salt in a light-colored liquid filling. The digital overlay suggests the molecular interaction of sodium ($Na+$) and chloride ($Cl-$) ions. Although often overlooked, salt plays a crucial role beyond flavor in custard-based desserts. It actually helps tighten the protein structure in eggs.
Salt modifies the way proteins interact during heating, making them coagulate more effectively. This leads to a firmer, cleaner-setting filling. A small measure of fine salt, fully dissolved into the filling, is a baker’s subtle trick against a watery outcome. Adding it at the mixing stage ensures the final texture is both well-seasoned and structurally sound.
Foolproof Hack 11: Don’t Skip the Salt
A lack of salt can lead to a pie that tastes flat and fails to set properly. Salt helps the egg proteins bond strongly, giving you that desirable clean slice.
Required Ingredients
- 1/2 teaspoon of fine sea salt or table salt
Equipment List
- Measuring spoons
- Whisk
- Mixing bowl
DIY Instruction Steps
- Measure Accurately: Use a precise measuring spoon to ensure you add exactly 1/2 teaspoon of fine salt. Avoid using coarse or flaky salt, as it may not dissolve completely.
- Dissolve Early: Add the salt directly into the syrup and butter mixture immediately after heating and before adding the eggs. You want the salt to fully dissolve into the liquid sweetener base.
- Mix Well: Whisk the syrup and salt mixture thoroughly for at least one minute until no granules remain.
- Finish Filling: Once dissolved, proceed with adding the eggs and any other liquid ingredients. The salt-enhanced base will set more robustly in the oven, providing a much firmer final texture.
12. Using High-Protein Thickener

Image Description: Cornmeal as a Thickening Agent
The bowl of rich yellow powder shown here is fine cornmeal. While traditionally associated with corn bread, cornmeal can act as a powerful, non-wheat thickener in certain pie fillings. It’s often used in traditional southern chess pie, which shares a similar custard base with pecan pie. Cornmeal is primarily starch, which means it swells and absorbs moisture during baking.
This ingredient adds a very slight, pleasant texture and ensures any excess moisture in the syrup or eggs is locked away. Unlike flour, which can sometimes make the filling taste pasty, a small amount of cornmeal adds substance without compromising the flavor profile. Visible eggs and vanilla suggest this is a dedicated thickening solution for a custard dessert.
Foolproof Hack 12: Introduce Cornmeal or Matzo Meal
If you need a very firm set and want to avoid using more flour or cornstarch, a small addition of cornmeal or matzo meal (a finely ground starch) can dramatically absorb extra liquid.
Required Ingredients
- 1 to 2 tablespoons of fine cornmeal or matzo meal
Equipment List
- Dry measuring spoon
- Whisk
- Mixing bowl
DIY Instruction Steps
- Measure the Meal: Measure out 1 to 2 tablespoons of the chosen meal. Start with 1 tablespoon if you prefer a smoother texture.
- Dry Blend: In your mixing bowl, whisk the cornmeal into the granulated sugar and any dry seasonings (like cinnamon or nutmeg) before adding the wet ingredients. This step ensures the meal is evenly dispersed and prevents clumping.
- Combine Slowly: Proceed with the recipe, adding the wet ingredients as usual. Whisk the entire mixture vigorously for two minutes.
- Bake to Set: The fine granules of cornmeal will swell as the pie bakes, effectively binding excess moisture that your eggs and syrup alone might not handle, resulting in a significantly firmer filling.
13. Achieving the Precision Temperature Set

Image Description: Temperature Control for Doneness
A digital thermometer plunged into a baked custard pie displays a temperature reading. Relying on a food thermometer is the most reliable way to achieve a non-runny, yet tender, custard filling. The internal temperature must reach a specific range for the egg proteins to fully coagulate. Guessing based on jiggle or sight can easily lead to an undercooked center.
For most custard-based pies, including pecan, the internal temperature should reach between $190^{\circ}\text{F}$ and $200^{\circ}\text{F}$ ($88^{\circ}\text{C}$ and $93^{\circ}\text{C}$) to be safely set. Using this tool eliminates guesswork. This ensures the eggs have fully done their job as binders, leading to a perfectly structured slice.
Foolproof Hack 13: Utilize a Digital Thermometer
The visual jiggle test can be subjective. For absolute certainty that your pie is set, measuring the internal temperature is the only way to confirm protein coagulation.
Required Ingredients
- Your pecan pie (near the end of its baking time)
Equipment List
- Instant-read digital thermometer
DIY Instruction Steps
- Prepare the Thermometer: Ensure your digital thermometer is clean and ready.
- Test the Temperature: About 10 minutes before the scheduled finish time, carefully open the oven. Gently insert the thermometer probe about one inch from the edge of the filling, then reinsert it near the center. Avoid touching the bottom of the pie dish.
- Target Range: The filling is sufficiently baked and ready to be removed when the center registers between $195^{\circ}\text{F}$ and $200^{\circ}\text{F}$ ($90^{\circ}\text{C}$ and $93^{\circ}\text{C}$).
- Remove Immediately: Once the temperature is reached, remove the pie immediately. This precise measurement guarantees the eggs are set without being overbaked, ensuring the filling is firm but still smooth.
14. Reducing Water Content by Heating Syrup

Image Description: Syrup Reduction for Density
A jar of “Reduced Maple Syrup for Candy Making” sits next to a small pot on a gas burner, where liquid is heating. Reducing the liquid sweetener before mixing is an effective way to thicken the filling. This process removes excess water content, concentrating the sugars and resulting in a much more viscous, heavier syrup.
Maple syrup, like corn syrup, contains a certain percentage of water. By simmering it gently, you naturally increase its density. This concentrated syrup will then contribute less free moisture to the final mixture, ensuring a firmer set and a richer, less watery flavor. A Brix refractometer nearby signifies the scientific approach to achieving the right sugar concentration.
Foolproof Hack 14: Gently Reduce Your Corn Syrup
Water content is the enemy of a set pie. Gently heating and simmering your corn syrup before mixing removes a small but significant amount of water, making the syrup naturally thicker.
Required Ingredients
- The recipe’s required amount of corn syrup or maple syrup
Equipment List
- Small, heavy-bottomed saucepan
- Wooden spoon or heatproof spatula
- Measuring cup
DIY Instruction Steps
- Measure and Heat: Measure out your required syrup and pour it into the small saucepan. Place it over low heat.
- Gentle Simmer: Bring the syrup to a very gentle simmer, just until small bubbles start to form around the edges. Do not let it boil rapidly, or you risk burning the sugar. Stir continuously for 5 minutes.
- Cool Slightly: Remove the syrup from the heat and allow it to cool for about 10 minutes.
- Re-Measure: After cooling, you will notice a slight reduction in volume. This concentrated, thicker syrup should now be combined with the butter and other ingredients as usual. Its increased viscosity will translate directly into a firmer final filling.
15. The Alcohol Evaporation Trick

Image Description: Flavoring and Firming with Spirits
Two bottles of aged spirits, one labeled “Bourbon,” flank a beautifully baked pecan pie. While spirits like bourbon or rum are often added for flavor complexity, they also serve a functional purpose in baking. Alcohol has a much lower boiling point than water, meaning it evaporates quickly during the baking process.
Adding a shot of alcohol introduces flavor while actually reducing the final water content of the filling. The heat of the oven drives off the alcohol, leaving behind the rich flavor notes and contributing to a drier, firmer custard matrix. This technique provides both a depth of taste and a structural advantage against runniness.
Foolproof Hack 15: Add a Shot of High-Proof Spirit
Introducing a high-proof spirit like bourbon or dark rum adds a complex layer of flavor while helping to dry out the filling during baking.
Required Ingredients
- 1 to 2 tablespoons of Bourbon, Dark Rum, or Cognac
- Your standard pecan pie filling ingredients
Equipment List
- Measuring spoons
- Whisk
DIY Instruction Steps
- Measure the Spirit: Accurately measure 1 or 2 tablespoons of your chosen high-proof spirit.
- Add to Liquids: Whisk the spirit into the combined syrup, butter, and egg mixture. Ensure it is fully incorporated.
- Benefit of Evaporation: During the high heat of the oven, the alcohol rapidly evaporates. This accelerates the removal of excess moisture from the filling and helps the custard set faster and firmer than a filling with the same amount of water added.
- Bake as Directed: Proceed with baking your pie, enjoying the knowledge that your filling is structurally sound and tastes richer.
16. Using Gelatin for Structural Integrity

Image Description: Gelatin as a Binder
A glossy, clear amber gelatin dessert, reminiscent of the color of set pecan pie filling, demonstrates the powerful gelling ability of gelatin. Gelatin is a protein derived from collagen; when dissolved in warm liquid and then cooled, it forms a strong, elastic gel.
For a challenging filling like pecan pie, which contains high amounts of sugar and liquid, adding a small, unnoticeable amount of gelatin provides a structural safety net. It guarantees the filling will set firmly upon cooling, even if the egg proteins are slightly undercooked or the liquid ratio is marginally high. This hack is reserved for when maximum assurance of non-runniness is required.
Foolproof Hack 16: Gelatin for the Insurance Set
For a guarantee against a wobbly pie, a touch of unflavored gelatin can provide the extra firmness you need, particularly if you are baking in a very humid environment.
Required Ingredients
- 1 teaspoon of unflavored powdered gelatin
- 3 tablespoons of cold water
- Your standard pecan pie filling ingredients
Equipment List
- Small ramekin or cup
- Whisk
- Saucepan
DIY Instruction Steps
- Bloom the Gelatin: Pour 3 tablespoons of cold water into the ramekin. Sprinkle the 1 teaspoon of powdered gelatin evenly over the water. Allow it to sit undisturbed for 5 minutes until the mixture thickens and looks spongy. This process is called “blooming.”
- Dissolve the Gelatin: Gently heat the saucepan containing your syrup and butter mixture (before adding eggs). Once warm, remove a small ladleful of the warm syrup and stir it into the bloomed gelatin until the gelatin is completely dissolved and clear.
- Temper and Combine: Whisk the dissolved gelatin mixture into the remaining main filling ingredients (eggs, etc.).
- Final Assurance: The gelatin will ensure the filling sets into a much firmer, sliceable consistency once the pie is chilled, even if the primary binding ingredients were slightly off.
17. Sealing the Crust with Egg Wash

Image Description: Brushing the Crust
A pastry brush applies a light coating of an egg/milk wash onto the bottom of a blind-baked crust. This simple yet critical technique is an excellent defense against a soggy bottom crust, which often contributes to a wobbly slice. The wash creates a waterproof barrier.
When baked, the egg proteins coagulate, forming a seal over the crust’s pores. This barrier prevents the liquid filling from soaking into the dough, which is a common cause of structural failure. A firm base is the essential starting point for a well-set filling. The technique takes only moments but delivers significant structural benefits.
Foolproof Hack 17: Create a Liquid Barrier with an Egg Wash
A damp crust is a weak crust. Applying a sealant to the bottom of your blind-baked shell creates a moisture barrier, ensuring a crisp, sturdy base that supports the heavy filling.
Required Ingredients
- 1 small egg white (or whole egg)
- 1 teaspoon of water or milk
- Your blind-baked pie crust (cooled)
Equipment List
- Small bowl
- Whisk or fork
- Pastry brush
DIY Instruction Steps
- Mix the Wash: In a small bowl, whisk the egg white (or whole egg) with the water or milk until it is lightly frothy and thoroughly combined.
- Apply the Seal: Using a pastry brush, gently and evenly brush the inside bottom and slightly up the sides of your cooled, blind-baked pie crust (refer to Hack 4). Use a thin layer; avoid pooling.
- Quick Bake: Return the brushed crust to the oven (which should still be warm or preheated to $350^{\circ}\text{F}$ or $175^{\circ}\text{C}$) for 3 to 5 minutes, or until the wash looks dry and matte.
- Fill and Bake: Remove the sealed crust and let it cool slightly before pouring in your pecan pie filling. The hardened egg wash provides a shield against the wet ingredients.
18. Double-Baking the Pie (Custard Layer)

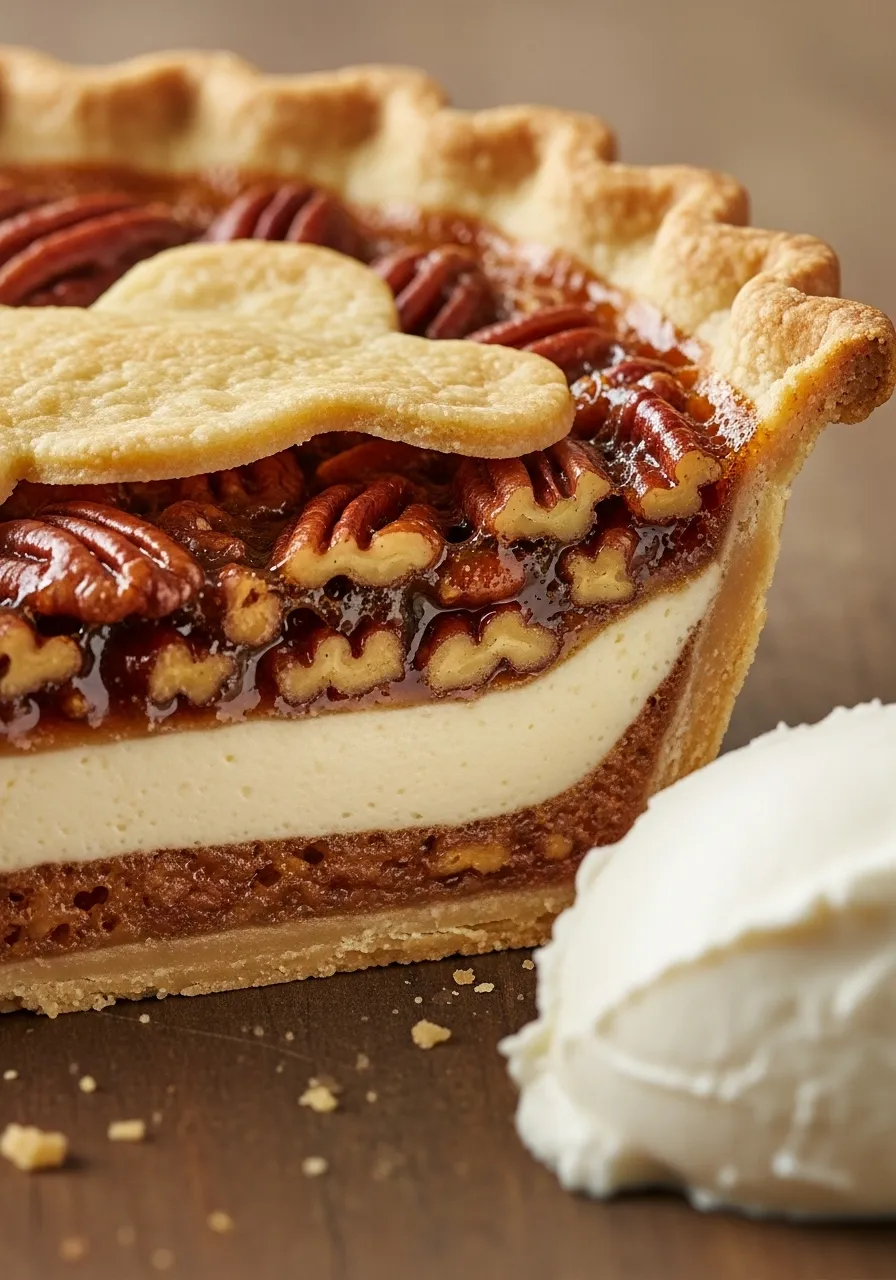
Image Description: Layered Pie Filling
This cross-section of a complex pie shows two distinct layers: a thick, creamy white layer below a dark, caramelized layer of pecans and filling. This layering suggests a “double-bake” technique, often used for cheesecakes or custard-pecan hybrids.
By introducing a separate, highly stable custard layer underneath the main pecan filling, you create a foundation that is guaranteed to set firmly. This structural support prevents the heavier pecan layer from sinking completely and ensures the overall pie remains robust and sliceable. It’s an advanced technique that completely bypasses the runniness problem by dividing the filling into two separate systems.
Foolproof Hack 18: Build a Stable Base Layer
For guaranteed structure, separate your filling into two parts: a rich, simple custard base, and the pecan-syrup layer. Baking the base first provides a guaranteed firm foundation.
Required Ingredients
- Your standard pecan pie filling ingredients
- Cream Cheese Layer: 8 ounces of softened cream cheese, 1/2 cup of granulated sugar, 1/2 teaspoon of vanilla extract, 1 egg (lightly beaten).
Equipment List
- Two large mixing bowls
- Electric mixer (optional, but helpful)
- Spatula
DIY Instruction Steps
- Prepare the Base: In a large bowl, use a mixer to beat the softened cream cheese, granulated sugar, vanilla extract, and egg until the mixture is completely smooth and fluffy.
- Blind Bake and Pre-Fill: Pour the cream cheese mixture into your blind-baked pie crust (Hack 4).
- Initial Bake: Bake the cream cheese base at $350^{\circ}\text{F}$ ($175^{\circ}\text{C}$) for about 20 minutes, or until the edges are set but the center is still wobbly.
- Add Pecan Layer: Prepare your standard pecan pie filling. Carefully pour this pecan-syrup mixture over the partially set cream cheese base.
- Finish Baking: Return the pie to the oven and finish baking as per your original recipe. This layered approach ensures a structurally sound, non-runny bottom half while maintaining the classic pecan top.
19. Prevent Separated Custard

Image Description: Overcooked vs. Properly Cooked Custard
This side-by-side comparison shows two slices of custard. The slice on the right, which is pocked with large air holes, shows signs of overcooking or steaming too quickly. The steam created large bubbles that expanded, leaving a sponge-like and often dry, separated texture. The slice on the left, with its finer, more even texture, is properly cooked.
When custard overcooks, the egg proteins seize up and squeeze out water, leading to weeping or a watery layer underneath the firm part. While this looks like a firmness, it means the structure failed internally. To prevent a runny result, we must ensure the pie does not develop these large internal air pockets and remains smooth.
Foolproof Hack 19: Tap Out Air Bubbles Before Baking
Air bubbles trapped in the filling expand during baking, creating pockets and cracks that can cause the filling to weep or separate, resulting in a runny appearance when sliced.
Required Ingredients
- Your pecan pie filling (poured into the crust)
Equipment List
- None (just your hands!)
DIY Instruction Steps
- Pour the Filling: Carefully pour your prepared pecan pie filling into the unbaked or blind-baked crust.
- The Tap Technique: Once the filling is in, hold the pie dish with both hands and gently tap the entire dish straight down onto the countertop 3 to 5 times.
- Release the Air: You will see any large air bubbles rise to the surface and pop. This process releases trapped air that would otherwise expand and potentially crack or separate the filling structure during baking.
- Smooth Surface: After tapping, the surface of the filling will look smooth and level. Bake immediately. This technique ensures a dense, uniform set without structural flaws.
20. The Acid Boost

Image Description: Acid for Flavor and Structure
A small container of lemon zest and juice is displayed next to a gelatin mold and berries. Acid, in the form of lemon juice or vinegar, is commonly used in pie fillings for flavor, but it also has a scientific benefit: it helps egg proteins set faster and more firmly.
A little acid increases the acidity of the filling, which encourages the egg proteins to coagulate more readily at a lower temperature. This faster setting time means less chance of the filling over-baking around the edges while waiting for the center to finish, preventing that watery separation often found in the middle of a runny pie.
Foolproof Hack 20: Add a Splash of Lemon or Vinegar
Acid helps egg proteins tighten and set more efficiently. A small amount of lemon juice or apple cider vinegar can be the secret ingredient to ensure a firm, clean-setting custard.
Required Ingredients
- 1 teaspoon of fresh lemon juice or apple cider vinegar
Equipment List
- Measuring spoon
- Whisk
DIY Instruction Steps
- Measure the Acid: Measure 1 full teaspoon of fresh lemon juice (for flavor) or apple cider vinegar (for a neutral flavor boost).
- Add to Wet Ingredients: Whisk the acid directly into your combined syrup, butter, and egg mixture. The acid is so minimal you will not taste it in the final product.
- Faster Coagulation: The acid slightly lowers the $pH$ of the filling, which encourages the egg proteins to bond more quickly and strongly in the heat of the oven.
- Bake with Confidence: This simple addition acts as an insurance policy for a firm set, especially when dealing with high-sugar, high-liquid fillings.
21. Utilizing the High Heat of a Baking Stone

Image Description: Pie on a Baking Stone
A tart is shown baking in an oven, resting on a flat, light-colored baking stone or steel. This image highlights a simple but powerful thermal hack. A preheated baking stone retains and transfers a steady, intense heat directly to the bottom of the pie dish. This focused heat is crucial for achieving a crisp, fully set bottom crust.
A cold oven floor or a thin metal rack often fails to provide enough initial heat to the base. This results in a soggy, undercooked bottom that leaks moisture and contributes to a runny filling. By using a baking stone, you guarantee a rapid, consistent heat transfer, which helps the crust seal and the bottom filling set quickly and thoroughly.
Foolproof Hack 21: Bake on a Preheated Baking Stone
To conquer the dreaded soggy bottom, which inevitably leads to a structurally weak, runny pie, use concentrated heat from the bottom up. A baking stone is an excellent heat conductor.
Required Ingredients
- Your unbaked pie in its dish
Equipment List
- Pizza stone or baking steel
- Oven mitts
DIY Instruction Steps
- Preheat the Stone: Place your pizza stone or baking steel on the bottom or middle rack of your oven before turning it on.
- Long Preheat: Preheat the oven and the stone together for at least 45 minutes to one hour at your recipe’s required temperature (usually $350^{\circ}\text{F}$ to $375^{\circ}\text{F}$). The stone must be thoroughly saturated with heat.
- Bake Directly: Once the oven is ready, carefully slide your unbaked pecan pie dish directly onto the hot baking stone. Do this quickly to avoid losing too much oven heat.
- Crisp Bottom Guarantee: The intense heat surge from the stone will instantly begin setting the bottom crust and the layer of filling directly above it, ensuring the final pie is sturdy from the base up.
22. Achieving Richness with Brown Butter

Image Description: Browning Butter on the Stovetop
A copper-bottomed saucepan on a burner holds bubbling, golden-brown liquid stirred with a wooden spoon. This is the process of browning butter, known as beurre noisette. Heating butter past its melting point allows the milk solids to toast, lending a deep, nutty, and complex flavor.
More importantly for structure, this process removes a small amount of water contained in the butter. By using browned butter instead of melted butter, you introduce less moisture to the filling and enhance the flavor without adding liquid bulk. The reduction in water content is a subtle yet effective strategy for a firmer, richer filling.
Foolproof Hack 22: Substitute Melted Butter with Brown Butter
Browning the butter before adding it to the filling removes a small amount of water content while adding a layer of deep, sophisticated nuttiness that complements the pecans perfectly.
Required Ingredients
- Your recipe’s required amount of unsalted butter
Equipment List
- Small, light-colored saucepan (a light color helps you monitor the color change)
- Wooden spoon or whisk
DIY Instruction Steps
- Melt the Butter: Place your measured butter in the small saucepan over medium heat. Let it melt completely.
- The Browning Process: Continue cooking, stirring constantly. The butter will foam up. Under the foam, you will see small brown bits forming on the bottom of the pan. Listen for the sound to quiet down.
- Watch the Color: As soon as the butter turns a deep golden brown and smells distinctly nutty (like hazelnuts), remove the pan immediately from the heat. Pour the butter, including the brown bits, into a cool bowl to stop the cooking.
- Cool and Use: Let the brown butter cool until it is just warm, then mix it into your pecan pie filling as directed. The slightly reduced water content and rich flavor will boost both the structure and the taste.
23. Cooling the Filling Before Baking

Image Description: Pie Going into the Freezer
A finished, unbaked pecan pie, resting on a wire rack, is being placed into a freezer compartment. This shows the technique of chilling the pie before it enters the oven. Cooling the entire filling mixture and crust together for a short period is a valuable step for pie integrity.
When the pie is placed into a hot oven, the cold filling takes longer to warm up. This delay allows the crust and the outer edges of the filling to set before the center begins to boil. This gentle, progressive set helps prevent the syrup from bubbling aggressively, which can cause cracking and separation, leading to a runny appearance.
Foolproof Hack 23: Pre-Chill the Unbaked Pie
Chilling the pie right before it goes into the oven helps the crust structure and prevents the filling from setting too quickly on the edges before the center can catch up.
Required Ingredients
- Your pecan pie (with filling poured into the crust)
Equipment List
- Freezer-safe wire rack
DIY Instruction Steps
- Assemble the Pie: Prepare your pie completely, pouring the filling into the crust and arranging the pecans.
- The Freezer Shock: Place the entire pie dish on a wire rack and put it in the freezer for 20 to 30 minutes. The edges of the crust and the filling will become firm and very cold.
- Transfer to Oven: Preheat your oven during the chilling time. Transfer the cold pie directly from the freezer to the hot oven.
- Even Set: The cold temperature provides a buffer. The crust fats will firm up quickly, and the filling will set more gradually, minimizing the chance of an overcooked edge/runny center contrast.
24. Pre-Cooking the Filling (Stovetop Method)

Image Description: Clear, Set Filling with Fruit
A clear, set filling, likely made with gelatin or a pre-cooked starch, holds pieces of peaches and raspberries in an unbaked pie crust. This technique demonstrates the effectiveness of pre-cooking the filling mixture on the stovetop until it visibly thickens, known as the “cooked custard” method.
By thickening the base before it ever enters the oven, you eliminate guesswork. The filling is already highly viscous when poured. When the pecan pie filling is heated gently until it coats the back of a spoon, you activate the starches and begin the coagulation of the eggs, ensuring a very firm texture that requires only a short bake to finish the crust.
Foolproof Hack 24: Pre-Thicken the Filling on the Stovetop
Instead of relying solely on the oven to set the filling, thicken the syrup, butter, and starch mixture on the stove first. This reduces the risk of a runny center.
Required Ingredients
- Your recipe’s required syrup, butter, and starch (cornstarch or flour)
- Eggs (kept separate)
Equipment List
- Saucepan
- Whisk
- Wooden spoon
DIY Instruction Steps
- Combine Thickener: In a saucepan, whisk the corn syrup, melted butter, sugar, and any required starch (cornstarch or flour).
- Gently Heat: Place the saucepan over medium-low heat. Cook, stirring constantly, until the mixture begins to simmer gently and thickens noticeably, coating the back of a wooden spoon. This activates the starch.
- Cool Slightly: Remove the thickened base from the heat and allow it to cool for 5 to 10 minutes. It must be warm, not hot.
- Add Eggs: Slowly whisk the slightly cooled, thickened base into your beaten eggs (refer to the tempering instructions, Hack 2) and any other flavoring. The pre-thickened base will now set faster and firmer in the oven.
25. Pass the Filling Through a Sieve

Image Description: Straining the Custard
A wire mesh sieve rests over a bowl, catching a thin layer of foam or small lumps as a pale yellow custard mixture is strained. This step is often overlooked but is crucial for achieving a smooth, uniform texture that sets properly. Unstrained filling may contain scrambled egg bits or small lumps of undissolved starch or sugar.
These lumps interrupt the smooth structure of the custard, leading to potential weak spots where the filling could weep or appear unevenly set. Straining the filling ensures a homogenous, smooth liquid, which will coagulate into a firm, silky custard in the oven.
Foolproof Hack 25: Strain the Filling for Uniformity
Undissolved sugar, flour lumps, or tiny pieces of scrambled egg white (even after gentle mixing) can disrupt the custard structure. Straining removes them, ensuring a smooth, uniform base that sets evenly.
Required Ingredients
- Your fully mixed pecan pie filling (before adding pecans)
Equipment List
- Fine-mesh sieve or strainer
- Spatula
- Receiving bowl
DIY Instruction Steps
- Place the Strainer: Set the fine-mesh sieve over a clean, separate bowl.
- Pour Through: Slowly pour the entire mixed pecan pie filling through the sieve into the receiving bowl.
- Push Through: Use a spatula to gently scrape the filling through the mesh. The sieve will catch any undissolved solids or tiny lumps. Discard whatever remains in the strainer.
- Add Nuts and Fill: Add your pecans to the now-strained, perfectly smooth filling, and pour it into your pie crust. The uniform texture guarantees a clean, stable set.
26. The Two-Step Bake (Crust Shield)

Image Description: Pie Edge Shielding
A pie, covered with an aluminum foil ring or shield, is shown resting on a wire rack. This image illustrates a technique aimed at controlling the temperature around the delicate crust edges. The edges of the pie crust and the thin filling near them cook much faster than the dense center. Overcooked edges can lead to a dry, cracked, and weeping filling around the rim.
By using a shield, you slow the cooking of the crust and the outer filling, allowing the center more time to set at the same rate. This ensures the entire filling sets evenly without the edges becoming brittle and potentially releasing moisture.
Foolproof Hack 26: Shield the Edges to Prevent Overcooking
Overcooked edges set too hard and push moisture toward the center, contributing to a runny middle. Shielding the crust ensures even heat distribution across the filling.
Required Ingredients
- Your pecan pie (15-20 minutes into baking)
Equipment List
- Aluminum foil
- Scissors
DIY Instruction Steps
- Initial Bake: Place the uncovered pie into the oven and bake for 15 to 20 minutes. The edges of the crust should be just starting to turn light gold.
- Prepare the Shield: Take a piece of aluminum foil and fold it into a long strip. Form a ring that is large enough to cover only the outer crimped edge of the pie crust.
- Apply the Shield: Gently pull the pie out of the oven. Carefully fit the foil ring over the crust, shielding it completely.
- Finish Baking: Return the shielded pie to the oven to finish cooking. The shield deflects direct heat from the edges, allowing the center to reach the proper set temperature without burning the crust.
27. Embrace the Power of a Crumb Crust

Image Description: Pie with Clear Runniness
A sliced pecan pie is shown, and beneath the central slice, a pool of dark, runny syrup has collected. This is the result we are actively trying to avoid. The liquid suggests a failure in the setting process or premature slicing.
However, notice the short, almost crumbly texture of the crust visible in the cut area. A crumb crust, made from crushed cookies or nuts and butter, is an excellent alternative to a traditional pastry crust. Crumb crusts, when pressed and baked, are much denser and less porous than pastry, creating a nearly watertight base that resists a soggy bottom far better than traditional dough.
Foolproof Hack 27: Use a Crumb Crust as a Moisture Barrier
If you frequently battle soggy bottoms, switch to a simple crumb crust. It is denser and butter-saturated, creating a natural, highly effective barrier against the liquid filling.
Required Ingredients
- 1 1/2 cups of graham cracker crumbs or vanilla wafer crumbs
- 1/4 cup of granulated sugar
- 6 tablespoons of unsalted butter (melted)
Equipment List
- 9-inch pie dish
- Mixing bowl
- Rubber spatula or measuring cup
DIY Instruction Steps
- Mix the Crumb: In a bowl, combine the crumbs and sugar. Pour in the melted butter and mix until all the crumbs are evenly moistened.
- Press and Shape: Press the crumb mixture firmly and evenly into the bottom and up the sides of your pie dish. Use the bottom of a measuring cup to compact the base tightly.
- Pre-Bake the Crust: Bake the crust at $350^{\circ}\text{F}$ ($175^{\circ}\text{C}$) for 8 to 10 minutes until lightly golden.
- Fill and Finish: Cool the crust completely before pouring in the filling. The butter in the crumb crust will have baked into a solid, impenetrable layer, ensuring zero moisture seepage.
28. Reduce the Syrup Volume

Image Description: Thick, Set Pie Filling
This image shows a very firm, dense slice of pie, indicating a minimal liquid-to-solid ratio. The filling is so set it stands tall and has a clean, smooth cut surface. Achieving this level of firmness often means reducing the overall volume of the liquid sweetener required in the recipe.
Corn syrup is necessary for flavor and chewiness, but too much is the primary reason for runniness. By carefully decreasing the amount of syrup and compensating with a drier sweetener like granulated or brown sugar (Hack 7), you reduce the inherent moisture, guaranteeing a denser, less runny result.
Foolproof Hack 28: Volumetric Syrup Reduction
Many recipes call for slightly too much corn syrup. By reducing the syrup by a small amount, you decrease the total water content of the filling, resulting in a naturally thicker texture.
Required Ingredients
- Your recipe’s required amount of corn syrup
- Granulated sugar (optional, for compensation)
Equipment List
- Liquid measuring cup
DIY Instruction Steps
- Measure the Syrup: Carefully measure out the amount of corn syrup required by your recipe.
- Reduce the Volume: Remove 2 to 4 tablespoons (1/8 to 1/4 cup) from the total measured amount. You will not replace this with liquid.
- Optional Sugar Boost: If you are concerned about losing sweetness, you may add 1 to 2 tablespoons of extra granulated sugar to compensate for the lost volume of syrup.
- Final Mix: Use this slightly reduced volume of syrup in your filling mixture. The lower liquid content forces the eggs and starches to create a tighter bond, minimizing the chance of weeping or runniness after cooling.
29. Use a Water Trap (Foil Tent)

Image Description: Steamy Pie Cooling
A steamy pie, fresh from the oven, is covered with a foil ring and sitting on a cooling rack. The steam indicates moisture escaping after baking. Steam is often trapped around the crust edges during baking. When the pie is removed, this hot steam condenses back into water on the surface and around the crust.
This condensation creates a ring of moisture around the pie, leading to a localized wetness that can seep into the crust and filling edges. Creating a small “tent” or using a cooling technique that allows steam to escape immediately is vital to prevent this self-sogging effect.
Foolproof Hack 29: Use a Foil Tent for Steam Management
Condensation during the first stage of cooling can make the crust edges soggy. Creating a loose foil tent traps and redirects steam away from the pie’s surface.
Required Ingredients
- Your pecan pie (immediately after removal from the oven)
Equipment List
- Large sheet of aluminum foil
DIY Instruction Steps
- Remove and Place: Remove the pie from the oven and place it immediately on a wire cooling rack.
- Create the Tent: Take a large piece of aluminum foil and crimp it loosely over the entire pie, making sure the top of the foil does not touch the filling. Leave the sides slightly open, allowing an air gap between the foil and the pie dish rim.
- Steam Escape: The foil acts like a roof, catching the escaping steam and redirecting it to drip away from the pie’s surface. This prevents a layer of moisture from forming on the crust and filling.
- Cool Slowly: Remove the foil tent after 30 minutes and allow the pie to continue cooling uncovered at room temperature before refrigerating.
30. Optimize the Pie Pan Material

Image Description: Pie in an Aluminum Dish
A pie, likely straight from the oven, is shown in a disposable aluminum foil pan, resting on a cooling rack. The pan material significantly impacts how the crust bakes and sets. Light-colored metal, like aluminum or shiny stainless steel, reflects heat. Glass and dark metal, on the other hand, absorb heat more readily.
A dark metal or glass pie dish promotes a browner, crispier crust bottom because it absorbs more oven heat. Using the right material ensures the bottom crust sets quickly and seals against the wet filling, preventing runniness from the bottom up.
Foolproof Hack 30: Use a Dark Metal or Glass Pie Dish
The type of pie dish you use directly affects the crust. Dark metal or glass absorbs more heat than shiny aluminum, ensuring the base of the pie bakes faster and firmer.
Required Ingredients
- Your pie crust and filling
Equipment List
- Dark metal or glass pie dish (9-inch or 10-inch)
DIY Instruction Steps
- Select the Dish: Choose a non-shiny, dark metal or a glass pie dish. Avoid using thin, disposable aluminum pans or shiny, light-colored metal dishes, as these reflect heat.
- Assemble as Usual: Fit your pie crust into the dark or glass dish and fill it with the pecan mixture.
- Conduction Benefit: Place the pie in the oven. The glass or dark metal material will absorb the oven’s radiant heat much more efficiently than a shiny pan, driving heat directly into the bottom crust.
- Superior Crispness: This simple material swap promotes faster, more thorough cooking of the bottom crust, providing a much stronger, non-soggy foundation for your filling.
31. Using Glucose Syrup for Texture and Stability

Image Description: Different Syrup Options
This image showcases various syrups, highlighting a small bowl labeled “Glucose Syrup” alongside dark corn syrup and a larger measuring cup of liquid sweetener. Glucose syrup, sometimes called confectioner’s glucose, is a less sweet and thicker alternative to corn syrup. Its unique molecular structure helps prevent sugar crystallization and, more importantly for pie, contributes to a more stable and less runny texture.
While corn syrup provides flavor and gloss, glucose syrup offers superior body and chewiness without adding excessive sweetness. Substituting a portion of your corn syrup with glucose syrup creates a filling that sets more firmly and holds its structure better, reducing the chance of a watery or overly soft center.
Foolproof Hack 31: Incorporate Glucose Syrup for Enhanced Body
Glucose syrup is a baker’s secret weapon. It prevents crystallization and adds significant body to your filling, making it less likely to be runny without over-sweetening.
Required Ingredients
- 1/4 cup of light corn syrup (reduce this amount from your recipe)
- 1/4 cup of liquid glucose syrup
Equipment List
- Liquid measuring cups
- Sturdy whisk
DIY Instruction Steps
- Adjust Syrup: Measure out your recipe’s required corn syrup. Reduce this amount by 1/4 cup.
- Add Glucose: Replace the removed corn syrup with 1/4 cup of liquid glucose syrup. Glucose syrup is very thick, so you might need to warm it slightly or use a spatula to get it out of the measuring cup.
- Combine Well: Whisk the glucose syrup into your butter and remaining corn syrup. Ensure it’s fully combined and smooth before adding eggs.
- Superior Texture: The unique properties of glucose syrup will result in a firmer, chewier, and more stable filling that is much less prone to weeping or being runny.
32. Oven Rack Placement Matters

Image Description: Pie Baking in the Oven’s Center
A pie with a lattice top is shown baking on the middle rack of an oven, surrounded by the warm, glowing light. This image emphasizes the importance of oven rack placement. Where you position your pie in the oven significantly affects how it bakes, especially concerning crust doneness and filling set.
The middle rack typically offers the most even heat distribution, allowing the top, bottom, and center of the pie to cook at a similar rate. Placing it too high can overcook the top and make the bottom soggy, while too low can burn the bottom crust before the center sets. Proper placement promotes a uniform bake, preventing one area from cooking faster and pushing moisture elsewhere.
Foolproof Hack 32: Place the Pie on the Middle Oven Rack
The middle rack provides the most even heat distribution in most ovens. This ensures the crust bakes thoroughly from bottom to top, and the filling sets uniformly without hot or cold spots.
Required Ingredients
- Your unbaked pecan pie
Equipment List
- Oven mitts
DIY Instruction Steps
- Preheat with Rack: Always preheat your oven with the main oven rack positioned in the center. This allows the rack itself to heat up evenly.
- Center Placement: Once your oven reaches the target temperature, carefully place your unbaked pecan pie directly onto the center of the middle rack.
- Even Baking: The balanced heat from the top and bottom elements will ensure your pie cooks consistently. This minimizes the risk of a soggy bottom, an overcooked top, or a runny center. Avoid opening the oven door unnecessarily, as this causes temperature fluctuations.
33. The Power of a Lower Baking Temperature

Image Description: Pie with a Cracked Top
A pie with a noticeably cracked top crust is shown, and a slice has been removed, revealing a slightly unset or bubbling filling beneath. This visual, while featuring a fruit pie, points to a common issue in custard baking: too high a temperature. High heat can cause the exterior of the pie to set and brown rapidly while the interior is still raw and liquid.
The intense steam created by high heat can also cause cracks on the surface as the filling expands too quickly. These cracks allow moisture to escape or seep, potentially leading to a runny result. Baking at a lower, more consistent temperature promotes a gentle, even set throughout the entire pie, preventing these structural failures.
Foolproof Hack 33: Start Hot, Finish Cool
Custards benefit from a gentle, extended bake. Begin your pie at a higher temperature to set the crust, then significantly reduce the heat for a slow, even set of the filling.
Required Ingredients
- Your unbaked pecan pie
Equipment List
- Oven timer
DIY Instruction Steps
- Initial Hot Bake: Preheat your oven to a higher temperature, typically $400^{\circ}\text{F}$ ($200^{\circ}\text{C}$). Place your pie in the hot oven and bake for the first 10 to 15 minutes. This initial burst of heat quickly sets the crust and begins to firm up the outer edges of the filling.
- Reduce Temperature: Without opening the oven door if possible, immediately reduce the oven temperature to $325^{\circ}\text{F}$ ($160^{\circ}\text{C}$).
- Slow and Steady: Continue baking the pie at this lower temperature for the remainder of the baking time, usually 45 to 60 minutes more, or until it passes the jiggle test (Hack 9) or thermometer test (Hack 13). This two-stage approach ensures a well-baked crust and a gently set, non-runny filling.
34. Avoid Overfilling the Pie Crust

Image Description: Pie with Overflowing Filling
A pie with a noticeably bubbling, possibly overflowing filling peeking out from beneath a top crust. The pie is visibly full to the brim. Overfilling a pie crust is a common mistake that can lead to structural problems and runniness.
When a pie dish is overfilled, the sheer volume of liquid puts immense pressure on the crust during baking. It can also prevent the filling from setting uniformly, as the center has too much mass to cook through properly before the edges dry out. The extra volume takes longer to set, increasing the chance of an undercooked, runny middle that spills over the sides during baking.
Foolproof Hack 34: Mind the Fill Line
Overfilling a pie means too much liquid, which takes longer to set and increases the chance of spillage or a runny center. Always leave adequate space.
Required Ingredients
- Your pecan pie filling
- Your pie crust
Equipment List
- Pie dish
DIY Instruction Steps
- Gauge the Crust: Before pouring, visually assess your pie crust. Note the height of the crimped edge.
- Pour Carefully: Slowly pour the pecan pie filling into your unbaked or blind-baked pie crust.
- Leave Headroom: Stop pouring when the filling reaches about 1/4 to 1/2 inch below the top edge of the crimped crust. This provides enough room for the filling to expand slightly during baking without overflowing.
- Even Set: Adhering to this fill line ensures that the total volume of filling can bake and set evenly within the given time, avoiding a deep, unset center.
35. The Importance of Resting the Dough

Image Description: Unbaked Pie and Dough Ball
An unbaked pie with its crimped crust is shown next to a round ball of unrolled pie dough. This scene emphasizes the initial steps of pie making and the significance of dough preparation. A well-rested pie dough is crucial not just for flakiness, but also for preventing shrinkage.
When pie dough is rolled out and then immediately filled and baked, the gluten in the flour, still elastic from mixing, can contract rapidly in the oven. This shrinkage pulls the crust away from the pie dish, potentially creating gaps where the filling can leak out. Resting the dough allows the gluten to relax, maintaining the crust’s shape and integrity as a solid container for the filling.
Foolproof Hack 35: Chill Your Pie Dough (Twice!)
Rested dough is happy dough! Chilling the dough both before rolling and again after fitting it into the pie dish prevents shrinkage, ensuring your crust forms a strong, leak-proof container for the filling.
Required Ingredients
- Your pie dough (homemade or store-bought)
Equipment List
- Rolling pin
- Pie dish
- Plastic wrap
DIY Instruction Steps
- First Chill (Before Rolling): After preparing your pie dough, flatten it into a disk, wrap it tightly in plastic wrap, and refrigerate it for at least 30 minutes, or up to 2 days. This allows the gluten to relax.
- Roll and Fit: Roll out your chilled dough and carefully fit it into your pie dish. Crimp the edges.
- Second Chill (After Fitting): Once the dough is in the dish and crimped, place the entire pie dish back into the refrigerator for another 20 to 30 minutes. This second chill firms up the butter in the crust and relaxes the gluten further.
- Stable Crust: A thoroughly chilled and rested crust will maintain its shape beautifully during baking, preventing shrinkage that could lead to cracks or gaps where the runny filling might escape.
36. Use a Lower Moisture Sweetener

Image Description: Measuring Syrups
A large measuring cup filled with a dark liquid sweetener, alongside small bowls of dark corn syrup and glucose syrup, illustrates the variety of sweeteners available. While corn syrup is traditional, it contains a significant amount of water. Different sweeteners have different moisture contents and viscosities.
Substituting some of the high-moisture corn syrup with a lower-moisture alternative, such as golden syrup (which is slightly thicker) or even a portion of maple syrup (which, when reduced, has less water), can significantly impact the final texture. This helps create a denser, less runny filling that sets more readily.
Foolproof Hack 36: Optimize Your Sweetener Blend
Different syrups have varying water content and viscosity. Blending or substituting a portion of your corn syrup with a thicker, lower-moisture sweetener can yield a much firmer filling.
Required Ingredients
- Your recipe’s required amount of light or dark corn syrup
- 1/4 to 1/2 cup of a thicker sweetener, such as golden syrup, or reduced maple syrup (Hack 14).
Equipment List
- Liquid measuring cups
- Whisk
DIY Instruction Steps
- Measure and Adjust: Measure out your recipe’s corn syrup, but reduce the total volume by 1/4 to 1/2 cup.
- Introduce Thicker Syrup: Replace the removed corn syrup with an equal amount of your chosen thicker sweetener. Golden syrup is an excellent option for its viscosity and rich flavor.
- Mix Thoroughly: Combine this adjusted syrup blend with your butter and other liquid ingredients. Whisk until a smooth, consistent mixture forms.
- Denser Filling: The lower overall water content and increased viscosity from the alternative sweetener will result in a pecan pie filling that sets more robustly and slices cleanly, without any runniness.
Key Takeaways
- Binders are Essential: Reinforce your filling by adding extra egg yolks or a small amount of cornstarch/flour slurry to boost the setting power.
- Heat Control is Key: Use the low-and-slow baking method and rely on a thermometer (target $195^{\circ}\text{F}$ to $200^{\circ}\text{F}$) rather than guesswork to ensure the custard sets without separating.
- Moisture is the Enemy: Reduce excess water by using evaporated milk, browning your butter, or reducing the corn syrup slightly on the stovetop.
- Crust Integrity: Blind baking and applying an egg wash seal (Hack 17) prevents a soggy bottom, providing a sturdy foundation for the heavy filling.
- Patience in Cooling: Never slice a warm pie. Complete, undisturbed cooling, preferably overnight in the refrigerator, is non-negotiable for a firm, clean slice.
Creating a sensational pecan pie requires attention to detail, but it does not need to be complicated. We have walked through 36 specific, actionable steps, proving that a runny filling is simply a problem that can be corrected with technique and a few smart ingredient adjustments.
You now possess a full toolkit, from tempering eggs and utilizing baking stones to mastering the subtle art of the jiggle test. Each hack is designed to guarantee a denser, cleaner, and ultimately more impressive pie.
Embrace these strategies in your kitchen. Say goodbye to guesswork and confidently present a dessert that is structurally sound and tastes absolutely remarkable. Your next pecan pie will undoubtedly be the star of the show.