Hosting a holiday gathering should be as joyful as the season itself. Instead of spending the entire night in the kitchen, you can serve a variety of small bites that allow you to mingle with your guests. These fifty recipes focus on simple assembly and big flavors that capture the holiday spirit.
Christmas Finger Foods
Finger foods are the best way to cater to different tastes and dietary needs. This collection ranges from savory meats and fresh vegetables to decadent chocolate treats. You will find that most of these items require very little equipment and can be prepared ahead of time to reduce your stress.
Your guests will love the vibrant colors and festive presentation of these snacks. Each recipe is designed to be eaten in one or two bites without the need for heavy silverware. Let this list be your guide to creating a memorable and delicious holiday open house.
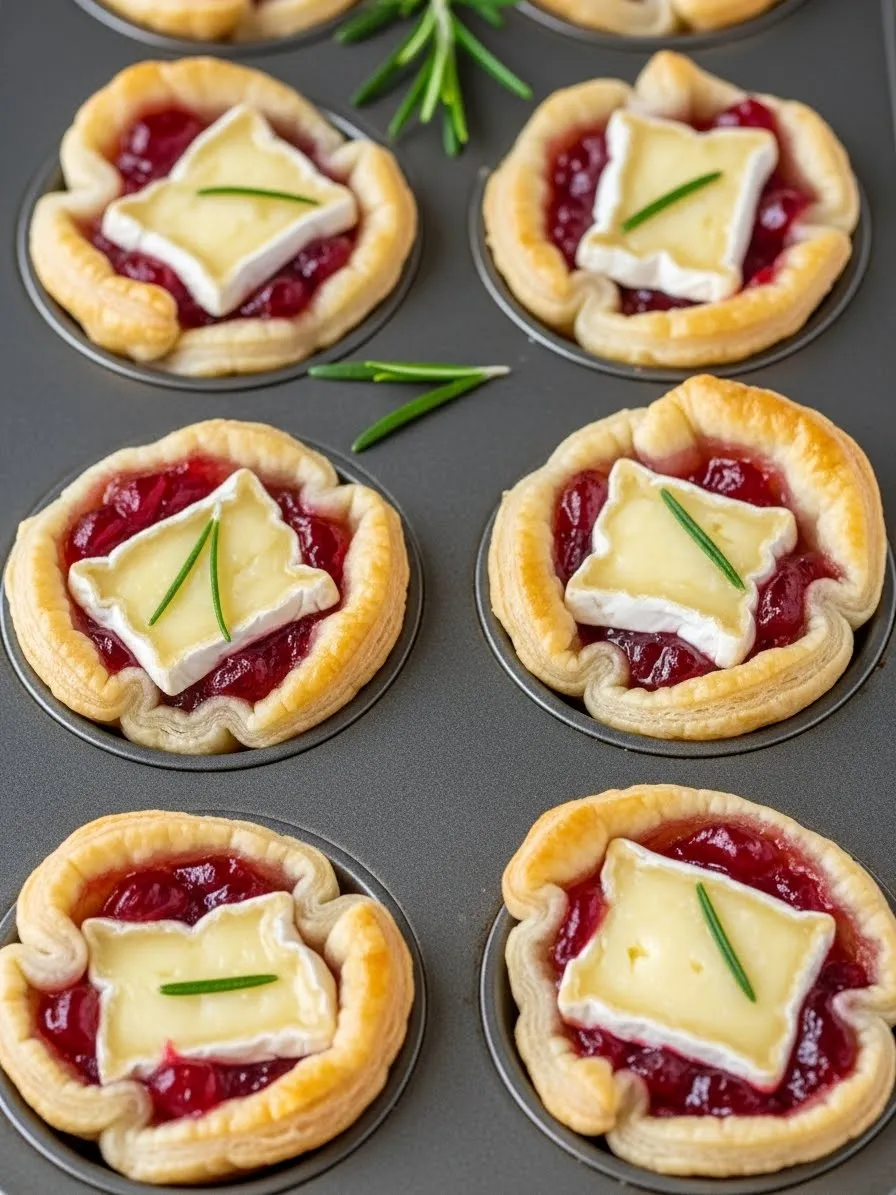
These colorful appetizers bring a festive touch to any holiday table. The golden puff pastry holds a rich blend of melted cheese and sweet fruit sauce. Every bite offers a light crunch followed by a smooth, savory finish.
Fresh rosemary sprigs add an aromatic scent that fills the room as they bake. These treats look elegant but require very little effort to assemble. Guests will enjoy the vibrant red and white colors that match your seasonal decor beautifully.
The combination of tart berries and creamy brie creates a balanced flavor profile. Serving these warm ensures the cheese stays gooey and delicious. They are easy to grab and eat while mingling with friends and family.
Required Ingredients
1 sheet of frozen puff pastry (thawed)
8 ounces of Brie cheese
1/2 cup of whole berry cranberry sauce
Fresh rosemary sprigs
Cooking spray or a little butter
All-purpose flour for dusting
Equipment List
Mini muffin tin (24 count)
Sharp knife
Cutting board
Small spoon
Rolling pin
DIY Instructions
Preheat your oven to 375 degrees Fahrenheit so it is hot when the food goes in.
Spray the holes of your mini muffin tin with cooking spray to prevent sticking.
Dust your clean counter with a little flour and roll out the thawed puff pastry sheet.
Cut the pastry into 24 even squares using your sharp knife.
Press one pastry square into each muffin tin hole to form a small cup.
Slice the Brie cheese into small chunks about one inch in size.
Place one piece of cheese inside each pastry cup.
Add a small spoonful of cranberry sauce right on top of the cheese.
Put one small leaf of fresh rosemary on the very top for flavor and decoration.
Bake the tray in the oven for about 12 to 15 minutes until the pastry turns golden brown.
Let them cool for five minutes before removing them from the tin to serve.
2. Pomegranate Glazed Meatballs
Christmas Finger Foods
These savory bites bring a splash of holiday color to your appetizer spread. A sticky red glaze coats each meatball, offering a tangy sweetness that pairs well with the rich meat. Tiny pomegranate seeds scattered on top provide a fresh pop of juice and a crunch that surprises the palate.
Using toothpicks makes these very easy for guests to enjoy while they walk around and chat. The deep red sauce looks beautiful against a wooden serving board, capturing the spirit of the season. You can prepare these in advance and keep them warm in a slow cooker throughout your party.
The aroma of simmering fruit and spices will draw everyone to the kitchen. This dish feels sophisticated because of the unique fruit garnish. It is a simple way to elevate a classic party staple into something special for Christmas.
Required Ingredients
1 pound pre-cooked frozen meatballs
1 cup pomegranate juice
2 tablespoons honey
1 tablespoon soy sauce
1/2 cup fresh pomegranate seeds
Fresh rosemary for garnish
Equipment List
Large saucepan
Wooden spoon
Serving platter
Toothpicks
DIY Instructions
Place the pomegranate juice, honey, and soy sauce into your large saucepan.
Turn the heat to medium and stir the mixture until it starts to bubble.
Simmer the liquid for about ten minutes until it thickens into a syrup.
Add your meatballs to the pan and toss them gently to coat every surface.
Cook them for another five to seven minutes so the meat heats through completely.
Arrange the glazed meatballs on your favorite serving platter.
Sprinkle the fresh pomegranate seeds over the top while the glaze is still sticky.
Poke a toothpick into the center of each meatball for easy grabbing.
Add a few rosemary leaves around the plate to finish the look.
3. Fig and Ricotta Crostini
Christmas Finger Foods
This elegant starter features a delightful mix of textures and sweet flavors. Toasted bread slices serve as a sturdy base for a thick layer of whipped white cheese. A dollop of dark fig jam sits right in the center, dripping slowly down the sides.
The contrast between the crunchy crust and the soft topping makes every bite interesting. Small green herbs on top add a hint of earthiness that cuts through the sweetness of the honey. These are light enough to keep guests hungry for the main meal while feeling indulgent.
You can toast the bread ahead of time to save minutes during your busy hosting schedule. Setting these out on a dark platter makes the bright white cheese stand out. They are a wonderful choice for those who love a blend of salty and sugary snacks.
Required Ingredients
1 French baguette
1 cup ricotta cheese
1/2 cup fig jam
2 tablespoons honey
Fresh thyme or mint leaves
Olive oil
Equipment List
Baking sheet
Pastry brush
Bread knife
Small mixing bowl
DIY Instructions
Turn your oven on to 400 degrees so it can get hot.
Slice the baguette into rounds that are about half an inch thick.
Lay the bread pieces on a flat baking sheet in a single layer.
Brush a tiny bit of olive oil on both sides of each bread slice.
Bake them for five to eight minutes until they feel crispy and look golden.
Whisk the ricotta cheese in a bowl until it looks smooth and fluffy.
Spread a generous spoonful of cheese onto each cooled piece of toast.
Place a small teaspoon of fig jam on top of the ricotta layer.
Drizzle a little honey over the entire tray for extra shine.
Scatter the fresh herb leaves on top to add a nice scent and color.
4. Spinach Artichoke Phyllo Cups
Christmas Finger Foods
These crispy pastry shells are filled with a warm and creamy vegetable dip. The ruffled edges of the phyllo dough add a fancy look to a very simple recipe. Inside, the green spinach and white sauce create a classic holiday color palette that looks great on a tray.
A sprinkle of red pepper flakes adds a tiny bit of heat for those who like a little kick. The cups stay crunchy even after sitting out for a while, making them a reliable party choice. They are the perfect size for a single bite, so guests do not have to worry about crumbs or mess.
Fresh parsley on top makes them look professional and garden fresh. You can find the pre-made shells in the freezer section to save yourself a lot of prep time. This appetizer is a crowd favorite that usually disappears within minutes of being served.
Required Ingredients
2 packages of pre-baked phyllo shells (30 cups total)
1 box of frozen chopped spinach (thawed and squeezed dry)
1 can of artichoke hearts (chopped small)
4 ounces of cream cheese
1/4 cup sour cream
1/2 cup shredded parmesan cheese
Salt, pepper, and red pepper flakes
Equipment List
Large mixing bowl
Spoon or spatula
Baking sheet
DIY Instructions
Preheat your oven to 350 degrees to prepare for baking.
Make sure you squeeze all the water out of your thawed spinach using a clean towel.
Mix the cream cheese and sour cream in a bowl until they are well combined.
Stir in the dry spinach, chopped artichokes, and half of the parmesan cheese.
Season the mix with a pinch of salt and pepper.
Arrange the empty phyllo shells on a flat baking sheet.
Fill each shell with a spoonful of the spinach mixture until it reaches the top.
Sprinkle the remaining parmesan and a few red pepper flakes over each cup.
Bake the tray for ten minutes until the cheese inside is melted and bubbly.
Garnish with a small leaf of parsley before you hand them out to guests.
5. Prosciutto Wrapped Asparagus
Christmas Finger Foods
This salty and savory snack is a sophisticated addition to any Christmas party. Thin ribbons of cured ham wrap tightly around bundles of bright green vegetable spears. The heat from the oven makes the ham crispy while keeping the vegetables tender and flavorful.
Large flakes of parmesan cheese on top add a sharp finish to the dish. This appetizer is naturally low in carbohydrates, making it a thoughtful option for guests with dietary preferences. The long shape makes them easy to pick up and eat without needing any silverware.
You can arrange them in a circular pattern on a plate to look like a festive wreath. The deep pink of the meat against the green stalks provides a natural holiday aesthetic. These taste just as good at room temperature as they do fresh out of the oven.
Required Ingredients
1 pound of fresh asparagus spears
1/2 pound of thinly sliced prosciutto
2 tablespoons olive oil
1/4 cup shaved parmesan cheese
Black pepper
Equipment List
Large baking sheet
Sharp knife
Serving plate
DIY Instructions
Set your oven temperature to 400 degrees.
Wash the asparagus and trim off the tough, woody ends with a knife.
Dry the spears completely so they roast instead of steaming.
Cut the long slices of prosciutto in half lengthwise to create thin strips.
Take two or three asparagus spears and wrap a strip of ham around the middle.
Lay the bundles on your baking sheet so they do not touch each other.
Drizzle a little olive oil and sprinkle black pepper over the tray.
Bake for about twelve to fifteen minutes until the ham looks dark and crispy.
Remove them from the oven and immediately top with the shaved parmesan.
Transfer the bundles to a platter for your guests to enjoy.
6. Bacon Wrapped Dates with Almonds
Christmas Finger Foods
These small bites offer a complex mix of sweet, salty, and crunchy flavors. A whole almond is tucked inside a soft date, which is then wrapped in a smoky strip of meat. As they bake, the bacon fat soaks into the fruit, creating a rich and savory treat.
A toothpick holds everything together, making these very easy for people to grab. The dark brown colors look rustic and cozy, especially when served on a wooden board. They are very filling, so a small batch goes a long way during a party.
A light dusting of dried herbs or black pepper adds a final touch of flavor. These are often the first things to disappear because the scent of cooking bacon is so inviting. You can assemble these a day early and just pop them in the oven when guests arrive.
Required Ingredients
20 whole Medjool dates
20 whole smoked almonds
10 slices of bacon
Toothpicks
Fresh rosemary for decoration
Equipment List
Baking sheet with a wire rack
Sharp knife
Paper towels
DIY Instructions
Heat your oven to 400 degrees.
Cut a small slit down the side of each date and remove the pit if it is still inside.
Press one almond into the center of the date where the pit used to be.
Cut your bacon slices in half so you have twenty short strips.
Wrap one piece of bacon around each date and secure it with a toothpick.
Place a wire rack on top of your baking sheet to help the bacon get crispy all over.
Line the dates up on the rack with a little space between each one.
Bake for fifteen to twenty minutes, turning them once halfway through.
Take them out when the bacon looks brown and crispy.
Let them sit on a paper towel for a minute to remove extra oil before serving.
7. Caprese Tortellini Skewers
Christmas Finger Foods
This fresh appetizer puts a fun twist on a classic Italian salad. Each skewer holds a soft cheese tortellini, a juicy tomato, and a creamy mozzarella ball. A large basil leaf provides a pop of green and a wonderful scent that reminds everyone of summer.
A thick balsamic drizzle adds a dark, tangy finish that looks beautiful against the white cheese. These are served cold, so you can make them hours before the party starts. They add a refreshing break from the heavier, warm snacks usually found at holiday events.
The yellow pasta and red tomatoes create a bright and cheerful look on the table. Using knotted bamboo skewers adds a touch of class to the presentation. Guests will appreciate having a fresh and healthy option to choose from among the fried foods.
Required Ingredients
1 package of cheese tortellini
1 pint of cherry tomatoes
1 container of small fresh mozzarella balls
1 bunch of fresh basil leaves
Balsamic glaze (the thick kind)
1 tablespoon olive oil
Equipment List
Medium pot
Small skewers or long toothpicks
Colander
DIY Instructions
Boil a pot of water and cook the tortellini according to the package directions.
Drain the pasta and rinse it with cold water so it stops cooking immediately.
Toss the cold pasta with a little olive oil so the pieces do not stick together.
Wash your tomatoes and basil leaves and pat them dry.
Slide a cherry tomato onto the skewer first.
Add a folded basil leaf next for a nice green layer.
Slide on one mozzarella ball followed by one cooked tortellini.
Stand the skewers up on a tray or lay them flat in a neat row.
Just before the party, drizzle the thick balsamic glaze over the top of everything.
Keep them in the fridge until you are ready for your guests to eat.
8. Smoked Salmon Crostini
Christmas Finger Foods
This sophisticated snack brings a touch of luxury to your holiday gathering. A thin slice of toasted rye bread holds a cool layer of herb cream cheese. Bright pink ribbons of smoked salmon sit on top, garnished with salty green capers and fresh dill.
The contrast of the dark bread and the vibrant fish makes these very eye catching. Each bite is creamy, salty, and full of fresh herb flavor. These are excellent for a brunch party or a late evening cocktail hour.
Small lemon wedges on the side allow guests to add a bit of acidity if they wish. These appetizers feel very upscale but take only minutes to put together. They are best served chilled to keep the fish and cream cheese fresh.
Required Ingredients
1 loaf of cocktail rye bread or a baguette
8 ounces of smoked salmon (sliced thin)
1 container of whipped cream cheese
2 tablespoons fresh chives (chopped)
1 jar of capers
Fresh dill sprigs
1 lemon
Equipment List
Small bowl
Spreader or butter knife
Serving tray
DIY Instructions
Toast the bread slices in the oven or a toaster until they are slightly firm.
Let the bread cool down so the cheese does not melt when you spread it.
Mix the chopped chives into the cream cheese in a small bowl.
Spread a thick layer of the herb cheese onto each piece of toast.
Tear the smoked salmon into small strips that fit the size of the bread.
Fold a strip of salmon and place it gently on top of the cream cheese.
Add three or four small capers to each bite for a salty kick.
Place a small piece of fresh dill on the very top for a pretty finish.
Cut the lemon into very thin slices or wedges and scatter them around the tray.
Arrange the finished bites on a platter and serve them right away.
9. Sausage Stuffed Mushrooms
Christmas Finger Foods
These hearty bites are filled with a savory mixture of meat, herbs, and melted cheese. The earthy flavor of the mushroom caps provides the best base for the rich stuffing. A golden layer of cheddar cheese on top makes them look warm and inviting.
The filling is moist and packed with spices that smell amazing while they cook. These are great for cold winter nights because they are very satisfying and warm. You can use different types of sausage to make them as mild or spicy as you like.
Small bits of green herbs sprinkled on top add a fresh look to the dark mushrooms. These are easy to eat in one or two bites, making them a mess free choice for guests. They hold their heat well, so they stay delicious for a long time on the buffet.
Required Ingredients
20 large white or cremini mushrooms
1/2 pound of ground breakfast sausage
1/4 cup breadcrumbs
1/4 cup cream cheese
1/2 cup shredded cheddar cheese
1 clove of garlic (minced)
Fresh parsley
Equipment List
Large skillet
Baking sheet
Spoon
Paper towels
DIY Instructions
Preheat your oven to 375 degrees.
Clean the mushrooms with a damp paper towel and pull out the stems.
Chop the stems into very small pieces and set them aside.
Cook the sausage in a skillet over medium heat until it is no longer pink.
Add the chopped mushroom stems and garlic to the skillet and cook for three minutes.
Drain any extra grease from the pan using a spoon or a paper towel.
Stir in the cream cheese and breadcrumbs until the mixture is thick and sticky.
Place the empty mushroom caps onto a baking sheet with the open side facing up.
Scoop a large spoonful of the sausage mix into each mushroom cap.
Top each one with a pinch of shredded cheddar cheese.
Bake for fifteen to twenty minutes until the mushrooms are soft and the cheese is melted.
10. Lemon Garlic Butter Shrimp
Christmas Finger Foods
These bright and zesty shrimp offer a lighter alternative to heavier holiday snacks. Each piece is coated in a shimmering sauce made of melted butter, fresh garlic, and citrus juice. Tiny bits of green parsley add a pop of color that makes the pink shrimp look even better.
The lemon slices tucked between the shrimp provide a fresh scent and a beautiful garnish. These are very quick to cook, so you can make them right before your guests arrive. Serving them with the tails on gives people a natural handle to hold while they eat.
The garlic aroma will surely draw people toward the serving dish. This appetizer feels fancy but uses very simple ingredients you likely already have. They are best served warm with a little extra sauce drizzled over the top.
Required Ingredients
1 pound large shrimp (peeled and deveined, tails left on)
3 tablespoons butter
3 cloves of garlic (minced)
1 lemon (sliced into rounds)
1 tablespoon lemon juice
Fresh parsley (chopped)
Salt and black pepper
Equipment List
Large frying pan
Tongs
Serving bowl
DIY Instructions
Wash the shrimp and pat them very dry with a paper towel.
Melt the butter in a large frying pan over medium heat.
Add the minced garlic to the butter and cook for one minute until it smells good.
Place the shrimp in the pan in a single layer so they all touch the heat.
Season them with a little salt and black pepper while they cook.
Cook the shrimp for two minutes on one side until they start to turn pink.
Flip them over using your tongs and cook for another two minutes.
Pour the lemon juice into the pan and toss the shrimp to coat them in the sauce.
Add the lemon slices to the pan for the last thirty seconds to warm them up.
Move the shrimp to a bowl and pour the garlic butter from the pan over them.
Sprinkle fresh parsley on top before serving.
11. Mini Beef Wellingtons
Christmas Finger Foods
These tiny pastries offer a high end dining experience in a single bite. Each golden puff pastry shell surrounds a piece of tender steak and a rich mushroom filling. The top of the dough is scored with a cross, allowing the heat to escape and creating a beautiful design.
The meat stays pink and juicy inside the crispy outer layer. Guests will love the savory aroma of beef and buttery pastry as these come out of the oven. They look very formal on a dark stone tray or a silver platter.
The earthy mushroom mixture adds a deep flavor that complements the beef perfectly. These are best served warm to keep the pastry light and flaky. They bring a touch of luxury to any holiday open house menu.
Required Ingredients
1 pound beef tenderloin (cut into small cubes)
1 sheet frozen puff pastry (thawed)
1 cup finely chopped mushrooms
1 tablespoon Dijon mustard
1 egg (beaten)
2 tablespoons butter
Salt and pepper
Equipment List
Large skillet
Baking sheet
Sharp knife
Pastry brush
Rolling pin
DIY Instructions
Turn your oven to 400 degrees to get it very hot.
Melt butter in a pan and cook the chopped mushrooms until all the liquid is gone.
Sear the beef cubes in a hot pan for only one minute per side to brown the outside.
Roll out your puff pastry on a flat surface and cut it into small circles or squares.
Spread a tiny dot of mustard and a spoonful of mushrooms in the center of the pastry.
Place one piece of seared beef on top of the mushrooms.
Fold the edges of the pastry up and over the beef to close it like a little bundle.
Brush the top of the pastry with the beaten egg to help it turn golden.
Use a knife to poke a small cross on the top of each bundle.
Bake for 10 to 12 minutes until the dough looks puffed and brown.
12. Antipasto Skewers
Christmas Finger Foods
This colorful snack brings the best of an Italian deli to your party table. Each stick features a variety of cured meats, cheeses, and marinated vegetables. The mix of green olives and red tomatoes creates a natural festive look that fits the Christmas theme.
The flavors are bold and tangy thanks to the artichoke hearts and salty salami. Because these do not require cooking, they stay fresh and cool throughout the evening. They are very easy for guests to pick up and enjoy while they hold a drink in their other hand.
You can arrange them in rows on a large plate for a neat presentation. The different textures of the soft cheese and crunchy vegetables make every bite exciting. These are a great way to provide a gluten free option for your friends.
Required Ingredients
1 pack of sliced salami (folded)
1 jar of marinated artichoke hearts
1 jar of pitted kalamata olives
1 cup cherry tomatoes
8 ounces of cubed pepper jack or provolone cheese
Fresh basil leaves
Equipment List
6 inch wooden skewers
Large serving platter
DIY Instructions
Drain the artichoke hearts and olives from their liquid using a strainer.
Fold each slice of salami into quarters so it looks like a small fan.
Slide an olive onto the bottom of the skewer to act as a base.
Add a cube of cheese next to provide a sturdy center.
Slide on a folded piece of salami followed by an artichoke heart.
Finish the skewer with a fresh basil leaf and a cherry tomato on top.
Repeat this process until you have used all your ingredients.
Place them in a circular pattern on your platter so the colors pop.
Keep them in the refrigerator until about ten minutes before your guests arrive.
13. Sweet Potato Bites with Pecans
Christmas Finger Foods
These warm slices of sweet potato provide a healthy and sugary treat for the holidays. A thick layer of creamy white topping sits on each toasted orange round. A whole toasted pecan rests on the very top, adding a satisfying crunch to the soft base.
Honey or maple syrup drizzles over the sides, making the bites look glossy and appetizing. The natural sweetness of the potato pairs wonderfully with the nutty flavor of the pecan. They look rustic and cozy when served on a wooden board.
These are a fantastic alternative to traditional heavy desserts. Guests will enjoy the warm spices that scent the air during the roasting process. They are small enough to be eaten in one mouthful, preventing any sticky fingers.
Required Ingredients
2 large sweet potatoes
1/2 cup goat cheese or cream cheese
20 whole pecans
2 tablespoons honey
1 tablespoon olive oil
A pinch of cinnamon
Equipment List
Baking sheet
Sharp knife
Small bowl
Spoon
DIY Instructions
Set your oven to 400 degrees.
Wash the sweet potatoes and slice them into rounds about half an inch thick.
Toss the potato rounds in a bowl with olive oil and a dash of salt.
Lay them flat on a baking sheet and roast for 20 minutes until they are soft.
Flip the rounds halfway through so both sides get a little brown.
While the potatoes cool, stir the cinnamon into your cheese until it is smooth.
Place a small dollop of the cheese mixture onto each potato slice.
Press one whole pecan into the center of the cheese.
Drizzle a tiny bit of honey over the top of each bite.
Serve them while they are still slightly warm for the best flavor.
14. Caramelized Onion Tartlets
Christmas Finger Foods
These savory pastries are filled with onions that have been cooked slowly until they are sweet and dark. A small amount of melted cheese on top adds a creamy texture that balances the rich filling. The crust is light and flaky, making it easy to eat without a mess.
Fresh green herbs are sprinkled on top to add a bit of brightness to the dish. The aroma of cooking onions will make your house feel warm and welcoming for the party. These look like they came from a professional bakery but are quite simple to make.
You can serve these at room temperature or warm from the oven. The deep brown color of the onions looks very elegant against the light pastry. They are a sophisticated choice for any holiday celebration.
Required Ingredients
2 large yellow onions (thinly sliced)
1 package of pre-made mini tart shells
1/4 cup shredded Gruyere cheese
2 tablespoons butter
1 teaspoon sugar
Fresh chives (chopped)
Equipment List
Large skillet
Baking sheet
Wooden spoon
DIY Instructions
Melt the butter in your skillet over low heat.
Add the sliced onions and the sugar to the pan.
Cook the onions very slowly for about 30 minutes, stirring often.
Wait until the onions turn a deep brown color and smell very sweet.
Preheat your oven to 350 degrees.
Place the mini tart shells on a flat baking sheet.
Spoon a small amount of the cooked onions into each shell.
Top each tartlet with a pinch of the shredded cheese.
Bake for 5 to 8 minutes until the cheese is melted and bubbly.
Sprinkle the chopped chives over the top before putting them on a platter.
15. Buffalo Chicken Celery Sticks
Christmas Finger Foods
This appetizer brings the heat of buffalo wings in a fresh and crunchy format. The bright green celery serves as a natural boat for the spicy orange chicken filling. Crumbled blue cheese on top adds a sharp and salty finish that cools down the spice.
Dabs of red hot sauce give the dish an extra kick for those who enjoy bold flavors. This is a great choice for guests who want something high in protein and low in bread. The colors are very vibrant and will stand out on any buffet table.
You can prepare the chicken mixture a day in advance to save time. Using pre-cooked rotisserie chicken makes the assembly process very fast. These are refreshing and spicy at the same time.
Required Ingredients
4 long stalks of celery
1 cup shredded cooked chicken
1/4 cup buffalo wing sauce
2 tablespoons cream cheese
1/4 cup blue cheese crumbles
Extra hot sauce for garnish
Equipment List
Small mixing bowl
Spoon
Sharp knife
DIY Instructions
Wash the celery stalks and dry them thoroughly with a towel.
Cut the celery into pieces that are about three inches long.
In a small bowl, mix the shredded chicken with the cream cheese and buffalo sauce.
Stir until the chicken is completely coated and the mixture is thick.
Use a spoon to fill the hollow center of each celery piece with the chicken mix.
Press the chicken down so it stays inside the celery boat.
Sprinkle a few blue cheese crumbles over the top of each piece.
Add a tiny drop of extra hot sauce if you want them to be very spicy.
Arrange them on a plate and keep them cold until you are ready to serve.
16. Ham and Swiss Sliders
Christmas Finger Foods
These warm sandwiches are a classic crowd pleaser that everyone enjoys. Soft rolls are filled with layers of salty ham and melted white cheese that drips down the sides. A savory glaze of butter and poppy seeds is brushed over the tops before baking.
The rolls become toasted and slightly sweet in the oven. These are very easy to make in large batches for a big group of people. The scent of melted cheese and butter will quickly draw your guests to the food table.
You can pull these apart easily, so people can take as many as they want. They are hearty enough to keep guests satisfied during a long party. Serving them on a wooden board adds to the cozy holiday feel.
Required Ingredients
1 package of slider rolls (12 count)
1/2 pound of deli ham (thinly sliced)
6 slices of Swiss cheese
1/4 cup melted butter
1 tablespoon Dijon mustard
1 tablespoon poppy seeds
1 teaspoon onion powder
Equipment List
Baking dish (9 by 13 inch)
Small bowl
Pastry brush
Bread knife
DIY Instructions
Preheat your oven to 350 degrees.
Use a large knife to slice the entire block of rolls in half horizontally.
Place the bottom half of the rolls into your baking dish.
Layer the ham slices evenly over the bread.
Place the Swiss cheese slices on top of the ham.
Put the top half of the rolls back on to close the sandwiches.
In a small bowl, mix the melted butter, mustard, poppy seeds, and onion powder.
Brush this butter mixture all over the tops of the rolls.
Cover the dish with foil and bake for 10 minutes.
Remove the foil and bake for another 5 minutes until the cheese is melted and the bread is toasted.
17. Everything Bagel Pigs in a Blanket
Christmas Finger Foods
This fun snack takes a childhood favorite and gives it a modern flavor. Small cocktail sausages are wrapped in crescent dough and topped with a crunchy seed mix. The seasoning includes garlic, onion, and poppy seeds for a savory taste in every bite.
These look very festive when piled high on a white serving dish. The golden dough is soft on the inside and crispy on the outside. They are the best finger food for kids and adults alike.
You can serve these with a side of mustard or cheese dip. The small size makes them perfect for snacking while walking around the room. They are simple to prepare and always disappear quickly.
Required Ingredients
1 can of refrigerated crescent roll dough
1 package of cocktail franks (mini sausages)
1 egg (beaten)
2 tablespoons everything bagel seasoning
Cooking spray
Equipment List
Baking sheet
Sharp knife
Pastry brush
DIY Instructions
Turn your oven on to 375 degrees.
Unroll the crescent dough and cut each triangle into three smaller, long strips.
Dry the mini sausages with a paper towel so the dough sticks better.
Place one sausage at the wide end of a dough strip and roll it up.
Put the wrapped sausages on a baking sheet sprayed with cooking oil.
Brush the top of each dough wrap with the beaten egg.
Sprinkle a generous amount of bagel seasoning over the wet egg wash.
Bake for 12 to 15 minutes until the dough looks puffed and golden brown.
Let them cool for just a minute before moving them to a platter.
18. Mini Quiche Assortment
Christmas Finger Foods
These small egg tarts offer a variety of flavors in a single tray. Some feature green spinach and white cheese, while others have savory bacon bits. The crust is short and buttery, holding the soft egg filling securely.
The different colors make the platter look interesting and varied. These are excellent for a morning or afternoon holiday party. You can make several types at once to ensure there is something for every guest.
Fresh herbs on top add a nice touch of green. These can be served warm or at room temperature, which is very helpful for a host. They feel like a fancy brunch item in a tiny, easy to eat size.
Required Ingredients
1 package of pre-made mini pie crusts
4 large eggs
1/2 cup heavy cream
1/4 cup cooked chopped bacon
1/4 cup chopped cooked spinach
1/2 cup shredded cheddar cheese
Salt and pepper
Equipment List
Medium mixing bowl
Whisk
Baking sheet
DIY Instructions
Preheat your oven to 375 degrees.
Lay the empty mini crusts out on a baking sheet.
In a bowl, whisk the eggs and heavy cream together with a pinch of salt.
Put a little bacon and cheese into half of the crusts.
Put a little spinach and cheese into the other half of the crusts.
Carefully pour the egg mixture into each crust until it is almost full.
Be careful not to let the liquid spill over the edges.
Bake for 15 to 20 minutes until the center of the quiche feels firm.
The tops should be slightly golden and puffed up.
Allow them to sit for a few minutes so the eggs can finish setting before serving.
19. Mexican Tortilla Pinwheels
Christmas Finger Foods
These bite sized rolls are packed with bold flavors and bright colors. Each slice shows a beautiful spiral of black beans, green peppers, and orange chicken. The cream cheese filling keeps everything together and adds a smooth texture.
Fresh cilantro and red chili rings on the board add a festive pop of color. These are served cold, so you can make them the night before your party. They are a great way to add some spice to your holiday appetizer selection.
Guests will love the mix of fresh vegetables and savory meat. These are very easy to grab and do not require any dipping sauce. They look very professional when sliced evenly and stacked on a wooden tray.
Required Ingredients
3 large flour tortillas
1 cup shredded cooked chicken
8 ounces cream cheese (softened)
1/2 cup black beans (rinsed)
1/2 cup diced green bell peppers
1/2 cup salsa
1 teaspoon taco seasoning
Equipment List
Small mixing bowl
Spatula
Plastic wrap
Sharp knife
DIY Instructions
In a bowl, mix the soft cream cheese with the taco seasoning and salsa.
Stir in the shredded chicken, black beans, and diced peppers until combined.
Lay a tortilla flat on your counter.
Spread a thin, even layer of the chicken mixture all the way to the edges.
Roll the tortilla up very tightly like a long cigar.
Wrap the roll in plastic wrap and put it in the fridge for at least one hour.
This helps the roll stay together when you cut it later.
Take the roll out of the fridge and remove the plastic.
Use a sharp knife to slice the roll into pieces that are one inch thick.
Place the pinwheels on a platter with the spiral side facing up.
20. Loaded Mini Potato Skins
Christmas Finger Foods
These tiny potatoes are filled with all the best toppings for a savory treat. Each roasted half holds melted cheddar cheese and crispy bits of bacon. A small dollop of cool sour cream and a tiny green onion on top finish the look.
The skins become crispy in the oven, providing a great crunch. These are a miniature version of a classic comfort food that everyone loves. They are the perfect size for a holiday snack and look great on a wooden tray.
The combination of warm potato and cold cream is very satisfying. These are hearty enough to keep people full but small enough to eat with your fingers. They are sure to be a favorite at any Christmas gathering.
Required Ingredients
10 small yellow or red potatoes
1/2 cup shredded cheddar cheese
1/4 cup cooked bacon bits
1/4 cup sour cream
2 green onions (sliced thin)
Olive oil and salt
Equipment List
Baking sheet
Sharp knife
Small spoon
DIY Instructions
Preheat your oven to 400 degrees.
Wash the potatoes and cut them in half lengthwise.
Toss them with olive oil and salt and place them cut side down on a baking sheet.
Roast for 20 minutes until the flat side is golden and the potato is soft.
Take them out and let them cool enough to touch.
Use a small spoon to scoop out just a little bit of the potato from the center.
Fill that small hole with shredded cheese and bacon bits.
Put them back in the oven for 5 minutes to melt the cheese.
Let them cool for a moment before adding a tiny scoop of sour cream to each one.
Top with a slice of green onion and serve them while they are still warm.
21. Pear and Blue Cheese Flatbread
Christmas Finger Foods
These elegant flatbread squares combine sweet and savory notes for a sophisticated holiday snack. Thin slices of fresh pear rest on a crispy golden base topped with creamy blue cheese crumbles. Every piece is finished with a crunchy walnut half and a sprig of aromatic rosemary.
The contrast between the tangy cheese and the juicy fruit creates a memorable flavor profile. These look beautiful when scattered on a dark wooden board during a cocktail hour. You can serve them warm to ensure the cheese is soft and the crust stays crunchy.
Guests will appreciate the light nature of this appetizer among heavier seasonal dishes. The white cheese and pale pear slices offer a clean and modern look for your table. It is a simple way to bring gourmet flair to your party menu.
Required Ingredients
1 pre-made flatbread or pizza dough
2 ripe pears (sliced very thin)
1/2 cup blue cheese crumbles
1/2 cup walnut halves
2 tablespoons honey
Fresh rosemary sprigs
Olive oil
Equipment List
Large baking sheet
Sharp knife or pizza cutter
Pastry brush
Small bowl
DIY Instructions
Set your oven to 400 degrees so it is ready for baking.
Lay your flatbread or rolled out dough on a flat baking sheet.
Brush a light layer of olive oil over the top of the dough.
Arrange the thin pear slices in a single layer across the bread.
Sprinkle the blue cheese crumbles evenly over the pears.
Place the walnut halves at even intervals so every square gets one.
Bake for 10 to 12 minutes until the edges of the bread are brown.
Remove from the oven and drizzle the honey over the warm surface.
Add small pieces of rosemary for scent and decoration.
Use a sharp knife to cut the flatbread into small square pieces for serving.
22. Grilled Chicken Satay with Peanut Sauce
Christmas Finger Foods
These charred chicken skewers bring a wonderful smoky aroma to your holiday gathering. Each strip of meat is marinated in warm spices and grilled until it shows beautiful dark marks. A thick and creamy peanut dipping sauce sits in the center of the platter for guests to enjoy.
Fresh cilantro and bright red chili rings add a pop of festive color to the wooden tray. This dish is easy to eat with one hand, making it a great choice for a busy room. The savory flavor of the chicken pairs perfectly with the sweet and salty sauce.
You can prepare the skewers early and grill them just before people arrive. Serving them with lime wedges allows guests to add a fresh citrus zing. It is a hearty protein option that always satisfies a hungry crowd.
Required Ingredients
1 pound chicken breast (cut into long thin strips)
1/2 cup creamy peanut butter
1/4 cup coconut milk
2 tablespoons soy sauce
1 tablespoon lime juice
1 tablespoon honey
Wooden skewers (soaked in water)
Fresh cilantro and sliced chilies
Equipment List
Grill pan or outdoor grill
Large mixing bowl
Small whisk
Serving platter
DIY Instructions
Soak your wooden skewers in water for thirty minutes to prevent burning.
Thread one strip of chicken onto each skewer in a wavy pattern.
Brush the chicken with a little oil and season with salt.
Heat your grill pan over medium high heat until it is very hot.
Cook the skewers for 3 to 4 minutes on each side until the meat is white all the way through.
In a small bowl, whisk together the peanut butter, coconut milk, soy sauce, lime juice, and honey.
Stir the sauce until it is smooth and pour it into a small serving dish.
Arrange the warm chicken skewers around the bowl of sauce.
Garnish with fresh cilantro leaves and chili rings for a professional look.
Serve with extra lime wedges on the side for squeezing.
23. Zucchini and Corn Fritters
Christmas Finger Foods
These golden brown cakes offer a fresh and vegetable forward option for your party. Shredded green zucchini and sweet yellow corn create a colorful interior that is soft and savory. A large dollop of cool herb cream on top adds a refreshing finish to the warm fritters.
The edges of the cakes become crispy in the pan, providing a satisfying crunch. These look wonderful stacked in small towers on a wooden serving board. They are a great way to sneak some vegetables into your holiday appetizer spread.
Fresh dill and lemon slices on the side make the presentation feel bright and clean. These can be served warm or at room temperature without losing their appeal. They are a unique alternative to traditional potato snacks.
Required Ingredients
2 medium zucchinis (grated)
1 cup corn kernels (fresh or canned)
1/2 cup all purpose flour
2 large eggs
1/2 cup sour cream
1 tablespoon fresh dill (chopped)
Salt and pepper
Vegetable oil for frying
Equipment List
Large mixing bowl
Large skillet
Clean kitchen towel
Spatula
DIY Instructions
Grate the zucchini and place it in a clean kitchen towel.
Squeeze the towel very hard to remove all the water from the zucchini.
Mix the dry zucchini, corn, flour, and eggs in a large bowl.
Add a pinch of salt and pepper and stir until you have a thick batter.
Heat two tablespoons of oil in a skillet over medium heat.
Drop large spoonfuls of the batter into the hot pan.
Press them down slightly with a spatula to make flat circles.
Cook for 3 minutes per side until they turn a dark golden brown.
In a separate small bowl, mix the sour cream with the chopped dill.
Top each warm fritter with a small spoonful of the cream and serve.
24. Avocado Chicken Phyllo Cups
Christmas Finger Foods
These light and airy pastry shells are filled with a creamy green chicken salad. Each bite features a rich blend of mashed avocado and tender meat for a smooth texture. A slice of sun dried tomato on top adds a chewy sweetness and a bright red holiday color.
The ruffled edges of the phyllo dough stay crispy and offer a delicate crunch. These are very easy to assemble if you use pre-cooked chicken and ready made shells. A single basil leaf provides a fresh scent that makes the appetizer feel garden fresh.
They are a fantastic choice for those who want a snack that feels healthy but indulgent. The green and red colors look very festive on a white porcelain tray. Guests will enjoy how easy these are to eat in one go.
Required Ingredients
2 packages mini phyllo shells (30 total)
1 cup shredded cooked chicken
1 ripe avocado (mashed)
1 tablespoon lime juice
1/4 cup oil packed sun dried tomatoes (sliced)
Fresh basil leaves
Salt and pepper
Equipment List
Medium mixing bowl
Fork or spoon
Serving tray
DIY Instructions
Place the phyllo shells on a tray so they are ready to fill.
In a mixing bowl, mash the avocado with the lime juice until smooth.
Add the shredded chicken to the avocado and stir well.
Season the mixture with a little bit of salt and pepper.
Scoop a small spoonful of the green chicken mix into each pastry shell.
Place one slice of sun dried tomato right in the center of the filling.
Add a tiny basil leaf next to the tomato for a nice color contrast.
Keep the tray in the refrigerator if you are not serving them immediately.
These are best eaten within an hour so the shells stay crunchy.
25. Honey Walnut Brie Rolls
Christmas Finger Foods
These warm pastry rolls are filled with gooey melted cheese and crunchy nuts. The thin layers of phyllo dough create a shatteringly crisp exterior that guests will love. A golden drizzle of honey over the top makes them shimmer and adds a natural sweetness.
A whole walnut is tucked into the end of each roll for an extra bit of texture. The scent of warm honey and toasted nuts will make your home smell like a holiday bakery. These look very elegant when served on a dark wood platter next to a small bowl of honey.
The soft cheese inside stays warm for a long time, making these a reliable choice for a party. They feel like a gourmet treat but use very simple ingredients. This appetizer is the best choice for those who love a sweet and savory mix.
Required Ingredients
1 package phyllo dough (thawed)
8 ounces Brie cheese (cut into long strips)
1/2 cup walnut halves
1/2 cup melted butter
1/4 cup honey
Fresh rosemary for garnish
Equipment List
Baking sheet
Pastry brush
Sharp knife
DIY Instructions
Turn your oven on to 375 degrees.
Lay out one sheet of phyllo dough and brush it lightly with melted butter.
Place another sheet on top and repeat until you have three layers.
Cut the dough into long strips that are about four inches wide.
Place a strip of Brie cheese at the bottom of each dough strip.
Roll the dough up tightly around the cheese like a small cigar.
Place the rolls on a baking sheet with the seam side facing down.
Brush the tops of the rolls with more butter and press a walnut onto each one.
Bake for 12 to 15 minutes until the pastry is golden and the cheese starts to leak out.
Drizzle warm honey over the rolls and add rosemary before serving.
26. Christmas Tree Cheese Balls
Christmas Finger Foods
These adorable snacks are shaped like tiny evergreen trees to delight your guests. Each ball is made of savory herb cheese and coated in a thick layer of bright green parsley. A small pretzel stick serves as the trunk, and a red pepper star sits on the very top.
The festive design makes these a great center piece for your holiday food table. You can also offer some coated in crushed pecans for a variety of textures and colors. They are fun to look at and even more fun to eat.
Setting them out on a clean white plate makes the green and red colors stand out beautifully. These are served cold and can be made many hours before your party starts. Kids and adults alike will enjoy this playful holiday treat.
Required Ingredients
8 ounces cream cheese (softened)
1/2 cup shredded white cheddar cheese
1/2 cup fresh parsley (finely chopped)
1/4 cup crushed pecans
1 red bell pepper (cut into small stars)
20 pretzel sticks
Garlic powder and onion powder
Equipment List
Mixing bowl
Small star shaped cookie cutter or knife
Serving plate
DIY Instructions
In a bowl, mix the cream cheese, cheddar, garlic powder, and onion powder.
Stir until the cheese is well combined and feels like thick dough.
Scoop out a small amount of cheese and roll it into a round ball about the size of a walnut.
Roll half of the balls in the chopped parsley until they are completely green.
Roll the other half in the crushed pecans for a brown wood look.
Push one pretzel stick into the bottom of each ball to act as a handle.
Use your star cutter or a knife to make tiny stars out of the red pepper.
Place one red star on top of each green cheese ball.
Stand them up on a flat plate so they look like a little forest.
Keep them in the fridge until it is time for the party.
27. Chocolate Cranberry Pistachio Clusters
Christmas Finger Foods
These sweet treats offer a wonderful mix of dark chocolate and festive fruits. Each cluster is packed with tart red cranberries and bright green pistachios for a classic Christmas look. A drizzle of extra chocolate and a sprinkle of sea salt on top finishes them perfectly.
The crunch of the nuts and the chew of the berries make every bite interesting. These are very easy to make in large batches and do not require any baking. They are a great way to add a bit of dessert to your finger food menu.
You can serve them on a wooden board or in small paper liners for a neat look. The deep brown chocolate makes the red and green colors of the ingredients pop. They are a thoughtful gift for guests to take home or enjoy during the party.
Required Ingredients
2 cups dark chocolate chips
1 cup dried cranberries
1 cup shelled pistachios
1 teaspoon sea salt
1 teaspoon coconut oil
Equipment List
Microwave safe bowl
Baking sheet
Parchment paper
Small spoon
DIY Instructions
Line a large baking sheet with a piece of parchment paper.
Place the chocolate chips and coconut oil in a microwave safe bowl.
Heat the chocolate in thirty second bursts, stirring in between, until it is smooth.
Stir the cranberries and pistachios into the melted chocolate.
Make sure every nut and berry is completely covered in chocolate.
Use a small spoon to drop mounds of the mix onto the parchment paper.
While the chocolate is still wet, sprinkle a tiny bit of sea salt over each cluster.
Drizzle any remaining melted chocolate over the tops in a zig zag pattern.
Place the tray in the fridge for 30 minutes until the chocolate is hard.
Peel them off the paper and arrange them on your favorite serving dish.
28. Marinated Mozzarella Bites
Christmas Finger Foods
These simple and fresh bites are a great way to add flavor to your cheese tray. Small white mozzarella balls soak in a bath of olive oil, lemon zest, and spicy red pepper flakes. Fresh thyme sprigs add a lovely herbal scent that makes the dish feel very special.
Every ball has a toothpick for easy grabbing, so guests do not get oil on their fingers. The bright yellow lemon and green herbs look beautiful in a white ceramic bowl. This is a very light snack that cleans the palate between heavier dishes.
You can prepare the marinade a few days early to let the flavors get stronger. The hint of spice from the pepper flakes adds a nice warmth to the cool cheese. It is a classic appetizer that fits into any holiday theme.
Required Ingredients
1 container small fresh mozzarella balls (bocconcini)
1/2 cup extra virgin olive oil
1 lemon (zest and juice)
1 teaspoon red pepper flakes
2 cloves garlic (smashed)
Fresh thyme sprigs
Salt
Equipment List
Medium glass bowl
Toothpicks
Serving bowl
DIY Instructions
Drain the mozzarella balls from their water and pat them dry with a paper towel.
In a glass bowl, mix the olive oil, lemon juice, lemon zest, and pepper flakes.
Add the smashed garlic cloves and the fresh thyme to the oil.
Place the mozzarella balls into the oil mixture and toss gently.
Cover the bowl and let it sit in the fridge for at least two hours.
The longer they sit, the more flavor the cheese will have.
When you are ready to serve, move the cheese and a little oil to a clean bowl.
Discard the large garlic cloves but keep the herbs for decoration.
Poke a toothpick into each ball so guests can pick them up easily.
Serve at room temperature for the best cheese texture.
29. Salmon and Cucumber Rounds
Christmas Finger Foods
This refreshing appetizer is light, healthy, and very easy to assemble. Crisp green cucumber slices serve as a cool base for a swirl of lemon cream cheese. A thin ribbon of smoked salmon is rolled into a rose shape and placed on the very top.
A tiny sprig of fresh dill adds a delicate touch and a wonderful aroma. The bright orange fish against the white cream and green cucumber looks very professional. These are excellent for a mid afternoon party or a holiday brunch.
Using a pastry bag for the cream cheese makes the presentation look very neat. These bites are naturally low in calories, making them a popular choice for health conscious guests. They provide a crisp crunch that contrasts beautifully with the soft salmon.
Required Ingredients
2 long English cucumbers
4 ounces smoked salmon
1 container whipped cream cheese
1 tablespoon fresh lemon juice
Fresh dill sprigs
Black pepper
Equipment List
Sharp knife
Cutting board
Pastry bag or small plastic bag
Serving platter
DIY Instructions
Wash the cucumbers and slice them into rounds that are half an inch thick.
Lay the cucumber rounds out on a large serving platter.
Mix the cream cheese with the lemon juice and a pinch of pepper.
Put the cheese into a pastry bag or a plastic bag with the corner cut off.
Squeeze a small, pretty swirl of cheese onto the center of each cucumber.
Cut the smoked salmon into long, thin strips about one inch wide.
Roll each strip up like a small flower and press it into the cream cheese.
Place a small piece of fresh dill on top of the salmon rose.
Keep the tray in the refrigerator until the very moment you are ready to serve.
These stay fresh and crunchy for about two hours after assembly.
30. Salami and Cream Cheese Cones
Christmas Finger Foods
These savory cones offer a creative way to serve classic deli ingredients. Thin slices of salty salami are rolled into a funnel shape and filled with a herb cheese blend. A tiny pickled cornichon and a sprig of dill peek out from the top for a fun look.
The red meat and white filling create a striking visual on a dark wooden board. These are very easy to pick up and eat without needing any plates or forks. The tangy pickle adds a sharp crunch that cuts through the richness of the cheese.
You can use different types of salami to vary the flavor and spice levels. These look very high end but take only minutes to roll and fill. They are a sturdy snack that holds up well during a long holiday party.
Required Ingredients
20 slices of large round salami
8 ounces cream cheese (softened)
2 tablespoons fresh chives (chopped)
1 jar mini pickles (cornichons)
Fresh dill sprigs
Garlic powder
Equipment List
Small mixing bowl
Spoon or spatula
Serving board
DIY Instructions
In a small bowl, mix the cream cheese, chives, and a pinch of garlic powder.
Stir until the cheese is smooth and the herbs are spread out evenly.
Take one slice of salami and fold it around your finger to make a cone shape.
Hold the cone together and use a small spoon to fill the center with cheese.
The cheese will act like glue and help the salami stay in the cone shape.
Place one mini pickle into the top of the cheese filling.
Add a small sprig of fresh dill next to the pickle for extra color.
Lay the cones flat on a serving board in a neat circular pattern.
Keep them in the fridge so the cheese stays firm and the meat stays fresh.
Serve them cold so they keep their shape while guests enjoy them.
31. White Chocolate Dipped Pretzels
Christmas Finger Foods
These crunchy treats bring a snowy look to your dessert table with their thick white coating and festive sprinkles. Long pretzel rods are dipped halfway into melted chocolate to create a simple yet elegant handle for guests to hold. The mix of red and green sugar pearls adds a traditional holiday sparkle that catches the light beautifully.
You can arrange these in a tall glass jar or lay them flat on a wooden board for easy grabbing. The combination of salty dough and sweet cream creates a balanced snack that satisfies every craving. These are a great project for the family since they require no oven time and look professional with very little effort.
The smooth finish of the chocolate provides a great contrast to the rough texture of the pretzel. Because they stay fresh for days, you can make a large batch well before your holiday open house begins. They add a playful and colorful touch to any spread of finger foods.
Required Ingredients
1 bag of large pretzel rods
12 ounces of white chocolate melting wafers
Red and green festive sprinkles
1 teaspoon coconut oil (optional for shine)
Equipment List
Tall microwave safe glass or jar
Baking sheet
Parchment paper
Small spoon
DIY Instructions
Line a large baking sheet with a piece of parchment paper so the chocolate does not stick.
Place the white chocolate wafers into a tall glass or jar that is microwave safe.
Heat the chocolate in the microwave for thirty seconds and stir it well.
Continue heating in ten second bursts until the liquid is completely smooth and runny.
Hold a pretzel rod by one end and dip the other half into the tall glass of chocolate.
Lift the pretzel out and let the extra chocolate drip back into the jar for a moment.
Lay the coated pretzel flat on the parchment paper.
Immediately shake your festive sprinkles over the wet chocolate before it gets hard.
Repeat this for all the rods and let them sit at room temperature for one hour.
Once the chocolate is firm to the touch, move them to a serving dish.
32. Classic Shrimp Cocktail Shots
Christmas Finger Foods
This upscale appetizer offers a fresh and chilled option that looks stunning in individual glassware. A large, perfectly cooked shrimp hangs over the edge of a small shot glass filled with zesty red sauce. A crisp stalk of bright green celery stands inside, providing a crunchy stir stick and a pop of color.
The red sauce is visible through the clear glass, making the presentation feel clean and modern. Serving these in single portions prevents double dipping and makes it easy for guests to eat while standing. The cool temperature and citrus notes provide a refreshing break from heavier, warm snacks.
You can prepare the glasses and sauce ahead of time and simply add the shrimp right before the party. This dish feels very fancy but is mostly about how you put the pieces together. It is a timeless choice for any sophisticated Christmas gathering.
Required Ingredients
1 pound jumbo shrimp (cooked, peeled, and chilled)
1 cup cocktail sauce
1 lemon (cut into small wedges)
1 bunch of thin celery stalks
1 tablespoon fresh parsley (chopped)
Equipment List
12 small shot glasses (2 ounces each)
Small spoon
Sharp knife
DIY Instructions
Wash the celery and cut the inner, thinner stalks into pieces that are four inches long.
Spoon about two tablespoons of cold cocktail sauce into the bottom of each shot glass.
Place one celery stalk into each glass so it stands up against the side.
Squeeze a tiny bit of fresh lemon juice into the sauce if you want extra zing.
Take a chilled shrimp and hook the curved body over the rim of the glass.
Ensure the tail of the shrimp is pointing outward for a nice look.
Sprinkle a tiny bit of chopped parsley over the top of the sauce.
Add a very small lemon wedge to the rim next to the shrimp if there is room.
Keep the glasses on a tray in the refrigerator until you are ready to serve.
Set them out all at once so the shrimp stay cold and fresh for your guests.
33. Tomato and Olive Garden Skewers
Christmas Finger Foods
These vibrant skewers bring a garden fresh look to your appetizer tray with bright red and deep black colors. A thick slice of cool cucumber is rolled around a block of white feta cheese to create a sturdy and flavorful base. A juicy cherry tomato and a salty black olive sit on top, held together by a simple wooden pick.
A light drizzle of oil and a sprinkle of dried herbs add a savory finish that enhances the fresh vegetables. These are served cold, making them a crisp and healthy choice for a holiday menu. The vertical presentation makes them stand out on a flat white platter.
Guests will enjoy the mix of salty cheese and juicy fruit in every bite. Because there is no bread involved, this is a wonderful gluten free option for your friends. They are quick to assemble and stay looking great for hours.
Required Ingredients
1 pint of cherry tomatoes
1 jar of pitted black olives
1 long English cucumber
8 ounces of feta cheese (cut into cubes)
2 tablespoons olive oil
1 teaspoon dried oregano
Equipment List
Vegetable peeler
Wooden toothpicks or small skewers
Sharp knife
Serving platter
DIY Instructions
Wash the cucumber and use a vegetable peeler to cut long, thin ribbons of the skin and flesh.
Pat the cucumber ribbons dry with a paper towel so they are not slippery.
Cut your feta cheese into cubes that are about half an inch wide.
Lay a cucumber ribbon flat and place a cheese cube at one end.
Roll the cucumber around the cheese until it is fully covered.
Push a toothpick through a black olive first, then a cherry tomato.
Push the end of the toothpick into the center of the cucumber and cheese roll.
Stand the skewer up on your platter so the tomato is on top.
Mix the olive oil and oregano in a small bowl and drizzle it over the tray.
Serve immediately or keep in the fridge for up to two hours.
34. Hummus Stuffed Mini Peppers
Christmas Finger Foods
These colorful pepper boats offer a crunchy and light snack that is full of savory flavor. Small bell peppers in red, orange, and yellow are sliced open and filled with a smooth, creamy chickpea dip. A dusting of red spice and a few toasted nuts on top add a professional finish and a nice texture.
A single leaf of fresh cilantro provides a bright green garnish that looks beautiful against the warm pepper tones. These are very easy to handle and do not create any mess for your guests. They are a fantastic vegan and vegetarian option that still feels very indulgent.
The natural sweetness of the peppers pairs perfectly with the salty and earthy taste of the filling. You can use different flavors of dip to give your guests a variety of choices. These look very festive when arranged on a dark stone or slate board.
Required Ingredients
1 bag of mini sweet bell peppers
1 container of classic or roasted garlic hummus
1/4 cup pine nuts (toasted)
1 teaspoon smoked paprika
Fresh cilantro leaves
Equipment List
Sharp knife
Small spoon or pastry bag
Serving board
DIY Instructions
Wash the mini peppers and cut them in half from the stem to the tip.
Use your fingers or a small spoon to remove any seeds from the inside.
Place the peppers on a board with the hollow side facing up.
Fill a small spoon with hummus and press it into the cavity of each pepper.
Smooth the top of the dip so it is level with the edges of the pepper.
Sprinkle a tiny pinch of smoked paprika over each filled boat for color.
Press three or four toasted pine nuts into the center of the dip.
Place one fresh cilantro leaf on the very top of each one.
Arrange the peppers by color on your serving board to create a rainbow look.
Serve them at room temperature or chilled from the refrigerator.
35. Reindeer Celery Snacks
Christmas Finger Foods
These playful treats are a hit with guests of all ages and bring a smile to any holiday party. A crisp green celery stick is filled with smooth nut butter and decorated to look like a tiny reindeer. Pretzels serve as the antlers, while a cluster of red berries or seeds forms a bright, round nose.
Small edible eyes make each character come to life, adding a whimsical touch to your food display. This is a great way to serve a healthy vegetable in a fun and creative way. These are very sturdy and easy for children to hold and eat without making a mess.
The combination of salty pretzels, sweet butter, and crunchy celery is a classic flavor profile. You can assemble these very quickly just before the party begins. They look wonderful when lined up in a row on a simple white tray.
Required Ingredients
4 long stalks of celery
1/2 cup peanut butter or almond butter
1 cup small twist pretzels
1 small jar of candy eyes (found in baking aisles)
1/2 cup fresh pomegranate seeds or red candies
Equipment List
Sharp knife
Butter knife
Serving tray
DIY Instructions
Wash the celery stalks and dry them completely so the butter sticks.
Cut each stalk into pieces that are about four inches long.
Use a butter knife to fill the hollow center of the celery with your nut butter.
Spread the butter all the way to the ends and smooth out the top.
Take two small pretzels and press them into the top of the butter to look like antlers.
Place two candy eyes just below the antlers in the center of the stick.
Press a small group of pomegranate seeds or a red candy at the bottom to be the nose.
Make sure all the pieces are pressed firmly into the butter so they do not fall off.
Place the reindeer on a tray, making sure they do not touch each other.
Serve them immediately so the pretzels stay crunchy.
36. Gingerbread Cupcakes with Spiced Cream
Christmas Finger Foods
These warm and cozy mini cakes bring the classic scent of Christmas spices to your dessert menu. A dark, moist gingerbread base is topped with a large swirl of thick white frosting that looks like a dollop of snow. A single piece of crystallized ginger on top adds a spicy chew and a touch of gold.
A light dusting of cinnamon over the cream provides an aromatic finish that guests will love. These are the best size for a single serving, allowing people to enjoy a sweet treat without needing a fork. The deep brown of the cake and the bright white of the topping create a beautiful contrast.
The flavors of molasses, ginger, and cloves make these feel very traditional and comforting. Serving them in a muffin tin or on a flat tray makes them easy for guests to grab as they mingle. They are a wonderful way to end a holiday open house on a sweet note.
Required Ingredients
1 box of gingerbread cake mix (and required oil/eggs)
1 tub of vanilla or cream cheese frosting
1/2 cup crystallized ginger (chopped into small bits)
1 teaspoon ground cinnamon
Mini cupcake liners
Equipment List
Mini cupcake tin
Large mixing bowl
Whisk or electric mixer
Pastry bag or large plastic bag
Small sifter
DIY Instructions
Preheat your oven to the temperature listed on the cake mix box.
Line your mini cupcake tin with paper liners to prevent sticking.
Mix the gingerbread batter in a large bowl according to the package directions.
Fill each cupcake liner about two thirds full with the spicy batter.
Bake for the time listed on the box until a toothpick comes out clean.
Let the mini cakes cool completely on a rack before you add the frosting.
Put the frosting into a pastry bag and pipe a tall, round swirl on each cake.
Use a small sifter to shake a tiny bit of cinnamon over the white frosting.
Place one piece of crystallized ginger right on the very top of each swirl.
Arrange the finished cupcakes on a tray and serve at room temperature.
37. Peppermint Chocolate Bark Squares
Christmas Finger Foods
These layered treats offer a cooling and festive end to your holiday party spread. A thick base of dark chocolate is topped with a smooth layer of white mint cream and finished with crushed candy canes. The bright red and white pieces look like fallen snow against the rich brown chocolate.
Because they are cut into even squares, they look very neat and organized on a wooden board. The snap of the cold chocolate and the crunch of the peppermint create a satisfying texture. These are very easy to make in large batches and can be stored in the fridge until the party starts.
Guests will enjoy the refreshing burst of mint after eating savory appetizers. These are a great way to use up extra holiday candy and create something beautiful. They add a classic Christmas color palette to your dessert selection.
Required Ingredients
2 cups dark chocolate melting wafers
2 cups white chocolate melting wafers
1 teaspoon peppermint extract
1/2 cup crushed candy canes or peppermint candies
Equipment List
Baking sheet
Parchment paper
Microwave safe bowls
Spatula
Sharp knife
DIY Instructions
Line a flat baking sheet with parchment paper so the bark can be removed easily.
Melt the dark chocolate in a bowl in the microwave using thirty second bursts.
Spread the melted dark chocolate into a thin, even layer on the parchment paper.
Place the tray in the fridge for ten minutes until the bottom layer is hard.
Melt the white chocolate in a clean bowl and stir in the peppermint extract.
Pour the white chocolate over the hard dark layer and spread it out to the edges.
Immediately sprinkle the crushed candy canes over the wet white chocolate.
Press the candy pieces down gently with your fingers so they stick.
Let the whole tray chill in the fridge for at least one hour until it is very firm.
Use a sharp knife to cut the bark into even square pieces and serve cold.
38. Strawberry Santa Hat Brownies
Christmas Finger Foods
These adorable bites transform a simple dessert into a festive character that will delight your guests. A small, round chocolate brownie serves as the base for a tall, bright red strawberry. A ring of white frosting at the bottom and a tiny dot on top create the look of a classic Santa hat.
The dark chocolate and vibrant red fruit look striking on a white serving plate. These are a great way to add fresh fruit to your dessert menu while still feeling indulgent. They are the perfect size for one bite and do not require any extra decorations.
The sweetness of the frosting and the tartness of the berry provide a very balanced flavor. You can use store bought brownies to save time and focus on the assembly. These are sure to be a conversation starter at any holiday open house.
Required Ingredients
1 tray of pre-made brownies (cut into small circles)
1 pint of large fresh strawberries
1 tube of white decorating frosting with a star tip
1 tablespoon powdered sugar (optional for snow)
Equipment List
Small round cookie cutter or knife
Serving plate
Paper towels
DIY Instructions
Use a small round cutter to make circles out of your brownie tray.
Wash the strawberries and cut the green leafy tops off so the bottom is flat.
Pat the berries very dry with a paper towel so the frosting stays in place.
Place a brownie circle on your serving tray.
Pipe a thick ring of white frosting around the top edge of the brownie.
Place the flat end of the strawberry onto the center of the frosting ring.
Press down gently so the berry sticks to the brownie.
Pipe a small, round dot of white frosting onto the pointed tip of the strawberry.
This dot acts as the pom pom on the top of the Santa hat.
Dust the whole tray with a little powdered sugar to look like snow before serving.
39. Mini Raspberry Cheesecakes
Christmas Finger Foods
These elegant individual desserts offer a creamy and tart finish to your holiday meal. A smooth white cheesecake sits on a dark chocolate crust, topped with a single, perfectly ripe red raspberry. The small size makes them feel very light and easy to enjoy without a plate.
The contrast of the white filling and the deep red fruit looks very sophisticated on a silver tray. These are baked in small liners, which keeps the edges neat and prevents any sticking. Guests will love the rich texture and the burst of fresh juice from the berry.
You can make these a day in advance to let the flavors develop in the refrigerator. They are a great way to serve a classic dessert in a modern, finger food format. A light shine on the berry makes them look like they came from a high end bakery.
Required Ingredients
1 cup crushed chocolate graham crackers
2 tablespoons melted butter
8 ounces cream cheese (softened)
1/4 cup sugar
1 egg
1 teaspoon vanilla extract
12 fresh raspberries
Equipment List
Mini muffin tin
Paper liners
Small mixing bowl
Whisk
DIY Instructions
Preheat your oven to 325 degrees and put liners in your mini muffin tin.
Mix the cracker crumbs and melted butter in a small bowl until it feels like wet sand.
Press a small spoonful of the crumbs into the bottom of each liner to make a crust.
In a separate bowl, whisk the cream cheese and sugar until there are no lumps.
Add the egg and vanilla and stir gently until the mix is smooth.
Pour the cheese mixture into each liner until it is almost at the top.
Bake for 15 minutes until the centers are set and do not jiggle.
Let the cakes cool completely at room temperature and then put them in the fridge.
Once they are cold, place one fresh raspberry right in the center of each cake.
Remove the paper liners carefully before placing the cakes on a serving platter.
40. Cream Filled Profiteroles
Christmas Finger Foods
These light and airy pastry puffs are a classic French treat that adds luxury to your party. Each golden shell is filled with a thick, sweet custard that slowly drips out when bitten. A dusting of powdered sugar and a hint of dark spice on top make them look like professional patisserie.
The outside of the puff is slightly crunchy while the inside stays soft and cool. These look wonderful piled into a pyramid on a decorative plate. They are easy to pick up and offer a very satisfying mix of textures.
Serving these with a warm cup of coffee or tea is a great way to welcome guests into your home. The neutral colors of the pastry and cream fit perfectly with any holiday decor. They are a timeless dessert that guests will recognize and enjoy.
Required Ingredients
1 package of frozen pre-made cream puffs (thawed)
1/2 cup heavy cream (whipped)
1/4 cup powdered sugar
1/2 teaspoon ground nutmeg or cinnamon
1 tablespoon chocolate shavings (optional)
Equipment List
Large serving plate
Small sifter
Pastry bag (if filling your own)
DIY Instructions
If you are using pre-filled puffs, move them from the freezer to the fridge two hours before the party.
If you are filling empty shells, poke a small hole in the bottom with a knife.
Squeeze your sweetened cream or custard into the hole until the puff feels heavy.
Arrange the puffs in a circle or a pile on your favorite serving plate.
Make sure the puffs are not too crowded so they do not get squished.
Put some powdered sugar into a small sifter or a fine mesh strainer.
Tap the side of the sifter to create a light “snow” of sugar over all the puffs.
Sprinkle a tiny bit of nutmeg or cinnamon over the top for a holiday scent.
Add a few chocolate shavings if you want a more decorative look.
Serve them immediately while the pastry is still light and the cream is cool.
41. Mini Pecan Pie Tarts
Christmas Finger Foods
These bite sized treats offer a rich and nutty finish to your holiday party. A dark brown sugar filling bubbles inside a buttery shortbread crust, topped with a large toasted pecan. The glossy surface catches the light, making them look like miniature jewels on your dessert tray.
The combination of salty nuts and sweet caramel creates a classic seasonal flavor profile. Every piece is baked until the edges are golden and the center is perfectly set. They are a wonderful way to serve a traditional pie without the need for forks or plates.
Small chocolate chips tucked into some of the tarts provide a surprise for those who love extra indulgence. These look beautiful when arranged in neat rows on a wooden serving board. They are sturdy enough to sit out for several hours while your guests mingle.
Required Ingredients
24 mini tart shells (pre-baked)
1 cup finely chopped pecans
24 whole pecan halves
1/2 cup dark corn syrup
1/4 cup brown sugar
1 tablespoon melted butter
1 egg (beaten)
1/2 teaspoon vanilla extract
Equipment List
Small mixing bowl
Whisk
Baking sheet
Measuring spoons
DIY Instructions
Set your oven to 350 degrees so it is ready for baking.
Lay the empty tart shells out on a flat baking sheet in a single layer.
In your mixing bowl, whisk the egg, corn syrup, brown sugar, butter, and vanilla until smooth.
Stir the chopped pecans into the liquid mixture until they are well coated.
Use a small spoon to fill each tart shell almost to the top with the pecan mix.
Place one whole pecan half right in the center of each filled tart.
Press the nut down very gently so it sticks to the filling.
Bake for 15 to 18 minutes until the filling is firm and no longer jiggles.
Let them cool completely on the baking sheet so the centers can finish hardening.
Move them to a platter once they are cold to the touch.
42. Pumpkin Cheesecake Bars
Christmas Finger Foods
These layered squares bring the warm colors of autumn to your Christmas table. A thick orange pumpkin layer sits on a crunchy crust, topped with a swirl of white cream cheese. A dusting of cinnamon and sugar over the top adds a sweet and spicy aroma that fills the room.
The creamy texture melts in your mouth, offering a refreshing contrast to crunchy snacks. These are cut into small cubes, making them very easy for guests to pick up. The bright orange and white layers look very festive against a dark serving tray.
Serving these chilled ensures the cheesecake stays firm and delicious. They are a great alternative for guests who prefer creamy desserts over cookies. You can prepare the entire tray a day early to save time on the day of your party.
Required Ingredients
1 box of graham cracker crumbs
4 tablespoons melted butter
16 ounces cream cheese (softened)
1 cup pumpkin puree
1/2 cup sugar
2 eggs
1 teaspoon pumpkin pie spice
Equipment List
8 by 8 inch baking pan
Parchment paper
Mixing bowl
Electric mixer or whisk
DIY Instructions
Heat your oven to 325 degrees.
Line your baking pan with parchment paper, leaving a little hanging over the sides.
Mix the cracker crumbs with melted butter and press them firmly into the bottom of the pan.
Beat the cream cheese and sugar in a bowl until the mixture looks fluffy.
Add the eggs one at a time while you continue to stir.
Take out half of the white mixture and set it aside in a small bowl.
Stir the pumpkin puree and spices into the remaining half of the mixture.
Spread the orange pumpkin layer over the crust in the pan.
Drop spoonfuls of the white mixture on top and use a knife to swirl the colors together.
Bake for 35 to 40 minutes until the edges are set but the middle still has a tiny jiggle.
Chill in the fridge for at least four hours before lifting them out by the paper and cutting into squares.
43. Raspberry Thumbprint Cookies
Christmas Finger Foods
These soft and buttery cookies feature a bright red center that looks like a festive holiday ornament. The pale dough is rolled in sugar to give it a sparkling finish that guests will love. A thin drizzle of white icing over the top adds a professional touch to these homemade treats.
The tartness of the raspberry jam balances the sweetness of the shortbread base. Every cookie is uniform in size, making them look very neat on a white porcelain plate. They are a classic choice for a holiday open house because they are so recognizable and well loved.
You can use different colors of jam to create a varied look on your dessert tray. These cookies stay soft for several days if kept in a sealed container. They are the best companion for a warm mug of cocoa or coffee.
Required Ingredients
1 cup butter (softened)
1/2 cup sugar
2 cups all purpose flour
1/2 cup raspberry jam
1/2 cup powdered sugar
1 teaspoon milk
Vanilla extract
Equipment List
Baking sheet
Parchment paper
Small bowl
Measuring cups
DIY Instructions
Preheat your oven to 350 degrees.
Mix the soft butter and sugar in a bowl until the mixture is creamy.
Stir in the flour slowly until a soft dough forms.
Scoop out a small piece of dough and roll it into a ball about one inch wide.
Place the balls on a baking sheet lined with parchment paper.
Use your thumb to press a deep hole into the center of each dough ball.
Fill the hole with a small spoonful of raspberry jam.
Bake for 10 to 12 minutes until the bottoms are just slightly brown.
Let the cookies cool completely.
Whisk the powdered sugar with a drop of milk and vanilla to make a thick icing.
Drizzle the icing back and forth over the cooled cookies for a pretty design.
44. Truffle Trio Platter
Christmas Finger Foods
This assortment of rich chocolate balls offers a variety of textures for the true cocoa lover. Some are rolled in crushed nuts, while others feature a dusting of dark powder or a sprinkle of sea salt. Each truffle hides a soft, melting center that feels very indulgent.
Small toothpicks with red beads allow guests to pick their favorite flavor without getting messy. The deep brown colors look very sophisticated on a dark stone board. These are the ultimate luxury finger food for a late night holiday party.
You can use white, milk, and dark chocolate to give people many options. These look like they came from a high end candy shop but are quite simple to assemble. They add a touch of class to any dessert spread.
Required Ingredients
12 ounces semi sweet chocolate chips
1/2 cup heavy cream
1/4 cup cocoa powder
1/4 cup finely crushed hazelnuts
1 tablespoon sea salt
1 teaspoon butter
Equipment List
Microwave safe bowl
Small plates for toppings
Spoon
Wax paper
DIY Instructions
Place the chocolate chips, cream, and butter in a microwave safe bowl.
Heat for thirty seconds, stir, and repeat until the mixture is completely smooth.
Put the bowl in the fridge for two hours until the chocolate is firm.
Scoop out a small spoonful of the cold chocolate and roll it between your palms to make a ball.
Put the cocoa powder, nuts, and salt onto separate small plates.
Roll some balls in the cocoa powder until they are fully covered.
Roll some in the crushed nuts and leave the rest plain with just a pinch of salt on top.
Place the finished truffles on wax paper to set.
Keep them in a cool place so they do not melt before the party.
Serve them on a platter with decorative toothpicks.
45. Apple Cinnamon Phyllo Triangles
Christmas Finger Foods
These warm pastries are filled with a sweet blend of spiced fruit and melted cheese. The thin layers of dough are baked until they are golden and incredibly crispy. A light dusting of powdered sugar over the top gives them a snowy, winter look.
The steam rising from the centers carries the scent of cinnamon and baked apples throughout your home. These are best served warm so the interior stays soft and gooey. They offer a comforting flavor that reminds everyone of holiday traditions.
The triangle shape is easy for guests to hold and eat in a few bites. You can serve them with a small bowl of caramel sauce for dipping if you want to be extra fancy. They are a great way to use seasonal fruit in a fun finger food format.
Required Ingredients
1 package phyllo dough (thawed)
2 apples (peeled and diced very small)
1/2 cup cheddar cheese cubes
1/4 cup sugar
1 teaspoon cinnamon
1/2 cup melted butter
Powdered sugar for dusting
Equipment List
Baking sheet
Pastry brush
Small bowl
Sharp knife
DIY Instructions
Turn your oven on to 375 degrees.
In a small bowl, mix the diced apples, sugar, and cinnamon together.
Lay one sheet of phyllo dough on your counter and brush it with melted butter.
Stack two more sheets on top, brushing each one with butter as you go.
Cut the stack into long strips that are three inches wide.
Place a spoonful of apples and one cube of cheese at the bottom of a strip.
Fold the corner of the dough over the filling to make a triangle shape.
Continue folding the triangle up the strip like you are folding a flag.
Place the triangles on a baking sheet and brush the tops with more butter.
Bake for 15 to 20 minutes until they are brown and crispy.
Sift a little powdered sugar over them before serving.
46. Red Velvet Cake Bites
Christmas Finger Foods
These vibrant red treats feature a hidden white heart in the center, making them a beautiful surprise for your guests. A thick coating of white chocolate surrounds the moist cake, finished with a dark chocolate drizzle. Every bite offers a mix of rich cocoa and sweet cream.
Serving these on toothpicks makes them very convenient for a party setting. The bright red color of the cake looks stunning against the white outer shell. They are a fun and modern take on a classic cake that everyone enjoys.
The small size ensures that guests can try many different things on your menu. These look very professional and will certainly be a highlight on your dessert table. They are a great way to add a pop of color to your holiday decor.
Required Ingredients
1 red velvet cake (baked and cooled)
1/2 cup cream cheese frosting
12 ounces white chocolate melting wafers
2 ounces dark chocolate (for drizzle)
Equipment List
Large mixing bowl
Baking sheet
Parchment paper
Toothpicks
DIY Instructions
Crumble the cooled red velvet cake into a large bowl using your hands.
Add the frosting and mix it with the cake crumbs until it feels like soft clay.
Roll the mixture into small balls and place them on a tray.
Melt the white chocolate wafers in the microwave in short bursts until smooth.
Dip each cake ball into the white chocolate until it is completely covered.
Place the balls on parchment paper to harden.
Melt the dark chocolate and use a spoon to drizzle thin lines over the top.
Poke a toothpick into each ball once the chocolate is firm.
Serve them standing up or lying flat on a pretty plate.
47. Chocolate Hazelnut Bliss Balls
Christmas Finger Foods
These rustic dessert balls are packed with the rich flavor of roasted nuts and dark cocoa. A whole hazelnut is hidden inside the center for a satisfying crunch that guests will love. Some are coated in dark powder, while others feature a snowy layer of white sugar.
The pile of truffles looks cozy and inviting on a wooden board. They are a great naturally sweet option that feels very indulgent. These are best served at room temperature to keep the texture soft and fudgy.
You can scatter a few extra nuts around the platter to show guests what is inside. These are very quick to make and require no baking at all. They are a perfect last minute addition to your holiday menu.
Required Ingredients
1 cup toasted hazelnuts (plus 20 whole nuts)
1/2 cup cocoa powder
1/4 cup honey or maple syrup
1/2 cup powdered sugar (for coating)
A pinch of salt
Equipment List
Food processor
Small plates
Serving tray
DIY Instructions
Put one cup of hazelnuts in a food processor and blend until they look like fine crumbs.
Add the cocoa powder, syrup, and salt to the processor.
Blend until the mixture turns into a thick, sticky paste.
Scoop out a small piece of the paste and flatten it in your hand.
Place one whole hazelnut in the middle and roll the paste into a ball around it.
Put powdered sugar on one plate and extra cocoa on another.
Roll half the balls in sugar and the other half in cocoa.
Tap off the extra powder so they look neat.
Arrange them in a pyramid on your serving tray.
48. Honey Drizzled Fruit Skewers
Christmas Finger Foods
This fresh and healthy appetizer brings the colors of a winter garden to your party. Layers of green grapes, red strawberries, and tart raspberries are stacked on wooden picks. A thin piece of kiwi in the middle adds a tropical twist and a beautiful design.
A slow drizzle of golden honey over the top makes the fruit shimmer and look very appetizing. These are a great way to provide a light option among the heavier holiday snacks. They are very easy for guests to grab and enjoy while they talk.
The natural sweetness of the fruit is enhanced by the honey coating. You can arrange these in rows on a white plate to make the colors stand out. They are a refreshing treat that guests of all ages will appreciate.
Required Ingredients
1 pint strawberries
1 pint raspberries
1 bunch green grapes
2 kiwis (peeled and sliced)
1/4 cup honey
Equipment List
Wooden skewers
Serving platter
Small spoon
DIY Instructions
Wash all the fruit and pat it dry with a towel.
Cut the green tops off the strawberries.
Slice the kiwis into thick rounds and then cut each round into quarters.
Slide a green grape onto the bottom of a skewer.
Add a piece of kiwi followed by a bright red raspberry.
Finish the skewer with a whole strawberry on the top.
Repeat this until you have enough skewers for all your guests.
Lay the skewers flat on a large white platter.
Warm the honey in the microwave for ten seconds so it is very runny.
Use a spoon to drizzle the honey in long lines over all the fruit.
49. Confetti Cookie Dough Bites
Christmas Finger Foods
These playful treats look like tiny snowballs covered in bright holiday sprinkles. Each ball features a smooth, egg free cookie dough center with a sweet yellow filling. The white chocolate coating provides a crisp shell that snaps when you bite into it.
The red, green, and blue stars on top make these look very cheerful and festive. They are a great choice for a family party where kids will be attending. These are served cold, making them a very refreshing sweet snack.
You can display them on a colorful plate to match the sprinkles. They are a fun way to enjoy the flavor of cookie dough without any of the risks. These will definitely be the most colorful item on your holiday table.
Required Ingredients
1 cup flour (heat treated)
1/2 cup butter (softened)
1/2 cup sugar
2 tablespoons milk
1/2 cup yellow frosting (for the center)
12 ounces white chocolate melting wafers
Holiday star sprinkles
Equipment List
Mixing bowl
Baking sheet
Parchment paper
Small spoon
DIY Instructions
Microwave your flour for one minute to make it safe to eat raw.
Mix the butter and sugar in a bowl until smooth.
Stir in the milk and the heat treated flour until a dough forms.
Roll a small ball of dough and use your pinky to make a hole in the center.
Fill the hole with a tiny dot of yellow frosting and close the dough around it.
Place the balls in the freezer for twenty minutes to get them very cold.
Melt the white chocolate wafers in a bowl until smooth.
Dip the cold dough balls into the chocolate and place them on parchment paper.
Immediately add the star sprinkles to the top before the chocolate dries.
Keep them in the fridge until you are ready to serve.
50. Chocolate Nutella Strawberries
Christmas Finger Foods
This final treat combines juicy fruit with the rich flavor of hazelnut cream. Large red strawberries are sliced and filled with a thick layer of dark chocolate spread. A topping of crushed nuts adds a satisfying crunch to the soft and sweet berry.
The bright red fruit and dark filling look very elegant and festive. These are very simple to make but always look like a gourmet dessert. They are the best way to end your holiday open house with a light yet indulgent bite.
Serving these on a dark wooden board makes the colors pop beautifully. Guests will love the classic combination of chocolate and fresh fruit. They are easy to pick up and eat in one or two mouthfuls.
Required Ingredients
20 large fresh strawberries
1/2 cup Nutella or hazelnut spread
1/4 cup finely crushed hazelnuts
Fresh mint for garnish
Equipment List
Sharp knife
Pastry bag or small spoon
Serving board
DIY Instructions
Wash the strawberries and dry them thoroughly.
Cut the green leaves off the top so the berry can stand up.
Slice the top third of the strawberry off and set it aside.
Use a small spoon to scoop out a little bit of the inside of the berry.
Fill a pastry bag with the hazelnut spread.
Squeeze a large dollop of the spread into the hollowed out strawberry.
Sprinkle the crushed nuts over the wet chocolate spread.
Place the strawberry “lid” back on top of the cream.
Press down gently so it stays in place.
Arrange them on a board and add a few mint leaves for extra color.
Key Takeaways
Prep in Advance: Many items like the Pomegranate Meatballs or Mexican Pinwheels can be made early to save time on the day of the party.
Balance Your Menu: Offer a mix of warm appetizers, fresh chilled bites, and sweet desserts to keep the palate interested.
Visual Appeal: Use natural garnishes like rosemary, pomegranate seeds, and fresh mint to create a festive look without extra cost.
Ease of Service: Use toothpicks or pre-made pastry shells to make the food easy to grab while guests are standing and talking.
Dietary Variety: This list includes several naturally gluten-free and vegetarian options to ensure every guest has something to enjoy.
Creating a festive spread for your holiday open house does not have to be overwhelming. By choosing a variety of these fifty finger foods, you can provide a gourmet experience that feels both cozy and sophisticated. The secret lies in using fresh ingredients and simple techniques that let the natural flavors shine.
As you plan your menu, remember that the best parties are the ones where the host is present and relaxed. These recipes are designed to give you that freedom while still impressing your friends and family. From the first savory bite to the last sweet truffle, your table will be the highlight of the season.
We hope these ideas inspire you to fill your home with good food and great company. Enjoy the process of building your holiday tray and celebrating with those who matter most. Happy hosting and merry Christmas to you and your guests!
Spread the loveHosting a New Year’s Eve celebration should be about clinking glasses and making memories, not hiding in the kitchen while the countdown begins. The pressure to serve a gourmet spread often leads to…
Spread the lovePacking a lunchbox can feel like a chore during a busy morning. You want to provide something healthy but also something that brings a smile. Valentine’s Day is a wonderful chance to add…
Spread the loveThe daily rush from the classroom to the kitchen table often leaves parents searching for inspiration. Finding a balance between nutritious ingredients and flavors that children actually enjoy can feel like a daunting…