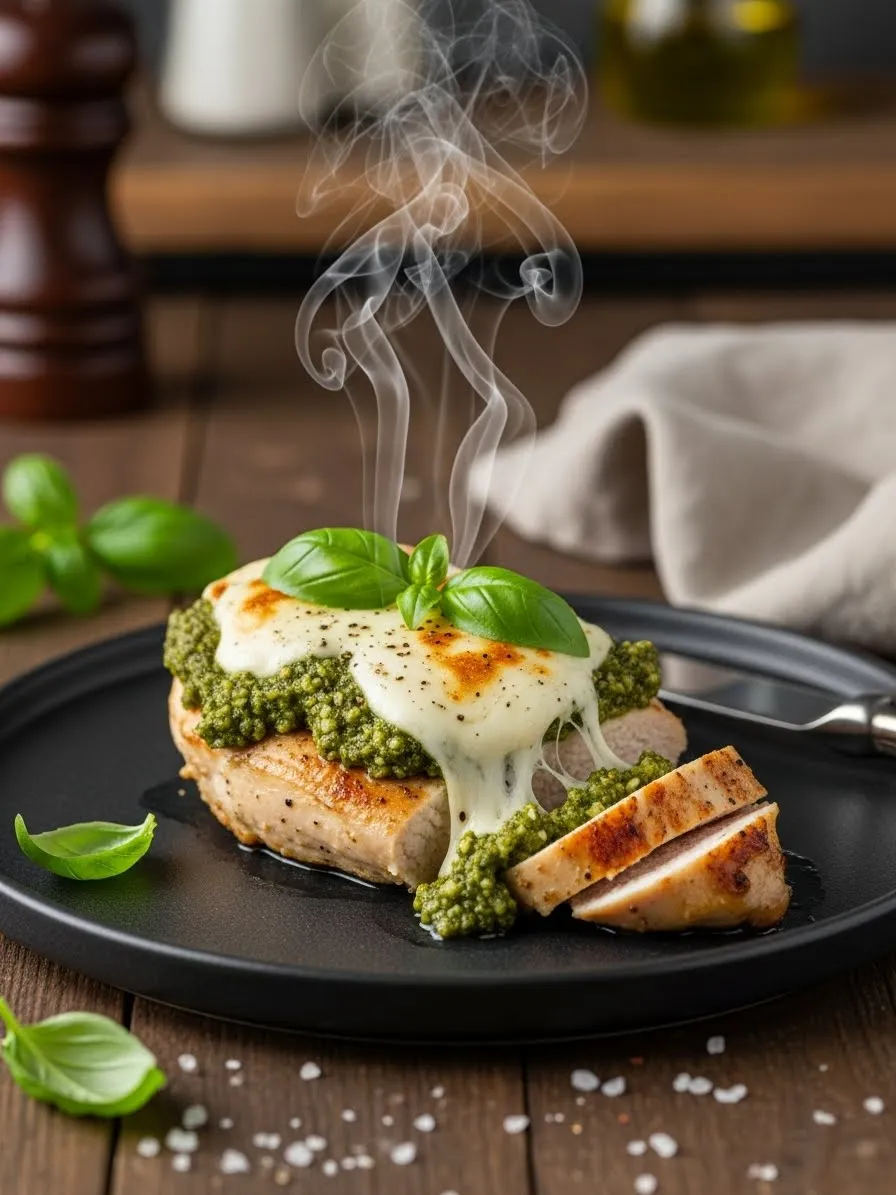
Dry and rubbery meat often ruins a long-awaited dinner. You follow the recipe precisely, yet the results remain disappointing and hard to chew. Most home cooks struggle with pork because it transitions from raw to overcooked in a matter of seconds.
Juicy Pork Chop Recipes
Achieving a succulent texture does not require professional culinary school training. It simply requires small, strategic adjustments to how you select, prep, and heat your meat. This guide provides actionable steps to ensure your kitchen produces restaurant quality results every single time.
Stop settling for flavorless, tough centerpieces on your dining table. These thirty-nine hacks cover everything from secret pantry ingredients to essential timing techniques. Transform your cooking habits and discover how easy it is to serve pork that truly melts in your mouth.
Selecting the right cut of meat serves as the first step toward avoiding a dry dinner. These thick bone in pork chops provide a natural buffer against heat because the bone protects the surrounding meat from overcooking. You can see the beautiful marbling within the pink flesh which promises a moist result after searing.
Cooking with the bone attached adds a depth of flavor that boneless cuts often lack. Heat travels along the bone to help cook the center evenly while the outer edges develop a golden crust. This specific thickness ensures your meat remains juicy inside even if you leave it on the pan for a minute too long.
Fresh pork should always look vibrant and firm before it hits the heat. Using a heavy pan like the one shown helps distribute energy across the entire surface. This prevents hot spots that might cause one side of your dinner to burn while the other stays raw.
Required Ingredients
3 Thick cut bone in pork chops
2 Tablespoons high smoke point oil (like avocado or canola oil)
1 Teaspoon coarse sea salt
1 Teaspoon cracked black pepper
1 Teaspoon garlic powder
Equipment List
Heavy bottomed skillet or grill pan
Kitchen tongs
Paper towels
Meat thermometer
DIY Instructions
Remove the meat from your refrigerator about twenty minutes before you plan to cook. Cold meat often cooks unevenly so letting it reach room temperature helps significantly.
Pat each side of the meat very dry using paper towels. Moisture on the surface creates steam which prevents that delicious brown crust from forming.
Sprinkle the salt, pepper, and garlic powder generously over both sides and the edges. Press the spices into the meat with your fingers so they stick during the searing process.
Place your pan over medium high heat and add the oil. Wait until the oil shimmers or barely starts to smoke before adding the meat.
Lay the chops into the pan carefully to avoid splashing hot oil. Let them cook undisturbed for about five minutes to develop a deep brown color.
Flip the meat using your tongs and cook the other side for another five minutes.
Check the internal temperature by inserting your thermometer into the thickest part without hitting the bone.
Remove the pan from the heat once the thermometer reads 140 degrees Fahrenheit.
Transfer the meat to a clean plate and let it sit for five full minutes. Resting allows the juices to move back into the fibers so they do not spill out when you take your first bite.
2. Brining with Coarse Sea Salt
Juicy Pork Chop Recipes
Applying salt well before the meat touches the pan transforms the texture of your pork. This simple step acts as a dry brine that breaks down tough muscle fibers effectively. You can see how the white grains sit on the surface to draw out moisture and then reabsorb it back into the flesh with added flavor.
Dry brining creates a seasoned environment within the meat rather than just on the skin. This process ensures every bite remains savory and helps the proteins hold onto water during the cooking process. You will notice the meat looks slightly darker and more translucent after the salt does its work.
Patience during this phase yields the best results for anyone struggling with dry chops. Leaving the salt to penetrate for at least thirty minutes makes a massive difference in tenderness. It prepares the surface for a beautiful crust while keeping the interior remarkably soft.
Required Ingredients
2 Thick bone in pork chops
1 Tablespoon coarse sea salt (enough to coat surface)
Equipment List
Cutting board or slate plate
Paper towels
DIY Instructions
Take your pork out of the package and place it on a flat surface like a cutting board.
Use a paper towel to pat the meat dry so the salt sticks directly to the flesh.
Sprinkle a generous layer of coarse salt over the top and bottom of each piece.
Rub the salt gently into the meat to make sure it is evenly distributed.
Set the meat aside at room temperature for thirty to forty minutes.
Watch as the salt disappears into the meat which signals it is ready for the heat.
Avoid rinsing the salt off before cooking as this will add unnecessary moisture back to the surface.
3. The Paper Towel Pat Down
Juicy Pork Chop Recipes
Removing surface moisture is a secret step that many home cooks overlook. This image shows the proper technique of using a clean paper towel to soak up every drop of liquid from the meat. Eliminating this moisture is the only way to ensure your pan sears the pork instead of steaming it.
Steamed meat often turns grey and stays tough because the temperature never gets high enough to brown the outside. A dry surface allows the heat to trigger the chemical reaction that creates a savory crust. This crust locks in the internal juices and provides a satisfying crunch.
Hold the paper towel firmly and press down across the entire surface of the chop. You may need two or three towels if the meat feels particularly wet from the packaging. Doing this right ensures your spices stick better and your pan stays hot.
Required Ingredients
1 Thick pork chop
2 Small pinches of black pepper
Equipment List
Roll of high quality paper towels
Non stick skillet
DIY Instructions
Place your raw pork chop inside a clean pan or on a plate.
Fold a single paper towel into a square to create a thick pad.
Press the towel firmly against the top of the meat to absorb all surface liquids.
Flip the meat over and repeat the process on the other side with a fresh towel.
Check the edges and near the bone since water often hides in those crevices.
Season the meat only after you have confirmed the surface feels completely dry to the touch.
4. Scoring the Fat Cap
Juicy Pork Chop Recipes
Cutting small slits into the white fat along the edge of the chop prevents the meat from curling. When fat hits a hot pan it shrinks much faster than the muscle tissue. This tension often causes the chop to bow upward which creates an uneven cook.
Scoring allows the fat to render down quickly and stay flat against the cooking surface. You can see in the photo how the precise cuts reach just to the edge of the pink meat. This technique ensures that every square inch of the pork maintains contact with the heat.
Using a sharp knife makes this process safe and easy for any beginner. You do not need to cut deep into the meat itself. Just a few shallow nicks through the tough outer membrane will keep your dinner looking professional and cooking evenly.
Required Ingredients
1 Thick cut pork chop with a visible fat strip
Equipment List
Sharp paring knife or chef’s knife
Stable cutting board
DIY Instructions
Lay the pork chop flat on your cutting board with the fat side facing you.
Grip your knife firmly and make a small vertical cut through the white fat.
Space these cuts about one inch apart along the entire length of the fat cap.
Stop the knife as soon as you reach the pink part of the meat to avoid losing juices.
Repeat this on any other chops you plan to cook to ensure they all stay flat in the pan.
5. Monitoring Internal Temperature
Juicy Pork Chop Recipes
Using a digital probe represents the most reliable way to guarantee juicy results every time. This tool removes all the guesswork by showing you exactly what is happening inside the thickest part of the meat. Taking the pork off the heat at the right moment prevents the proteins from tightening and becoming like rubber.
Pork is safe to eat and much tastier when cooked to medium rare or medium. This image shows a reading of 140 degrees which is the sweet spot for pulling the pan off the stove. The temperature will naturally rise a few more degrees while the meat rests on the counter.
Avoid cutting into the meat to check for doneness because that lets the moisture escape. A thin probe leaves a tiny hole that keeps the delicious juices trapped where they belong. This small investment in a thermometer changes your cooking game forever.
Required Ingredients
1 Cooked pork chop (still in the pan)
Equipment List
Digital instant read thermometer
Grill pan
DIY Instructions
Open the probe of your digital thermometer and turn the power on.
Insert the metal tip into the very center of the thickest part of the pork chop.
Steer clear of the bone because bone conducts heat differently and will give a false reading.
Wait three seconds for the numbers on the screen to stop moving.
Aim for a reading between 140 and 145 degrees for the most tender texture.
Pull the chop from the heat immediately once you reach that target number.
6. Tenting and Resting
Juicy Pork Chop Recipes
Giving your meat time to rest under a layer of aluminum foil is a mandatory step for success. Heat forces the juices into the center of the chop during the cooking process. If you cut it immediately those juices will run out onto your plate and leave the meat dry.
Tenting with foil keeps the heat inside so the meat stays warm without continuing to cook aggressively. The fibers inside the pork relax during these five to ten minutes. This relaxation allows the moisture to redistribute throughout the entire piece of meat.
Notice how the sliced piece in the image looks moist from edge to edge. This result only happens because the cook waited before picking up the knife. Your patience will be rewarded with a much softer and more flavorful dining experience.
Required Ingredients
1 Freshly cooked pork chop
Foil for covering
Equipment List
Aluminum foil
Resting plate or wooden board
Sharp carving knife
DIY Instructions
Move your pork chop from the hot pan to a room temperature plate as soon as it is done.
Tear off a piece of aluminum foil that is large enough to cover the plate.
Drape the foil loosely over the meat like a small tent.
Leave the meat alone for at least five full minutes without touching or poking it.
Remove the foil and slice the meat against the grain for the best bite.
7. Searing for a Golden Crust
Juicy Pork Chop Recipes
Creating a dark brown exterior provides a massive boost to the overall flavor and texture of the pork. This image displays the beautiful grill marks and peppery seasoning that form when meat hits a very hot surface. A strong sear creates a barrier that helps maintain the structure of the chop.
High heat is your friend when you want to achieve this level of color. The sugars and proteins on the surface react to the heat to create a complex and savory taste. You should hear a loud sizzling sound the moment the meat touches the metal.
Proper spacing in the pan allows the heat to circulate around each piece of meat. Crowding the pan will drop the temperature and lead to a grey appearance. Keep a small gap between each chop to ensure that every side gets that deep and smoky finish.
Required Ingredients
4 Bone in pork chops
Salt and cracked black pepper
1 Tablespoon cooking oil
Equipment List
Large cast iron skillet or grill pan
Metal tongs
DIY Instructions
Heat your pan on high for three minutes before adding any oil.
Pour in the oil and swirl it around until the bottom of the pan is coated.
Place the seasoned meat into the pan and press down slightly with your tongs.
Cook for four minutes without moving the meat so the crust can develop fully.
Flip the pork and cook for another four minutes to match the color on the other side.
Stand the chops on their side using tongs to sear the fat edge for one minute.
8. Mayo Sear Technique
Juicy Pork Chop Recipes
Spreading a thin layer of mayonnaise over the surface of your pork might sound unusual but it works wonders. Mayonnaise is mostly oil and egg which creates an incredible browning effect very quickly. This layer protects the meat from drying out while adding a rich and savory depth.
This technique ensures a beautiful golden color even if your stove does not get extremely hot. The fat in the mayo helps the heat distribute evenly across the entire face of the chop. You can see how the creamy swirls sit ready to transform into a crisp crust once they hit the heat.
Do not worry about the flavor of the mayo lingering after the meat is cooked. The tangy taste disappears and leaves behind only a seasoned and crunchy exterior. This hack is a favorite among professional chefs for achieving a restaurant look at home.
Required Ingredients
4 Pork chops
3 Tablespoons of plain mayonnaise
Dried herbs or black pepper
Equipment List
Small spoon or silicone brush
Frying pan
DIY Instructions
Pat the pork chops dry as you normally would before seasoning.
Use a spoon to scoop a small amount of mayonnaise onto each chop.
Spread the mayo in a thin and even layer across the top surface.
Sprinkle your favorite herbs or pepper directly onto the mayo layer.
Place the mayo side down into a preheated pan.
Coat the side facing up with mayo while the first side sears.
Flip the meat and cook until both sides look dark and crispy.
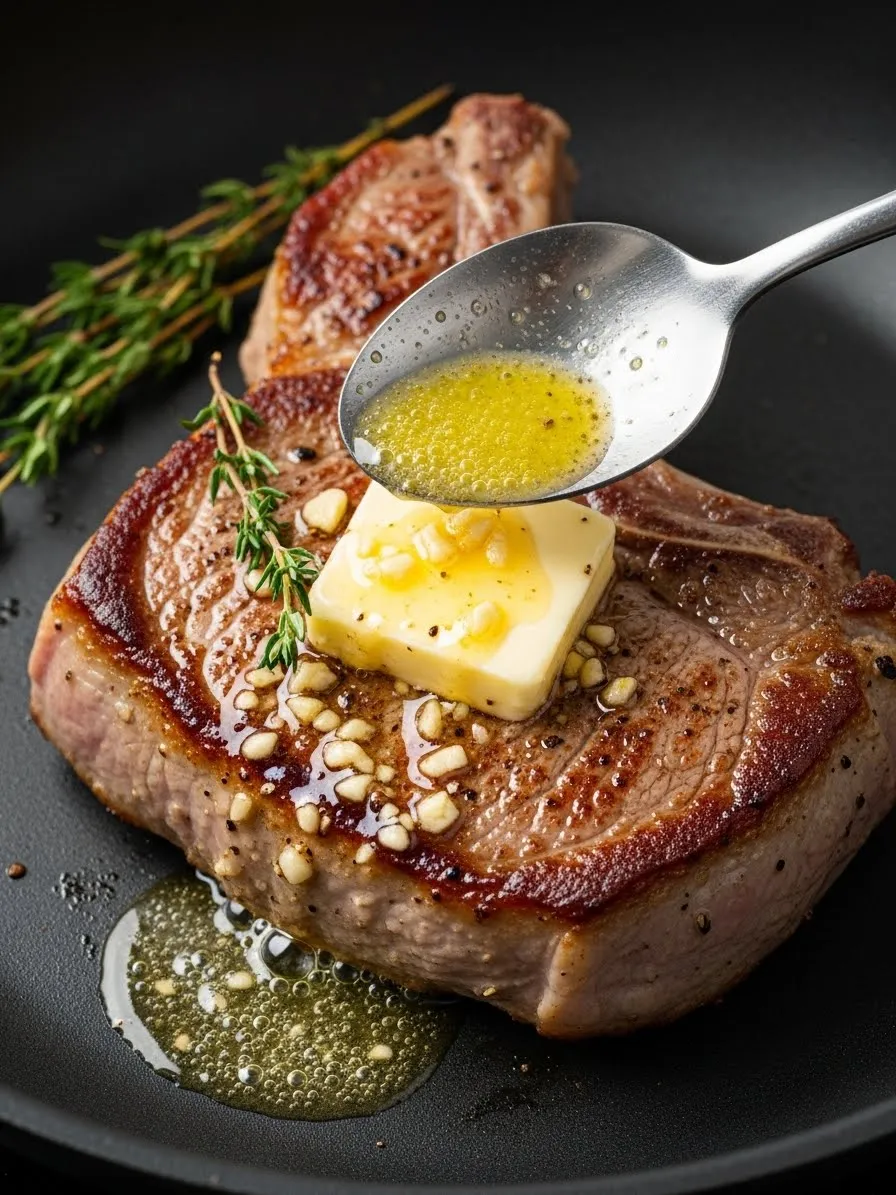
9. Butter Basting with Aromatics
Juicy Pork Chop Recipes
Basting your pork chops with melted butter and fresh herbs adds a luxurious finish to your meal. This process involves tilting the pan and spooning hot fat over the meat repeatedly. The hot butter seeps into every crevice to keep the meat incredibly moist and tender.
Adding garlic and thyme to the pan seasons the butter with an earthy and rich aroma. This image shows the bubbling golden liquid being poured over the seared crust. This final touch creates a glossy appearance that looks as good as it tastes.
Lower the heat slightly before adding the butter to prevent it from burning. You want the butter to foam and turn slightly brown which releases a nutty scent. This simple restaurant trick makes even the most basic pork chop feel like a gourmet feast.
Required Ingredients
2 Seared pork chops
3 Tablespoons unsalted butter
2 Cloves of smashed garlic
1 Sprig of fresh thyme or rosemary
Equipment List
Large metal spoon
Skillet
DIY Instructions
Cook your pork chops until they are almost done according to your thermometer.
Toss the butter, garlic, and herbs into the pan alongside the meat.
Tilt the pan toward you so the melting butter pools at the bottom edge.
Use a large spoon to scoop up the foaming butter and pour it over the top of the meat.
Repeat this motion for about two minutes while the meat finishes cooking.
Ensure the garlic and herbs stay in the butter to release their full flavor.
10. Brown Sugar Rub
Juicy Pork Chop Recipes
Applying a small amount of brown sugar to your pork creates a sweet and smoky glaze. The sugar melts under the heat and caramelizes into the cracks of the meat surface. This provides a wonderful contrast to the salty seasoning and helps produce those dark grill lines.
Sugar also helps the meat brown much faster than salt alone. You can see the crystals sitting on top of the seared meat ready to be melted into a sticky and delicious coating. This method works especially well for those who enjoy a barbecue style flavor profile.
Be careful not to use too much sugar or the pan will become a smoky mess. A light dusting is all you need to achieve that rich and mahogany color. This hack turns a standard weeknight dinner into something truly special and flavorful.
Required Ingredients
2 Thick pork chops
1 Tablespoon light brown sugar
1/2 Teaspoon smoked paprika
Equipment List
Grill pan or outdoor grill
Small bowl for mixing
DIY Instructions
Mix the brown sugar and paprika together in a small bowl until combined.
Sear your pork chops on one side first to get the cooking process started.
Flip the meat and immediately sprinkle the sugar mixture over the cooked side.
Allow the heat from the meat and the pan to melt the sugar into a glaze.
Monitor the pan closely to ensure the sugar does not burn or turn black.
Remove the meat once the glaze looks shiny and the internal temperature is correct.
11. Acidic Liquid Marinating
Juicy Pork Chop Recipes
Submerging your pork in an acidic liquid like lemon juice or vinegar helps tenderize the meat by breaking down rigid proteins. This image shows a rich, amber colored marinade being poured over fresh cuts to begin the softening process. The acid works its way into the fibers to ensure the final result is far from chewy.
Citrus juices provide a bright flavor that cuts through the natural richness of the fat. You can see the lemon slices in the background which add both scent and effective enzymes to the bowl. This method is excellent for thinner cuts that tend to dry out quickly on a hot grill.
Avoid leaving the meat in the liquid for too long or the texture may become mushy. A quick soak for thirty minutes usually provides enough punch to keep the chops succulent. This simple hack ensures your dinner remains moist and full of zesty character.
Required Ingredients
6 Small pork loin cuts
1 Cup apple cider vinegar or lemon juice
2 Tablespoons honey
1 Whole lemon (sliced)
Equipment List
Deep ceramic bowl or glass dish
Large metal spoon
Measuring cup
DIY Instructions
Place your pork pieces inside a deep bowl so they sit flat against the bottom.
Mix your acidic liquid with honey in a separate cup to balance the tartness.
Pour the mixture over the meat until every piece is almost covered.
Stir the contents gently with a spoon to ensure the marinade reaches the underside of the meat.
Cover the bowl and let it sit in your refrigerator for about half an hour.
Drain the excess liquid before you move the meat to your cooking pan.
12. Double Pan Searing
Juicy Pork Chop Recipes
Using two heavy pans at once allows you to cook a larger batch without overcrowding the heat source. This photo displays how maintaining space between the chops ensures each one develops a consistent crust. Cast iron skillets hold heat exceptionally well which helps lock in juices from the very first second.
Separating the meat into two pans prevents the temperature of the metal from dropping too fast. When pans get too crowded the meat releases water and begins to boil rather than sear. This double pan approach keeps the sizzle loud and the exterior beautifully browned.
Fresh greens like broccoli can be tossed into the corners of the pan to soak up the rendered fat. This adds flavor to your side dishes while the pork reaches its finish line. This professional setup is the best way to serve a large family a hot and tender meal.
Required Ingredients
4 Bone in pork chops
2 Tablespoons cooking oil
Salt and black pepper
Fresh broccoli florets
Equipment List
2 Large cast iron skillets
Kitchen tongs
Stovetop with two available burners
DIY Instructions
Place both skillets on your stove and turn the heat to medium high.
Add one tablespoon of oil to each pan once the metal feels hot.
Season your pork chops on both sides with salt and pepper while you wait.
Put two chops into the first pan and two into the second pan.
Let them cook for five minutes on the first side without moving them at all.
Flip the meat over and add your broccoli florets to the empty spaces in the pans.
Cook for another five minutes until the internal temperature reaches a safe level.
13. Cornstarch Coating
Juicy Pork Chop Recipes
Dusting your pork with a fine layer of cornstarch or baking soda creates a protective barrier against high heat. This image shows a white powder being used to coat multiple slices of meat before they hit the oil. This technique is often called “velveting” and it is a secret to keeping meat soft in high heat stir frys.
The starch prevents the outer layer of the meat from becoming tough or stringy. It also helps any sauces or seasonings stick better to the surface of the pork. You will notice a silky texture to the meat once it finishes cooking.
Arrange your slices in a circle around the starch to make the coating process organized and clean. A light toss is all you need to ensure the meat stays tender inside its crispy shell. This is a fantastic way to handle leaner cuts that usually turn dry.
Required Ingredients
12 Thin pork slices
3 Tablespoons cornstarch
1 Pinch of fine salt
Equipment List
Large flat plate or shallow bowl
Clean hands or tongs
DIY Instructions
Arrange your thin pork slices in a circular pattern on a large white plate.
Mound the cornstarch in the center of the plate for easy access.
Take one slice at a time and press both sides into the white powder.
Shake the meat gently to remove any thick clumps of starch.
Lay the coated slices on a clean surface until you are ready to fry them.
Heat your pan with a bit of oil and fry the slices quickly on high heat.
14. The Deep Dish Bake
Juicy Pork Chop Recipes
Cooking pork chops in a high sided baking dish helps trap steam and heat around the meat. This photo shows thick bone in chops resting in a dark pan where they can finish cooking slowly. This environment ensures the meat stays juicy because the moisture cannot escape easily into the open air.
Baking after a quick sear allows the center of the meat to reach the right temperature without burning the outside. The juices collect at the bottom of the dish to create a natural basting liquid. This method is very forgiving for those who worry about overcooking on the stovetop.
Adding a sprinkle of fresh herbs over the top during the bake adds a wonderful aroma. The bone helps conduct heat to the middle of the chop while keeping the structure intact. This result is a dinner that looks rustic and remains incredibly soft.
Required Ingredients
4 Thick seared pork chops
1 Tablespoon dried herbs (thyme or parsley)
Equipment List
Deep rectangular baking pan
Oven mitts
DIY Instructions
Preheat your oven to 375 degrees before you start with the meat.
Sear the outside of your chops in a pan for two minutes on each side first.
Transfer the seared meat into the deep baking dish.
Sprinkle your herbs over the top of each piece for added flavor.
Place the pan in the middle rack of your oven.
Bake for about ten to fifteen minutes depending on the thickness of the meat.
Use a thermometer to ensure the center is cooked through before serving.
15. Pomegranate and Rosemary Garnish
Juicy Pork Chop Recipes
Pairing your meat with acidic fruits and fresh herbs provides a chemical and flavorful boost to tenderness. This image displays seared chops surrounded by bright pomegranate seeds and long rosemary sprigs. The natural acids in the fruit help keep the meat feeling light and easy to chew.
A side of creamy sauce provides a cooling contrast to the smoky char of the grill. You can see how the dark grill marks stand out against the juicy interior of the meat. This presentation is a classic way to ensure every bite is balanced with moisture and fat.
Rosemary oil naturally seeps into the meat as it rests on the board. This adds a woody scent that pairs beautifully with the sweet pop of the fruit. This setup is a great way to impress guests while keeping the pork from feeling dry.
Required Ingredients
3 Grilled pork chops
1/2 Cup fresh pomegranate seeds
4 Sprigs of fresh rosemary
1 Small bowl of sour cream or Greek yogurt
Equipment List
Wooden serving board
Small dipping bowl
Serving spoon
DIY Instructions
Lay your freshly cooked pork chops onto a large wooden board.
Place a small bowl of creamy sauce in the corner of the board.
Scatter the pomegranate seeds over the meat and around the edges.
Tuck the rosemary sprigs between the chops so the warmth releases their oils.
Let everything sit for three minutes so the flavors can mingle.
Serve the chops with a spoonful of the cream for an extra boost of moisture.
16. Meat Mallet Tenderizing
Juicy Pork Chop Recipes
Using a heavy mallet to physically break down tough fibers is a foolproof way to get tender results. This image shows a silver metal mallet positioned over a fresh pork chop wrapped in plastic. This mechanical process ensures that even the cheapest cuts of meat become easy to eat.
Covering the meat with plastic wrap prevents any mess while you work. The textured side of the mallet creates tiny indentations that allow heat and seasonings to penetrate deeper. This technique is especially helpful if you plan to bread and fry your pork.
You do not need to hit the meat with extreme force to get a good result. Consistent and firm taps will thin out the chop and even out its thickness. This makes the cooking time much shorter and more predictable in a hot pan.
Required Ingredients
1 Thick pork loin chop
Large piece of plastic kitchen wrap
Equipment List
Metal meat mallet (tenderizer)
Flat cutting board
DIY Instructions
Place your pork chop in the center of a sturdy cutting board.
Tear off a piece of plastic wrap and drape it completely over the meat.
Hold the mallet by the handle and use the spiked side for the best results.
Tap the meat firmly starting from the center and moving toward the edges.
Flip the meat over and repeat the process on the other side.
Stop once the meat has spread out and looks about half an inch thick.
17. The High Heat Flame Sear
Juicy Pork Chop Recipes
Cooking over an open gas flame provides a rapid sear that locks in moisture instantly. This photo shows a cast iron pan sitting directly over blue flames with steam rising from the hot meat. This intense heat creates a savory crust that prevents the internal juices from leaking out.
Using tongs to flip the meat ensures you have total control over the cooking process. You can see the dark grid patterns forming on the surface which indicate a successful sear. This method is the fastest way to get a restaurant quality finish on your pork.
Make sure your pan is smoking hot before the meat ever touches the surface. This prevents the pork from sticking and ensures the proteins firm up immediately. This quick blast of heat is the best defense against a grey and soggy dinner.
Required Ingredients
1 Large pork steak or chop
1 Tablespoon high heat oil
Equipment List
Cast iron skillet
Metal kitchen tongs
Gas stove
DIY Instructions
Turn your gas burner to a high setting and place the empty pan on top.
Wait three minutes until you see a tiny bit of wispy smoke coming off the metal.
Pour the oil into the pan and tilt it to coat the entire bottom surface.
Place the meat into the center of the pan using your tongs.
Press down on the meat for ten seconds to ensure good contact with the heat.
Cook for three minutes on each side until the exterior is dark and crisp.
18. Slicing Against the Grain
Juicy Pork Chop Recipes
Cutting your pork in the right direction is just as important as how you cook it. This image shows a beautifully rested chop being sliced into thick strips with a sharp knife. By cutting across the muscle fibers you make the meat much easier to chew and enjoy.
You can see the light pink center which proves the meat stayed juicy and tender during the rest. A sharp blade prevents the meat from tearing or losing its shape while you slice. This presentation makes it easy to see the quality of your work before the first bite.
Always look for the direction the lines are running in the meat before you start. Turn the chop so your knife crosses those lines at a right angle. This simple trick turns a good chop into an amazing one that melts in your mouth.
Required Ingredients
1 Rested bone in pork chop
Fresh greens for garnish
Equipment List
Sharp carving knife
Flat serving plate
DIY Instructions
Place your cooked and rested pork chop on a clean plate or board.
Look closely at the surface to see the direction of the long muscle lines.
Position your knife so it is perpendicular to those muscle lines.
Slice the meat into strips that are about half an inch wide.
Keep the slices close together to maintain the warmth of the meat.
Serve immediately while the center is still warm and moist.
19. Tropical Fruit Enzyme Softening
Juicy Pork Chop Recipes
Using tropical fruits like kiwi or pineapple can tenderize pork faster than almost any other method. These fruits contain natural enzymes that actively dissolve the tough connective tissues in the meat. This image shows a bright yellow fruit paste being applied directly to a raw pork chop.
Kiwi is particularly powerful and only needs a few minutes to work its magic. You can see the fresh slices of fruit on the board which can be mashed into a simple and effective rub. This hack is perfect for very thick chops that might otherwise stay tough in the middle.
Be careful not to leave the fruit on for too long or the meat will start to break down too much. A quick ten minute coating is usually all that is required for a soft texture. This adds a subtle sweetness that pairs perfectly with the savory pork.
Required Ingredients
2 Raw pork chops
1 Fresh kiwi or a slice of pineapple
1 Small bowl of fruit puree
Equipment List
Wooden cutting board
Small wooden spoon or spatula
DIY Instructions
Mash a ripe kiwi or a slice of pineapple into a smooth paste in a small bowl.
Lay your raw pork chops flat on a wooden cutting board.
Spread a thick layer of the fruit paste over the top of the meat.
Let the meat sit at room temperature for no more than ten minutes.
Scrape the fruit paste off the meat with a spoon before you begin cooking.
Pat the meat dry and season it as you normally would for the pan.
20. The Foil Wrap Finish
Juicy Pork Chop Recipes
Wrapping your meat in a foil nest while it rests helps preserve every drop of liquid. This photo shows a thick cut of pork sliced open to reveal a perfectly pink and moist interior. The foil acts as a small oven that keeps the temperature stable while the juices settle.
You can see the steam rising from the meat which shows that it is still hot and ready to eat. Resting in foil prevents the outer crust from becoming too hard or dry. This is the final step in ensuring your hard work in the kitchen pays off at the table.
Make sure the foil is gathered loosely around the meat so it does not squash the crust. The juices gathered at the bottom of the foil can be poured back over the meat for extra flavor. This simple habit is the mark of a truly skilled home cook.
Required Ingredients
1 Large seared pork chop
Salt and pepper to taste
Equipment List
Square sheet of aluminum foil
Frying pan
Sharp knife
DIY Instructions
Place a sheet of foil inside your pan or on a warm plate.
Set your cooked pork chop directly in the center of the foil sheet.
Fold the edges of the foil upward to create a bowl shape around the meat.
Close the top of the foil loosely to trap the heat and steam inside.
Wait five to seven minutes before opening the package.
Slice the meat inside the foil to catch any juices that might escape.
21. Mustard and Seed Rub
Juicy Pork Chop Recipes
Adding a layer of stone ground mustard creates a tangy moisture barrier on your pork chops. This image shows the creamy yellow sauce being poured over a seasoned piece of meat in a pan. The vinegar in the mustard acts as a gentle tenderizer while the seeds add a delightful pop of texture to every bite.
Mustard helps the dry spices cling to the meat during the high heat of searing. You can see the fine grains of pepper and herbs already coating the pork beneath the wet rub. This double layer of flavor ensures the exterior becomes a savory crust that keeps the inside from drying out.
Spread the mustard evenly with a spoon to cover every inch of the surface. This technique prevents the heat from drawing out too much liquid too quickly. You will find that the sharp flavor of the mustard mellows into a deep and savory profile after it hits the hot metal.
Required Ingredients
2 Thick cut pork chops
2 Tablespoons stone ground mustard
1 Teaspoon garlic salt
1 Teaspoon dried thyme
Equipment List
Small ceramic bowl
Stainless steel skillet
Small spoon
DIY Instructions
Place your raw pork chops on a clean surface or directly in a cold pan.
Sprinkle your garlic salt and dried thyme over both sides of the meat.
Use a small spoon to drizzle the stone ground mustard over the top of the chop.
Spread the mustard around until the top and sides of the meat are fully coated.
Turn your stove to medium heat and allow the pan to warm up gradually.
Cook the first side for five minutes before flipping to repeat the mustard coating on the second side.
22. Paprika and Oil Infusion
Juicy Pork Chop Recipes
Infusing your pork with a mix of oil and smoked paprika provides a deep color and a smoky finish. This photo displays a vibrant orange rub being applied to a thick bone in chop. The oil penetrates the meat to keep it lubricated during the cooking process while the paprika adds an earthy warmth.
Using a spoon to apply the rub ensures you get a thick and consistent layer. Notice the raw chop in the background waiting its turn for this flavor boost. This method is particularly effective for thick cuts that need a long time on the heat to reach a safe internal temperature.
Avoid using high heat when cooking with sugar based rubs, but this oil and spice mix handles the flame well. The paprika will toast in the pan to create a rich scent throughout your kitchen. This is a simple way to make your dinner look and taste like it came from a professional smokehouse.
Required Ingredients
2 Bone in pork chops
1 Tablespoon smoked paprika
2 Tablespoons olive oil
1/2 Teaspoon sea salt
Equipment List
Wooden cutting board
Large metal spoon
Small mixing bowl
DIY Instructions
Mix the olive oil, paprika, and salt in a small bowl until it forms a thick paste.
Lay your pork chops flat on a wooden cutting board.
Scoop the red oil mixture onto the center of each chop using your spoon.
Spread the paste from the center outward until the entire surface is covered.
Let the meat sit for ten minutes so the oil can start soaking into the fibers.
Sear the chops in a preheated pan until the crust looks dark and flavorful.
23. Checking for Added Solutions
Juicy Pork Chop Recipes
Reading the labels on your meat packaging is a vital step in choosing the best pork for tenderness. This image points out a common industry practice where meat is injected with a salt and water solution. While this sounds like it might add moisture, it often results in a rubbery texture and a salty taste that you cannot control.
Avoiding these “enhanced” products allows you to brine and season the meat yourself. You can see the fingers pointing to the warning label that many shoppers miss at the grocery store. Choosing natural pork ensures you are starting with a clean slate for all your tenderizing hacks.
Check the bottom of the package for any excess liquid or hidden ingredients. Natural pork should only have one ingredient on the label: pork. This small bit of research at the store prevents a disappointing and tough dinner later that evening.
Required Ingredients
1 Package of retail pork chops
Equipment List
None (Grocery store observation)
DIY Instructions
Pick up a package of pork chops at your local meat counter.
Flip the package over to find the nutritional facts and ingredient list.
Look for phrases like “injected with up to 12% solution” or “enhanced with sodium phosphates.”
Put that package back if you see those words and look for a “natural” option instead.
Ensure the meat has a bright pink color and no sitting water in the tray before purchasing.
24. Sous Vide Simplicity
Juicy Pork Chop Recipes
Using a sous vide machine is the most consistent way to achieve a tender pork chop every time. This image shows a chop sealed inside a plastic bag being cooked in a precise water bath. This method cooks the meat to the exact temperature you set so it is impossible to overcook or dry out the pork.
The bag locks in every drop of juice and prevents the meat from losing its natural moisture to the air. You can see the digital display showing a target of 135 degrees for a two hour cook. This slow and low approach breaks down connective tissues without making the muscle fibers tight.
Notice how the meat remains pink and vibrant even while it sits in the hot water. This technique allows you to prepare your dinner hours in advance without any stress. You only need a quick sear in a pan at the very end to get that crunchy exterior you love.
Required Ingredients
1 Thick pork chop
1 Sprig of fresh herbs
1 Pinch of salt
Equipment List
Sous vide immersion circulator
Large water container
Vacuum sealer or zip top bag
DIY Instructions
Fill a large pot or plastic tub with water and attach your sous vide machine.
Set the machine to 140 degrees Fahrenheit and let the water heat up.
Place your seasoned pork chop inside a vacuum bag or a heavy duty zip bag.
Remove as much air as possible before sealing the bag tightly.
Drop the bag into the water bath and ensure it is fully submerged.
Let the meat cook for at least ninety minutes but no more than four hours.
Remove the chop from the bag and sear it quickly in a hot pan for one minute per side.
25. Finishing with Liquid Gold
Juicy Pork Chop Recipes
Pouring melted butter or oil over a seared chop adds a final layer of fat and moisture. This photo shows two perfectly browned chops in a pan with a small bowl of golden butter ready for basting. This step helps soften the crust and adds a rich mouthfeel that makes the meat feel more tender.
Using high quality fats like avocado oil or grass fed butter improves the overall flavor of the dish. You can see the bottles of oil in the background which are used to keep the pan lubricated. This prevents the meat from sticking and tearing which can cause juices to leak out.
Tilt the pan slightly so the liquid pools at the bottom for easy scooping. This final touch is what separates a dry home cooked meal from a succulent restaurant dish. Your family will notice the difference in texture the moment their fork hits the meat.
Required Ingredients
2 Seared pork chops
2 Tablespoons unsalted butter
1 Tablespoon olive oil
Equipment List
Non stick frying pan
Small dipping bowl
Large spoon
DIY Instructions
Cook your pork chops in the pan until they have a dark brown crust on both sides.
Melt the butter in a small bowl while the meat finishes cooking.
Pour the melted butter directly into the pan with the meat.
Use your spoon to pour the hot fat over the top of the chops repeatedly.
Do this for about sixty seconds to ensure the meat is fully coated and glossy.
Take the pan off the heat and let the meat rest in the buttery liquid for a few minutes.
26. The Oven Finish Method
Juicy Pork Chop Recipes
Starting your pork on the stove and finishing it in the oven is a great way to handle thick cuts. This image shows a seared chop sitting on a plate inside a warm oven alongside roasted vegetables. This indirect heat cooks the center of the meat gently without burning the outside.
A hot oven provides a steady environment that prevents the meat from experience temperature spikes. You can see the steam rising from the roasted potatoes which helps keep the air inside the oven moist. This prevents the surface of the pork from becoming like leather.
Always use a meat thermometer to track the progress when using this two step method. The transition from the stove to the oven allows you to time your meal perfectly. This ensures everything reaches the table hot and at the peak of tenderness.
Required Ingredients
1 Thick bone in pork chop
Assorted vegetables (potatoes and tomatoes)
Equipment List
Oven safe plate or tray
Kitchen oven
Meat thermometer
DIY Instructions
Preheat your oven to 350 degrees before you start cooking the meat.
Sear your pork chop in a hot pan for three minutes on each side.
Move the seared chop to an oven safe plate.
Place the plate on the middle rack of the oven.
Bake the meat for eight to ten minutes until the internal temperature hits 145 degrees.
Remove the plate carefully using an oven mitt and let the meat rest before slicing.
27. The Freezer Bag Brine
Juicy Pork Chop Recipes
Using a large zip top bag to brine your pork is a clean and effective way to tenderize. This photo shows a whole chicken in a bag of liquid, but the same rule applies perfectly to pork chops. Submerging the meat in a salt and sugar solution allows the fibers to absorb moisture deep into the center.
The bag ensures that every part of the meat stays in contact with the brine without using a huge amount of liquid. You can see the clear water surrounding the meat which will transform the texture overnight. This is the most effective hack for those who plan their meals in advance.
Place the bag in a bowl while it sits in the fridge to prevent any accidental leaks. This step is a insurance policy for a juicy and tender dinner the following day. You will be amazed at how much heavier and moister the meat feels after a long soak.
Required Ingredients
4 Pork chops
1 Quart of water
1/4 Cup salt
1/4 Cup sugar
Equipment List
Gallon size zip top bag
Large bowl
Measuring cups
DIY Instructions
Dissolve the salt and sugar into the quart of water in a large bowl.
Place your pork chops inside the gallon size bag.
Pour the salt water solution into the bag until the meat is covered.
Squeeze out as much air as possible and seal the bag tightly.
Put the bag in the bowl and place it in the refrigerator for four to twelve hours.
Remove the meat from the bag and rinse it under cold water before patting it dry.
28. Panko Breadcrumb Protection
Juicy Pork Chop Recipes
Coating your pork in breadcrumbs creates a physical shield that protects the meat from direct heat. This image shows a thick chop covered in golden panko crumbs frying in a shallow layer of oil. The crust browns beautifully while the meat inside stays steamed and soft.
The bubbles in the oil show that the heat is working on the crumbs rather than the muscle fibers. This keeps the internal temperature from rising too fast and prevents the pork from becoming tough. You get a satisfying crunch on the outside and a tender bite on the inside.
Press the crumbs firmly into the meat to make sure they do not fall off in the pan. This hack is a favorite for kids and adults alike because it adds a lot of flavor and texture. It is a foolproof way to ensure your pork chops never come out dry.
Required Ingredients
1 Thick pork chop
1 Cup panko breadcrumbs
1 Egg (beaten)
2 Tablespoons flour
Equipment List
Three shallow bowls
Frying pan
Tongs
DIY Instructions
Set up three bowls: one with flour, one with beaten egg, and one with panko.
Dip your pork chop into the flour and shake off any extra.
Submerge the floured meat into the egg wash until it is fully wet.
Press the meat into the panko crumbs until a thick layer sticks to both sides.
Heat a half inch of oil in a pan over medium heat.
Fry the breaded pork for four minutes per side until the crust is deep golden brown.
29. Coffee Rub for Deep Flavor
Juicy Pork Chop Recipes
Using finely ground coffee as a rub adds an incredible depth of flavor and helps tenderize the meat. The natural acidity in the coffee beans works to soften the proteins while it sears on the grill. This photo displays a thick chop on a flaming grill covered in dark brown coffee granules.
The high heat of the grill caramelizes the coffee to create a unique and savory crust. You can see the flames licking the edges of the meat which provides a smoky aroma. This hack is excellent for outdoor cooking where you want a bold taste and a very soft texture.
Mix the coffee with a bit of brown sugar to balance the bitterness. This combination creates a mahogany color that looks professional and tastes even better. Your guests will be surprised by the secret ingredient that makes your pork so tender.
Required Ingredients
2 Thick cut pork chops
2 Tablespoons finely ground coffee
1 Tablespoon brown sugar
1 Teaspoon salt
Equipment List
Outdoor grill or grill pan
Small bowl for mixing rub
Tongs
DIY Instructions
Combine the coffee grounds, brown sugar, and salt in a small bowl.
Rub the mixture generously onto all sides of your raw pork chops.
Let the meat sit for fifteen minutes so the coffee can start working on the fibers.
Preheat your grill to high heat and clean the grates.
Place the chops on the grill and cook for five minutes per side.
Watch for flare ups as the sugar and coffee can burn if left too long.
30. Avoiding the Microwave Reheat
Juicy Pork Chop Recipes
Reheating your leftover pork chops in the microwave is a fast track to a tough and rubbery meal. This image shows a fresh plate of salmon and greens with a warning note to avoid the microwave. The same rule is even more important for pork because the waves cook the meat from the inside out and zap all moisture.
The high energy of a microwave causes the protein fibers to tighten up instantly. You end up with a piece of meat that feels like a shoe sole even if it was tender the night before. This warning is the best advice for enjoying your leftovers as much as the first meal.
Try using a low oven or a pan with a splash of water to reheat your pork instead. This slow warmth gently wakes up the juices without destroying the texture. Your patience will be rewarded with a meal that feels fresh and remains easy to chew.
Required Ingredients
Leftover pork chops
1 Tablespoon water or broth
Equipment List
Small frying pan with lid
Stovetop
DIY Instructions
Place your leftover pork chop into a cold frying pan.
Add a single tablespoon of water or chicken broth to the bottom of the pan.
Cover the pan with a tight fitting lid.
Turn the heat to low and wait about five minutes for the steam to warm the meat.
Flip the chop once and heat for another two minutes.
Remove the meat from the pan and enjoy it while it is still moist and soft.
31. The Target Temp Sizzle
Juicy Pork Chop Recipes
Taking your meat off the heat at the exact right moment is the only way to ensure a succulent bite. This image shows a digital thermometer piercing a thick, pale chop that is still cooking in a heavy pan. Watching the numbers climb allows you to stop the cooking process before the proteins tighten and squeeze out all the moisture.
Pulling the pan when the internal reading hits about 140 degrees lets the natural residual heat finish the job. You can see the steam rising as the meat reaches its peak temperature on the stove. This proactive approach prevents the common mistake of waiting until the meat looks “done” on the outside, which usually means it is overcooked inside.
Accuracy matters more than timing when you want tender results for your family. A quick probe in the thickest part of the muscle gives you the confidence to serve a meal that is safe and juicy. Using this tool takes away the stress of guessing and ensures every dinner is a success.
Required Ingredients
4 Thick cut pork chops
2 Tablespoons cooking oil
Sea salt and coarse pepper
Equipment List
Cast iron skillet
Instant read digital thermometer
Metal tongs
DIY Instructions
Heat your skillet over medium-high heat until the oil begins to shimmer.
Place your seasoned chops into the pan and let them sear for four minutes.
Flip the meat over to brown the other side for another three minutes.
Insert the tip of your digital thermometer into the center of the largest chop.
Watch the display carefully until it reaches 140 degrees Fahrenheit.
Remove the chops from the pan immediately and place them on a clean plate.
Let the meat sit for five minutes so the temperature can rise naturally to 145 degrees.
32. Black Pepper Crusted Sear
Juicy Pork Chop Recipes
Coating the entire exterior of a thick cut with cracked black pepper creates a bold flavor and a protective crust. This photo shows a close-up of a dense, round chop covered in a thick layer of seasoning that has been seared to a dark mahogany color. The pepper helps insulate the meat from the direct flame while adding a satisfying crunch to the surface.
Searing such a thick piece of meat requires patience and a very hot surface to lock in the juices. You can see the pink center peeking through, which indicates the meat remained moist despite the intense heat used for the crust. This method is excellent for those who enjoy a steak-house style finish on their pork.
Rub the seasoning deep into the fibers before the meat ever touches the pan. This ensures the spices stay attached and form a unified barrier against moisture loss. This technique transforms a simple piece of pork into a gourmet centerpiece with a deep, smoky aroma.
Required Ingredients
1 Extra thick pork tenderloin or loin chop
3 Tablespoons cracked black pepper
1 Teaspoon kosher salt
Equipment List
Heavy bottomed pan
Small bowl for mixing spices
Kitchen scale (optional)
DIY Instructions
Mix your cracked pepper and salt in a small bowl until they are well combined.
Press the raw meat firmly into the spice mixture until every side is fully covered.
Shake off any loose grains so they do not burn and become bitter in the pan.
Place the meat in a hot, lightly oiled skillet over high heat.
Sear each side for two minutes to create a dark, flavorful exterior.
Lower the heat to medium to allow the center to reach your target temperature slowly.
33. Selecting Heritage Breeds
Juicy Pork Chop Recipes
Starting with high-quality heritage breeds is a secret hack that professional chefs use for the most tender results. This image displays “Buy Heritage Breeds” above two beautiful cuts of pork with intense white marbling and a deep red color. Unlike standard grocery store pork, these breeds are raised for flavor and fat content, which keeps the meat soft.
Notice the intricate webbing of fat within the muscle fibers of these chops. This fat melts during the cooking process to naturally baste the meat from the inside out. Choosing these specific cuts means you have to do less work in the kitchen to achieve a juicy and tender result.
Vibrant color and firm texture are the hallmarks of a superior breed of pig. Look for names like Berkshire or Duroc at your local butcher to ensure you are buying the best starting material. This investment in quality pays off in a meal that is naturally more flavorful and easy to chew.
Required Ingredients
2 Heritage breed pork chops (Berkshire or similar)
Fresh rosemary sprigs for garnish
Equipment List
Access to a quality butcher or specialty market
Ceramic serving platter
DIY Instructions
Visit a local butcher or a high-end grocery store that carries heritage pork.
Look for meat that has a darker red color rather than the typical pale pink.
Select chops that have visible white lines of fat running through the main muscle.
Ask the butcher to cut the chops at least one and a half inches thick.
Keep the meat cold until you are ready to start your room-temperature tempering process.
34. The Vinegar Spray Hack
Juicy Pork Chop Recipes
Spritzing your meat with a fine mist of apple cider vinegar during grilling helps break down tough proteins. This image shows a green spray bottle releasing a cloud of liquid over seared chops on a hot outdoor grill. The acidity in the vinegar acts as a fast-acting tenderizer that keeps the exterior from becoming hard.
Adding moisture to the surface of the meat prevents it from drying out over the intense heat of the flames. You can see the steam and smoke rising as the liquid hits the hot grate and the meat surface. This simple step adds a subtle tang that complements the smoky flavor of the char.
Keep your spray bottle handy and mist the meat every ten minutes during a long cook. This layer of protection ensures the pork remains succulent even if you are cooking over high heat. It is a favorite trick for barbecue experts who want to maintain a soft and moist texture.
Required Ingredients
4 Large bone-in pork chops
1 Cup apple cider vinegar
1/2 Cup water
Equipment List
Clean food-grade spray bottle
Outdoor grill
Long-handled grill tongs
DIY Instructions
Fill your spray bottle with a mixture of vinegar and water.
Preheat your grill to a medium-high setting and clean the grates thoroughly.
Place your seasoned pork chops on the grill and close the lid for five minutes.
Open the grill and spray a generous mist of the vinegar mixture over the top of the meat.
Flip the chops and spray the other side immediately.
Repeat this process every few minutes until the meat is fully cooked and tender.
35. Red Wine and Butter Finish
Juicy Pork Chop Recipes
Deglazing your pan with a bit of red wine and finishing with butter creates a rich sauce that keeps meat moist. This photo shows a seared chop in a pan with a melting square of butter and a dark, glossy liquid. The wine helps lift the savory bits from the bottom of the pan and incorporates them back into the meat.
Butter adds a silky mouthfeel and a layer of fat that prevents the pork from feeling dry on the palate. You can see the bottles of oil in the background which are used to keep the pan lubricated. This prevents the meat from sticking and tearing which can cause juices to leak out.
Lowering the heat before adding these ingredients prevents the butter from burning and the wine from evaporating too fast. This creates a gentle poaching environment for the final minutes of cooking. Your pork will absorb these rich flavors and remain incredibly soft.
Required Ingredients
1 Seared pork chop
1/4 Cup red wine
1 Tablespoon cold butter
Black pepper
Equipment List
Stainless steel or cast iron pan
Large metal spoon
DIY Instructions
Sear your pork chop as you normally would until it is nearly finished.
Pour the red wine into the hot pan around the edges of the meat.
Use your spoon to scrape up any browned bits stuck to the bottom of the metal.
Add the cold butter to the liquid and stir it until it melts into a thick sauce.
Spoon the red wine butter over the meat repeatedly for two minutes.
Remove the pan from the heat and let the meat rest in the sauce before serving.
36. The Double Bone Presentation
Juicy Pork Chop Recipes
Cooking a double-boned pork roast and slicing it into thick chops preserves a massive amount of internal moisture. This image shows a large, perfectly seared roast with two long rib bones standing tall on a wooden board. Slicing the meat after it has cooked as a single large piece ensures the center stays incredibly juicy.
The thickness of this cut allows for a very long and slow cooking process that melts all the connective tissues. You can see the pink, tender interior as the knife slides through the seared crust. This “king of chops” approach is the ultimate way to serve a crowd without worrying about dry meat.
Resting a large roast like this is vital to allow the juices to settle back into the center. The heavy bone acts as a heat sink that helps the meat cook evenly from the inside out. This presentation is visually stunning and guarantees a tender bite every time.
Required Ingredients
1 Double-bone pork rib roast
Coarse sea salt
Fresh rosemary and garlic
Equipment List
Sharp carving knife
Large wooden cutting board
Roasting pan
DIY Instructions
Season the entire surface of the double-bone roast with salt, garlic, and herbs.
Sear the outside of the roast in a hot pan to develop a dark brown crust.
Transfer the roast to a pan and bake at a low temperature of 300 degrees.
Use a thermometer to pull the roast when the center hits 135 degrees.
Let the roast sit on your cutting board for at least fifteen minutes.
Slice between the two bones to create extra-thick, succulent individual servings.
37. The Spatula Flip Technique
Juicy Pork Chop Recipes
Using a wide metal spatula to handle your meat prevents you from piercing the surface and losing juices. This photo shows a person carefully lifting a seared chop over a flaming grill using professional tongs and a spatula. Supporting the meat from underneath ensures the crust stays intact and the internal moisture stays trapped.
Avoid using forks or sharp tools to move your pork while it is over the heat. Every hole you poke acts like a small drain for the precious liquids that keep the meat tender. This gentle handling technique is a small habit that makes a big difference in the final texture.
Notice how the grill marks are clean and the meat looks plump and full of moisture. This careful movement allows you to check the bottom of the meat without disturbing the cooking process. It is the best way to manage multiple chops at once while keeping them all succulent.
Required Ingredients
5 Small pork loin chops
Cooking spray for the grates
Equipment List
Wide metal spatula
Professional kitchen tongs
Outdoor grill
DIY Instructions
Preheat your grill and ensure the grates are clean and lightly oiled.
Place your chops on the heat and let them sit for three minutes to set the crust.
Slide your spatula under the meat to loosen it from the grate gently.
Use your tongs to help steady the meat as you lift and flip it with the spatula.
Repeat this process for each chop to avoid tearing the delicate surface.
Move the meat to a cooler part of the grill if you see the exterior browning too fast.
38. Compound Butter Topping
Juicy Pork Chop Recipes
Placing a disc of herb-infused compound butter on top of a hot chop adds a final burst of moisture and flavor. This image shows a thick, seared pork chop on a white plate with a melting circle of green herb butter. As the butter melts, it runs down the sides of the meat and into the grill marks to keep the surface soft.
The fat from the butter provides a rich coating that enhances the natural tenderness of the pork. You can see the fresh rosemary and thyme leaves within the butter, which release their oils as they hit the warm meat. This is one of the easiest ways to rescue a chop that might have spent an extra minute on the grill.
Prepare your butter in advance so it is cold when it hits the hot meat. This temperature difference allows the butter to melt slowly and create a thick, savory glaze. This hack turns a basic weeknight meal into a decadent and moist dining experience.
Required Ingredients
1 Grilled pork chop
2 Tablespoons unsalted butter (softened)
1 Teaspoon chopped fresh herbs (parsley or rosemary)
Equipment List
Small bowl for mixing butter
Plastic wrap
Serving plate
DIY Instructions
Mix your softened butter with the chopped herbs in a small bowl.
Roll the butter into a log shape using a piece of plastic wrap.
Chill the butter log in the fridge for an hour until it is firm.
Slice a thick coin of the butter and place it directly on the center of your hot pork chop.
Let the butter melt completely for two minutes before you take your first bite.
Use the melted butter at the bottom of the plate as a dipping sauce for each slice.
39. The Honey Glaze Brush
Juicy Pork Chop Recipes
Brushing a sweet honey or maple glaze over your pork during the last few minutes of cooking seals in moisture. This image shows a pastry brush applying a thick, amber liquid to a seared chop in a roasting pan. The sugar in the glaze creates a sticky barrier that prevents the air from drying out the top of the meat.
This technique adds a beautiful shine and a layer of sweetness that balances the salty pork. You can see the droplets of glaze sitting on the surface, ready to be baked into a delicious and tender coating. This is a fantastic hack for lean boneless chops that need extra help to stay moist.
Apply the glaze only toward the end of the cooking process to prevent the sugar from burning. A few minutes in the oven is all it takes to set the glaze into a shimmering and protective layer. This final step ensures your pork chops are as eye-catching as they are succulent.
Required Ingredients
3 Roasted pork chops
2 Tablespoons honey
1 Teaspoon soy sauce
Equipment List
Silicone or natural bristle pastry brush
Small bowl
Baking pan
DIY Instructions
Mix your honey and soy sauce in a small bowl until the liquid is smooth.
Cook your pork chops in the oven or pan until they are almost done.
Dip your pastry brush into the honey mixture and coat the top of each chop generously.
Return the meat to the heat for three more minutes to allow the glaze to bubble and stick.
Remove the meat from the heat and let it rest so the glaze can firm up slightly.
Serve the chops with any extra glaze from the bottom of the pan poured over the top.
Key Takeaways
Temperature is everything. Pulling meat at 140°F and letting it rest is the most effective way to avoid dryness.
Prep work pays off. Techniques like dry brining, scoring fat, and patting the meat dry create a superior crust and internal moisture.
Mechanical and chemical help. Use mallets for physical tenderizing or acidic marinades and fruit enzymes to break down tough fibers.
Fat adds moisture. Incorporating butter basting, mayo sears, or selecting heritage breeds ensures a richer, softer bite.
Mastering the art of the juicy pork chop is a journey of small wins. You now have a massive toolkit of techniques that prevent the proteins from tightening into a tough mess. Whether you choose the precision of sous vide or the simplicity of a paper towel pat-down, your results will improve immediately.
Cooking should be a joy rather than a stressful guessing game. Experiment with these different methods to find which flavors and textures suit your family best. You will soon find that “tough” is a word that no longer describes your dinner.
Take these hacks into your kitchen tonight and start with the most basic steps. Consistency is the secret ingredient to becoming an expert at the stove. Your perfectly tender, golden-brown pork chops are just one sear away.
Spread the loveStop letting long grocery lists and mountain-high piles of dishes steal your evening joy. Many people believe a delicious dinner requires hours of preparation and an overflowing pantry. This collection proves that you…
Spread the loveFinding the time to cook a nutritious meal often feels like a second job. You likely come home after a tiring day only to face a kitchen that requires hours of your energy.…
Spread the loveWe all appreciate the simple elegance of a traditional fudgy brownie. That rich, dark square represents pure comfort and chocolate bliss. Yet, the world of baking is vast, demanding creativity and unexpected flavor…