The alarm clock blares and the race begins. Between finding matching socks and hunting for car keys, a nutritious meal often falls to the bottom of your priority list. You might settle for a stale granola bar or skip eating entirely.
Make-Ahead Breakfast Recipes
This cycle leaves you feeling drained by noon. Your body needs reliable fuel to handle a demanding schedule. Fortunately, a little preparation can transform your morning chaos into a calm, delicious experience.
We gathered a massive collection of recipes designed for your busiest days. These options range from savory egg bites to refreshing yogurt jars. You can reclaim your time without sacrificing the quality of your food.
Morning chaos often leaves little room for a nutritious meal. These savory egg muffins provide a protein-packed solution that stays fresh in your fridge for days. They combine vibrant green spinach with tangy tomatoes to create a Mediterranean flavor profile.
Each bite offers a light and airy texture. You can grab two or three as you head out the door. Preparing a batch on Sunday ensures you have a reliable breakfast throughout the busy work week.
These bites also cater to various dietary needs since they are naturally low in carbohydrates. Using simple ingredients makes the cooking process quick and stress-free. Your family will appreciate having a warm meal ready in seconds.
Required Equipment
12-cup non-stick muffin tin
Large mixing bowl
Whisk or large fork
Measuring cups and spoons
Cutting board and knife
Wire cooling rack
Ingredients
8 large eggs
1/2 cup whole milk or heavy cream
1 cup fresh spinach, chopped roughly
1/2 cup sun-dried tomatoes, drained and sliced
1/4 cup crumbled feta cheese
1/2 teaspoon salt
1/4 teaspoon black pepper
Cooking spray or olive oil for greasing
DIY Instructions
Preheat your oven: Set your oven to 350 degrees Fahrenheit. Allow it to heat up fully while you prepare the mixture.
Prepare the muffin tin: Coat each cup of the muffin tin thoroughly with cooking spray. This prevents the eggs from sticking to the sides.
Whisk the eggs: Crack all eight eggs into your large mixing bowl. Pour in the milk, salt, and pepper. Use your whisk to beat the mixture until the yolks and whites are completely combined.
Prepare the vegetables: Chop your fresh spinach into small pieces. Slice the sun-dried tomatoes into thin strips if they are not already cut.
Layer the fillings: Place a small pinch of chopped spinach and a few slices of sun-dried tomato into the bottom of each muffin cup. Sprinkle a little feta cheese on top of the vegetables.
Add the egg mixture: Carefully pour the whisked egg liquid into each cup. Fill them about three-quarters of the way to the top to allow room for the eggs to rise.
Bake the muffins: Place the tin on the center rack of the oven. Bake for 20 to 25 minutes. You will know they are done when the centers feel firm to the touch and the edges are lightly golden.
Cool and store: Let the muffins sit in the tin for five minutes. Slide a butter knife around the edges to pop them out. Place them on a wire rack to cool before putting them in a container for the fridge.
2. Apple Cinnamon Chia Pudding Jars
Make-Ahead Breakfast Recipes
Mornings often feel like a race against the clock. Preparing these chia pudding jars ahead of time gives you a nutritious head start. The combination of crisp green apples and warm cinnamon creates a cozy flavor that reminds many of home-cooked autumn treats.
Small glass jars make this breakfast portable and easy to stack in your refrigerator. Tiny chia seeds expand overnight to create a thick, creamy base. You simply grab a jar and a spoon before heading out to work or school.
Fresh apple chunks add a satisfying crunch to every bite. This recipe relies on natural sweetness and wholesome fats to keep you full until lunch. You will love how simple it is to maintain a healthy routine with such a tasty option.
Required Equipment
Three 8-ounce glass mason jars with lids
Small mixing bowl
Measuring cups and spoons
Sharp knife and cutting board
Large spoon for stirring
Ingredients
1 cup unsweetened almond milk or coconut milk
4 tablespoons black chia seeds
2 medium green apples, diced into small cubes
1 teaspoon ground cinnamon
1 tablespoon maple syrup or honey
1/2 teaspoon vanilla extract
DIY Instructions
Mix the base: Pour your choice of milk into a mixing bowl. Add the chia seeds, vanilla extract, and your sweetener. Stir the liquid vigorously for one minute to ensure the seeds do not clump together.
Rest the mixture: Let the bowl sit for about five minutes. Stir it again once the seeds begin to absorb the liquid.
Prepare the fruit: Wash your green apples thoroughly. Use a sharp knife to cut them into small, bite-sized cubes. Toss the cubes with half of the cinnamon in a separate small bowl.
Layer the jars: Divide the chia mixture evenly among your three glass jars. Fill them only halfway to leave plenty of room for the fruit.
Add the topping: Spoon a generous layer of the cinnamon-coated apples over the top of the pudding in each jar.
Seal and chill: Screw the lids onto the jars tightly. Place them in the refrigerator for at least four hours, though leaving them overnight is better for the texture.
Serve cold: Open a jar when you are ready to eat. Sprinkle the remaining cinnamon on top for an extra boost of flavor.
3. Sweet Potato and Black Bean Breakfast Burritos
Make-Ahead Breakfast Recipes
Fueling your body for a long day requires a balance of fiber and protein. These burritos pack roasted sweet potatoes and savory black beans into a soft flour tortilla. The melted cheese creates a rich texture that holds all the hearty ingredients together.
Batch-cooking these wraps allows you to stock your freezer for the entire month. You can reheat one in just a few minutes whenever you need a filling meal. Bright lime juice and fresh cilantro elevate the earthy flavors of the vegetables.
Busy families find these burritos helpful because they are easy to eat with one hand. They offer a great vegetarian alternative to traditional sausage or bacon wraps. You get a colorful and satisfying start to your day without any morning prep work.
Required Equipment
Large baking sheet
Non-stick skillet
Large mixing bowl
Aluminum foil for wrapping
Spatula
Ingredients
4 large flour tortillas
2 large sweet potatoes, peeled and cubed
1 can black beans, rinsed and drained
6 large eggs, lightly beaten
1 cup shredded cheddar or pepper jack cheese
2 tablespoons olive oil
1 teaspoon cumin
Salt and pepper to taste
DIY Instructions
Roast the potatoes: Set your oven to 400 degrees. Toss the sweet potato cubes with olive oil and cumin on a baking sheet. Bake for 20 minutes until they are soft and slightly browned.
Scramble the eggs: Heat a skillet over medium heat. Pour in your beaten eggs and cook them slowly. Use a spatula to move the eggs around until they form soft, fluffy curds.
Warm the tortillas: Heat each tortilla in a dry pan for ten seconds per side. This makes them stretchy and prevents them from cracking while you roll them.
Assemble the filling: Lay a tortilla flat on a clean surface. Place a spoonful of roasted potatoes, black beans, and scrambled eggs in the center.
Add the cheese: Sprinkle a generous amount of shredded cheese over the hot filling so it starts to melt.
Fold the burrito: Pull the sides of the tortilla inward over the filling. Roll the bottom edge up and keep tucking the ingredients in as you roll toward the top.
Wrap for storage: Place each finished burrito on a square of aluminum foil. Wrap it tightly to keep the air out.
Freeze or refrigerate: Store the wraps in the fridge if you plan to eat them within three days. Otherwise, place them in a freezer-safe bag for long-term use.
4. Raspberry Swirl Sheet Pan Pancakes
Make-Ahead Breakfast Recipes
Cooking pancakes for a crowd usually means standing over a hot stove for an hour. This sheet pan method lets you bake a massive batch all at once. The tart raspberries and sweet batter create a beautiful marbled pattern that looks as good as it tastes.
Slicing the finished cake into squares makes serving incredibly fast. You can even top the squares with a drizzle of nut butter for extra protein. These stay moist and fluffy even when reheated later in the week.
Kids love the bright red swirls and the soft texture of these pancakes. Using a baking sheet ensures every piece is cooked evenly. It is a smart way to enjoy a classic weekend breakfast on a hectic Tuesday morning.
Required Equipment
13×18 inch rimmed baking sheet
Parchment paper
Large mixing bowl
Whisk
Small bowl for the raspberry swirl
Ingredients
3 cups all-purpose flour
2 tablespoons baking powder
2 1/2 cups buttermilk
2 large eggs
1/4 cup melted butter
1 cup fresh or frozen raspberries
1/4 cup raspberry jam
2 tablespoons almond butter or peanut butter for drizzling
DIY Instructions
Prepare the oven: Heat your oven to 425 degrees. Line your large baking sheet with parchment paper to ensure the pancakes do not stick.
Mix dry ingredients: Whisk the flour and baking powder together in your large bowl. Ensure there are no large lumps in the powder.
Combine wet ingredients: Stir the buttermilk, eggs, and melted butter into the dry mixture. Mix only until the flour disappears to keep the pancakes light and airy.
Pour the batter: Empty the bowl onto the prepared baking sheet. Use a spatula to spread the batter into the corners so it forms an even layer.
Create the swirl: Mash your raspberries and jam together in a small bowl. Drop small spoonfuls of this mixture onto the pancake batter.
Design the pattern: Use a toothpick or the tip of a knife to gently drag the jam through the batter. This creates a pretty marbled look across the surface.
Bake the pancakes: Slide the tray into the oven for 15 minutes. The top should be golden and spring back when you touch it gently.
Slice and serve: Let the sheet cool for a few minutes before cutting it into twelve large squares. Serve immediately or store them in a container.
5. Quinoa and Soft-Boiled Egg Salad Jars
Make-Ahead Breakfast Recipes
Savory breakfast lovers will enjoy this refreshing change from sweet oats. These jars feature fluffy quinoa topped with fresh arugula and tomatoes. A perfectly jammy soft-boiled egg sits on top to provide a rich, golden sauce for the grains.
Layering the ingredients in a jar keeps the greens crisp and prevents the salad from becoming soggy. The quinoa absorbs the flavors of the feta cheese and tomatoes over time. It is a sophisticated meal that feels like it came from a high-end cafe.
Eating a vegetable-heavy breakfast provides lasting energy without a mid-morning sugar crash. You can prepare several of these on a Sunday evening for a stress-free week. This recipe proves that salads can be a hearty and satisfying morning option.
Required Equipment
Medium saucepan with a lid
Small pot for boiling eggs
Two wide-mouth glass jars
Measuring cups
Ingredients
1 cup cooked quinoa (cooled)
2 large eggs
1 cup fresh arugula
1/2 cup cherry tomatoes, halved
1/4 cup crumbled feta cheese
1 tablespoon pine nuts
1 tablespoon olive oil and a squeeze of lemon
DIY Instructions
Cook the quinoa: Boil one cup of water and add a half-cup of dry quinoa. Cover and simmer for 15 minutes. Let it cool completely before using it in the jars.
Boil the eggs: Bring a small pot of water to a boil. Gently lower the eggs into the water and cook for exactly six and a half minutes.
Cool the eggs: Immediately move the eggs to a bowl of ice water. Let them sit for five minutes before carefully peeling off the shells.
Season the base: Mix your cooled quinoa with olive oil, lemon juice, salt, and pepper in a bowl. This ensures the grains are flavorful.
Start the layers: Place the seasoned quinoa at the very bottom of each glass jar. Press it down slightly with a spoon.
Add the toppings: Place a layer of feta cheese and halved cherry tomatoes over the quinoa. This creates a barrier for the greens.
Fill with greens: Pack a handful of fresh arugula into the top of the jar. Sprinkle the pine nuts over the leaves.
Finish with the egg: Place the soft-boiled egg right on top of the greens. Seal the jar and keep it upright in the fridge until you are ready to eat.
6. Savory Zucchini and Cheese Muffins
Make-Ahead Breakfast Recipes
Hiding vegetables in a muffin is a clever way to boost your daily nutrition. These savory treats use shredded zucchini to stay incredibly moist. A golden crust of melted cheese on top adds a salty, satisfying finish to every bite.
Steam rises from the center when you pull these apart. They work well as a side dish for eggs or as a stand-alone snack on the go. You can easily customize the flavor by adding different herbs or spices to the batter.
Preparing these muffins ahead of time saves you from the temptation of processed pastries. They freeze beautifully and reheat in the microwave in less than a minute. Your kitchen will smell like a bakery while these brown in the oven.
Required Equipment
12-cup muffin tin
Box grater
Clean kitchen towel
Two mixing bowls
Large spoon
Ingredients
2 cups all-purpose flour
1 tablespoon baking powder
2 cups shredded zucchini (about 2 medium zucchinis)
1 cup shredded cheddar cheese
1/2 cup milk
1/4 cup olive oil
1 large egg
Salt and black pepper
DIY Instructions
Grate the zucchini: Use the coarse side of a box grater to shred your zucchinis. Place the shreds in a clean kitchen towel and squeeze hard to remove as much water as possible.
Mix dry items: Combine the flour, baking powder, and a pinch of salt in a bowl. Stir in most of the shredded cheese, saving a little for the topping.
Whisk wet items: Beat the egg, milk, and olive oil in a second bowl until the liquid is smooth.
Combine the batter: Pour the liquid into the dry flour mixture. Add the squeezed zucchini and stir until just combined. Do not overmix or the muffins will be tough.
Fill the tin: Grease your muffin tin or use paper liners. Spoon the thick batter into the cups until they are almost full.
Add the topping: Sprinkle the remaining cheese over the top of each muffin. This will create a crispy, golden crust during baking.
Bake until golden: Place the tin in a 375-degree oven for 20 to 22 minutes. A toothpick inserted into the center should come out clean.
Cool gently: Let the muffins rest in the pan for a few minutes. Move them to a cooling rack so the bottoms do not get soggy from the steam.
7. Blueberry Crumble Breakfast Cake
Make-Ahead Breakfast Recipes
Starting your morning with a slice of cake feels like a luxury. This recipe uses a dense, buttery base filled with juicy blueberries that burst during baking. A crunchy oat crumble on top adds a lovely contrast to the soft fruit.
Pouring a bit of maple syrup over a warm slice enhances the natural sweetness. This dish is great for hosting guests or enjoying a slow morning at home. It stays fresh for several days when kept in an airtight container on your counter.
Blueberries are known for their antioxidants, making this a smart choice for a balanced diet. The cake is sturdy enough to be wrapped in a napkin and eaten on your commute. It brings a bit of joy to even the most stressful Monday.
Required Equipment
9×9 inch square baking pan
Parchment paper
Mixing bowls
Pastry cutter or two forks
Silicone spatula
Ingredients
2 cups all-purpose flour
1 cup granulated sugar
1/2 cup softened butter
1/2 cup Greek yogurt
2 large eggs
2 cups fresh blueberries
1/2 cup rolled oats (for the topping)
1/4 cup brown sugar (for the topping)
DIY Instructions
Line the pan: Heat your oven to 350 degrees. Line your square pan with parchment paper, leaving a little hanging over the sides to use as handles later.
Cream the butter: Beat the softened butter and granulated sugar together until the mixture looks pale and fluffy.
Add the binders: Stir in the eggs and Greek yogurt. The yogurt keeps the cake moist without adding too much fat.
Fold in flour: Gently stir the flour into the wet mixture. Once the white streaks disappear, stop stirring.
Add the berries: Toss your blueberries with a spoonful of flour to prevent them from sinking. Fold them into the batter very carefully.
Make the crumble: Mix the oats, brown sugar, and a tablespoon of cold butter in a small bowl. Use your forks to mash the butter until the mixture looks like coarse sand.
Bake the cake: Spread the batter in the pan and sprinkle the crumble over the top. Bake for 40 to 45 minutes until the center is firm.
Slice and drizzle: Let the cake cool completely before lifting it out of the pan. Cut it into squares and serve with a little maple syrup if you like.
8. Smoked Salmon and Egg Breakfast Jars
Make-Ahead Breakfast Recipes
Bringing the flavors of a classic bagel shop into a portable jar is a game-changer. These jars feature layers of sliced cucumbers, hard-boiled eggs, and premium smoked salmon. A dollop of cream cheese sprinkled with “everything” seasoning adds a savory punch.
Eating directly from the jar keeps your workspace clean while you catch up on emails. The fresh cucumber provides a cooling crunch that balances the richness of the fish. It is a high-protein meal that requires absolutely no cooking in the morning.
You can serve these with a side of whole-grain crackers for added texture. The presentation is elegant enough for a weekend brunch but simple enough for daily meal prep. It is a light and healthy way to start your workday.
Required Equipment
Three wide-mouth 8-ounce jars
Small pot for boiling eggs
Knife and cutting board
Ingredients
6 ounces smoked salmon, torn into pieces
3 large eggs
1 large cucumber, sliced into rounds
1/4 cup cream cheese or Greek yogurt
2 tablespoons “everything bagel” seasoning
Fresh chives and capers for garnish
DIY Instructions
Boil the eggs: Place eggs in a pot of cold water. Bring to a boil, then turn off the heat and cover for 9 minutes.
Peel and slice: Move the eggs to cold water, then peel them. Slice the eggs into rounds or quarters.
Prep the cucumber: Slice your cucumber into thin circles. These will act as the base for your other ingredients.
Layer the jars: Place a few cucumber slices at the bottom of each jar. Follow with a layer of the sliced eggs.
Add the salmon: Tuck several pieces of smoked salmon over the eggs. Gently press them down to make room for the topping.
Add the creaminess: Place a spoonful of cream cheese on top of the salmon. You can use a small scoop to make it look like a neat ball.
Season the top: Sprinkle a generous amount of bagel seasoning over the cream cheese. Add a few capers and chopped chives for extra flavor.
Seal and store: Close the jars tightly. These are best eaten within two days to keep the cucumbers crisp and the fish fresh.
9. Chocolate Nut Energy Bites
Make-Ahead Breakfast Recipes
Sometimes you need a breakfast you can eat while literally running out the door. These energy bites combine oats, nuts, and dark chocolate into a compact, chewy ball. They provide a quick burst of energy and keep you satisfied with healthy fats.
A single batch makes enough bites to last the whole week for the entire family. You do not even need to turn on the oven to make these. They taste like a treat but are packed with nutritious ingredients like flax seeds and walnuts.
Storing them in the freezer makes them extra chewy and refreshing. They are a great alternative to sugary granola bars from the store. You will love having a reliable, bite-sized meal ready for those extra-busy mornings.
Required Equipment
Food processor
Large mixing bowl
Cookie scoop or spoon
Baking sheet with parchment paper
Ingredients
1 cup walnuts or almonds
1 cup pitted dates
1/2 cup rolled oats
2 tablespoons cocoa powder
1/4 cup dark chocolate chips
1 tablespoon chia seeds or ground flax
A pinch of sea salt
DIY Instructions
Process the nuts: Place your walnuts or almonds in the food processor. Pulse them until they look like coarse crumbs, but do not let them turn into butter.
Add the sweetness: Throw the pitted dates into the processor. Blend until the mixture starts to clump together into a sticky paste.
Mix in the base: Add the oats and cocoa powder. Pulse a few more times to combine everything evenly.
Stir in the extras: Move the mixture to a large bowl. Stir in the chocolate chips and chia seeds by hand so they stay whole.
Form the balls: Use a cookie scoop to grab a small amount of the dough. Roll it between your palms until it forms a smooth, round ball about the size of a golf ball.
Add a finish: If you like, roll the finished balls in a little extra cocoa powder or shredded coconut.
Set the texture: Place the bites on a parchment-lined tray. Put them in the fridge for an hour to help them firm up and hold their shape.
Store for later: Move the bites into a zip-top bag or a glass container. Keep them in the fridge for up to two weeks or the freezer for much longer.
10. Sheet Pan Tofu Scramble and Kale
Make-Ahead Breakfast Recipes
Plant-based meal prepping is simple when you use a single sheet pan. This recipe features crumbled tofu seasoned with turmeric for a bright yellow color that looks just like eggs. Roasted red peppers and olives add a salty, Mediterranean flair.
Kale stays hardy in the fridge, making it the perfect green for a week-long meal plan. You can divide the scramble into glass containers for a quick microwaveable breakfast. It is a colorful and nutrient-dense way to start your morning.
The tofu absorbs all the savory spices while it roasts in the oven. This method is much easier than stirring a pan on the stove. You get a consistent texture and flavor in every single bite.
Required Equipment
Large rimmed baking sheet
Clean kitchen towel or paper towels
Large mixing bowl
Three glass meal prep containers
Ingredients
1 block extra-firm tofu, drained
1 bunch fresh kale, stems removed and chopped
1/2 cup roasted red peppers, sliced
1/4 cup kalamata olives, pitted
1 teaspoon turmeric powder
1 teaspoon garlic powder
2 tablespoons olive oil
Salt and pepper to taste
DIY Instructions
Press the tofu: Wrap your block of tofu in a clean towel. Place a heavy book or pan on top for ten minutes to squeeze out the excess water.
Prepare the oven: Heat the oven to 400 degrees. Lightly grease your baking sheet so the tofu does not stick.
Crumble the tofu: Use your hands to break the tofu into small chunks in a bowl. It should look like large cottage cheese curds.
Season the mix: Add the olive oil, turmeric, garlic powder, salt, and pepper to the tofu. Stir until every piece is coated in the bright yellow spice.
Roast the tofu: Spread the tofu on one side of the baking sheet. Bake for 15 minutes to let it firm up and develop a slightly crispy edge.
Add the vegetables: Toss the kale with a little oil and salt. Place it on the other side of the tray. Add the peppers and olives to the tofu side.
Finish baking: Put the tray back in the oven for another 10 minutes. The kale should be slightly wilted but not burnt.
Portion it out: Divide the kale and tofu mixture among your three glass containers. Let them cool before closing the lids and putting them in the refrigerator.
11. Golden Turmeric Oatmeal Jars
Make-Ahead Breakfast Recipes
Mornings often feel like a race against the clock, but these vibrant jars provide a steady head start. They combine earthy turmeric with creamy oats to create a glowing base that tastes as good as it looks. A thick layer of white yogurt adds a cooling contrast to the warm spices underneath.
Crunchy cashews sit right on top to give every spoonful a satisfying texture. You can watch the golden honey drizzle down the sides of the glass, sweetening the grains naturally. Preparing these on Sunday means you have a nutrient-dense meal ready for the most frantic Monday.
Every ingredient works together to support your well-being throughout a long workday. This recipe transforms a standard bowl of porridge into a portable, gourmet experience. You will love how the flavors deepen as the jars sit in your refrigerator overnight.
Required Equipment
Two 12-ounce glass jars with lids
Small saucepan
Measuring cups and spoons
Silicone spatula
Small bowl for mixing
Ingredients
1 cup rolled oats
1 1/2 cups unsweetened almond milk
1 teaspoon turmeric powder
1/2 teaspoon ground ginger
1 cup Greek yogurt
1/4 cup whole cashews
2 tablespoons honey or agave syrup
DIY Instructions
Cook the oats: Combine your almond milk, oats, turmeric, and ginger in a small saucepan. Bring the liquid to a gentle simmer over medium heat.
Stir frequently: Use your spatula to stir the mixture for about five to seven minutes. The oats should become thick and turn a bright golden yellow.
Cool the base: Remove the pan from the heat and let the oatmeal cool for ten minutes. This prevents the yogurt from melting when you layer the jars.
Start the first layer: Spoon half of the golden oatmeal into the bottom of each glass jar. Smooth the top with the back of your spoon.
Add the yogurt: Carefully dollop a thick layer of Greek yogurt over the oatmeal. You can use a knife to swirl it against the glass for a pretty look.
Top with nuts: Place a generous handful of whole cashews on top of the yogurt layer.
Drizzle the sweetener: Pour a tablespoon of honey over the cashews in each jar. Let it seep down into the layers below.
Seal and store: Screw the lids on tightly and place the jars in the fridge. They stay fresh and delicious for up to four days.
12. Savory Soy and Sesame Oatmeal Bowl
Make-Ahead Breakfast Recipes
Savory oats offer a refreshing change of pace for those who prefer salt over sugar in the morning. This bowl features a rich, dark soy sauce glaze that seasons the grains deeply. A soft-boiled egg sits in the center, waiting to release its silky yolk over the savory base.
Bright green scallions and toasted sesame seeds provide a fresh crunch and nutty aroma. The dark ribbons of seaweed add a salty, umami depth that makes this meal feel incredibly substantial. It is a sophisticated way to stay full until lunch without a sugar crash.
Preparing the components ahead of time makes assembly quick during your morning routine. You simply warm the pre-cooked oats and add your fresh toppings. This dish proves that oatmeal can be a hearty, dinner-inspired breakfast.
Required Equipment
Medium saucepan
Small pot for boiling eggs
Serving bowl
Measuring spoons
Small knife and cutting board
Ingredients
1 cup steel-cut or rolled oats
2 cups vegetable broth
1 large egg
1 tablespoon soy sauce
1 teaspoon toasted sesame oil
1 stalk green onion, sliced thin
1 teaspoon toasted sesame seeds
1 small sheet of dried nori (seaweed), shredded
DIY Instructions
Simmer the grains: Cook your oats in the vegetable broth instead of water. This infuses them with savory flavor from the very beginning.
Boil the egg: Place your egg in a small pot of boiling water for six and a half minutes. Immediately move it to a bowl of ice water to stop the cooking.
Prepare the toppings: Slice your green onions into thin rounds while the egg cools. Shred the seaweed into tiny strips using your hands or a knife.
Season the oats: Stir the soy sauce and sesame oil into the warm, cooked oats. Taste them to ensure they are salty enough for your liking.
Peel the egg: Gently crack the shell of the cooled egg and peel it carefully. The center should still be soft and slightly runny.
Assemble the bowl: Scoop the seasoned oats into a bowl. Place the egg right in the middle and slice it open gently.
Garnish the dish: Sprinkle the sesame seeds, green onions, and seaweed strips over the top.
Serve immediately: Enjoy the bowl while it is warm so the yolk creates a rich sauce for the oatmeal.
13. Berry and Quinoa Yogurt Bars
Make-Ahead Breakfast Recipes
Traditional breakfast bars often contain hidden sugars, but these homemade squares keep things simple and fresh. They feature a sturdy quinoa base that provides a satisfying, nutty chew. Layers of creamy white yogurt and frozen berries create a beautiful, stacked appearance.
Slicing these into rectangles makes them the ultimate grab-and-go meal for active mornings. The bright red strawberries and deep blue blueberries pop against the white filling. You can keep a stack in your freezer and pull one out whenever you are in a rush.
Kids love the cold, refreshing texture that feels almost like a frozen treat. Using quinoa adds a boost of protein that helps you stay focused during long meetings. It is a colorful and smart way to fuel your body with real food.
Required Equipment
8×8 inch square baking dish
Parchment paper
Large mixing bowl
Spatula
Sharp knife
Ingredients
2 cups cooked quinoa, cooled
1 1/2 cups thick Greek yogurt
1/4 cup honey or maple syrup
1 cup mixed berries (strawberries, blueberries, raspberries)
1 teaspoon vanilla extract
1/2 cup puffed rice or granola for extra crunch
DIY Instructions
Line the dish: Place a piece of parchment paper in your square dish. Make sure it covers the bottom and sides so you can lift the bars out easily later.
Mix the base: Combine the cooked quinoa and puffed rice in a bowl. Stir in a tablespoon of honey to help the grains stick together.
Press the layer: Spread the quinoa mixture into the bottom of the dish. Use the back of a spoon to press it down firmly until it forms a solid, even sheet.
Prepare the filling: Whisk the Greek yogurt, vanilla, and remaining honey in a separate bowl until smooth.
Spread the yogurt: Pour the yogurt mixture over the quinoa base. Use a spatula to level the surface so it is perfectly flat.
Add the fruit: Press your fresh or frozen berries into the top of the yogurt. Space them out so every bar gets a good mix of fruit.
Freeze the bars: Place the dish in the freezer for at least four hours. The yogurt needs to be completely hard before you try to slice it.
Slice and store: Lift the parchment paper to remove the giant block from the dish. Cut it into eight long bars and store them in the freezer in a sealed bag.
14. Carrot Cake Oatmeal Breakfast Cookies
Make-Ahead Breakfast Recipes
Enjoying cookies for breakfast is a dream come true for both kids and adults. These hearty rounds pack all the flavors of a classic carrot cake into a portable snack. Shredded carrots and chewy raisins provide a natural sweetness that pairs beautifully with the warm spices.
Small pieces of walnuts add a buttery crunch to the soft, oat-based dough. These cookies are sturdy enough to survive being tossed into a backpack or gym bag. They stay fresh for a full week, making your Sunday meal prep very efficient.
You can even top them with a little nut butter for an extra layer of flavor. They offer a great way to sneak a serving of vegetables into your morning routine. You will feel like you are having a treat while actually eating a balanced meal.
Required Equipment
Large baking sheet
Box grater
Large mixing bowl
Measuring cups and spoons
Wire cooling rack
Ingredients
1 1/2 cups rolled oats
1 cup finely shredded carrots
1/2 cup walnuts, chopped
1/2 cup raisins
1/4 cup maple syrup
1 teaspoon cinnamon
1/2 teaspoon ground ginger
1/2 cup applesauce (acts as a binder)
DIY Instructions
Heat the oven: Set your oven to 350 degrees. Prepare a baking sheet with parchment paper or a light coating of oil.
Grate the carrots: Use the fine side of your box grater to shred the carrots. You want them very small so they blend into the cookie dough easily.
Mix dry items: Toss the oats, cinnamon, and ginger together in your large bowl. Ensure the spices are distributed evenly through the oats.
Add the sweetness: Stir in the shredded carrots, raisins, and chopped walnuts.
Bind the dough: Pour the applesauce and maple syrup over the mixture. Stir everything together until the oats are fully damp and the dough is sticky.
Scoop the cookies: Use a large spoon to place mounds of dough onto the baking sheet. Flatten them slightly with your palm since these cookies do not spread during baking.
Bake until firm: Place the tray in the oven for 15 to 18 minutes. The edges should look golden and the centers should feel set.
Cool down: Let the cookies sit on the tray for five minutes. Move them to a wire rack to cool completely before putting them in a container.
15. Savory Barley and Spinach Breakfast Bowl
Make-Ahead Breakfast Recipes
Barley provides a wonderful, chewy texture that makes any breakfast feel more substantial. This savory bowl features vibrant green spinach leaves that wilt slightly against the warm grains. A dusting of black pepper and a few shavings of cheese add a sharp, gourmet finish.
The center of the dish holds a perfectly poached egg with a soft, white exterior. Cutting into the egg allows the yolk to flow over the barley like a rich sauce. It is a sophisticated, restaurant-quality meal that you can easily assemble at home.
Eating whole grains like barley in the morning keeps your energy levels steady for hours. This recipe is a great way to use up leftover grains from a previous dinner. You get a colorful and nutritious start to your day with very little effort.
Required Equipment
Medium saucepan with a lid
Small skillet
Slotted spoon for the egg
Shallow serving bowl
Measuring cups
Ingredients
1 cup cooked pearl barley
1 large egg
1 cup fresh baby spinach
1 teaspoon olive oil
1 tablespoon shredded parmesan cheese
Salt and coarse black pepper to taste
A pinch of red chili flakes (optional)
DIY Instructions
Warm the barley: Place your pre-cooked barley in a small skillet with a teaspoon of water. Heat it over medium-low until it is steaming.
Wilt the greens: Add the fresh spinach to the skillet with the barley. Stir gently for one minute until the leaves turn bright green and shrink slightly.
Boil water for the egg: Fill a small saucepan with water and a drop of vinegar. Bring it to a very light simmer where tiny bubbles are just reaching the surface.
Poach the egg: Crack your egg into a small cup. Use a spoon to create a gentle swirl in the hot water, then slide the egg into the center.
Wait for the set: Let the egg cook for three minutes without touching it. The white should be opaque but the yolk should still be soft.
Drain the egg: Use a slotted spoon to lift the egg out of the water. Gently pat the bottom of the spoon with a paper towel to remove excess moisture.
Build the bowl: Scoop the warm barley and spinach into a shallow bowl. Place the poached egg right on top of the greens.
Season and serve: Sprinkle the parmesan cheese, salt, pepper, and chili flakes over the dish. Enjoy it immediately while the egg is hot.
16. Cherry and Buckwheat Yogurt Jars
Make-Ahead Breakfast Recipes
Buckwheat groats offer a unique, triangular shape and a hearty crunch that stands out in these jars. They are layered between thick, snowy white yogurt and a deep red cherry compote. The frozen cherries on top look like little jewels resting on a bed of fruit sauce.
These jars are excellent for those who want a gluten-free option that still feels filling. The buckwheat stays firm even after sitting in the fridge, providing a great contrast to the smooth yogurt. You can prepare several of these at once for a beautiful display in your refrigerator.
The tartness of the cherries balances the creamy flavor of the yogurt perfectly. This breakfast feels light and refreshing, making it a great choice for warmer mornings. You will love how easy it is to grab a jar as you rush out to start your day.
Required Equipment
Two 8-ounce glass jars
Small saucepan
Measuring cups
Large spoon
Ingredients
1/2 cup buckwheat groats (soaked overnight)
1 1/2 cups Greek yogurt
1 cup frozen pitted cherries
1 tablespoon honey
1/2 teaspoon vanilla extract
DIY Instructions
Prepare the groats: Soak your raw buckwheat groats in water overnight. Rinse them thoroughly in the morning; they will be soft but still have a nice bite.
Make the fruit sauce: Place half of the cherries in a small saucepan with a splash of water. Simmer them over low heat for five minutes until they burst and create a thick syrup.
Sweeten the mix: Stir the honey and vanilla into the warm cherry sauce. Let it cool for a few minutes.
Start the layers: Spoon a layer of the soaked buckwheat into the bottom of each glass jar.
Add the creaminess: Place a generous amount of Greek yogurt over the buckwheat. You can tap the jar on the counter to level the yogurt.
Add the fruit layer: Pour the cherry sauce and simmered fruit over the yogurt.
Repeat the layers: Add one more thin layer of buckwheat and a final scoop of yogurt to fill the jar.
Top with cherries: Place the remaining whole frozen cherries on the very top. Seal the jars and store them in the fridge until you are ready to eat.
17. Pumpkin Spice Millet Porridge
Make-Ahead Breakfast Recipes
Millet is a tiny, ancient grain that creates a wonderfully creamy porridge when cooked slowly. This bowl features a swirl of orange pumpkin puree mixed with warm, seasonal spices. A few green pumpkin seeds in the center add a pop of color and a light crunch.
The circular patterns on top make this dish look like a work of art from a professional kitchen. It provides a cozy, comforting flavor that is especially nice during the colder months. You can make a large pot of the base and simply reheat small portions each morning.
This recipe is a great way to use up leftover canned pumpkin from holiday baking. Millet is highly nutritious and offers a different texture than standard oatmeal. Your home will smell like cinnamon and nutmeg as this simmers on the stove.
Required Equipment
Medium saucepan
Whisk
Measuring cups and spoons
Serving bowl
Ingredients
1/2 cup dry millet
2 cups water or milk of choice
1/2 cup pumpkin puree
1 teaspoon pumpkin pie spice (cinnamon, nutmeg, cloves)
1 tablespoon maple syrup
1 tablespoon pumpkin seeds (pepitas) for garnish
DIY Instructions
Toast the grain: Place the dry millet in a saucepan over medium heat for two minutes. Stir it constantly until it smells slightly nutty.
Add the liquid: Carefully pour the water or milk into the pan. Bring the mixture to a boil, then turn the heat down to low.
Simmer the millet: Cover the pan and let it cook for about 20 minutes. The grains should absorb the liquid and become soft.
Mix the flavor: Stir the pumpkin puree, maple syrup, and spices into the cooked millet. Use a whisk to ensure the pumpkin is fully incorporated and the porridge is smooth.
Check the texture: If the porridge is too thick, add a splash more milk until it reaches your preferred consistency.
Pour the bowl: Scoop the warm pumpkin millet into a serving bowl.
Create the pattern: If you have extra pumpkin puree, you can use a spoon to swirl a circle on top of the porridge.
Add the finish: Sprinkle the green pumpkin seeds in the very center. Serve it warm with an extra drizzle of maple syrup if you like.
18. Apple and Pecan Sheet Pan Oats
Make-Ahead Breakfast Recipes
Baking your oatmeal on a sheet pan creates a texture that is a cross between a muffin and a traditional bowl. This version features thin slices of fresh apple nestled into a bed of cinnamon-scented oats. Crunchy pecan halves are scattered across the top for a rich, nutty finish.
Cutting the finished sheet into large squares makes it easy to pack for the week ahead. Steam rises from the center of a fresh slice, carrying the scent of warm fruit and spices. You can eat these cold like a bar or warm them up for a few seconds.
This method is great for feeding a large family without making individual bowls. The apples soften in the oven and become sweet and tender. It is a hearty and wholesome way to enjoy the flavors of a classic apple crumble for breakfast.
Required Equipment
9×13 inch rimmed baking sheet
Large mixing bowl
Sharp knife and cutting board
Spatula
Measuring cups
Ingredients
3 cups rolled oats
1 teaspoon baking powder
1 tablespoon cinnamon
2 large apples, sliced thin
1/2 cup pecans, chopped roughly
2 cups milk of choice
2 large eggs
1/4 cup melted butter or coconut oil
1/4 cup honey
DIY Instructions
Prepare the pan: Heat your oven to 350 degrees. Grease your baking sheet or line it with parchment paper to prevent sticking.
Mix dry items: Combine the oats, baking powder, and cinnamon in a large bowl. Stir until the powder is invisible.
Combine wet items: Whisk the milk, eggs, melted butter, and honey in a separate container.
Merge the batter: Pour the liquid over the oats and stir well. Let the mixture sit for five minutes so the oats can start to soften.
Spread the oats: Pour the batter onto the baking sheet. Use a spatula to push it into the corners until it forms an even layer.
Decorate the top: Arrange your apple slices in neat rows across the surface of the oats. Sprinkle the pecans into the gaps between the apples.
Bake until golden: Place the tray in the oven for 25 to 30 minutes. The oats should be firm and the pecans should look toasted.
Slice into squares: Let the sheet cool for ten minutes before cutting it into twelve pieces. Store the squares in a container for an easy morning meal.
19. Tomato and Mozzarella Savory Oats
Make-Ahead Breakfast Recipes
This jar of savory oats looks more like a gourmet pasta dish than a breakfast meal. It features a bright red tomato sauce base that seasons the oats with a tangy, Mediterranean flavor. Tiny white mozzarella pearls melt slightly into the warm grains, creating long, cheesy strings.
A sprinkle of dried herbs on top adds an aromatic finish that ties the flavors together. This is a perfect option for those who crave something salty and warm during their morning commute. The glass jar keeps the heat in while you travel to work.
You can prepare the tomato oat base in a large batch and just add the cheese when you are ready to eat. It is a creative way to rethink what “breakfast food” can be. You will love how the savory sauce makes the oats feel like a rich comfort meal.
Required Equipment
Medium saucepan
12-ounce glass jar
Large spoon
Measuring spoons
Ingredients
1 cup rolled oats
1 1/2 cups tomato juice or thin tomato sauce
1/2 cup water
1/4 cup mini mozzarella pearls
1 teaspoon dried oregano or basil
1 tablespoon olive oil
Salt and red pepper flakes to taste
DIY Instructions
Cook the base: Combine the oats, tomato juice, and water in a saucepan. Bring it to a simmer over medium heat.
Season the oats: Stir in the dried herbs, salt, and olive oil. The oats will turn a deep red and absorb the flavor of the tomato.
Simmer until thick: Continue cooking for about five to seven minutes. The mixture should be thick and creamy, similar to a risotto.
Prepare the jar: Spoon half of the hot tomato oats into your glass jar.
Add the cheese: Place a few mozzarella pearls in the middle of the jar. The heat from the oats will start to soften them.
Fill the jar: Add the rest of the tomato oats on top of the cheese.
Finish the top: Place a few more mozzarella pearls on the very top and sprinkle with a bit more oregano or pepper flakes.
Seal and go: Close the jar tightly. If you are eating it later, you can reheat the whole jar in the microwave for 30 seconds to get the cheese extra melty.
20. Mocha Espresso Overnight Oats
Make-Ahead Breakfast Recipes
Coffee lovers will find this jar to be the ultimate morning pick-me-up. It combines the deep flavor of dark cocoa with a shot of espresso to create a rich, chocolatey base. A thick layer of creamy yogurt on top balances the intensity of the mocha oats.
Real coffee beans are scattered across the top to provide a bold aroma and a professional look. This jar is designed to be kept right next to your laptop while you start your workday. It provides both a nutritious meal and a caffeine boost in one portable container.
The chia seeds in the mixture create a pudding-like texture that feels like a decadent dessert. It is a smart way to enjoy your morning coffee and breakfast at the same time. You will look forward to opening this jar every single morning.
Required Equipment
10-ounce glass jar with a lid
Measuring cups and spoons
Small whisk or spoon for mixing
Ingredients
1/2 cup rolled oats
1/2 cup milk of choice
1 shot of espresso or 1/4 cup strong coffee
1 tablespoon cocoa powder
1 tablespoon chia seeds
1/2 cup Greek yogurt
A few coffee beans for garnish (optional)
1 tablespoon maple syrup
DIY Instructions
Mix the mocha base: Combine the oats, milk, coffee, cocoa powder, and chia seeds in your glass jar.
Sweeten it up: Stir in the maple syrup until the cocoa powder is fully dissolved and the liquid looks like chocolate milk.
Rest the oats: Close the lid and shake the jar for thirty seconds. Let it sit on your counter for ten minutes, then shake it again to prevent the chia seeds from clumping.
Chill overnight: Place the jar in the refrigerator for at least six hours. The oats will soak up the coffee and milk, becoming thick and creamy.
Add the topping: In the morning, open the jar and dollop a thick layer of Greek yogurt on top of the mocha oats.
Decorate the jar: Place a few roasted coffee beans on top of the white yogurt for a beautiful contrast.
Serve cold: Enjoy the oats directly from the jar. You can stir the yogurt in or eat it layer by layer.
Store for later: These jars stay fresh in the fridge for up to three days, so you can make several at once.
21. Sausage and Spinach Egg Bites
Make-Ahead Breakfast Recipes
Planning your morning meals shouldn’t feel like a chore. These protein-packed egg bites offer a savory start that keeps you energized until lunch. They feature a golden, fluffy texture studded with bits of seasoned sausage and fresh green spinach.
Small portions make these easy to store in glass containers for the entire week. You can quickly warm them up or enjoy them cold if you are in a true hurry. A light dusting of melted cheese on top adds a salty finish that everyone in the family will love.
Using a wire rack to cool them ensures they stay firm and don’t become soggy. These are a fantastic low-carb option for those watching their sugar intake. You will find that having a batch ready makes your Monday morning much smoother.
Required Equipment
12-cup non-stick muffin tin
Large mixing bowl
Whisk
Measuring cups and spoons
Wire cooling rack
Ingredients
10 large eggs
1/2 cup cooked breakfast sausage crumbles
1 cup fresh spinach, chopped
1/2 cup shredded cheddar cheese
1/4 cup whole milk
1/2 teaspoon salt
1/4 teaspoon black pepper
Cooking spray
DIY Instructions
Heat the oven: Set your oven temperature to 350 degrees. Let it warm up fully while you prep the batter.
Grease the pan: Coat each muffin cup thoroughly with cooking spray. This step is vital so the eggs slide out easily later.
Whisk the eggs: Crack all ten eggs into your large bowl. Add the milk, salt, and pepper, then whisk until the mixture is a pale yellow color.
Prepare the fillings: Chop your spinach into small ribbons. If your sausage is not already crumbled, break it into small pieces with a fork.
Fill the tin: Place a pinch of spinach and some sausage crumbles into the bottom of each muffin cup.
Add the liquid: Pour the egg mixture over the fillings. Fill each cup about three-quarters of the way to leave room for the eggs to puff up.
Top with cheese: Sprinkle a little shredded cheddar over each cup. This creates a tasty crust as they bake.
Bake and cool: Slide the tin into the oven for 20 minutes. Once firm, let them rest on a wire rack before moving them to storage containers.
22. Shakshuka Style Poached Egg Bowls
Make-Ahead Breakfast Recipes
Waking up to a warm, spiced tomato sauce can transform your entire mood. These individual bowls feature a rich red pepper and tomato base that is simmered until thick. A single egg is poached right in the center, creating a silky yolk that blends with the sauce.
Creamy white feta cheese and fresh cilantro provide a cooling contrast to the savory heat. You can use a crusty piece of bread to scoop up every last drop of the flavorful liquid. It is a hearty, restaurant-quality meal that you can easily prepare in your own kitchen.
These bowls are great for a slow brunch or a prepared weekday breakfast. The bold colors make it a beautiful dish to serve to guests. You get a deep, complex flavor with just a few simple pantry staples.
Required Equipment
Three small oven-safe ramekins or bowls
Large skillet
Spatula
Measuring spoons
Ingredients
1 can (15 oz) crushed tomatoes
3 large eggs
1/2 cup diced red bell pepper
1/4 cup crumbled feta cheese
1 tablespoon olive oil
1 teaspoon smoked paprika
1/2 teaspoon cumin
Fresh cilantro for garnish
DIY Instructions
Sauté the base: Heat olive oil in a skillet over medium heat. Cook the diced red peppers until they are soft and slightly browned.
Make the sauce: Pour in the crushed tomatoes, paprika, and cumin. Let the sauce simmer for ten minutes until it thickens and smells aromatic.
Fill the bowls: Divide the hot tomato sauce evenly among your three oven-safe ramekins.
Add the eggs: Use a spoon to make a small well in the center of the sauce in each bowl. Carefully crack one egg into each well.
Bake the eggs: Place the bowls on a baking sheet and slide them into a 375-degree oven. Bake for about 10 to 12 minutes until the whites are set but the yolks remain soft.
Add the cheese: Remove the bowls from the oven and immediately sprinkle the crumbled feta on top. The heat will soften the cheese slightly.
Garnish the dish: Place a few fresh cilantro leaves on top for a burst of color.
Serve warm: Enjoy the dish immediately with a slice of toasted bread for dipping into the yolk.
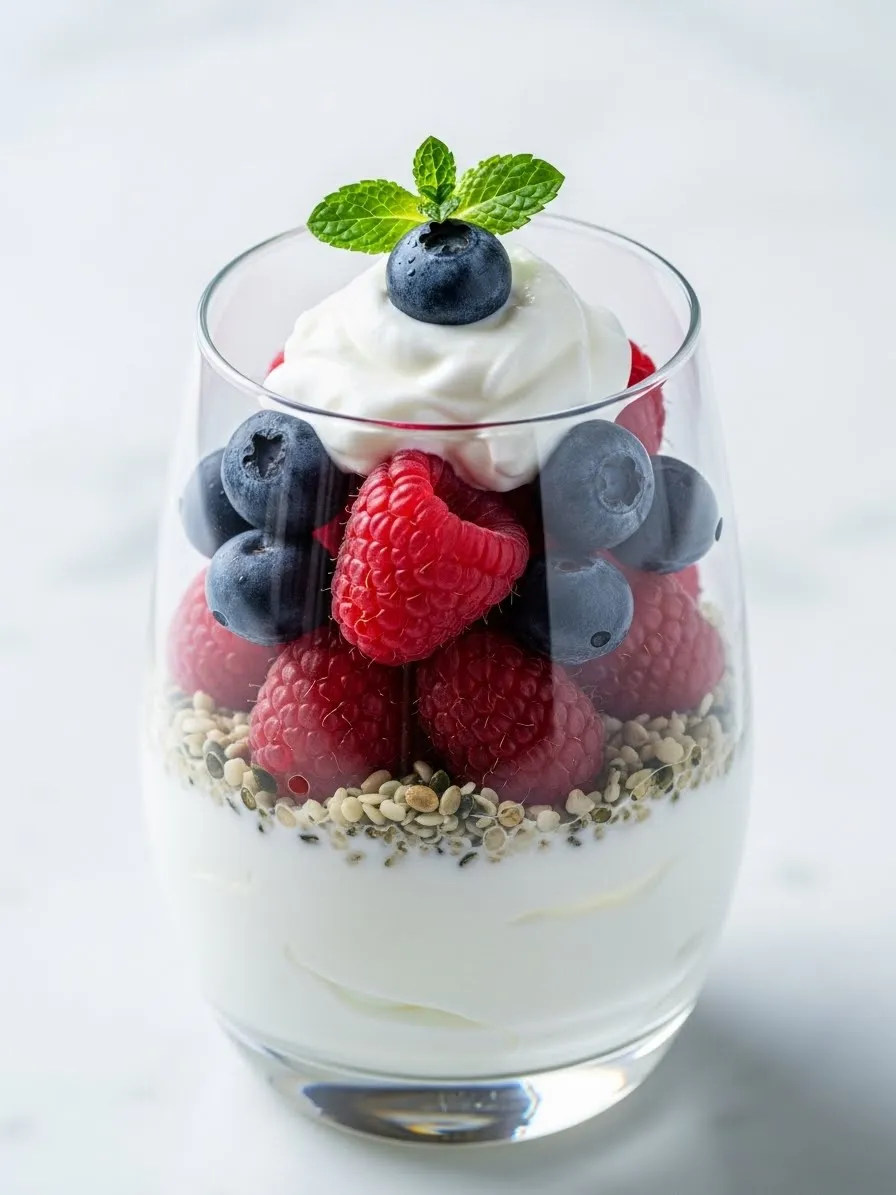
23. Tropical Mango and Macadamia Parfait
Make-Ahead Breakfast Recipes
Brighten your morning with a taste of the islands. This refreshing parfait features sweet, sun-yellow mango chunks layered over a bed of creamy cottage cheese. Tiny bits of green lime zest and crunchy macadamia nuts add layers of texture and flavor.
Small glass jars make this a convenient grab-and-go option for busy professionals. The high protein content of the cheese keeps you feeling full and focused. It is a light, cooling meal that is especially pleasant on a warm summer morning.
Every bite offers a balance of creamy, crunchy, and sweet. You can prepare these the night before to let the flavors meld together. It is a simple way to feel like you are on vacation even on a workday.
Required Equipment
Two 8-ounce glass jars
Sharp knife and cutting board
Measuring cups
Small spoon
Ingredients
1 cup low-fat cottage cheese or Greek yogurt
1 large ripe mango, peeled and diced
1/4 cup roasted macadamia nuts, chopped
1 teaspoon lime zest
1 tablespoon honey (optional)
Fresh mint for garnish
DIY Instructions
Prepare the fruit: Slice the mango into small, uniform cubes. Grate the skin of a lime to get a teaspoon of bright green zest.
Layer the base: Spoon a half-cup of cottage cheese into the bottom of each jar.
Add the fruit: Place a generous layer of mango cubes on top of the cheese.
Add the crunch: Sprinkle the chopped macadamia nuts over the mango layer. These provide a buttery texture that pairs perfectly with the fruit.
Season the top: Scatter the lime zest over the nuts. This adds a zesty aroma that makes the mango taste even sweeter.
Sweeten it: Drizzle a little honey over the top if you prefer a sweeter breakfast.
Seal and chill: Put the lids on the jars and store them in the fridge.
Enjoy cold: Eat the parfait directly from the jar whenever you are ready for a tropical treat.
24. Savory Lentil and Spinach Breakfast Patties
Make-Ahead Breakfast Recipes
Hearty patties offer a unique way to enjoy legumes for breakfast. These golden-brown rounds are made from cooked lentils mixed with chopped spinach and warm spices. They have a satisfying, earthy flavor that feels much more substantial than a typical cereal.
Making a large batch on the weekend allows you to have a quick protein source ready for days. You can eat them on their own or sandwich them between a toasted English muffin. They stay firm and hold their shape, making them a great portable snack.
A hint of cumin and sage gives these patties a savory, sausage-like aroma. They are a wonderful plant-based alternative for those who want a filling meal. You will love how the outside gets slightly crispy when reheated in a pan.
Required Equipment
Large baking sheet
Medium mixing bowl
Potato masher or fork
Measuring cups and spoons
Ingredients
2 cups cooked brown lentils, drained well
1 cup fresh spinach, finely chopped
1/2 cup breadcrumbs or oat flour
1 large egg (or flax egg for vegan version)
1 teaspoon ground cumin
1/2 teaspoon dried sage
Salt and pepper to taste
Olive oil for brushing
DIY Instructions
Mash the lentils: Place your cooked lentils in a bowl. Use a potato masher to crush about half of them into a paste, leaving some whole for texture.
Mix the dough: Add the chopped spinach, breadcrumbs, egg, and spices to the bowl. Stir everything until it forms a thick, sticky dough.
Shape the patties: Scoop a small amount of the mixture and roll it into a ball. Flatten it between your palms to create a disc about one inch thick.
Prepare the tray: Line a baking sheet with parchment paper. Place the patties on the sheet, leaving a little space between each one.
Add a coating: Lightly brush the top of each patty with a bit of olive oil. This helps them turn golden and crispy in the oven.
Bake until firm: Place the tray in a 400-degree oven for 15 to 20 minutes. Flip them halfway through so both sides cook evenly.
Cool down: Let the patties sit on the tray for a few minutes to firm up further.
Store or freeze: Keep them in a sealed container in the fridge for five days, or freeze them for up to a month.
25. Peanut Butter and Berry Breakfast Bars
Make-Ahead Breakfast Recipes
Layering classic flavors into a bar makes for a very convenient morning. These treats feature a thick, creamy yogurt base topped with crunchy granola and fresh raspberries. A swirl of smooth peanut butter on top adds a rich, nutty finish that everyone loves.
Freezing these bars creates a refreshing texture that is perfect for a quick snack. You can slice them into triangles or squares to fit your storage containers. They offer a great mix of protein, healthy fats, and natural fruit sweetness.
The bright red berries look beautiful against the white yogurt and golden granola. It is a smart way to satisfy a sweet craving while sticking to your health goals. You will find yourself reaching for these every time you are in a rush.
Required Equipment
8×8 inch square baking pan
Parchment paper
Small microwave-safe bowl
Spatula
Ingredients
2 cups Greek yogurt
1 cup granola
1/2 cup fresh raspberries and sliced strawberries
1/4 cup smooth peanut butter
1 tablespoon honey or maple syrup
DIY Instructions
Prepare the pan: Line your square pan with parchment paper. Leave a little extra over the edges so you can lift the frozen sheet out later.
Spread the yogurt: Pour the yogurt into the pan and use a spatula to make it perfectly flat.
Add the crunch: Sprinkle your favorite granola evenly over the entire surface of the yogurt.
Press in the fruit: Place the berries on top of the granola. Press them down gently so they stick into the yogurt layer.
Melt the butter: Put the peanut butter in a small bowl and microwave it for 20 seconds. This makes it thin enough to drizzle.
Design the top: Use a spoon to drizzle the warm peanut butter in long lines across the bars.
Freeze solid: Place the pan in your freezer for at least three hours. It needs to be very hard before you try to cut it.
Slice and serve: Lift the block out by the parchment paper handles. Use a sharp knife to cut it into bars and keep them in the freezer until you are ready to eat.
26. Prosciutto and Asparagus Egg Cups
Make-Ahead Breakfast Recipes
Elegant breakfasts don’t have to be complicated to make at home. These egg cups use thin slices of salty prosciutto as a natural, crispy crust. A whole egg is baked inside each cup with tender green asparagus spears reaching out.
The bright orange yolk in the center provides a rich sauce for the vegetables. Small dots of white goat cheese add a tangy creaminess that balances the saltiness of the meat. These look like they came from a high-end cafe and are sure to impress your family.
Preparing these on a Sunday gives you a gourmet meal that takes only seconds to reheat. They are naturally gluten-free and very high in protein. You get a sophisticated start to your day with minimal morning effort.
Required Equipment
6-cup jumbo muffin tin
Small knife
Measuring spoons
Ingredients
6 thin slices of prosciutto
6 large eggs
12 thin asparagus tips
2 tablespoons crumbled goat cheese
Coarse black pepper
Cooking spray
DIY Instructions
Heat the oven: Set your oven to 375 degrees.
Line the tin: Spray your muffin tin with oil. Lay one slice of prosciutto into each cup, pressing it against the bottom and sides to create a meat bowl.
Prep the vegetables: Snap the woody ends off your asparagus. You only want the tender top parts that will fit inside the muffin cups.
Add the eggs: Carefully crack one egg into each prosciutto-lined cup. Try to keep the yolk whole for a better presentation.
Tuck in the greens: Place two asparagus tips into each cup, leaning them against the side of the egg.
Add the cheese: Sprinkle a little goat cheese over the top of each egg. Season with a generous amount of black pepper.
Bake the cups: Slide the tin into the oven for 12 to 15 minutes. The whites should be solid, but the yolks can stay a bit soft if you prefer.
Remove and serve: Use a spoon to lift the cups out of the tin. The prosciutto will be crispy and hold its shape perfectly.
27. Black Bean and Corn Breakfast Quesadillas
Make-Ahead Breakfast Recipes
Folding savory ingredients into a tortilla is a great way to make a portable meal. These quesadillas are stuffed with fluffy scrambled eggs, black beans, and sweet yellow corn. Melted cheese acts as a delicious glue that keeps everything together while you eat.
Grilling the outside until it is golden brown adds a satisfying crunch to every bite. You can slice them into triangles and pack them in foil for a meal on the move. They are filling, colorful, and packed with plant-based fiber.
These are a hit with both kids and adults because they are so easy to customize. You can dip them in your favorite salsa for an extra kick of flavor. It is a hearty and fun way to fuel your morning.
Required Equipment
Large non-stick skillet
Spatula
Pizza cutter or sharp knife
Measuring cups
Ingredients
4 large flour tortillas
6 large eggs, scrambled
1/2 cup canned black beans, rinsed
1/2 cup frozen corn, thawed
1 cup shredded Mexican blend cheese
1 tablespoon butter or oil
DIY Instructions
Cook the eggs: Scramble your eggs in a pan until they are soft and fluffy. Set them aside in a small bowl.
Prep the filling: Mix the black beans and corn together in another bowl.
Build the base: Lay a tortilla flat. Sprinkle a layer of cheese over one half of the surface.
Add the layers: Place a spoonful of eggs and the bean-corn mix over the cheese. Finish with another light sprinkle of cheese on top.
Fold it over: Fold the empty half of the tortilla over the filling to create a half-moon shape.
Toast the outside: Melt a little butter in your skillet over medium heat. Place the folded tortilla in the pan and cook for two minutes per side.
Melt the center: The cheese should be completely melted and the outside should be golden and crispy.
Slice and pack: Use a pizza cutter to slice the quesadilla into three triangles. Wrap them in foil if you are taking them to go.
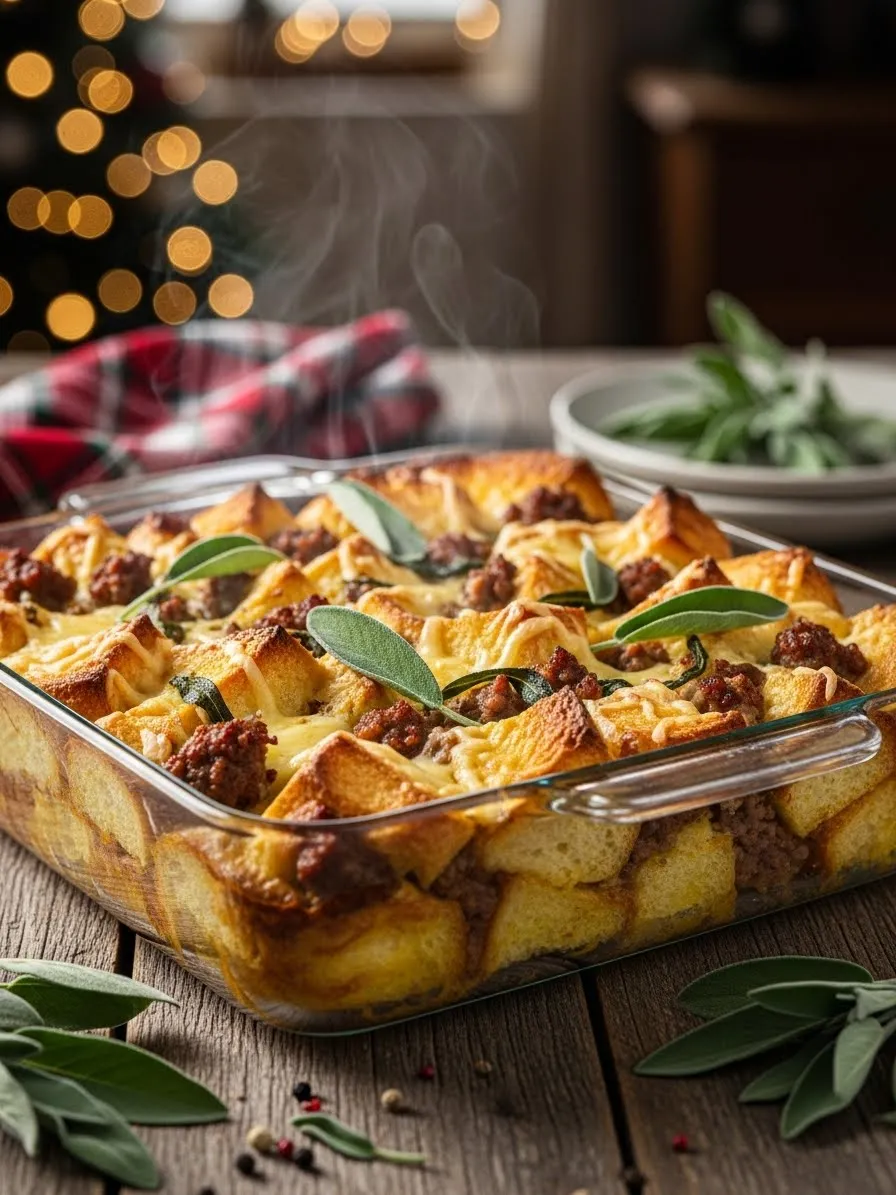
28. Ham and Cheese Croissant Bake
Make-Ahead Breakfast Recipes
Transforming flaky croissants into a savory bake is a brilliant way to feed a group. This dish features golden, buttery croissant pieces topped with cubes of savory ham and melted cheese. A rich egg custard soaks into the bread, making it soft on the inside and crispy on the top.
Pulling a square of this warm bake out of the pan is the ultimate comfort. It feels like a special weekend treat even if you prepared it days ago. The combination of salty meat and rich pastry is a classic that never goes out of style.
You can assemble the whole dish the night before and just slide it into the oven in the morning. It reheats beautifully in the microwave or a small toaster oven. This recipe is a great way to use up croissants that might be a day old.
Required Equipment
9×13 inch baking dish
Large mixing bowl
Whisk
Measuring cups
Ingredients
4 large croissants, torn into bite-sized pieces
1 cup cooked ham, diced into cubes
1 1/2 cups shredded Swiss or Gruyere cheese
6 large eggs
1 1/2 cups whole milk
1/2 teaspoon dry mustard (optional)
Salt and pepper to taste
DIY Instructions
Fill the pan: Grease your baking dish. Scatter the croissant pieces and ham cubes evenly across the bottom.
Add the cheese: Sprinkle the shredded cheese over the bread and meat. Toss them gently with your hands to mix them up.
Make the custard: Whisk the eggs, milk, mustard, salt, and pepper in your large bowl until very smooth.
Pour the liquid: Slowly pour the egg mixture over the croissants. Press down on the bread with a spatula to make sure every piece gets soaked.
Let it rest: If you have time, let the dish sit for 20 minutes (or overnight in the fridge) so the bread absorbs the liquid.
Bake the dish: Heat your oven to 350 degrees. Bake for 35 to 40 minutes until the center is set and the top is a deep golden brown.
Cool slightly: Let the bake sit for five minutes before slicing it into large squares.
Serve warm: Enjoy the contrast between the soft, custardy interior and the flaky, buttery top.
29. Sweet Potato Breakfast Toast Three Ways
Make-Ahead Breakfast Recipes
Slicing a sweet potato into thick “toasts” is a creative alternative to processed bread. You can roast several slices at once and keep them in the fridge for a quick base. This platter shows three different toppings: creamy avocado with chili, almond butter with seeds, and yogurt with honey.
The bright orange base provides a natural sweetness and a good dose of vitamins. Every topping choice offers a different nutritional benefit, from healthy fats to protein. It is a colorful and fun way to vary your breakfast throughout the week.
Eating these “toasts” feels light but keeps you surprisingly full. You can experiment with whatever you have in your pantry to create your own unique combinations. It is a smart and gluten-free way to start your day with real vegetables.
Required Equipment
Large baking sheet
Sharp knife and cutting board
Toaster (optional for reheating)
Small spoons for spreading
Ingredients
1 large, wide sweet potato
1/2 avocado, mashed
2 tablespoons almond butter
1/4 cup Greek yogurt
Toppings: red chili flakes, hemp seeds, almonds, honey, and lime
DIY Instructions
Slice the potato: Wash the sweet potato well. Use a sharp knife to cut it lengthwise into slices about half an inch thick.
Roast the slices: Place the slices on a baking sheet. Bake at 400 degrees for 20 minutes, flipping once, until they are tender but not mushy.
Store the base: Once cooled, keep these slices in a container. You can pop them in a toaster to reheat them just like bread.
Make the Avocado Toast: Spread mashed avocado on a slice. Top with red chili flakes and a squeeze of lime juice.
Make the Almond Toast: Spread almond butter on a second slice. Sprinkle with hemp seeds and a few whole almonds for extra crunch.
Make the Yogurt Toast: Dollop Greek yogurt on a third slice. Drizzle with honey and add a few more seeds if you like.
Assemble the plate: Arrange your colorful toasts on a platter for a beautiful morning meal.
Eat immediately: These are best enjoyed while the potato base is warm and the toppings are fresh.
30. Savory Hummus and Chickpea Breakfast Bowl
Make-Ahead Breakfast Recipes
Savory bowls are a fantastic way to break away from the usual sugary breakfast routine. This dish features a thick, creamy hummus base topped with whole chickpeas and vibrant red paprika. Sliced cucumbers and fresh parsley add a cooling, garden-fresh crunch to the meal.
Eating a protein-heavy breakfast like this helps maintain steady energy levels all day long. You can dip crunchy crackers into the smooth dip for a satisfying texture. It is a simple, no-cook assembly that you can put together in just a few minutes.
The bold red spice and green herbs make this bowl look as good as it tastes. It is a great option for vegans or anyone looking for a Mediterranean-inspired start. You will love how the different textures work together in every spoonful.
Required Equipment
Shallow serving bowl
Large spoon
Small knife and cutting board
Ingredients
1 cup plain hummus
1/2 cup canned chickpeas, rinsed
1/2 large cucumber, sliced into rounds
1 teaspoon smoked paprika
1 tablespoon capers
1 handful fresh parsley, chopped
A pack of whole-grain crackers
DIY Instructions
Prepare the base: Scoop the hummus into your bowl. Use the back of a spoon to create a little swirl or well in the center.
Add the protein: Pile the whole chickpeas into the middle of the hummus.
Season the dish: Sprinkle the smoked paprika over the top. This adds a beautiful red color and a hint of earthy flavor.
Add the garnishes: Scatter the capers and chopped parsley over the bowl. These provide a salty and fresh punch to the creamy dip.
Prep the vegetables: Slice your cucumber into thin circles and place them along the edge of the bowl.
Add the crunch: Tuck a few whole-grain crackers into the side of the hummus for easy dipping.
Serve at room temperature: This dish is best enjoyed when the hummus is not too cold, so the flavors are more prominent.
Store for later: If you are prepping this for work, keep the crackers and cucumbers in a separate small bag to keep them crisp.
31. White Chocolate Matcha Chia Pudding
Make-Ahead Breakfast Recipes
Starting your day with a calm energy boost can change your entire outlook. This elegant jar combines earthy matcha green tea with creamy chia seeds to create a vibrant, velvet-like base. A thick layer of white chocolate curls on top provides a sweet, indulgent contrast to the tea’s natural bitterness.
Every spoonful offers a balance of health and luxury. The chia seeds expand overnight to create a satisfying pudding texture that keeps you full for hours. You can admire the beautiful green layers through the glass as you enjoy a peaceful moment before work.
Prepare these jars on a Sunday to ensure you have a gourmet treat waiting for you all week. This recipe feels like a fancy cafe order but is incredibly simple to assemble at home. You will love how the white chocolate slowly melts into the chilled pudding.
Required Equipment
Two 10-ounce glass jars with lids
Small mixing bowl
Whisk
Vegetable peeler (for chocolate curls)
Measuring spoons
Ingredients
1/2 cup black or white chia seeds
1 1/2 cups unsweetened almond milk
2 teaspoons high-quality matcha powder
1 tablespoon maple syrup
1/2 teaspoon vanilla extract
2 ounces white chocolate bar
1/4 cup Greek yogurt for topping
DIY Instructions
Dissolve the matcha: Place the matcha powder in a small bowl. Add a tiny splash of warm milk and whisk until it forms a smooth, lump-free green paste.
Combine the liquid: Pour the rest of the almond milk, maple syrup, and vanilla into the green paste. Whisk vigorously until the color is a uniform bright green.
Add the seeds: Stir in the chia seeds. Ensure they are fully submerged so they can absorb the liquid evenly.
Rest and stir: Let the bowl sit for ten minutes. Stir it again to break up any clumps of seeds that have settled at the bottom.
Initial chill: Pour the mixture into your glass jars. Seal them and place them in the fridge for at least four hours or overnight.
Create the curls: Use a vegetable peeler to shave long curls from the side of your white chocolate bar.
Assemble the top: Once the pudding is firm, open the jar and add a dollop of Greek yogurt.
Add the finish: Pile the white chocolate curls high on top of the yogurt. Serve the jar cold with a long spoon.
32. Ginger and Soy Rice Congee
Make-Ahead Breakfast Recipes
Comforting warmth is sometimes the only thing that makes an early morning manageable. This savory rice porridge is simmered until the grains are soft and creamy, creating a healing base for your day. A pair of soy-marinated eggs sit in the center, their jammy yolks adding a rich, golden sauce to the bowl.
Bright green scallions and toasted sesame seeds provide a fresh crunch against the smooth rice. The scent of fresh ginger and star anise rises from the steam, waking up your senses gently. This is a traditional staple that offers deep satisfaction and long-lasting energy.
You can make a large pot of congee and keep it in the fridge for several days. Reheat a portion with a splash of water to bring back its silky texture. It is a savory alternative that feels like a warm hug in a bowl.
Required Equipment
Large heavy-bottomed pot or slow cooker
Small saucepan (for eggs)
Wooden spoon
Measuring cups
Small knife
Ingredients
1 cup jasmine rice
7 cups water or chicken broth
1-inch piece of fresh ginger, sliced
2 whole star anise
2 large eggs
2 tablespoons soy sauce
1 teaspoon sesame oil
Sliced green onions and sesame seeds for garnish
DIY Instructions
Start the porridge: Rinse your rice until the water runs clear. Place it in a large pot with seven cups of broth or water.
Add the aromatics: Toss in the ginger slices and star anise. Bring the liquid to a boil, then turn the heat down to a very low simmer.
Simmer slowly: Cover the pot and cook for about 45 to 60 minutes. Stir occasionally to prevent the rice from sticking to the bottom until it becomes thick and creamy.
Prep the eggs: While the rice cooks, boil your eggs for six minutes. Peel them and let them soak in a small bowl of soy sauce for ten minutes to color the outsides.
Remove the spices: Before serving, use a spoon to find and discard the ginger slices and star anise pieces.
Bowl it up: Scoop the hot congee into a deep bowl. Drizzle with a little sesame oil for a nutty aroma.
Add the eggs: Slice your soy-stained eggs in half and place them gently on top of the rice.
Garnish and serve: Sprinkle the sliced green onions and sesame seeds over the top. Serve hot with an extra dash of soy sauce if you like.
33. Chocolate Banana Protein Shake Bags
Make-Ahead Breakfast Recipes
Rushing out the door shouldn’t mean skipping a balanced meal. These convenient shake bags allow you to prep all your ingredients ahead of time for a five-second morning routine. Each bag contains frozen banana slices, rich cocoa powder, and crunchy cacao nibs.
Storing these in the freezer ensures your smoothie is icy and thick without needing extra ice cubes. You simply dump the contents into a blender with your favorite milk and hit the start button. It tastes like a decadent milkshake but provides the fuel your body needs for a busy week.
The addition of a cinnamon stick in the glass adds a warm, spicy aroma to every sip. This is a smart solution for fitness enthusiasts or anyone who prefers a drinkable breakfast. You will love how easy it is to stay on track with your goals.
Required Equipment
High-speed blender
Reusable silicone or plastic freezer bags
Measuring spoons
Tall glass
Ingredients
1 large ripe banana, sliced
2 tablespoons dark cocoa powder
1 scoop chocolate protein powder (optional)
1 tablespoon cacao nibs
1/2 teaspoon ground cinnamon
1 1/2 cups oat milk or water (added during blending)
1 cinnamon stick for garnish
DIY Instructions
Prep the fruit: Peel your banana and slice it into uniform rounds.
Fill the bag: Place the banana slices into a freezer bag. Add the cocoa powder, protein powder, cacao nibs, and ground cinnamon directly into the bag.
Seal and freeze: Squeeze out as much air as possible before sealing the bag. Lay it flat in your freezer so the banana slices do not freeze in one giant clump.
Morning blend: When you are ready for breakfast, take one bag out of the freezer.
Add the liquid: Empty the frozen contents into your blender. Pour in the oat milk or water.
Process until smooth: Blend on high for about 45 seconds. The frozen bananas will create a thick, creamy texture like soft-serve ice cream.
Pour and decorate: Pour the dark chocolate shake into a tall glass.
Final touch: Drop in a cinnamon stick and sprinkle a few extra cacao nibs on top for a professional look.
34. Hummus and Veggie Rainbow Wraps
Make-Ahead Breakfast Recipes
Eating a variety of colors is the easiest way to ensure you get a range of nutrients. These vibrant wraps feature a thick spread of creamy hummus topped with layers of crisp cucumber and fresh greens. Crumbled white feta cheese adds a salty tang that ties all the garden flavors together.
The green spinach tortilla makes this meal look as fresh as it tastes. You can wrap these tightly in parchment paper and slice them in half for an easy-to-handle breakfast on the go. They stay crisp in the fridge, making them an excellent choice for meal prep.
Every bite offers a satisfying crunch from the fresh vegetables. Using hummus instead of mayo or butter keeps the wrap light and healthy. It is a refreshing, savory option that feels like a celebration of fresh produce.
Required Equipment
Large cutting board
Sharp knife
Parchment paper for wrapping
Measuring spoons
Ingredients
2 large spinach or kale tortillas
1/2 cup roasted garlic hummus
1/2 cup fresh arugula or baby spinach
1 large cucumber, cut into long batons
1/4 cup crumbled feta cheese
2 thin slices of tomato or red pepper
A squeeze of lemon juice
DIY Instructions
Lay the base: Place your green tortilla flat on a clean cutting board.
Spread the protein: Use a spoon to spread a thick, even layer of hummus over the middle of the tortilla. Leave an inch of space around the edges.
Add the greens: Pile a handful of arugula or spinach over the hummus. Press it down slightly so it sticks to the spread.
Layer the crunch: Place your cucumber batons in a neat row in the center. Add the tomato or pepper slices next to them.
Add the cheese: Sprinkle the crumbled feta over the vegetables. This adds a nice texture and a bit of saltiness.
Season and fold: Add a squeeze of lemon juice and a pinch of pepper. Fold the sides of the tortilla inward, then roll it tightly from the bottom up.
Wrap for travel: Wrap the entire roll in parchment paper. This keeps the wrap tight and prevents the filling from falling out while you eat.
Slice and store: Cut the wrap in half at a diagonal angle. Place the halves in a container and keep them in the fridge for a quick morning meal.
35. Pistachio and Apricot Overnight Oats
Make-Ahead Breakfast Recipes
Nutty flavors and chewy dried fruits create a sophisticated texture in this breakfast bowl. These oats are soaked in a creamy milk base and topped with a ring of vibrant green crushed pistachios. Dried apricot halves and delicate rose petals add a touch of sweetness and beauty.
The circular arrangement of the toppings makes this dish look like a piece of art. It is a wonderful way to brighten up your morning routine with exotic flavors. Preparing the oats overnight allows the grains to soften perfectly while absorbing the scent of the nuts.
A dusting of bright green powder around the edges adds a professional finish. This meal provides a great balance of fiber and healthy fats to keep your energy levels high. You will feel like you are starting your day at a luxury spa.
Required Equipment
Clear glass breakfast bowl
Small food processor or mortar and pestle
Measuring cups
Spoon for layering
Ingredients
1/2 cup rolled oats
1 cup whole milk or coconut milk
1/4 cup shelled pistachios, crushed finely
3 dried apricots, sliced thin
1 tablespoon honey
Dried edible rose petals (optional)
1/2 teaspoon cardamom (optional)
DIY Instructions
Mix the oats: Combine the oats, milk, honey, and cardamom in a jar. Stir well and let it sit in the fridge overnight to thicken.
Prep the nuts: Place the pistachios in a food processor and pulse until they become a fine green crumble.
Transfer to a bowl: In the morning, scoop the thickened oats into a wide, clear glass bowl. Smooth the top with your spoon.
Create the ring: Carefully sprinkle the crushed pistachios in a wide circle around the outer edge of the bowl.
Add the fruit: Place the sliced dried apricots in the center of the bowl, leaving space for the other garnishes.
Decorate with petals: Scatter a few dried rose petals over the apricots for a pop of pink color and a light floral scent.
Add the final dust: If you have extra pistachio powder, lightly dust the very center of the bowl.
Enjoy immediately: Dig in while the oats are chilled and the nuts are still crunchy.
36. Sweet Cream Crepe Rolls
Make-Ahead Breakfast Recipes
Delicate and thin crepes offer a lighter alternative to heavy pancakes or waffles. These golden rolls are filled with a cloud-like whipped cream and a hint of zesty lemon. A drizzle of clear honey on the cut side adds a beautiful, glistening finish.
Stacking these rolls on a plate makes for a stunning presentation that is easy to share. They are soft, sweet, and melt in your mouth with every bite. You can make the crepes in advance and fill them just before serving to keep the pastry fresh.
The marbled pattern on the outside of the crepes shows they were cooked to a perfect golden brown. This is a lovely choice for a birthday breakfast or a special weekday treat. You get a touch of elegance without a lot of complicated prep work.
Required Equipment
Non-stick crepe pan or small skillet
Large mixing bowl
Whisk
Hand mixer (for the cream)
Spatula
Ingredients
1 cup all-purpose flour
2 large eggs
1 1/2 cups milk
2 tablespoons melted butter
1 cup heavy whipping cream
2 tablespoons powdered sugar
1 teaspoon lemon zest
Honey for drizzling
DIY Instructions
Make the batter: Whisk the flour, eggs, milk, and melted butter until the liquid is very thin and smooth. Let it rest for ten minutes.
Cook the crepes: Heat your pan and pour in a small amount of batter. Swirl the pan quickly to coat the bottom in a thin layer.
Flip and set: Cook for one minute until the edges lift. Flip carefully and cook for thirty more seconds. Repeat until all batter is used.
Whip the filling: Beat the heavy cream and powdered sugar in a bowl until stiff peaks form. Fold in the fresh lemon zest.
Fill the rolls: Lay a cooled crepe flat. Spread a thick line of whipped cream down the center.
Roll it up: Fold the sides in slightly and roll the crepe tightly into a cylinder.
Slice for serving: Use a sharp knife to cut the rolls into two-inch pieces. Stand them up on a plate so the cream is visible.
Add the drizzle: Pour a little honey over the top of the rolls just before you eat.
37. Roasted Sausage and Potato Sheet Pan
Make-Ahead Breakfast Recipes
Savory breakfast lovers will appreciate the simplicity of a hearty sheet pan meal. This dish features thick slices of savory sausage tossed with golden potato cubes and red onion wedges. Fresh rosemary sprigs and sliced apples add a sweet and herbal depth to the roast.
Cooking everything on one tray means very little cleanup after your morning meal. The heat of the oven caramelizes the onions and makes the potato edges perfectly crispy. You can portion this out into containers for a high-protein breakfast that lasts all week.
The combination of salty meat and sweet roasted apples is a classic flavor pairing. It provides a filling, warm start that is especially good on cold mornings. You get a complete, balanced meal with almost zero active cooking time.
Required Equipment
Large rimmed baking sheet
Sharp knife and cutting board
Large mixing bowl
Spatula
Ingredients
1 pound baby potatoes, quartered
3 large breakfast sausages, sliced into rounds
1 red onion, cut into thick wedges
1 large apple, sliced into half-moons
2 tablespoons olive oil
3 sprigs fresh rosemary
Salt and black pepper to taste
DIY Instructions
Heat the oven: Set your oven to 400 degrees.
Prep the vegetables: Cut your potatoes and onions. Place them in a large bowl with the sliced sausages.
Season the mix: Pour the olive oil over the ingredients. Add salt, pepper, and the leaves from two rosemary sprigs. Toss until everything is coated.
Spread the tray: Empty the bowl onto your baking sheet. Spread the pieces out so they are in a single layer for the best browning.
Add the fruit: Tuck the apple slices and the remaining whole rosemary sprig among the meat and potatoes.
Roast until golden: Place the tray in the oven for 25 to 30 minutes. Use a spatula to toss the ingredients halfway through the cooking time.
Check for doneness: The potatoes should be soft inside and the sausage should be browned on the outside.
Portion and store: Let the pan cool slightly before dividing the meal into your prep containers. It reheats perfectly in a skillet or microwave.
38. Date and Sesame Granola Clusters
Make-Ahead Breakfast Recipes
Making your own granola is a smart way to control the sugar and quality of your breakfast. These clusters are packed with toasted oats, crunchy sesame seeds, and chewy whole dates. The honey-based glaze creates a satisfying snap when you bite into a cluster.
Keeping a large jar of this on your counter makes for a quick and easy morning. You can eat it with milk, sprinkle it over yogurt, or just grab a handful as you walk out the door. It is a natural, high-energy snack that keeps you going during long meetings.
The deep brown color of the toasted oats and seeds shows off the rich flavor. Using whole dates adds a caramel-like sweetness without needing refined sugars. You will love having a home that smells like toasted honey and nuts every time you bake a batch.
Required Equipment
Large baking sheet
Parchment paper
Large mixing bowl
Measuring cups and spoons
Airtight glass jar for storage
Ingredients
3 cups rolled oats
1/2 cup white sesame seeds
1 cup pitted medjool dates, chopped or left whole
1/2 cup honey or maple syrup
1/4 cup coconut oil, melted
1 teaspoon vanilla extract
1/2 teaspoon sea salt
DIY Instructions
Prepare the pan: Heat your oven to 325 degrees. Line a large sheet pan with parchment paper.
Mix dry items: Combine the oats, sesame seeds, and salt in a large bowl.
Whisk the glaze: Stir the melted coconut oil, honey, and vanilla in a small cup until combined.
Coat the grains: Pour the liquid over the oat mixture. Use a large spoon to stir until every oat is damp and shiny.
Add the dates: Toss the dates into the mixture. If they are very sticky, pull them apart so they are distributed evenly.
Press the clusters: Spread the granola onto the baking sheet. Use the back of your spoon to press the mixture down firmly into a solid sheet. This is the secret to getting big clusters.
Bake slowly: Place the tray in the oven for 20 to 25 minutes. Do not stir it! You want the sheet to stay together as it browns.
Cool and break: Let the granola cool completely in the pan. Once it is hard, use your hands to break it into large, chunky clusters and store them in your glass jar.
Key Takeaways
Batch cooking saves hours: Spending one afternoon in the kitchen provides a full week of ready-to-eat meals.
Portable options are vital: Using mason jars or wraps allows you to eat during your commute or at your desk.
Protein keeps you focused: Recipes featuring eggs, quinoa, and lentils prevent the dreaded mid-morning energy crash.
Variety prevents boredom: Rotating between sweet oats and savory bakes keeps your routine exciting and sustainable.
Mastering your morning does not require waking up at dawn to cook a gourmet feast. By choosing a few of these make-ahead favorites, you remove the stress of decision-making from your daily routine. You deserve a start to the day that feels organized and nourishing.
Start small by picking just two recipes for the upcoming week. You will quickly notice how much smoother your life feels when breakfast is already waiting for you. Healthy eating becomes easy when the hard work is already finished.
Spread the loveFeeling sluggish after your morning meal can ruin your productivity for the entire day. Many traditional morning foods are loaded with heavy carbs and processed sugars that lead to an early afternoon crash.…
Spread the loveChristmas morning should feel like a dream rather than a chore in the kitchen. You want to watch the children open gifts and sip your coffee while a warm meal bakes slowly in…
Spread the loveFeeling sluggish or noticing your skin looks a bit dull lately? These are often the first signs that your body is calling out for more nutrients. Most of us struggle to fit enough…