Hosting a New Year’s Eve celebration should be about clinking glasses and making memories, not hiding in the kitchen while the countdown begins. The pressure to serve a gourmet spread often leads to unnecessary holiday burnout. You deserve to enjoy the festivities just as much as your guests.
Make-Ahead Party Food
This guide provides 50 simple, make-ahead recipes designed to take the weight off your shoulders. We have selected dishes that balance sophisticated flavors with effortless preparation. From savory bites to sparkling desserts, these options ensure your table remains full while you stay relaxed.
Stop worrying about timing every dish to hit the table at once. These recipes allow you to prep hours or even days in advance. Prepare to transform your party into a stress-free event that leaves everyone impressed.
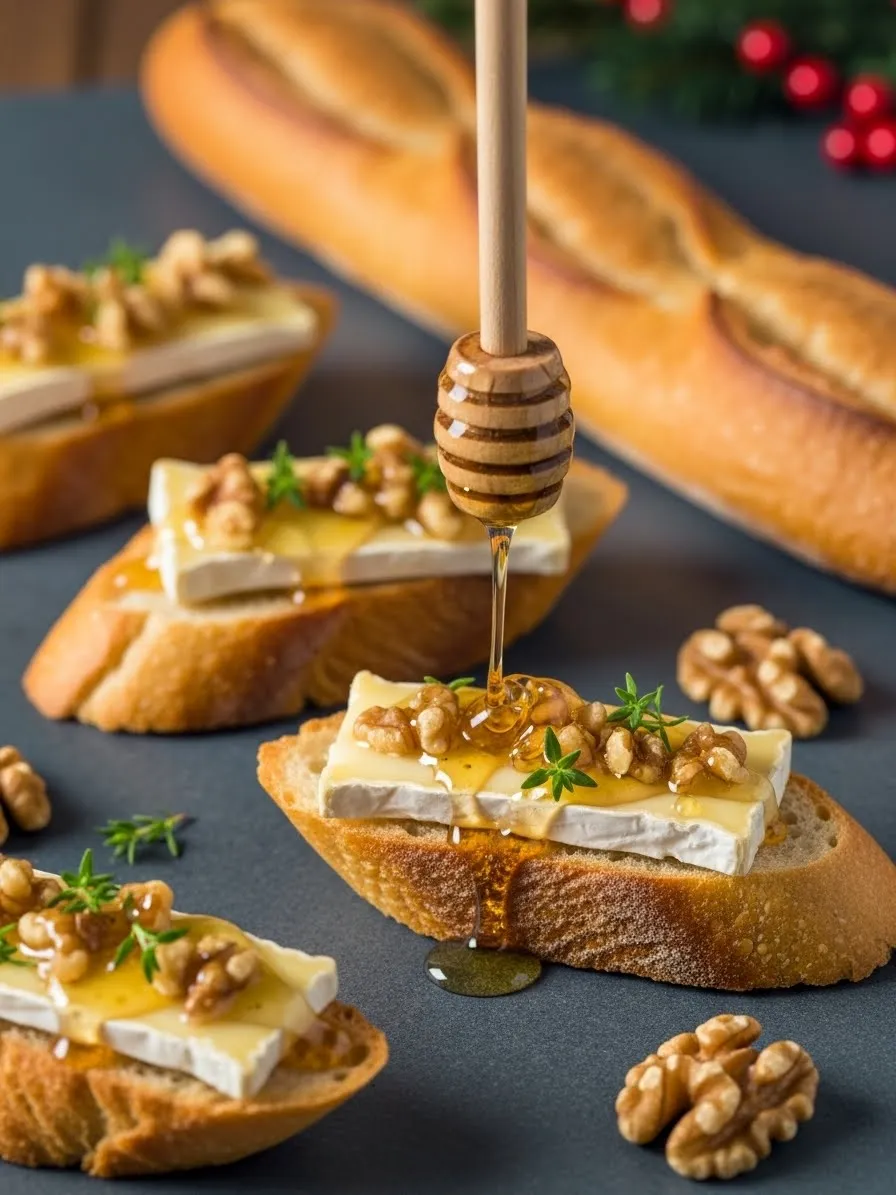
Whipped cheese makes a sophisticated addition to any New Year’s Eve spread. This dish combines the creamy texture of fresh ricotta with the crunch of toasted nuts and the sweetness of golden honey. It looks stunning in a bowl and tastes even better when paired with warm, charred bread.
Guests will appreciate how light and airy this dip feels compared to heavy store-bought options. Sprinkling fresh herbs like thyme adds a pop of color and an earthy aroma that fills the room. You can prepare the base hours ahead of time, leaving you free to enjoy the countdown.
A drizzle of honey right before serving gives the dish a beautiful glossy finish. The combination of salty and sweet flavors keeps people coming back for just one more bite. It is a simple way to elevate your appetizer game without spending all night in the kitchen.
Required Ingredients
2 cups whole milk ricotta cheese
1/4 cup extra virgin olive oil
1/2 teaspoon sea salt
1/4 cup honey (for drizzling)
1/3 cup roasted pistachios, roughly chopped
2-3 sprigs of fresh thyme or rosemary
1 bag of pita bread or a fresh baguette
Equipment List
Food processor or electric hand mixer
Small frying pan
Rubber spatula
Serving bowl
Bread knife
DIY Instructions
Prep the Cheese: Scoop the cold ricotta cheese into your food processor. Add the olive oil and sea salt into the bowl.
Blend until Smooth: Turn the processor on high. Let it run for about 2 minutes until the cheese loses its grainy texture and becomes fluffy like whipped cream.
Toast the Bread: Slice your pita or baguette into triangles. Heat a pan over medium heat and lightly toast the bread until you see dark grill marks on both sides.
Chill the Dip: Transfer the whipped ricotta into a serving bowl using a spatula. If you are making this ahead, cover it with plastic wrap and keep it in the fridge.
Add the Toppings: Just before your guests arrive, use a spoon to create a small swirl or “well” in the center of the cheese. Pour the honey slowly over the top so it drips down the sides.
Final Flourish: Scatter the chopped pistachios and fresh herb leaves over the honey. Serve immediately while the bread is still warm.
2. Cranberry and Brie Phyllo Cups
Make-Ahead Party Food
Warm, melted cheese combined with tart fruit creates a sophisticated flavor profile for any winter gathering. These bite-sized treats use flaky pastry shells to hold a creamy slice of brie topped with vibrant cranberry sauce. A single rosemary sprig adds a woody aroma that complements the sweetness of the berries.
You can assemble these trays well before your guests arrive at the party. The shells stay crisp while the cheese softens into a rich, velvety texture during a quick bake. Serving them on a silver platter makes the deep red colors pop against the golden pastry.
This appetizer offers a mess-free way to enjoy a classic cheese board pairing. The contrast between the crunchy base and the gooey center provides a satisfying mouthfeel in every bite. It is a festive option that looks far more complex than it actually is to prepare.
Required Ingredients
1 package pre-made mini phyllo shells (15 count)
8 ounces brie cheese wheel
1/2 cup whole berry cranberry sauce
15 small fresh rosemary sprigs
2 tablespoons honey
Equipment List
Large baking sheet
Sharp knife
Cutting board
Small spoon
DIY Instructions
Heat Your Oven: Turn your oven to 350 degrees Fahrenheit. Place the empty phyllo shells onto a flat baking sheet so they are not touching.
Slice the Cheese: Keep the brie cold to make it easier to cut. Slice the cheese into small cubes or wedges that are about one inch wide to fit inside the shells.
Fill the Shells: Place one piece of brie into the center of each pastry cup. Press down gently so there is room for the topping.
Add the Fruit: Spoon a small dollop of cranberry sauce directly on top of the cheese. Try to keep the sauce in the center so it does not spill over the edges.
Bake Briefly: Put the tray in the oven for five to seven minutes. Remove them once the brie looks melted and the pastry edges are a light golden brown.
Garnish and Serve: Tuck a tiny rosemary sprig into the sauce while the cheese is still soft. Drizzle a tiny amount of honey over the top and serve them warm.
3. Slow Cooker Bourbon Glazed Meatballs
Make-Ahead Party Food
Hearty snacks are essential for a long night of New Year’s Eve celebrations. These meatballs are coated in a thick, smoky bourbon sauce that clings to the meat for maximum flavor. Sprinkling fresh chives over the top adds a bright finish to the dark, savory glaze.
Using a slow cooker allows you to set the dish and forget it while you focus on other hosting duties. The meat stays tender and juicy as it simmers in the rich liquid for several hours. This method ensures every bite is infused with the sweet and tangy notes of the sauce.
Skewering each meatball with a bamboo pick makes them easy for guests to grab while mingling. The deep mahogany color of the glaze looks beautiful in a dark ceramic serving pot. It is a crowd-pleasing choice that provides plenty of protein to keep the energy high.
Required Ingredients
1 bag frozen pre-cooked Italian meatballs (32 ounces)
1 cup barbecue sauce
1/4 cup bourbon or apple juice
2 tablespoons brown sugar
1 tablespoon Worcestershire sauce
1 bunch fresh chives, finely chopped
Equipment List
Slow cooker (Crockpot)
Measuring cups and spoons
Small mixing bowl
Bamboo appetizer skewers
DIY Instructions
Load the Pot: Open the bag of frozen meatballs and pour them into the bottom of your slow cooker. There is no need to thaw them first.
Mix the Glaze: Whisk the barbecue sauce, bourbon, brown sugar, and Worcestershire sauce together in a small bowl. Ensure the sugar is fully dissolved into the liquid.
Coat the Meat: Pour the sauce mixture over the meatballs. Stir them gently with a large spoon until every piece is covered in the dark liquid.
Slow Cook: Set the temperature to low and cover the pot with the lid. Let the meatballs cook for three to four hours until they are hot all the way through.
Adjust Temperature: Turn the setting to “warm” once the cooking time is up. This prevents the sauce from burning while guests serve themselves throughout the evening.
Final Touch: Insert a bamboo skewer into the top of each meatball. Scatter the chopped chives over the entire batch right before people start eating.
4. Antipasto Skewers with Balsamic Drizzle
Make-Ahead Party Food
Italian flavors come together in a portable format that is visually stunning and fresh. These skewers feature layers of salty salami, creamy mozzarella, and bright cherry tomatoes. A dark balsamic glaze provides a sharp, acidic finish that balances the rich fats of the meat and cheese.
Preparing these sticks ahead of time saves you from last-minute stress in the kitchen. You can arrange them on a white marble slab to highlight the vibrant reds and greens of the ingredients. The addition of a black olive at the base provides a sturdy foundation for the display.
Each bite offers a refreshing change from heavier fried or baked appetizers. Fresh basil leaves provide a fragrant element that makes the whole tray smell like a summer garden. This is a colorful, low-carb option that caters to many different dietary needs.
Required Ingredients
20 cherry tomatoes
20 mini mozzarella pearls
20 thin slices of Genoa salami
20 large fresh basil leaves
20 pitted black or Kalamata olives
1/2 cup balsamic glaze (store-bought)
Equipment List
4-inch wooden or bamboo skewers
Paper towels
Large serving platter
DIY Instructions
Prepare the Ingredients: Wash the tomatoes and basil leaves under cold water. Pat them completely dry with paper towels to prevent the skewers from getting soggy.
Fold the Meat: Take a round slice of salami and fold it in half. Fold it in half again to create a small triangle or “ribbon” shape.
Assemble the Base: Slide one black olive onto the bottom of the skewer. This acts as an anchor to help the stick stand up or lay flat.
Layer the Colors: Thread the folded salami next, followed by a mozzarella ball. Place a fresh basil leaf on top of the cheese.
Add the Top: Finish the skewer by sliding a whole cherry tomato onto the very top. Repeat this process until you have used all your ingredients.
Apply the Glaze: Arrange the finished skewers on your serving tray. Just before the party starts, drizzle the thick balsamic glaze in a zigzag pattern over the center of the sticks.
5. Cheesy Spinach and Artichoke Skillet Dip
Make-Ahead Party Food
Bubbling cheese and tender greens make this dip a staple for any festive gathering. The skillet presentation keeps the bottom warm while the top develops a beautiful crust of browned mozzarella. Steam rises from the dish, inviting guests to dip in with pieces of crusty toasted bread.
This recipe relies on a blend of different cheeses to achieve the ultimate stretchy texture. Artichoke hearts provide a slight tang that cuts through the richness of the cream base. It is a comforting, warm addition to your New Year’s menu that pairs well with sparkling drinks.
You can mix the ingredients the day before and store the skillet in the fridge. When you are ready to eat, simply slide it into a hot oven until the edges are sizzling. This ensures you spend more time counting down to midnight and less time hovering over the stove.
1 can artichoke hearts (14 ounces), drained and chopped
1 cup shredded mozzarella cheese
1/2 cup grated parmesan cheese
8 ounces softened cream cheese
1/2 cup sour cream
1 loaf of French bread or a baguette
Equipment List
10-inch cast iron skillet or oven-safe baking dish
Large mixing bowl
Sturdy wooden spoon
Bread knife
DIY Instructions
Remove the Moisture: Place the thawed spinach into a clean kitchen towel. Twist and squeeze the towel over the sink until no more water comes out of the greens.
Blend the Base: Stir the softened cream cheese and sour cream together in a large bowl. Add the parmesan cheese and half of the mozzarella to the mixture.
Combine the Rest: Fold in the dry spinach and the chopped artichoke hearts. Mix everything until the greens are evenly distributed throughout the white cheese.
Fill the Skillet: Spread the mixture into your cast iron skillet. Use a spoon to smooth out the top so it cooks evenly.
Top and Bake: Sprinkle the remaining mozzarella over the surface. Bake at 375 degrees Fahrenheit for twenty minutes until the top is bubbly and has golden brown spots.
Toast the Dippers: Slice your bread into rounds. Place them on a rack in the oven for the last five minutes of baking so they are warm and crunchy for dipping.
6. Classic Caprese Salad Bites
Make-Ahead Party Food
Simple ingredients often yield the most elegant results for a holiday party. These bites feature the timeless trio of mozzarella, tomato, and basil held together by a single toothpick. Coarse sea salt sprinkled over the top enhances the natural sweetness of the ripe tomatoes.
The red and white colors fit perfectly with a festive theme while providing a light, healthy snack. Using a balsamic reduction adds a touch of sweetness and a beautiful visual contrast against the white cheese. These are easy to assemble in large batches if you are hosting a big crowd.
Each small stack delivers a burst of freshness that cleanses the palate between richer dishes. The bamboo picks allow guests to eat with one hand while holding a glass in the other. This appetizer is a great way to bring a taste of the Mediterranean to your winter celebration.
Required Ingredients
1 pint grape or cherry tomatoes
1 container mini mozzarella balls (bocconcini)
1 bunch fresh basil leaves
2 tablespoons extra virgin olive oil
1 teaspoon coarse sea salt
1/4 cup balsamic reduction
Equipment List
Decorative toothpicks or bamboo picks
Small bowl for dipping
Serving tray
DIY Instructions
Wash the Produce: Rinse the tomatoes and basil. Dry them thoroughly so the oil and glaze stick to the surface instead of sliding off.
Half the Tomatoes: Slice the cherry tomatoes in half horizontally. This creates a flat surface that helps the bites sit more securely on the tray.
Stack the Layers: Place one half of a tomato on a flat surface. Layer a folded basil leaf on top, followed by a mozzarella ball.
Secure the Bite: Push a toothpick through the top of the cheese and down into the tomato base. Ensure the stick goes all the way through so the bite does not fall apart.
Season Lightly: Arrange the bites on your platter. Drizzle the olive oil over the cheese and tomatoes, then sprinkle the coarse salt over everything.
Add the Glaze: Use a spoon to drizzle the thick balsamic reduction over the tray in a thin stream. Serve these at room temperature for the best flavor.
7. Golden Sausage Rolls in Puff Pastry
Make-Ahead Party Food
Flaky, buttery pastry wrapped around seasoned meat creates a savory treat that everyone loves. These rolls are baked until the crust reaches a deep golden color and the center is piping hot. The aroma of toasted dough and herbs makes them an instant hit as soon as they leave the oven.
Sausage rolls are a classic party food because they are filling and easy to hold. You can slice them into small rounds for appetizers or leave them slightly larger for a more substantial snack. The layers of puff pastry shatter with every bite, revealing the juicy filling inside.
Preparing these in advance is simple since they can be frozen before baking. This allows you to pop a fresh tray into the oven whenever the party starts to get busy. Serving them with a side of spicy mustard or ketchup adds a nice kick to the savory meat.
Required Ingredients
1 pound ground pork sausage or bratwurst meat
1 sheet frozen puff pastry, thawed
1 egg (for egg wash)
1 teaspoon dried sage or thyme
1/2 teaspoon black pepper
Flour (for dusting the counter)
Equipment List
Baking sheet
Parchment paper
Rolling pin
Pastry brush
Serrated knife
DIY Instructions
Prep the Surface: Sprinkle a little flour on your clean countertop. Unroll the thawed puff pastry sheet and gently roll it out to smooth any creases.
Season the Meat: Mix the raw sausage meat with the dried herbs and pepper in a bowl. Use your hands to ensure the spices are evenly mixed into the pork.
Form the Rolls: Shape the meat into a long, thin log along the edge of the pastry. Roll the pastry over the meat once until it is fully enclosed.
Seal the Edge: Beat the egg in a small cup. Brush a little egg wash along the edge of the pastry and press it down to seal the roll shut.
Cut into Pieces: Use a serrated knife to cut the long roll into two-inch sections. Place these pieces onto a baking sheet lined with parchment paper.
Bake until Crispy: Brush the tops of the rolls with more egg wash. Bake at 400 degrees Fahrenheit for twenty to twenty-five minutes until the pastry is puffed and golden.
8. Smoked Salmon and Cucumber Rounds
Make-Ahead Party Food
Crisp cucumber slices serve as a refreshing base for this upscale New Year’s Eve appetizer. A swirl of herb-infused cream cheese sits on top, finished with a small dollop of black caviar for a touch of luxury. The bright green of the vegetable makes the pink salmon mousse stand out beautifully.
This dish is a fantastic alternative to crackers for guests who prefer something lighter or gluten-free. The crunch of the cucumber paired with the soft, airy topping creates a professional look with very little effort. A tiny sprig of fresh drill adds a final note of herbal brightness.
You can pipe the topping onto the rounds just before the party to keep the vegetables crisp. The addition of lemon zest gives the salmon a zesty lift that cuts through the creamy texture. It is a sophisticated bite that looks like it came straight from a high-end catering menu.
Required Ingredients
2 large English cucumbers
4 ounces smoked salmon, finely chopped
8 ounces softened cream cheese
1 tablespoon fresh lemon juice
1 teaspoon lemon zest
1 jar black caviar or seaweed pearls
Fresh dill for garnish
Equipment List
Vegetable peeler
Sharp knife
Piping bag with a star tip
Small mixing bowl
DIY Instructions
Slice the Base: Peel alternating strips of skin off the cucumbers to create a striped pattern. Slice them into half-inch thick rounds and lay them out on a paper towel to drain.
Create the Mousse: Combine the softened cream cheese, chopped smoked salmon, and lemon juice in a bowl. Stir vigorously until the mixture is smooth and light.
Set up the Bag: Fit a piping bag with a star-shaped metal tip. Scoop the salmon mixture into the bag and push it toward the bottom to remove air bubbles.
Add the Topping: Pipe a neat swirl of the salmon cream onto the center of each cucumber round. Start from the outside and move the tip in a circle toward the middle.
Garnish for Style: Place a tiny amount of caviar on the very peak of the cream cheese swirl. Add a small piece of fresh dill next to the caviar.
Final Detail: Sprinkle the fresh lemon zest over the entire tray. Keep these chilled in the refrigerator until you are ready to pass them out to your guests.
9. Roasted Garlic Hummus with Winter Veggies
Make-Ahead Party Food
A vibrant vegetable platter centered around a bowl of silky hummus is a healthy addition to a party spread. This dip features the deep, mellow flavor of roasted garlic and a swirl of rich olive oil. A dusting of paprika adds a smoky note and a splash of color to the creamy surface.
The surrounding vegetables like purple carrots and watermelon radishes turn a simple dip into a work of art. These seasonal choices offer a variety of textures from crunchy to tender. It is a great way to ensure there is something fresh and nutritious on the table among the richer snacks.
Roasting the garlic beforehand removes the sharp bite and replaces it with a buttery sweetness. This makes the hummus much more complex and enjoyable for all guests. The large platter is easy to refill throughout the night as people graze during the festivities.
Required Ingredients
2 cans chickpeas (15 ounces each), drained and rinsed
1/2 cup tahini
1/4 cup lemon juice
2 whole heads of garlic
1/3 cup olive oil
1 teaspoon salt
Assorted veggies (carrots, radishes, snap peas)
1/2 teaspoon paprika
Equipment List
Food processor
Aluminum foil
Oven
Large circular platter
Serving bowl
DIY Instructions
Roast the Garlic: Cut the tops off the garlic heads to expose the cloves. Drizzle with oil, wrap in foil, and bake at 400 degrees for forty minutes until soft.
Squeeze the Cloves: Once the garlic is cool, squeeze the soft cloves out of the skins and into your food processor. Discard the papery skins.
Blend the Base: Add the chickpeas, tahini, lemon juice, and salt to the processor. Turn it on and let it run until the mixture starts to look thick.
Stream in Oil: While the motor is running, slowly pour in the olive oil. Keep blending until the hummus is completely smooth and has no lumps.
Prep the Platter: Wash and slice your colorful vegetables into long sticks or thin rounds. Arrange them in a circle around the edge of a large plate.
Plating: Spoon the hummus into a bowl and place it in the center of the vegetables. Use a spoon to make a swirl, pour a little extra oil in the middle, and dust with paprika.
10. Bacon Wrapped Dates Stuffed with Goat Cheese
Make-Ahead Party Food
Salty and sweet flavors collide in this classic appetizer that remains a staple at every elegant holiday gathering. Each chewy date is stuffed with a pocket of tangy goat cheese and wrapped in a thin, smoky slice of bacon. The fat from the meat renders down during baking, creating a crisp and glistening exterior.
The dates become soft and jam-like in the oven, providing a perfect contrast to the savory bacon. A single toothpick with a decorative loop makes them easy to pick up and enjoy while holding a drink. These are best served warm so the cheese in the center is slightly melted and incredibly creamy.
You can easily assemble these a day in advance and keep them in the refrigerator. When your guests arrive, simply slide the tray into the oven for a quick roast until the bacon is perfectly browned. It is a sophisticated, three-ingredient snack that delivers a complex flavor profile with very little effort.
Required Ingredients
20 Medjool dates, pitted
4 ounces goat cheese (plain or honey-flavored)
10 slices of bacon, cut in half
Freshly ground black pepper
20 decorative bamboo toothpicks
Equipment List
Rimmed baking sheet
Small spoon or butter knife
Cooling rack (optional, for crispier bacon)
DIY Instructions
Pit the Dates: Use a knife to slice each date lengthwise, but do not cut all the way through. Remove the pit from the center and discard it.
Stuff the Centers: Use a small spoon to fill the cavity of each date with about a teaspoon of goat cheese. Press the date closed gently around the cheese.
Wrap with Bacon: Take a half-slice of bacon and wrap it tightly around the middle of the date. Ensure the ends of the bacon are tucked underneath.
Secure the Bite: Push a decorative toothpick through the center of the bacon and date. This keeps the wrap from unraveling as the meat shrinks during cooking.
Roast until Crisp: Place the dates on a baking sheet. Bake at 400 degrees Fahrenheit for 15 to 20 minutes, turning them halfway through until the bacon is crispy.
Drain and Serve: Let the dates sit for five minutes on a paper towel to absorb any excess grease. Serve them while they are still warm for the best texture.
11. Mini Quiche Lorraine Bites
Make-Ahead Party Food
These savory little tarts offer a sophisticated way to serve a classic breakfast favorite at your midnight celebration. Each pastry crust is filled with a rich egg custard, salty bacon bits, and tender leeks. They are small enough to eat in two bites, making them a mess-free choice for guests who are standing and chatting.
The golden, buttery crust provides a satisfying crunch that yields to a velvety, soft center. Fresh chives on top add a peppery finish and a pop of green against the yellow filling. Because they look so polished, they work beautifully as a central piece on a tiered appetizer stand.
You can easily bake these ahead and reheat them right before the countdown begins. The smell of baking pastry and savory bacon will make your home feel incredibly inviting as friends arrive. They are a timeless option that appeals to both kids and adults alike.
Required Ingredients
2 packages pre-made mini phyllo or pastry shells (30 total)
4 large eggs
1/2 cup heavy cream
1/2 cup cooked bacon, crumbled
1/4 cup leeks, thinly sliced and sautéed
1/2 cup shredded Swiss or Gruyere cheese
2 tablespoons fresh chives, chopped
1/4 teaspoon salt and black pepper
Equipment List
Large baking sheet
Medium mixing bowl
Whisk
Small ladle or spoon
Sharp knife
DIY Instructions
Get the Oven Ready: Heat your oven to 375 degrees Fahrenheit and line a baking sheet with parchment paper to prevent sticking.
Whisk the Base: Crack the eggs into a bowl and pour in the heavy cream. Use a whisk to beat them together until the color is uniform and the mixture is slightly frothy.
Prep the Shells: Arrange the pre-made pastry shells on your baking sheet so they are not touching each other.
Layer the Fillings: Place a tiny pinch of cheese, a few bacon crumbles, and a slice of sautéed leek into the bottom of every shell.
Pour the Custard: Carefully ladle the egg mixture into each shell. Fill them almost to the top but leave a tiny bit of room so they do not overflow while baking.
Bake and Finish: Slide the tray into the oven for 12 to 15 minutes. Remove them when the egg is set and no longer jiggles. Sprinkle fresh chives over the top while they are warm.
12. Ultimate Seven-Layer Party Dip
Make-Ahead Party Food
A towering glass bowl filled with colorful layers makes an impressive statement on any snack table. This dip features hearty beans, cool guacamole, zesty salsa, and a thick blanket of shredded cheese. Black olive rings and fresh green onions create a decorative border that hints at the bold flavors hidden inside.
Guests love digging deep with a sturdy corn chip to get every single flavor in one scoop. The transparent container allows everyone to see the beautiful contrast between the red tomatoes and the bright green avocado. It is a fresh, cool alternative to the many warm snacks typically served at New Year’s parties.
Preparation is simple because you can build the layers several hours before the event. Keeping it chilled ensures the sour cream and guacamole stay firm and refreshing. This is a dependable crowd-pleaser that usually disappears long before the clock strikes twelve.
Required Ingredients
1 can refried beans (16 ounces)
2 cups prepared guacamole
1 container sour cream (16 ounces)
1 jar chunky red salsa (16 ounces)
2 cups shredded Mexican blend cheese
1 can sliced black olives
1 bunch green onions, chopped
1 bag of large corn tortilla chips
Equipment List
Large glass trifle bowl or deep clear dish
Rubber spatula
Medium bowl
Serving spoon
DIY Instructions
Smooth the Foundation: Spread the refried beans into a flat, even layer at the very bottom of your glass bowl using a spatula.
Add the Green: Carefully spoon the guacamole over the beans. Spread it slowly so you do not mix the two colors together.
Layer the Cream: Dollop the sour cream over the guacamole and smooth it out. This white layer acts as a bright visual break between the darker colors.
Pour the Salsa: Drain any excess liquid from your salsa so the dip doesn’t get watery. Spread the thick tomato mixture over the sour cream.
Cheese and Garnish: Sprinkle the shredded cheese in a thick layer over the salsa. Place the black olive slices in neat circles around the edge of the bowl.
Final Touch: Scatter the chopped green onions in the center. Chill the bowl in the refrigerator for at least one hour before serving with a side of chips.
13. Spicy Buffalo Chicken Dip with Blue Cheese
Make-Ahead Party Food
Bold heat and creamy textures define this classic party favorite that always draws a crowd. This dip features shredded chicken smothered in a spicy buffalo sauce and melted cheese. Small mounds of extra chicken and drizzles of hot sauce on top signal the fiery flavor profile to your guests.
Serving this in a white ceramic dish helps the vibrant orange and red colors stand out. Crisp celery sticks and dark purple tortilla chips provide the perfect crunch to balance the soft, rich dip. A side of blue cheese dressing offers a cooling element for those who find the spice a bit intense.
You can mix the base ingredients in advance and bake it just as the party starts to pick up. The bubbling edges and browned cheese crust make it look and smell irresistible. It is a great way to serve the flavors of buffalo wings without the messy bones.
Required Ingredients
2 cups cooked chicken, shredded (rotisserie chicken works well)
8 ounces cream cheese, softened
1/2 cup buffalo hot sauce
1/2 cup ranch dressing
1 1/2 cups shredded mozzarella or cheddar cheese
1/4 cup blue cheese crumbles (for the side)
1 bunch celery sticks
Equipment List
Medium baking dish
Large mixing bowl
Wooden spoon
Serving platter for veggies
DIY Instructions
Prepare the Heat: Mix the softened cream cheese and buffalo sauce in a large bowl until the mixture is a smooth, orange paste.
Combine Ingredients: Fold in the shredded chicken, ranch dressing, and one cup of the shredded cheese. Stir until the chicken is fully coated.
Transfer to Dish: Spread the mixture into your baking dish. Use a spoon to make sure it is level so it heats through evenly.
Add More Cheese: Sprinkle the remaining half cup of cheese over the top. For extra flair, add a few small clumps of shredded chicken on the surface.
Bake until Bubbly: Place the dish in a 350-degree oven for twenty minutes. The cheese on top should be melted and the edges should be slightly browned.
Serve and Dip: Arrange the celery sticks and chips around the hot dish. Place the blue cheese crumbles in a small cup nearby for guests to add as they like.
14. Garlic and Herb Stuffed Mushrooms
Make-Ahead Party Food
These savory morsels are packed with a rich filling of breadcrumbs, parmesan, and fresh herbs. Each mushroom cap is roasted until tender, allowing the juices to mingle with the crispy, golden topping. A light dusting of extra cheese on top adds a professional touch to these bite-sized appetizers.
Stuffed mushrooms are a fantastic make-ahead option because they hold their shape and flavor well. The combination of garlic and parsley creates a fragrant aroma that greets guests as they move toward the food table. They offer a satisfying, earthy taste that feels substantial without being too heavy.
Arranging them in neat rows on a dark baking sheet creates an attractive, organized display. They are easy to grab with fingers or a small fork, making them a very practical choice for a busy social event. These are often the first items to vanish at any holiday gathering.
Required Ingredients
20 large white or Cremini mushrooms
1/2 cup Italian breadcrumbs
1/4 cup grated parmesan cheese
2 cloves garlic, minced
2 tablespoons fresh parsley, chopped
3 tablespoons melted butter
1/4 teaspoon salt
Equipment List
Large rimmed baking sheet
Small mixing bowl
Spoon or small scoop
Damp paper towel
DIY Instructions
Clean the Mushrooms: Wipe the mushroom caps with a damp paper towel to remove any dirt. Do not soak them in water or they will become soggy.
Remove the Stems: Gently pop the stems out of the caps. You can discard the stems or chop them finely to add back into the filling.
Mix the Stuffing: Combine the breadcrumbs, parmesan, garlic, parsley, and salt in a bowl. Pour the melted butter over the top and stir until the crumbs are moist.
Fill the Caps: Use a small spoon to mound the stuffing into each empty mushroom hole. Press down slightly so the filling stays in place during baking.
Roast: Place the mushrooms on a baking sheet. Bake at 400 degrees Fahrenheit for fifteen to twenty minutes until the caps are soft and the tops are golden brown.
Plating: Let them cool for five minutes before moving them to a serving tray. Sprinkle a little fresh parsley over the tops for a final pop of color.
15. Southern Pimento Cheese Spread
Make-Ahead Party Food
This creamy, tangy spread brings a touch of classic comfort to a modern New Year’s Eve menu. It features a blend of sharp cheddar cheese, sweet pimientos, and a hint of spice for a truly deep flavor. Served in a wooden bowl, it looks rustic and inviting alongside a ring of golden crackers.
Guests can enjoy this as a simple dip or use it to create their own small sandwiches. A slice of fresh jalapeño on top adds a bright green contrast and a bit of extra heat for those who want it. The texture is thick and chunky, making it perfect for spreading on crusty bread or dipping vegetables.
You can whip up a large batch of this cheese several days in advance. The flavors actually improve as they sit in the refrigerator, making it the ultimate stress-free appetizer. It is a versatile dish that works just as well for a casual hangout as it does for a formal party.
Required Ingredients
2 cups sharp cheddar cheese, freshly shredded
4 ounces cream cheese, softened
1/2 cup mayonnaise
1 jar diced pimientos (4 ounces), drained
1/2 teaspoon garlic powder
1/4 teaspoon cayenne pepper
1 fresh jalapeño, sliced (for garnish)
1 box butter crackers
Equipment List
Large mixing bowl
Box grater (for the cheese)
Sturdy spoon or spatula
Wooden serving bowl
DIY Instructions
Shred the Cheese: Use a box grater to shred your own cheddar. Pre-shredded cheese has a waxy coating that prevents the spread from being perfectly creamy.
Cream the Base: Beat the softened cream cheese and mayonnaise together in a bowl until the mixture is smooth and has no lumps.
Add the Flavor: Stir in the garlic powder and cayenne pepper. Fold in the drained pimientos gently so they do not break apart too much.
Combine with Cheddar: Add the shredded cheese to the bowl. Mix thoroughly until the white cream base and the orange cheese are fully combined.
Chill for Flavor: Place the spread in a container and refrigerate for at least two hours. This gives the spices time to blend into the cheese.
Serve: Scoop the mixture into a wooden bowl. Top with a single jalapeño slice and arrange the crackers in a circle around the base of the bowl.
16. Sticky Honey Garlic Chicken Wings
Make-Ahead Party Food
Sweet and savory flavors collide in these glazed wings that are sure to be a hit with every guest. Each piece is coated in a thick, glossy sauce made from honey, garlic, and soy. A generous sprinkle of toasted sesame seeds and fresh green onions adds a professional look and a nice crunch.
Baking the wings until they are crispy before adding the sauce ensures they have a great texture. The sticky glaze clings to the meat, making every bite flavorful and satisfying. Serving them with a side of extra dipping sauce allows guests to customize their level of sweetness.
A large platter of these wings provides a hearty protein option for your party menu. They are easy to prepare in bulk, which is helpful when you have a long list of guests to feed. The combination of the dark sauce and bright green garnish makes them look very appetizing under party lights.
Required Ingredients
2 pounds chicken wings (flats and drumettes)
1/2 cup honey
1/4 cup soy sauce
3 cloves garlic, minced
1 tablespoon fresh ginger, grated
2 tablespoons sesame seeds
2 green onions, sliced
Equipment List
Large baking sheet with a wire rack
Small saucepan
Large mixing bowl
Tongs
DIY Instructions
Bake the Wings: Dry the wings with paper towels. Place them on a wire rack over a baking sheet and bake at 400 degrees for forty-five minutes until crispy.
Simmer the Sauce: While the wings cook, combine honey, soy sauce, garlic, and ginger in a small saucepan over medium heat.
Thicken the Glaze: Let the sauce bubble for about five to eight minutes. It should reduce and become thick enough to coat the back of a spoon.
Toss the Chicken: Once the wings are done, put them into a large bowl. Pour the warm honey garlic sauce over them.
Coat Evenly: Use tongs to toss the wings until every piece is fully covered in the sticky glaze.
Garnish and Serve: Pile the wings onto a platter. Sprinkle the sesame seeds and sliced green onions over the top while the sauce is still wet so they stick.
17. Classic Shrimp Cocktail Platter
Make-Ahead Party Food
Fresh, chilled shrimp served with a tangy red sauce is a sophisticated choice for a New Year’s Eve celebration. These large shrimp are poached until tender and then chilled over a bed of crushed ice. A wedge of lime and a twist of citrus peel add a bright, acidic finish to the display.
Presenting the shrimp in a martini glass or a tiered server makes this appetizer look like a professional catering piece. The cold temperature of the seafood is incredibly refreshing among the many warm, fried snacks on the table. It is a light, high-protein option that guests always appreciate.
You can peel and de-vein the shrimp a day early to save time on the day of the party. Just before serving, arrange them neatly around the rim of your glass with the tails pointing out. This classic look is timeless and adds an air of luxury to your festive menu.
Required Ingredients
1 pound large shrimp, peeled and de-veined (tails left on)
1 cup ketchup
2 tablespoons horseradish
1 teaspoon lemon juice
1/2 teaspoon Worcestershire sauce
1 lime, cut into wedges
2 cups crushed ice
Equipment List
Large pot for boiling
Large bowl for ice bath
Martini glasses or wide serving bowls
Small glass for sauce
DIY Instructions
Boil the Shrimp: Bring a pot of water to a boil. Drop the shrimp in and cook for only two to three minutes until they turn pink and opaque.
Shock in Ice: Immediately move the hot shrimp into a bowl filled with ice and cold water. This stops the cooking and keeps them from becoming rubbery.
Mix the Sauce: Stir the ketchup, horseradish, lemon juice, and Worcestershire sauce in a small bowl. Adjust the horseradish if you want more “zip.”
Prep the Serving Dish: Fill a martini glass or bowl with crushed ice. Place a small cup of the red cocktail sauce right in the center of the ice.
Arrange the Seafood: Hook the shrimp over the edge of the glass. The tails should hang on the outside for easy grabbing.
Final Garnish: Squeeze a little lime juice over the shrimp. Perch a lime wedge on the rim of the glass and serve while everything is ice cold.
18. Classic Devilled Eggs with Paprika
Make-Ahead Party Food
Rich, creamy centers and a hint of spice make these devilled eggs a timeless favorite for any celebratory spread. Each egg white half is filled with a smooth, whipped yolk mixture that has been piped into a perfect star shape. A dusting of bright red paprika on top adds a traditional look and a subtle smoky finish.
The addition of fresh microgreens on the side of each egg brings a modern, gourmet touch to this vintage dish. Guests always appreciate the protein-packed, bite-sized nature of this snack while they mingle around the room. Arranging them in a special indented tray ensures they stay in place and look incredibly professional.
You can hard-boil the eggs and prepare the filling the day before to streamline your party prep. Keeping the whites and the yolk mixture separate until the last minute prevents the eggs from losing their fresh appearance. It is a dependable, crowd-pleasing option that never goes out of style for a New Year’s Eve party.
Required Ingredients
12 large eggs
1/2 cup mayonnaise
1 tablespoon Dijon mustard
1 teaspoon apple cider vinegar
1/2 teaspoon salt
1/2 teaspoon smoked paprika (for dusting)
1 small container microgreens for garnish
Equipment List
Large pot for boiling eggs
Ice bath bowl
Piping bag with a star tip
Small mixing bowl
Devilled egg serving tray
DIY Instructions
Boil the Eggs: Place the eggs in a pot and cover with water. Bring to a boil, then cover and remove from heat for twelve minutes to get perfect yolks.
Peel with Ease: Move the hot eggs immediately into a bowl of ice water for ten minutes. This makes the shells slide off much easier without tearing the whites.
Slice and Scoop: Cut each peeled egg in half lengthwise. Gently pop the yellow yolks into a bowl and set the whites aside on your serving tray.
Create the Filling: Mash the yolks with a fork until they are fine crumbs. Stir in the mayonnaise, mustard, vinegar, and salt until the mixture is silky smooth.
Pipe for Precision: Fill a piping bag with the yolk mixture. Squeeze a generous amount into the center of each egg white using a circular motion to create a peak.
Garnish for Style: Sprinkle a tiny amount of paprika over each egg. Place a small sprig of microgreens next to the filling for a final, professional touch.
19. Prosciutto Wrapped Asparagus Bundles
Make-Ahead Party Food
Thin, salty slices of Italian ham wrapped around tender green stalks create a sophisticated and healthy appetizer. These bundles are roasted until the meat becomes crispy and the vegetables are perfectly charred. A few strips of orange zest on top provide a bright, citrusy note that cuts through the richness of the ham.
The vibrant green color of the asparagus looks beautiful on a white platter, making it a very visually appealing dish. Serving them warm ensures the meat has a satisfying crunch while the vegetable remains juicy. This is a fantastic low-carb option for guests who are looking for something lighter among the heavier party foods.
Preparation is very simple since you only need a few high-quality ingredients to make this dish stand out. You can assemble the bundles earlier in the day and keep them chilled until it is time to slide them into the oven. It is a refined snack that feels much fancier than the minimal effort required to make it.
Required Ingredients
20 medium-sized asparagus spears, trimmed
10 slices of prosciutto, cut in half lengthwise
2 tablespoons extra virgin olive oil
1/2 teaspoon black pepper
1 orange (for zest)
Equipment List
Baking sheet
Parchment paper
Vegetable peeler
Serving platter
DIY Instructions
Prep the Veggies: Snap the woody ends off the asparagus spears so they are all the same length. Wash them and pat them completely dry.
Season Lightly: Toss the asparagus in a bowl with olive oil and black pepper. The ham is already salty, so there is no need to add extra salt.
Wrap the Stalks: Take one strip of prosciutto and wrap it tightly around a single asparagus spear, starting at the bottom and moving toward the tip.
Roast until Crisp: Place the bundles on a parchment-lined tray. Bake at 400 degrees Fahrenheit for 12 to 15 minutes until the meat is crispy and the tips are dark.
Add the Garnish: Use a peeler or a zester to create long, thin strips of orange peel. Scatter these over the warm bundles for a pop of color and flavor.
Plating: Arrange the stalks in a neat row on your platter. Serve them immediately while they are still hot for the best texture.
20. Teriyaki Pineapple Meatballs
Make-Ahead Party Food
Sweet and savory flavors come together in these tropical-themed meatballs that are a guaranteed hit at any gathering. Each bite-sized piece is coated in a thick, glossy teriyaki glaze and topped with a generous sprinkle of toasted sesame seeds. Sliced green onions and chunks of grilled pineapple add a refreshing crunch and a splash of bright color.
The combination of the warm meat and the juicy fruit provides a satisfying balance that keeps guests coming back for more. Using a bamboo pick for each meatball makes them an easy, mess-free option for people to grab as they mingle. Serving them in a deep blue bowl helps the vibrant orange and yellow colors of the dish stand out.
You can easily prepare the meatballs and the sauce in advance and keep them warm in a slow cooker throughout the night. This allows you to spend more time celebrating and less time worry about the food. It is a crowd-pleasing snack that offers a fun, island-inspired twist on a classic party appetizer.
Required Ingredients
1 bag frozen pre-cooked meatballs (32 ounces)
1 cup teriyaki sauce
1 can pineapple chunks, drained
2 tablespoons toasted sesame seeds
1/4 cup green onions, sliced
1/2 cup pineapple juice (from the can)
Equipment List
Large skillet or slow cooker
Wooden spoon
Serving bowl
Bamboo appetizer skewers
DIY Instructions
Heat the Base: Pour the teriyaki sauce and pineapple juice into a large skillet over medium heat. Let the liquid simmer until it starts to thicken slightly.
Add the Meat: Drop the frozen meatballs into the sauce. Stir them gently until every piece is coated and the meat is hot all the way through.
Mix in the Fruit: Add the drained pineapple chunks to the pan. Cook for another three minutes so the fruit gets warm and starts to absorb the sauce.
Transfer to Bowl: Scoop the meatballs and pineapple into a serving bowl. Use a spatula to get every bit of the thick glaze out of the pan.
Garnish for Crunch: Sprinkle the toasted sesame seeds and sliced green onions over the top of the entire dish.
Secure for Serving: Place a bamboo skewer into each meatball to make them easy for guests to pick up. Serve them warm for the best flavor experience.
21. Golden Spinach and Feta Phyllo Triangles
Make-Ahead Party Food
Crispy, golden layers of pastry enclose a savory Mediterranean filling that is sure to delight your guests. These hand-held triangles feature a vibrant mix of sautéed spinach and tangy feta cheese, seasoned with fresh herbs. The shattered flakes of the outer crust offer a satisfying crunch that contrasts beautifully with the soft, salty center.
Providing a vegetarian option that feels substantial is easy with these flaky treats. A dusting of dried oregano on the surface adds an aromatic touch that enhances the earthy greens inside. They look beautiful arranged on a blue and white patterned platter, bringing a bright touch to your winter spread.
You can assemble these well in advance and keep them chilled until it is time to bake. This allows you to serve them piping hot right as the party energy begins to peak. Their small size makes them an excellent choice for a busy New Year’s Eve where people prefer to graze while they mingle.
Required Ingredients
1 package frozen phyllo dough, thawed
1 pound fresh spinach, chopped and sautéed
1 cup crumbled feta cheese
1/2 cup ricotta cheese
1/4 cup green onions, finely sliced
1/2 cup unsalted butter, melted
1 tablespoon dried oregano
1/2 teaspoon black pepper
Equipment List
Large baking sheet
Pastry brush
Mixing bowl
Sharp knife
Clean kitchen towel
DIY Instructions
Prepare the Filling: Squeeze all excess liquid from the cooked spinach until it is dry. Mix it in a bowl with the feta, ricotta, green onions, and black pepper until well combined.
Handle the Dough: Unroll the phyllo sheets and cover them with a damp kitchen towel. This prevents the thin layers from drying out and cracking while you work.
Butter and Layer: Lay one sheet of dough on a clean surface and brush it lightly with melted butter. Place a second sheet on top and butter it as well.
Fold the Strips: Cut the layered dough into long strips about three inches wide. Place a small spoonful of the spinach mixture at the bottom corner of a strip.
Create the Triangle: Fold the corner over the filling to form a triangle. Continue folding the strip up like a flag until you reach the end, then brush the top with more butter.
Bake until Crispy: Place the triangles on a baking sheet and sprinkle with dried oregano. Bake at 375 degrees Fahrenheit for 15 to 20 minutes until they are a deep golden brown.
22. Mini Crab Cakes with Zesty Remoulade
Make-Ahead Party Food
Bring a touch of coastal elegance to your New Year’s Eve celebration with these succulent seafood bites. Each mini crab cake is seared until a golden crust forms, hiding a tender interior packed with sweet lump crab meat. A creamy dollop of orange-tinted remoulade sauce sits on top, providing a zesty kick to every mouthful.
Garnishing each piece with a thin radish slice and fresh cilantro makes them look like they came from a high-end restaurant. The bright citrus notes from the sauce cut through the richness of the seafood perfectly. These are served on a dark slate board to make the vibrant colors of the garnish really stand out.
These appetizers are incredibly easy to portion and cook in batches. You can prepare the crab mixture and the sauce the morning of your party. When guests arrive, a quick sear in a hot pan ensures everyone gets a warm, flavorful treat that feels truly special.
Required Ingredients
1 pound lump crab meat, drained
1/4 cup breadcrumbs
1 large egg, beaten
2 tablespoons mayonnaise
1 tablespoon Dijon mustard
1/4 cup red bell pepper, finely diced
1/4 cup fresh cilantro, chopped
1/2 cup remoulade sauce (store-bought or homemade)
5 radishes, thinly sliced
Equipment List
Large non-stick skillet
Medium mixing bowl
Small scoop or tablespoon
Spatula
Serving board or slate
DIY Instructions
Mix the Base: Combine the egg, mayonnaise, mustard, and spices in a medium bowl. Whisk until the liquid is smooth.
Add the Texture: Fold in the red bell peppers and cilantro. Gently stir in the lump crab meat and breadcrumbs, being careful not to break up the large crab chunks too much.
Form the Cakes: Use a small scoop to form the mixture into balls the size of a golf ball. Flatten them slightly into thick discs with your palms.
Sear to Golden: Heat a little oil in a skillet over medium heat. Cook the cakes for three to four minutes per side until the edges are crispy and brown.
Add the Sauce: Move the warm cakes to your serving board. Use a small spoon or a piping bag to add a neat swirl of remoulade sauce to the center of each one.
Final Garnish: Tuck a radish slice and a tiny cilantro leaf into the sauce. Serve immediately while the seafood is still hot and the sauce is cool.
23. Crispy Rosemary Roasted Chickpeas
Make-Ahead Party Food
Sometimes the most addictive party snacks are the simplest ones to prepare. These chickpeas are roasted until they achieve a deep mahogany color and a satisfying, crunchy texture. Scattered fresh rosemary needles and large flakes of sea salt provide an earthy, savory flavor that keeps people reaching for the bowl.
This snack is a fantastic healthy alternative to greasy chips or heavy crackers. The woody aroma of the herbs fills the air as they roast, creating a cozy atmosphere for your gathering. They look rustic and inviting when served in a simple wooden bowl on a dark tablecloth.
You can bake a large batch of these earlier in the week as they store remarkably well in an airtight container. This makes them a great “buffer” snack to have on the table as soon as the first guests walk through the door. They offer a great source of protein and fiber to help balance out the festive drinks.
Required Ingredients
2 cans chickpeas (15 ounces each), rinsed and patted dry
2 tablespoons extra virgin olive oil
2 tablespoons fresh rosemary, chopped
1 teaspoon coarse sea salt (Maldon salt works great)
1/2 teaspoon garlic powder
1/4 teaspoon smoked paprika
Equipment List
Large baking sheet
Paper towels
Medium mixing bowl
Wooden serving bowl
DIY Instructions
Dry Thoroughly: This is the most important step for a good crunch. Roll the rinsed chickpeas between paper towels until they are completely dry and the skins start to peel slightly.
Season the Batch: Put the dry chickpeas into a bowl. Pour over the olive oil and toss them with the rosemary, garlic powder, and paprika until they are well coated.
Spread them Out: Pour the chickpeas onto a baking sheet. Make sure they are in a single layer with space between them so they roast rather than steam.
Roast until Crunchy: Bake at 400 degrees Fahrenheit for 25 to 30 minutes. Shake the pan every ten minutes to ensure they brown evenly on all sides.
Add the Salt: Take the pan out of the oven and immediately sprinkle the large sea salt flakes over the hot chickpeas. The salt sticks better while the oil is still warm.
Cool and Serve: Let them cool completely on the tray before moving them to a bowl. This final cooling stage is when they reach their maximum crispness.
24. Caramelized Onion and Gruyere Tartlets
Make-Ahead Party Food
The deep, sweet flavor of slowly cooked onions meets the nutty richness of melted cheese in these elegant tartlets. Each pastry shell is filled with a dark onion jam and topped with a circle of bubbly, toasted Gruyere. A tiny sprig of fresh thyme adds a final note of herbal freshness to the savory bite.
These appetizers offer a sophisticated profile that pairs beautifully with a glass of sparkling wine. The visual of the charred cheese spots against the dark onions creates a professional, catered look for your menu. They are small enough to be eaten comfortably in one or two bites without any mess.
Preparing the onion mixture a day ahead saves you a lot of time on the evening of your party. All you have to do is fill the pre-made shells and give them a quick toast under the broiler. This ensures you can serve a warm, gourmet snack with very minimal effort during the festivities.
Required Ingredients
2 packages pre-made mini pastry shells (30 total)
3 large yellow onions, thinly sliced
1 tablespoon olive oil
1 tablespoon balsamic vinegar
1 cup shredded Gruyere cheese
15 fresh thyme sprigs
1/2 teaspoon salt
Equipment List
Large skillet
Baking sheet
Spoon
Sharp knife
DIY Instructions
Cook the Onions: Heat the olive oil in a skillet over low heat. Add the sliced onions and salt, stirring occasionally for about 30 minutes until they are soft and dark brown.
Deglaze for Flavor: Stir in the balsamic vinegar and let it cook for another two minutes. This adds a tangy sweetness that balances the rich cheese.
Prepare the Shells: Place the empty pastry shells on a baking sheet. Fill each one about three-quarters full with the warm caramelized onions.
Top with Cheese: Sprinkle a generous amount of shredded Gruyere over the top of each onion-filled shell. Press the cheese down slightly so it stays in place.
Melt and Toast: Place the tray under the broiler for two to three minutes. Watch them closely so the cheese melts and forms small brown spots without burning the pastry.
Garnish: Remove from the oven and immediately place a small thyme leaf on the center of the melted cheese. Serve them while the cheese is still stretchy.
25. Herb and Ham Cream Cheese Pinwheels
Make-Ahead Party Food
Bright green spinach tortillas make a striking base for these colorful, rolled appetizers. A thick layer of herb-infused cream cheese holds together slices of savory ham, sharp cheddar, and crunchy red peppers. When sliced, they reveal a beautiful spiral pattern that looks fantastic on a large white platter.
A single leaf of fresh parsley in the center of the tray ties the whole presentation together. These pinwheels are a great choice for guests who prefer a cool, refreshing snack over something warm. The combination of textures from the soft wrap to the crisp peppers provides a satisfying bite.
You can roll these up tightly in plastic wrap and keep them in the fridge for several hours before slicing. This make-ahead feature helps the flavors meld and makes the rolls easier to cut into neat, uniform pieces. They are a reliable crowd-pleaser that is both kid-friendly and visually appealing.
Required Ingredients
4 large spinach or garden herb tortillas
8 ounces softened cream cheese
2 tablespoons fresh dill or chives, chopped
1/2 pound thinly sliced deli ham
1 cup shredded cheddar cheese
1 red bell pepper, cut into very thin strips
Fresh parsley for garnish
Equipment List
Small mixing bowl
Offset spatula or butter knife
Plastic wrap
Serrated knife
DIY Instructions
Make the Spread: Mix the softened cream cheese with the chopped herbs in a small bowl until it is smooth and easy to spread.
Coat the Tortilla: Lay a tortilla flat on your counter. Spread a thin, even layer of the cream cheese mixture all the way to the very edges.
Layer the Meat: Place several slices of ham over the cheese, leaving a small gap at the top edge to help the roll seal.
Add the Veggies: Sprinkle the shredded cheddar over the ham and place a few strips of red pepper in a line across the center of the tortilla.
Roll it Up: Start from the bottom and roll the tortilla as tightly as possible toward the top edge. Wrap the log tightly in plastic wrap.
Chill and Slice: Place the logs in the fridge for at least one hour. Use a serrated knife to slice the ends off, then cut the rest into one-inch rounds.
26. Caramelized Onion and Brie Sliders
Make-Ahead Party Food
Sweet and savory notes come together in these mini burgers that feel like a gourmet meal in a few bites. Each slider features a juicy beef patty topped with a thick slice of melted brie and a mound of dark, jammy onions. The shiny brioche buns are toasted to a golden brown and held together with a silver-tipped pick.
These sliders offer a more filling option for your New Year’s menu to keep guests satisfied throughout the night. The richness of the cheese pairs perfectly with the sweetness of the onions and the soft, buttery bread. They look incredibly appetizing when served on a dark plate, highlighting the glossy finish of the buns.
You can prepare the onion topping and shape the patties earlier in the day to streamline the cooking process. Assembling them takes just a few minutes once the meat is grilled or pan-seared. They are a great way to add a “wow” factor to your appetizer spread with very little stress.
Required Ingredients
12 mini brioche slider buns
1 pound ground beef
8 ounces brie cheese, sliced
2 large red onions, caramelized (see instructions below)
2 tablespoons butter
1 teaspoon salt and pepper
12 appetizer picks
Equipment List
Large skillet or griddle
Spatula
Knife
Small bowl
DIY Instructions
Prep the Onions: Sauté sliced red onions in a pan with a little butter and sugar over low heat until they are soft, dark, and sticky. Set these aside in a bowl.
Form the Patties: Shape the ground beef into 12 small, flat discs that are slightly wider than your slider buns. Season both sides with salt and pepper.
Cook the Meat: Heat your skillet over medium-high heat. Cook the patties for about three minutes per side until they are browned and cooked through.
Melt the Cheese: Place a slice of brie on each patty during the last minute of cooking. Cover the pan with a lid for thirty seconds to help the cheese melt.
Toast the Buns: Split the buns and lightly toast the inside surfaces in the same pan until they are golden and warm.
Assemble: Place a patty on each bottom bun, top with a spoonful of caramelized onions, and add the top bun. Secure the whole slider with a decorative pick.
27. Sicilian Eggplant Caponata Crostini
Make-Ahead Party Food
A vibrant mix of Mediterranean vegetables creates a sophisticated topping for these crunchy bread rounds. This caponata features tender eggplant, salty olives, and sweet raisins simmered together for a complex flavor profile. Fresh parsley and a drizzle of oil add a bright finish to the rustic, toasted baguette slices.
This appetizer is a wonderful vegan-friendly option that doesn’t sacrifice any depth of flavor. The contrast between the soft, vinegary vegetables and the charred, crunchy bread makes for an exciting texture in every bite. It looks beautiful served on a wooden cutting board next to a bottle of red wine.
The vegetable mixture actually tastes better the next day, making it a perfect candidate for advanced preparation. You can toast the bread rounds a few hours before the party and simply spoon on the topping as people arrive. It is a fresh, colorful addition that brings a taste of summer to your winter celebration.
Required Ingredients
1 large eggplant, diced into small cubes
1/4 cup olive oil
1/2 cup green olives, chopped
1/4 cup capers, drained
1/4 cup golden raisins
2 tablespoons red wine vinegar
1 baguette, sliced and toasted
Fresh parsley for garnish
Equipment List
Large skillet
Baking sheet (for toasting bread)
Bread knife
Serving spoon
DIY Instructions
Brown the Eggplant: Heat the olive oil in a large skillet. Add the diced eggplant and cook over medium heat until it is soft and golden brown on all sides.
Build the Flavor: Stir in the chopped olives, capers, and raisins. Let the mixture simmer for five minutes so the flavors can start to blend together.
Add the Tang: Pour in the red wine vinegar and stir well. The liquid should reduce slightly and coat the vegetables in a glossy, savory sauce.
Toast the Rounds: Slice your baguette into half-inch thick rounds. Place them on a baking sheet and toast them in the oven until the edges are crispy and charred.
Assemble the Bites: Spoon a generous amount of the warm or room-temperature eggplant mixture onto each toasted bread slice.
Final Touch: Scatter fresh parsley leaves over the top and add a tiny drizzle of extra olive oil. Serve them at room temperature for the best experience.
28. BBQ Pulled Pork Sliders with Apple Slaw
Make-Ahead Party Food
Slow-cooked meat piled onto soft buns creates a hearty and comforting option for your midnight feast. These sliders feature tender pulled pork tossed in a smoky barbecue sauce, topped with a crisp, refreshing apple slaw. A single jalapeño slice on top provides a bright green contrast and a subtle kick of heat.
The combination of the warm, savory pork and the cold, crunchy slaw offers an exciting balance in every bite. Using brioche or slider buns ensures the bread is soft enough to absorb the flavorful juices without falling apart. These are substantial enough to serve as a mini-meal, keeping guests energized throughout the long celebration.
You can easily prepare the pork a day in advance in your slow cooker and simply reheat it before assembly. Mixing the slaw right before the party starts ensures the vegetables stay crisp and vibrant. This dish is a guaranteed crowd-pleaser that brings a rustic, barbecue flair to your New Year’s Eve menu.
Required Ingredients
1 pound cooked pulled pork (slow-cooked and shredded)
1/2 cup barbecue sauce
12 slider buns
1 cup shredded cabbage mix
1 green apple, julienned
2 tablespoons apple cider vinegar
1 tablespoon honey
1 fresh jalapeño, sliced
Equipment List
Slow cooker or large pot
Mixing bowl
Tongs
Small knife
Serving tray
DIY Instructions
Warm the Pork: Place your shredded pulled pork in a pot or slow cooker over low heat. Pour the barbecue sauce over the meat and stir with tongs until every strand is coated and hot.
Make the Slaw: Whisk the apple cider vinegar and honey together in a bowl. Toss in the shredded cabbage and the thin apple strips until they are evenly dressed.
Toast the Buns: Slice the slider buns in half. Lightly toast the inside of the buns in a dry pan for a minute until they are warm and slightly golden.
Build the Slider: Scoop a generous portion of the warm BBQ pork onto the bottom half of each bun.
Add the Crunch: Place a small mound of the apple slaw directly on top of the pork. The acidity of the apple helps cut through the richness of the meat.
Final Assembly: Place the top bun on and secure it with a toothpick if needed. Add a thin slice of jalapeño to the very top for a festive, spicy finish.
29. Herb and Garlic Roasted Nut Mix
Make-Ahead Party Food
Warm, aromatic nuts provide a classic snacking experience that fits perfectly in any party setting. This mix features a blend of almonds, cashews, pecans, and walnuts roasted with whole garlic cloves and fresh rosemary. Large flakes of sea salt and a touch of black pepper enhance the natural buttery flavors of the nuts.
The scent of roasting garlic and herbs will fill your home, making it feel cozy as guests arrive. Serving these in a cast-iron skillet or a wooden bowl adds a rustic and sophisticated touch to your snack table. This is an excellent low-carb and gluten-free option that allows people to graze throughout the evening.
You can customize this mix with your favorite nuts or even add a pinch of cayenne for extra spice. Roasting them at a lower temperature ensures the nuts become crunchy without the oils becoming bitter. It is a simple, high-quality snack that pairs beautifully with craft beers or a glass of wine.
Required Ingredients
3 cups mixed raw nuts (almonds, pecans, cashews, walnuts)
2 whole heads of garlic, cloves separated but unpeeled
3-4 sprigs of fresh rosemary
2 tablespoons olive oil
1 teaspoon coarse sea salt
1/2 teaspoon cracked black pepper
Equipment List
Large baking sheet or cast-iron skillet
Large mixing bowl
Spatula
Serving bowl
DIY Instructions
Combine the Mix: Place all the raw nuts into a large mixing bowl. Toss them with the olive oil, salt, and pepper until the nuts look shiny and are evenly coated.
Add the Aromatics: Throw the unpeeled garlic cloves and the whole rosemary sprigs into the bowl. Mix them in so the flavors can distribute during the roasting process.
Spread the Layer: Pour the mixture onto a baking sheet or into a skillet. Ensure the nuts are in a flat, single layer so they roast evenly instead of steaming.
Roast to Perfection: Bake at 325 degrees Fahrenheit for 15 to 20 minutes. Stir the nuts every few minutes to prevent any smaller pieces from burning.
Cool Down: Remove the tray from the oven once the nuts are fragrant and golden. Let them cool slightly on the pan, as they will continue to crisp up as the temperature drops.
Serve: Pour the warm mix into a serving bowl. You can leave the roasted garlic and rosemary in the bowl for a beautiful, rustic presentation.
30. Classic Tomato and Basil Bruschetta
Make-Ahead Party Food
Bright, fresh flavors shine in this traditional Italian appetizer that never goes out of style. The topping consists of juicy, diced tomatoes mixed with aromatic basil and a hint of garlic on top of charred bread. A thin shaving of aged parmesan cheese adds a salty, sharp finish that ties all the ingredients together.
Bruschetta is a fantastic way to bring a light and healthy element to a menu filled with richer foods. The contrast between the cold tomato mixture and the warm, garlic-rubbed bread provides a refreshing experience for the palate. It is a visually appealing dish that highlights the simple beauty of fresh, seasonal produce.
You can prepare the tomato mixture a few hours ahead to allow the juices to develop and the flavors to meld. Toast the bread just as the party begins to ensure the base remains sturdy and crunchy. This is a versatile and reliable choice that adds a touch of Mediterranean elegance to your New Year’s Eve celebration.
Required Ingredients
1 baguette, sliced into 1/2 inch rounds
4 large Roma tomatoes, seeded and diced
1/2 cup fresh basil leaves, chiffonade (thinly sliced)
2 cloves garlic (one minced, one left whole)
2 tablespoons extra virgin olive oil
1 teaspoon balsamic glaze
1/4 cup shaved parmesan cheese
Salt and pepper to taste
Equipment List
Large mixing bowl
Baking sheet or grill pan
Bread knife
Small spoon
DIY Instructions
Prepare the Tomatoes: Dice the tomatoes and place them in a bowl. Mix in the minced garlic, sliced basil, olive oil, salt, and pepper. Let this sit for 20 minutes.
Toast the Bread: Arrange the baguette slices on a baking sheet. Toast them in a 400-degree oven for about 5 minutes or until the edges are golden and crispy.
The Garlic Secret: Take the whole garlic clove and rub the cut side against the rough surface of the warm, toasted bread. This adds a subtle, authentic garlic flavor without being overpowering.
Strain the Mixture: Use a slotted spoon to scoop the tomato mixture. This prevents the extra liquid from making your crispy bread soggy.
Top the Toasts: Pile a generous spoonful of the tomato mix onto each slice of bread. Press it down slightly so the pieces stay in place.
Finish and Serve: Place a single shaving of parmesan cheese on each piece. Drizzle a tiny bit of balsamic glaze over the top and serve immediately.
31. Loaded Mini Potato Skins
Make-Ahead Party Food
Tiny potatoes offer a hearty, comforting bite that guests will gravitate toward during a cold New Year’s Eve. These mini skins are roasted until the outside is crisp, then filled with melted cheddar and salty bacon crumbles. A dollop of cool sour cream on top creates a classic flavor profile that everyone recognizes and loves.
Finishing the dish with a sprinkle of fresh chives adds a bright green color that makes the platter look professionally styled. The small size makes them much easier to handle than a full-sized potato skin at a busy party. You can arrange them on a large metal baking sheet for a rustic, kitchen-to-table presentation.
The contrast between the warm, cheesy base and the cold cream provides a satisfying mouthfeel. Because these are so filling, they help balance out the lighter appetizers on your menu. They are a dependable choice for hosts who want to serve something substantial without a lot of last-minute fuss.
Required Ingredients
15-20 baby Yukon Gold or red potatoes
1 cup shredded sharp cheddar cheese
1/2 cup cooked bacon, crumbled
1/2 cup sour cream
1/4 cup fresh chives, chopped
2 tablespoons olive oil
1/2 teaspoon salt
Equipment List
Large baking sheet
Small spoon or melon baller
Piping bag or small plastic bag
Sharp knife
DIY Instructions
Roast the Potatoes: Wash the small potatoes and toss them in olive oil and salt. Place them on a baking sheet and bake at 400 degrees Fahrenheit for 20 minutes until they are soft when poked with a fork.
Cool and Halve: Let the potatoes sit until they are cool enough to handle. Slice each one in half lengthwise with a sharp knife.
Scoop the Centers: Use a small spoon to gently scoop out the middle of each potato half. Leave a thin wall of potato inside the skin so it stays sturdy.
Fill with Cheese: Place the hollowed skins back on the tray. Fill each one with a generous pinch of shredded cheddar and some bacon crumbles.
Melt until Bubbly: Return the tray to the oven for 5 minutes. Remove them once the cheese is fully melted and starting to bubble.
Top and Serve: Put the sour cream into a plastic bag and snip off the corner. Pipe a small swirl onto each warm potato and scatter the chives over the top.
32. Grilled Chicken Satay with Peanut Sauce
Make-Ahead Party Food
Skewered meats bring a wonderful smoky aroma to your party spread that immediately makes guests feel hungry. These chicken strips are marinated in aromatic spices and grilled until they show beautiful char marks. A thick, creamy peanut sauce is drizzled over the top to add a rich, nutty depth to the savory poultry.
Fresh cilantro leaves and thin slices of red chili provide a vibrant garnish that hints at the complex flavors within. The bamboo sticks make this a very practical choice for a “walk-around” party where people are mingling. Serving them on a dark ceramic plate allows the golden-brown color of the sauce to pop.
The combination of salty, sweet, and slightly spicy notes makes this a sophisticated addition to any international-themed menu. You can prepare the skewers hours in advance and give them a quick sear just before people arrive. It is a high-protein snack that feels much fancier than basic chicken nuggets.
Required Ingredients
1 pound chicken breast, cut into thin strips
1/2 cup creamy peanut butter
1/4 cup coconut milk
2 tablespoons soy sauce
1 tablespoon honey
1 lime, juiced
1 red chili, thinly sliced
1 bunch fresh cilantro
Equipment List
Bamboo skewers (soaked in water)
Grill pan or outdoor grill
Small saucepan
Tongs
DIY Instructions
Soak the Sticks: Put your bamboo skewers in a bowl of water for 30 minutes. This prevents them from burning or catching fire while you are grilling the meat.
Thread the Meat: Weave one strip of chicken onto each damp skewer in a “zigzag” pattern. This ensures the meat stays flat and cooks evenly on the grill.
Sear the Chicken: Place the skewers on a hot grill pan. Cook for about 4 minutes on each side until you see dark brown stripes and the meat is no longer pink.
Make the Sauce: Combine peanut butter, coconut milk, soy sauce, and honey in a small saucepan over low heat. Whisk until it becomes a smooth, pourable glaze.
Drizzle for Style: Arrange the hot chicken on a platter. Use a spoon to drizzle the warm peanut sauce in a thick line across the middle of the skewers.
Final Garnish: Scatter the sliced red chilis and fresh cilantro leaves over the top. Serve with extra lime wedges on the side for squeezing.
33. Sweet and Savory Ham and Cheese Sliders
Make-Ahead Party Food
Pull-apart sandwiches are a fantastic way to feed a crowd without spending all night assembling individual portions. These sliders feature layers of salty deli ham and melty Swiss cheese tucked inside soft, buttery rolls. A glaze of poppy seeds and melted butter on top adds a subtle crunch and a beautiful, glossy finish.
The sight of the stretchy, melted cheese as you pull the rolls apart is a guaranteed hit at any gathering. These are baked in a single dish, which helps keep the bread warm and soft throughout the evening. They offer a comforting, familiar taste that pairs well with both sparkling wine and casual sodas.
Because you can build the entire tray in minutes, these are a lifesaver for busy hosts. You can even assemble them the day before and just slide the pan into the oven when the party starts. They are filling, easy to hold, and always one of the first things to disappear from the table.
Required Ingredients
1 package Hawaiian sweet rolls (12 count)
1/2 pound thinly sliced deli ham
6-8 slices Swiss or Provolone cheese
1/2 cup melted butter
1 tablespoon Dijon mustard
1 tablespoon poppy seeds
1/2 teaspoon garlic powder
Equipment List
9×13 inch baking dish
Serrated bread knife
Pastry brush
Small bowl
DIY Instructions
Slice the Bread: Use a long serrated knife to slice the entire block of rolls in half horizontally. Do not pull the individual rolls apart yet.
Layer the Filling: Place the bottom half of the bread into your baking dish. Lay the ham slices in an even layer, then cover them completely with the cheese slices.
Replace the Top: Put the top half of the bread block back on. Press down gently so the sandwich stays together.
Mix the Glaze: Stir the melted butter, Dijon mustard, poppy seeds, and garlic powder together in a small bowl.
Brush the Buns: Use a pastry brush to coat the tops of the rolls with the butter mixture. Make sure some of the liquid drips down between the rolls for extra flavor.
Bake and Serve: Cover with foil and bake at 350 degrees Fahrenheit for 15 minutes. Remove the foil for the last 5 minutes so the tops get golden and the cheese is fully melted.
34. Fig and Goat Cheese Crostini with Thyme
Make-Ahead Party Food
Sophisticated flavors come together in this elegant appetizer that is surprisingly simple to put together. A thick layer of creamy goat cheese provides a tangy base for a dollop of rich, dark fig jam. The crunchy, toasted baguette rounds offer a sturdy foundation that holds up well during a long party.
The deep purple of the fig jam against the white cheese creates a high-end look that elevates any New Year’s Eve spread. Fresh thyme leaves sprinkled over the top add an earthy fragrance that balances the sweetness of the fruit. This is a great choice for hosts who want to serve something that feels like it came from a gourmet deli.
Because these don’t require any cooking besides toasting the bread, they are very easy to assemble in large batches. You can toast the crostini ahead of time and keep them in an airtight container to stay crisp. They offer a refined bite that transitions perfectly from early evening cocktails to the midnight toast.
Required Ingredients
1 baguette, sliced into rounds
8 ounces goat cheese (chevre), softened
1 jar high-quality fig jam
2 tablespoons fresh thyme leaves
1 tablespoon honey (for drizzling)
Black pepper to taste
Equipment List
Baking sheet
Butter knife or small spatula
Bread knife
Small spoon
DIY Instructions
Toast the Rounds: Slice the baguette into half-inch thick pieces. Place them on a baking sheet and toast at 375 degrees for about 5 minutes until they are crispy but not dark.
Spread the Cheese: Wait for the bread to cool slightly so the cheese doesn’t melt off. Spread a thick, even layer of goat cheese onto each toasted round.
Add the Jam: Use a small spoon to place a neat dollop of fig jam right in the center of the white cheese.
Garnish with Herbs: Strip the tiny leaves from the thyme sprigs. Scatter a few leaves over each crostini for a pop of color and flavor.
Drizzle and Season: For extra depth, add a tiny drizzle of honey and a tiny pinch of cracked black pepper over the jam.
Arrange and Serve: Place them in neat rows on a white platter. These are best served at room temperature so the cheese is soft and flavorful.
35. Traditional English Cucumber Tea Sandwiches
Make-Ahead Party Food
Refreshing and light, these classic sandwiches provide a crisp alternative to the many fried snacks usually found at parties. Each triangle features thin, peeled cucumber slices layered with a herb-infused cream cheese spread on soft white bread. A sprig of fresh dill on top adds a professional touch to this timeless favorite.
The tiered presentation makes these look incredibly elegant and inviting for a festive afternoon or evening gathering. Using an English cucumber is key because the skin is thin and the seeds are small, ensuring a smooth texture in every bite. They are a wonderful palate cleanser that feels sophisticated and clean.
You can prepare the herb cream cheese a day in advance to let the flavors of the dill and lemon zest meld together. Assemble the sandwiches just before your guests arrive to keep the bread from drying out or getting soggy. This is a great way to include a vegetarian option that feels fancy and traditional.
Required Ingredients
1 loaf of soft white sandwich bread
1 large English cucumber
8 ounces cream cheese, softened
2 tablespoons fresh dill, chopped (plus extra for garnish)
1 teaspoon lemon zest
1/2 teaspoon salt
Equipment List
Sharp knife or mandoline slicer
Vegetable peeler
Small mixing bowl
Serving tier or platter
DIY Instructions
Prep the Spread: Mix the softened cream cheese with the chopped dill and lemon zest in a small bowl. Ensure it is smooth and easy to spread.
Slice the Veggies: Peel the cucumber to remove the dark green skin. Use a sharp knife to cut it into very thin, translucent rounds.
Build the Sandwich: Spread a layer of the herb cream cheese onto two slices of bread. Lay the cucumber slices in overlapping rows on one slice, then top with the second slice.
Remove the Crusts: Use a sharp knife to carefully cut the brown crusts off all four sides of the sandwich. This is essential for the classic “tea sandwich” look.
Cut into Shapes: Slice each square sandwich into two or four triangles. Make sure your knife is very sharp so you don’t squish the soft bread.
Final Detail: Arrange the triangles on a tiered stand. Place a small sprig of fresh dill on top of the cream cheese peeking out from the sides for a beautiful finish.
36. Crispy Polenta Fries with Herb Garnish
Make-Ahead Party Food
Golden and crunchy on the outside with a creamy center, these polenta sticks are a unique twist on the standard potato fry. They are stacked in a “log cabin” style that looks impressive and makes them easy for guests to grab. A generous dusting of grated parmesan and fresh rosemary needles adds a savory, Mediterranean flair.
Serving these with a side of creamy garlic aioli or truffle mayo provides a rich dipping experience that guests will love. The bright yellow color of the cornmeal stands out beautifully against a dark plate or newspaper-style liner. They offer a satisfying crunch that stays firm even as they cool down during the party.
You can cook the polenta the day before and let it set in a flat pan in the refrigerator. This makes it very easy to slice into uniform sticks and fry or bake right before you need them. It is a creative, gluten-free snack that brings a bit of rustic Italian charm to your New Year’s Eve table.
Required Ingredients
1 tube prepared plain polenta (or homemade, set firm)
1/2 cup grated parmesan cheese
2 tablespoons fresh rosemary, chopped
1/2 cup garlic aioli or mayonnaise (for dipping)
Vegetable oil (for frying)
1/2 teaspoon sea salt
Equipment List
Large skillet or frying pan
Sharp knife
Cutting board
Small dipping bowl
DIY Instructions
Slice the Polenta: Take your firm polenta and slice it into long, rectangular sticks about the size of a large steak fry. Try to keep them all the same size so they cook at the same rate.
Heat the Pan: Pour a thin layer of oil into your skillet over medium-high heat. Wait until the oil is hot and shimmering before adding the polenta.
Fry until Golden: Place the sticks in the pan, making sure they aren’t touching. Fry for about 3 minutes on each side until they are deep golden brown and crispy.
Drain and Season: Move the hot fries to a plate lined with paper towels to remove excess oil. Immediately sprinkle them with sea salt and the chopped rosemary.
Stack for Style: Arrange the fries on a platter in a cross-hatch or “tower” pattern. This keeps them from getting soggy and looks great on the table.
Add the Cheese: Shower the entire stack with the grated parmesan while the fries are still warm. Serve with a bowl of garlic aioli right in the middle for dipping.
37. Chocolate Dipped Strawberries with Gold Leaf
Make-Ahead Party Food
Luxury meets simplicity in this stunning dessert that is a perfect match for a midnight champagne toast. Large, ripe strawberries are partially dipped in dark chocolate and finished with elegant white chocolate stripes. A few select berries are completely covered in edible gold leaf, creating a centerpiece that looks incredibly expensive.
The deep red of the fruit peeking through the chocolate adds a romantic and festive touch to your New Year’s Eve menu. These look best when arranged on a clean white marble slab or a silver tray. Guests will appreciate a sweet treat that feels light and indulgent at the same time.
Using high-quality chocolate ensures a smooth, glossy finish that snaps when you bite into it. You can prepare these a few hours ahead of time and keep them in a cool spot so the chocolate stays firm. They are a mess-free way to serve fruit and chocolate together in a single, beautiful package.
Required Ingredients
1 pound large fresh strawberries (with stems)
1 cup dark chocolate melting wafers
1/4 cup white chocolate melting wafers
1 pack edible gold leaf sheets (food grade)
1 teaspoon coconut oil
Equipment List
Microwave-safe bowls
Parchment paper
Small tweezers (for the gold leaf)
Toothpicks
DIY Instructions
Wash and Dry: Rinse the strawberries and pat them completely dry with a towel. If there is any water on the skin, the chocolate will slide right off.
Melt the Dark Chocolate: Put the dark chocolate and a tiny bit of coconut oil in a bowl. Microwave in 30-second bursts, stirring each time until it is liquid and smooth.
Dip the Fruit: Hold a strawberry by the stem and dip it three-quarters of the way into the dark chocolate. Shake off the extra and place it on parchment paper to set.
Apply the Gold: Once a few berries are dry, use tweezers to carefully place small pieces of gold leaf onto the chocolate. It is very thin and will stick instantly.
Add the Stripes: Melt the white chocolate and put it in a small plastic bag. Snip a tiny hole in the corner and drizzle thin, zigzag lines over the dark chocolate berries.
Let it Set: Leave the berries at room temperature for an hour until the chocolate is hard. Do not put them in the fridge or the chocolate might get “sweaty” and lose its shine.
38. Mini Raspberry Cheesecake Bites
Make-Ahead Party Food
Tiny, individual desserts are always a favorite because they allow guests to enjoy a sweet treat without needing a plate or fork. These cheesecake rounds feature a dark chocolate cookie crust and a smooth, creamy filling. A swirl of bright red raspberry sauce and a fresh mint leaf on top make them look like professional pastries.
The contrast between the rich, white cheesecake and the vibrant fruit sauce is visually stunning on a New Year’s Eve dessert table. They are the perfect size for a one-bite indulgence as the clock counts down to midnight. Serving them chilled ensures the texture is firm and the flavor is refreshing.
You can bake a large batch of these in a mini muffin tin a day or two before your party. This takes the pressure off your hosting duties on the big night. They are easy to transport and look beautiful when arranged in neat rows on a simple white ceramic platter.
Required Ingredients
1 package chocolate sandwich cookies (like Oreos), crushed
16 ounces cream cheese, softened
1/2 cup sugar
2 large eggs
1/2 cup raspberry jam or sauce
12 fresh raspberries
12 fresh mint leaves
Equipment List
Mini muffin tin
Paper liners
Large mixing bowl
Electric hand mixer
DIY Instructions
Make the Crust: Press a small spoonful of crushed cookies into the bottom of each paper-lined muffin tin cup. Use the back of a spoon to pack it down tightly.
Blend the Filling: Beat the cream cheese and sugar together until smooth. Add the eggs one at a time, mixing on low speed just until combined.
Bake the Bites: Pour the cheesecake mixture into the cups, filling them almost to the top. Bake at 325 degrees Fahrenheit for 15 to 18 minutes.
Cool and Chill: Let the cheesecakes cool in the pan, then move them to the fridge for at least three hours. This is what gives them their firm, creamy texture.
Add the Topping: Just before the party, spoon a small amount of raspberry sauce over the top of each chilled cheesecake.
Garnish for Style: Place one fresh raspberry and a tiny mint leaf on each bite. Arrange them on your platter and keep them cold until it is time for dessert.
39. Golden Star Rice Cereal Treats
Make-Ahead Party Food
Bring a touch of magic to your New Year’s Eve celebration with these sparkling, star-shaped snacks. These crispy treats are coated in white chocolate and decorated with shimmering gold sprinkles and silver stars. They are fun, nostalgic, and look incredibly festive under the glow of party lights.
Stacking them in a pile makes a beautiful edible centerpiece that kids and adults will both enjoy. The combination of the crunchy cereal and the smooth chocolate topping provides a classic taste that is always a hit. They are sturdier than cookies, making them a great choice for a busy party where food might be moved around.
You can make these in large batches very quickly since they don’t require any actual baking. Using a star-shaped cookie cutter ensures every piece is uniform and professional-looking. They offer a light, sweet crunch that is the perfect way to end a night of heavy appetizers.
Required Ingredients
6 cups crisp rice cereal
1 bag marshmallows (10 ounces)
3 tablespoons butter
1 cup white chocolate chips
Gold sanding sugar and silver star sprinkles
Equipment List
Large pot
9×13 inch pan
Star-shaped cookie cutter
Small bowl
DIY Instructions
Melt the Base: Melt the butter in a large pot over low heat. Add the marshmallows and stir constantly until they are completely melted and smooth.
Mix the Cereal: Remove the pot from the heat and pour in the rice cereal. Stir quickly until every piece of cereal is coated in the sticky marshmallow mixture.
Press into Pan: Butter a 9×13 inch pan and press the mixture into it. Use a piece of parchment paper to push it down so it is even and flat.
Cut the Stars: Once the treats are cool and firm, use your star cookie cutter to punch out as many shapes as possible.
Dip in Chocolate: Melt the white chocolate chips in the microwave. Dip the top half of each star into the chocolate and shake off any extra.
Decorate: While the chocolate is still wet, sprinkle the gold sugar and silver stars over the top. Let them sit on a tray until the chocolate is hard before stacking them.
40. Refreshing Lemon Bar Squares
Make-Ahead Party Food
Bright, zesty, and dusted with a snow-like layer of powdered sugar, these lemon bars are a classic crowd-pleaser. They feature a buttery shortbread crust topped with a thick, tangy citrus custard that melts in your mouth. A single slice of fresh lemon and a tiny mint leaf on the side add a beautiful, natural garnish.
The sharp acidity of the lemon is a wonderful way to cut through the richness of other party foods. These are cut into neat, uniform squares that look organized and professional on a wooden serving board. They offer a sunshine-bright flavor that feels optimistic and fresh for the start of a new year.
You can bake the entire tray the night before, which actually makes them easier to slice into perfect squares. The powdered sugar should be added right before serving to keep it looking white and fluffy. They are a reliable, low-stress dessert that brings a high-impact flavor to your menu.
Required Ingredients
2 cups flour
1/2 cup powdered sugar (plus extra for dusting)
1 cup cold butter, cubed
4 large eggs
1 1/2 cups granulated sugar
1/2 cup fresh lemon juice
1 tablespoon lemon zest
Equipment List
9×13 inch baking pan
Parchment paper
Large mixing bowl
Sifter or fine-mesh strainer
DIY Instructions
Make the Crust: Mix the flour, powdered sugar, and cold butter in a bowl until it looks like crumbs. Press this into a parchment-lined pan and bake at 350 degrees for 20 minutes.
Whisk the Filling: While the crust is hot, whisk the eggs, granulated sugar, lemon juice, and lemon zest together until the mixture is frothy.
Pour and Bake: Pour the lemon mixture directly onto the warm crust. Return the pan to the oven and bake for another 20 to 25 minutes until the center is set.
Cool Completely: This is the hard part! You must let the bars cool in the pan, then refrigerate them for at least two hours before cutting.
Slice into Squares: Lift the parchment paper out of the pan. Use a long, sharp knife to cut the block into even squares, wiping the knife between each cut.
Final Dusting: Put some powdered sugar into a sifter and shake it over the squares until they are covered in a thick white layer. Garnish with a lemon slice and serve.
41. Sea Salted Dark Chocolate Truffles
Make-Ahead Party Food
Decadent dark chocolate ganache forms the heart of these luxurious, hand-rolled truffles. Each sphere is coated in a fine layer of unsweetened cocoa powder, providing a matte finish that looks beautiful on a dark slate serving board. A single flake of sea salt is nestled into the center of a bitten truffle, showcasing the rich, velvety interior.
Guests will enjoy the intense cocoa flavor that melts slowly on the tongue. The salt enhances the deep notes of the chocolate, creating a balance that feels sophisticated and indulgent. These are small enough to be a guilt-free treat as the clock ticks toward midnight.
You can prepare the chocolate base days in advance and roll them whenever you have a spare moment. Keeping them in a cool spot ensures they maintain their shape and smooth texture throughout the party. They serve as a refined ending to a night of celebration.
Required Ingredients
8 ounces high-quality dark chocolate (60% cocoa or higher), chopped
1/2 cup heavy cream
1/4 cup unsweetened cocoa powder (for rolling)
1 teaspoon flaky sea salt (like Maldon)
1/2 teaspoon vanilla extract
Equipment List
Small saucepan
Heat-proof glass bowl
Small cookie scoop or teaspoon
Baking sheet
Parchment paper
DIY Instructions
Chop the Chocolate: Cut your chocolate bars into very small, even pieces so they melt quickly and do not burn.
Heat the Cream: Warm the heavy cream in a small pot over medium heat until it just starts to simmer. Do not let it reach a full boil.
Create the Ganache: Pour the hot cream over the chocolate pieces in a bowl. Let it sit for five minutes, then stir gently until the mixture is glossy and smooth.
Chill the Base: Stir in the vanilla extract. Cover the bowl and put it in the fridge for at least two hours until the chocolate is firm enough to scoop.
Form the Truffles: Use a small scoop to make one-inch balls. Roll them quickly between your palms to make them round, then immediately roll them in a bowl of cocoa powder.
Add the Salt: Place the finished truffles on parchment paper. Press one large flake of sea salt into the top of each one before the chocolate fully sets.
42. Fudgy Sea Salt Brownie Bites
Make-Ahead Party Food
Rich, chewy brownies offer a classic comfort that fits perfectly on any dessert table. These bites are served in gold foil liners, making them easy for guests to grab without getting their hands messy. Each square is topped with a distinct flake of sea salt that sparkles against the dark, crackly crust.
The center of these brownies remains soft and fudgy, providing a satisfying contrast to the thin, crispy top layer. Placing them in a tall stack creates a visually appealing tower of chocolate goodness. They are a reliable choice that satisfies the cravings of both children and adults.
Baking these ahead of time is actually better as it allows the chocolate flavors to deepen. You can slice them into small, uniform squares to ensure they look professional and tidy. This simple addition to your menu provides a familiar and beloved flavor that everyone will appreciate.
Required Ingredients
1 cup unsalted butter, melted
2 cups granulated sugar
4 large eggs
1 cup all-purpose flour
1 cup cocoa powder
1/2 teaspoon salt
1 tablespoon flaky sea salt (for topping)
Equipment List
9×9 inch baking pan
Parchment paper
Large mixing bowl
Whisk
Gold foil cupcake liners
DIY Instructions
Prep the Pan: Line your baking pan with parchment paper, leaving an inch of overhang on the sides. This makes it easy to lift the whole block out later.
Mix the Batter: Whisk the melted butter and sugar together. Add the eggs one at a time, beating well after each addition until the mix is light in color.
Fold in Dry Goods: Sift the flour, cocoa powder, and regular salt into the wet ingredients. Fold them in gently with a spatula until you no longer see white streaks.
Bake: Pour the thick batter into the pan and smooth the top. Bake at 350 degrees Fahrenheit for 25 to 30 minutes until a toothpick comes out with just a few moist crumbs.
Cool and Slice: Let the brownies cool completely in the pan. Lift them out using the parchment paper and cut them into tiny one-inch squares.
Style for Serving: Place each brownie square into a gold foil liner. Sprinkle a generous pinch of sea salt over the top right before putting them on the platter.
43. Rainbow Fruit Skewers with Honey Yogurt
Make-Ahead Party Food
Vibrant colors and fresh flavors make these fruit sticks a refreshing highlight of any New Year’s Eve spread. These skewers feature a beautiful progression of dragon fruit, pineapple, kiwi, and strawberries. A bowl of creamy Greek yogurt drizzled with honey and lime zest sits in the center for dipping.
Guests will love the natural sweetness and the fun, portable nature of this snack. The bright lime zest adds a citrusy aroma that makes the whole tray feel light and energetic. It is a fantastic way to offer a healthy, hydrating option among the richer holiday treats.
You can chop the fruit in advance, but it is best to thread them onto the sticks shortly before the party. Keeping the yogurt dip chilled ensures it stays thick and refreshing for every dip. This colorful display brings a festive, tropical vibe to your winter celebration.
Required Ingredients
1 dragon fruit, cubed
1 fresh pineapple, cubed
3 kiwis, sliced and quartered
1 pint large strawberries, hulled
1 cup plain Greek yogurt
2 tablespoons honey
1 lime (for zest and juice)
Equipment List
6-inch wooden skewers
Small dipping bowl
Vegetable knife
Zester
DIY Instructions
Prepare the Fruit: Peel and cut all your fruit into pieces that are roughly the same size. This makes the skewers look neat and organized.
Thread the Sticks: Slide the fruit onto the skewers in a consistent color pattern. Start with the purple dragon fruit, followed by yellow pineapple, green kiwi, and red strawberry.
Make the Dip: Scoop the Greek yogurt into a small bowl. Stir in a squeeze of lime juice to give it a tangy kick.
Add the Garnish: Use a spoon to create a swirl in the yogurt. Drizzle the honey over the top and sprinkle a generous amount of lime zest across the surface.
Arrange the Platter: Lay the skewers in a fan shape around the dipping bowl on a large white plate.
Keep it Fresh: If you are not serving them immediately, cover the fruit tightly with plastic wrap and store them in the fridge to keep the edges from drying out.
44. Metallic Silver and Blue Macarons
Make-Ahead Party Food
These delicate French cookies bring a high-fashion, winter aesthetic to your dessert collection. The stack features a mix of deep teal and sandy beige shells, each filled with a smooth vanilla buttercream. A bold stroke of edible silver paint across the top adds a futuristic sparkle that is perfect for New Year’s Eve.
The shells have a light, airy crunch that melts into a chewy center with every bite. The color palette mimics a cold winter night, making them a very stylish choice for a modern party theme. They look like expensive jewels when piled into a neat pyramid on a glass stand.
While these require a bit of patience to bake, the result is an incredibly polished and impressive treat. You can make the shells a day early and fill them the next morning to let the flavors mature. They are the ultimate sophisticated bite to pair with a glass of chilled champagne.
Required Ingredients
1 3/4 cups powdered sugar
1 cup almond flour, finely ground
3 large egg whites, room temperature
1/4 cup granulated sugar
Blue food coloring gel
1/2 cup buttercream frosting
Edible silver luster dust and vodka (for paint)
Equipment List
Food processor
Fine mesh sifter
Electric stand mixer
Piping bag with a round tip
Small food-safe paintbrush
DIY Instructions
Sift the Flour: Pulse the powdered sugar and almond flour in a food processor, then sift them twice. This ensures your macaron shells are perfectly smooth.
Whip the Meringue: Beat the egg whites until they are foamy. Slowly add the granulated sugar and keep beating until you have stiff, glossy peaks.
Fold the Batter: Gently fold the dry ingredients into the egg whites. Divide the batter and add a drop of blue gel to one half to get that deep teal color.
Pipe the Rounds: Pipe one-inch circles onto a baking sheet lined with a silicone mat. Tap the tray hard on the counter to pop any air bubbles.
Dry and Bake: Let the trays sit for thirty minutes until a “skin” forms on the cookies. Bake at 300 degrees Fahrenheit for 12 to 15 minutes.
Paint and Fill: Once cool, mix a little silver dust with a drop of vodka. Paint a single, thick stripe across the top shells, then sandwich them together with buttercream.
45. Crispy Cinnamon Churros with Chocolate Dip
Make-Ahead Party Food
Warm, fried dough coated in a thick layer of cinnamon sugar offers a nostalgic and comforting party snack. These churros are served as thick, ridged sticks that are perfect for scooping up rich, dark chocolate sauce. The dusting of sugar sparkles under the lights, making them look as good as they taste.
The contrast between the crunchy exterior and the soft, doughy middle provides a satisfying texture. Serving the dipping sauce in a central bowl allows guests to gather around and share this interactive dessert. It is a hearty, warm treat that provides a boost of energy as the night goes on.
You can fry these in small batches to ensure they are served at the peak of their crispiness. The chocolate sauce can be kept warm in a small slow cooker or a fondue pot on the table. This is a fun, casual dessert that brings a festive street-food vibe to your home celebration.
Required Ingredients
1 cup water
1/2 cup unsalted butter
1 tablespoon granulated sugar
1 cup all-purpose flour
3 large eggs
1/2 cup sugar mixed with 1 tablespoon cinnamon (for coating)
1/2 cup dark chocolate chips
1/4 cup heavy cream (for the sauce)
Equipment List
Large saucepan
Piping bag with a large star tip
Deep frying pan or pot
Tongs
Slotted spoon
DIY Instructions
Boil the Base: Combine water, butter, and a tablespoon of sugar in a pot. Bring it to a boil over medium heat until the butter is fully melted.
Form the Dough: Add the flour all at once and stir vigorously with a wooden spoon. Keep stirring over the heat until the dough forms a ball and pulls away from the sides.
Add the Eggs: Let the dough cool for five minutes, then beat in the eggs one at a time. The mixture will look separated at first but will eventually become smooth and stretchy.
Fry the Sticks: Pipe four-inch strips of dough directly into hot oil. Use scissors to snip the dough at the end of the piping tip. Fry for two minutes per side.
Coat in Sugar: Use a slotted spoon to remove the hot churros. Toss them immediately in the bowl of cinnamon sugar while they are still oily so the sugar sticks.
Make the Dip: Melt the chocolate chips and heavy cream together in the microwave for 30 seconds. Stir until smooth and serve alongside the warm churro sticks.
46. Peppermint Bark Triangles
Make-Ahead Party Food
Sharp white and dark chocolate layers create a beautiful, snap-able treat that embodies the winter season. These shards of bark are loaded with crushed red and white peppermint candies for a festive crunch. The jagged, triangular shapes look rustic and modern when piled together on a silver tray.
The cool, minty flavor is incredibly refreshing after a long night of savory appetizers. This is one of the easiest desserts to make in bulk, making it a favorite for large gatherings. It is a visually striking addition to your menu that guests can easily snap into smaller pieces.
Since this bark stays firm at room temperature, you can set it out early in the evening. It also makes a wonderful take-home gift for guests if you pack a few pieces into small clear bags. The bright red and white colors add a classic holiday feel to your New Year’s Eve display.
Required Ingredients
12 ounces dark chocolate chips
12 ounces white chocolate chips
1 teaspoon peppermint extract
1/2 cup crushed peppermint candies or candy canes
1 teaspoon coconut oil (optional, for smoother melting)
Equipment List
Large baking sheet
Parchment paper
Two microwave-safe bowls
Offset spatula
Sharp knife
DIY Instructions
Melt the Dark Layer: Melt the dark chocolate chips in a bowl. Stir in half of the peppermint extract. Spread the chocolate into a thin, even layer on a parchment-lined baking sheet.
First Chill: Put the tray in the fridge for about fifteen minutes. You want the chocolate to be set but not rock hard, or the layers will separate later.
Melt the White Layer: Melt the white chocolate chips and stir in the remaining peppermint extract. Let it cool slightly so it does not melt the dark layer when you pour it.
Spread and Top: Pour the white chocolate over the dark layer and spread it quickly with a spatula. Immediately sprinkle the crushed peppermint candies over the wet surface.
Final Set: Put the tray back in the fridge for at least one hour until the entire block is completely solid.
Break into Shards: Lift the parchment paper off the tray. Use a sharp knife to cut the bark into long triangles, or simply use your hands to break it into organic, jagged pieces.
47. Mini Fresh Fruit Tartlets
Make-Ahead Party Food
Crisp, buttery shortbread shells hold a smooth vanilla custard base topped with a crown of seasonal fruits. These tartlets feature a beautiful arrangement of blackberries, blueberries, and a slice of starfruit for a celestial look. The small size makes them a delicate and elegant choice for a formal New Year’s Eve event.
A thin glaze of apricot jam over the fruit adds a professional shine and helps keep the produce fresh throughout the night. The variety of colors makes the tray look like a jewelry box of edible gems. They offer a light, creamy sweetness that is a perfect bridge between heavy snacks and the midnight toast.
You can bake the shells and make the custard the day before to save time. Assembling them takes just a few minutes of placing the fruit on top before your guests arrive. They look stunning when arranged in neat rows on a long, rectangular white platter.
Required Ingredients
15-20 pre-made mini tart shells
1 cup whole milk
3 egg yolks
1/4 cup sugar
2 tablespoons cornstarch
1 teaspoon vanilla bean paste
Assorted fruit (blackberries, blueberries, starfruit)
Equipment List
Small saucepan
Whisk
Piping bag
Small bowl
Serving platter
DIY Instructions
Make the Custard: Whisk egg yolks, sugar, and cornstarch in a bowl. Heat the milk in a pot until simmering, then slowly whisk it into the egg mixture.
Thicken the Mix: Pour everything back into the pot. Stir constantly over medium heat until the custard becomes thick like pudding.
Chill the Cream: Stir in the vanilla bean paste. Transfer the custard to a bowl, cover it with plastic wrap (touching the surface), and refrigerate until cold.
Fill the Shells: Spoon or pipe the cold custard into each tart shell. Fill them right to the brim for a full, lush look.
Decorate with Fruit: Place one large blackberry, a few blueberries, and a starfruit slice on top of each tart. Press them gently into the custard so they stay in place.
Glaze for Shine: Warm a little apricot jam with a drop of water and brush it lightly over the fruit. This gives them a beautiful glossy finish and keeps the fruit from wilting.
48. Salted Caramel Popcorn Cones
Make-Ahead Party Food
Sweet, sticky caramel and crunchy popcorn combine for a snack that is hard to put down. These popcorn clusters are served in individual paper cones, making them a very practical “grab-and-go” option for a busy party. Each piece is coated in a golden glaze and finished with a visible dusting of large sea salt flakes.
The vertical presentation in a wooden crate or holder adds a fun, carnival-like element to your New Year’s Eve decor. Guests can hold their own cone while they move around the room and wait for the countdown. It is a great way to serve a high-volume snack in a way that feels intentional and stylish.
You can make a massive batch of this popcorn several hours before the event starts. The caramel hardens as it cools, ensuring the popcorn stays crunchy and doesn’t get soggy. This is a budget-friendly but high-impact addition to your menu that guests of all ages will love.
Required Ingredients
10 cups popped popcorn (plain, no butter)
1 cup unsalted butter
1 cup light brown sugar
1/4 cup light corn syrup
1/2 teaspoon baking soda
1 tablespoon flaky sea salt
Equipment List
Large roasting pan
Medium saucepan
Wooden spoon
Parchment paper cones
Large bowl
DIY Instructions
Boil the Caramel: Combine butter, brown sugar, and corn syrup in a saucepan. Bring it to a boil over medium heat and let it bubble for exactly five minutes without stirring.
Add the Lift: Remove from heat and quickly stir in the baking soda. The mixture will foam up and turn a light, creamy tan color.
Coat the Corn: Pour the hot caramel over the popcorn in a large bowl. Toss it gently with a spoon until every piece is covered in the sticky glaze.
Bake for Crunch: Spread the popcorn onto a roasting pan. Bake at 250 degrees Fahrenheit for 30 minutes, stirring every ten minutes to break up large clumps.
Salt and Cool: Take the pan out of the oven and immediately sprinkle the sea salt over the hot popcorn. Let it cool completely until the caramel is hard and crisp.
Fill the Cones: Break any giant chunks into bite-sized clusters. Scoop the popcorn into paper cones and stand them up in a basket or box for guests to take.
49. Red Velvet Midnight Cupcakes
Make-Ahead Party Food
Rich, cocoa-infused red cake topped with a high swirl of white cream cheese frosting makes a bold statement. These cupcakes are decorated with tiny gold pearls that look like stars scattered across a snowy landscape. The deep crimson color of the cake provides a beautiful contrast against the bright white topping.
Serving these in dark paper liners adds a touch of mystery and elegance to your New Year’s dessert table. They are a substantial treat that feels festive and sophisticated, perfect for the final hour of the year. The cream cheese frosting is light and tangy, perfectly balancing the sweetness of the cake.
You can bake the cupcakes a day ahead and frost them the morning of the party. Adding the gold pearls right before serving ensures they stay shiny and don’t sink into the cream. They are a classic holiday favorite that brings a touch of “wow” factor to your appetizer spread.
Required Ingredients
1 1/2 cups all-purpose flour
1 cup granulated sugar
1/2 teaspoon baking soda
1 tablespoon cocoa powder
1 cup buttermilk
1/2 cup vegetable oil
1 tablespoon red food coloring
8 ounces cream cheese (for frosting)
Edible gold pearls
Equipment List
Cupcake tin
Paper liners
Large mixing bowl
Electric hand mixer
Piping bag with a star tip
DIY Instructions
Mix the Batter: Whisk the flour, sugar, baking soda, and cocoa in a bowl. In a separate bowl, mix the buttermilk, oil, and red food coloring.
Combine and Bake: Slowly add the wet ingredients to the dry ones, whisking until the batter is smooth and bright red. Fill your cupcake liners about two-thirds full.
Cook until Springy: Bake at 350 degrees Fahrenheit for 18 to 20 minutes. The tops should spring back when touched and a toothpick should come out clean.
Make the Frosting: Beat the softened cream cheese and a little powdered sugar until it is very fluffy. Use a piping bag to create a tall, winding swirl on each cool cupcake.
Add the Stars: Carefully place three or four gold pearls onto each frosting swirl. Try to vary the placement so they look like naturally scattered stars.
Display: Arrange the cupcakes on a tiered stand. These look best when they are the tallest item on your dessert table, drawing everyone’s eye to the center.
50. Champagne Sorbet with Gold Raspberry
Make-Ahead Party Food
The final item on your New Year’s menu is a refreshing and luxurious palate cleanser that is as beautiful as a cocktail. Three scoops of pale, crisp champagne sorbet are served in a crystal glass and topped with a single gold-dusted raspberry. As you pour more bubbly over the top, the sorbet creates a festive, fizzing foam.
This dessert offers a light and bubbly end to the night that perfectly mirrors the midnight toast. The gold leaf on the raspberry adds a final touch of opulence that makes every guest feel like a VIP. It is an incredibly easy but high-impact way to serve champagne in a new and exciting format.
You can scoop the sorbet into the glasses twenty minutes before the countdown and keep them in the freezer. When the clock strikes twelve, simply bring the glasses out and pour the champagne at the table. It is a theatrical and memorable way to welcome the new year with your friends.
Required Ingredients
1 pint high-quality lemon or pear sorbet
1 bottle of chilled champagne or Prosecco
12 large fresh raspberries
Edible gold luster dust or gold leaf
1 teaspoon honey (to help the gold stick)
Equipment List
Crystal coupe or martini glasses
Small cookie scoop
Small food-safe paintbrush
Champagne chiller
DIY Instructions
Prep the Fruit: Use a small paintbrush to coat the raspberries in a tiny bit of honey. Gently roll them in gold luster dust until they are completely covered in a metallic shine.
Scoop the Sorbet: Use a small scoop to place three neat rounds of sorbet into each chilled glass. Make sure the sorbet is very cold so it doesn’t melt instantly.
Add the Topper: Carefully place one gold raspberry on the very top scoop of sorbet in each glass.
The Big Reveal: Bring the glasses out to your guests just before the midnight countdown begins.
The Pour: While everyone is watching, slowly pour the chilled champagne over the sorbet. The liquid will bubble up and create a beautiful, effervescent foam around the fruit.
Celebrate: Serve immediately with a small silver spoon. This dual-purpose treat acts as both a drink and a dessert to ring in the new year in style.
Key Takeaways
Preparation is King: Choosing dishes that can be assembled early prevents last-minute kitchen chaos.
Balance Your Flavors: Mix rich, savory meats with fresh, acidic fruits to keep your guests’ palates excited.
Focus on Portability: Finger foods and skewers allow guests to eat easily while they mingle and move.
Elevate the Simple: Small garnishes like fresh herbs or edible gold leaf turn basic snacks into luxury appetizers.
Temperature Matters: Utilize slow cookers for warm items and chilled platters for seafood to maintain food safety.
New Year’s Eve marks a fresh start, and your hosting experience should reflect that same sense of joy and ease. By selecting a variety of these 50 make-ahead foods, you create a professional-grade buffet without the professional-grade stress. Your guests will remember the laughter and the atmosphere just as much as the delicious bites you served.
The secret to a successful party lies in the ability of the host to actually be present. These recipes are your toolkit for reclaiming your evening and celebrating the arrival of the new year. Now, put on your party outfit, pour yourself a drink, and get ready to welcome your friends with confidence.
Spread the loveThe holiday season often leaves our refrigerators overflowing with various wedges, blocks, and bags of artisanal dairy. You might find yourself staring at half-eaten wheels of Brie or stray crumbles of blue cheese.…
Spread the loveThanksgiving gatherings bring together family, friends, and, inevitably, a long list of hosting duties. You are planning the menu, timing the turkey, and prepping the table. Amidst all that work, the drinks should…
Spread the loveValentine’s Day deserves a special touch this year. You can skip the crowded bars and long wait times easily. These recipes help you create a cozy lounge right in your own living room.…