Opening a bare refrigerator on a Tuesday afternoon feels quite stressful. You want to eat something nutritious but the energy to cook from scratch simply isn’t there. This common struggle leads many of us to reach for expensive and processed takeout options.
Meal Prep Recipes
Starting a meal prep habit can change your entire relationship with your kitchen. Having a freezer stocked with home cooked meals gives you back your time and protects your budget. You can finally stop worrying about what you will eat for lunch every single day.
We gathered fifty various recipes that stay fresh and taste wonderful after being frozen. These options range from hearty stews to light grain bowls that provide lasting energy. Explore these simple steps to transform your empty shelves into a source of daily inspiration.
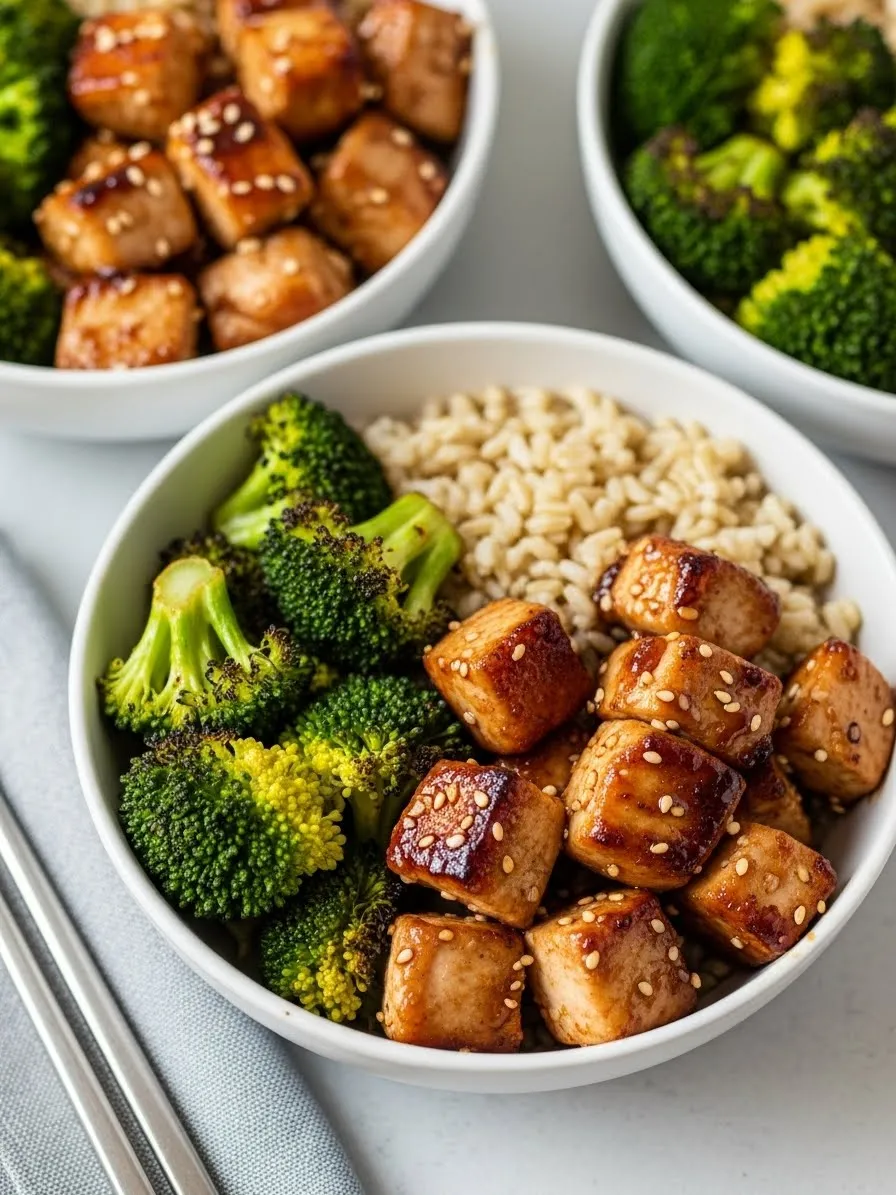
1. Garlic Ginger Glazed Chicken with Broccoli and Brown Rice
Meal Prep Recipes
This vibrant meal prep bowl brings together savory and sweet flavors in a balanced way. Glazed chicken breast sits alongside fluffy brown rice and bright green broccoli florets. You can see the glossy sauce coating each slice of protein, promising a satisfying bite every time.
Planning your week becomes much easier when you have these meal prep recipes waiting in the fridge. The combination of complex carbohydrates and lean protein provides steady energy throughout a busy afternoon. It remains a reliable choice for anyone wanting to eat better without spending hours in the kitchen daily.
Vegetables like steamed broccoli add a fresh crunch to the soft rice. Every element works to create a wholesome dish that tastes just as good reheated as it does fresh. You will love how simple it is to put this together on a Sunday evening.
Ingredients
1 pound boneless skinless chicken breasts
2 cups fresh broccoli florets
1 cup dry brown rice
2 tablespoons soy sauce
1 tablespoon honey
2 cloves minced garlic
1 teaspoon grated ginger
1 tablespoon olive oil
Equipment
Medium saucepan with a tight lid
Large nonstick skillet
Small mixing bowl
Sharp knife and cutting board
Four airtight food storage containers
DIY Instructions
Start by rinsing the brown rice under cold water until the water runs clear. Put the rice in a saucepan with two cups of water and bring it to a boil. Turn the heat down low, cover the pot, and let it simmer for about forty five minutes.
Cut the chicken breasts into even strips while the rice cooks. Mix the soy sauce, honey, garlic, and ginger in a small bowl to create your glaze.
Heat olive oil in the skillet over medium heat. Place the chicken pieces in the pan and cook them until they are no longer pink inside.
Pour the glaze over the chicken in the skillet. Let the sauce bubble and thicken until it coats every piece of meat.
Steam the broccoli florets in a separate pot or in the microwave with a splash of water until they are tender.
Divide the cooked rice into four separate containers. Place the glazed chicken and steamed broccoli on top of the rice in equal portions.
Seal the lids tightly once the food cools down and store them in the freezer for a quick lunch later.
2. Hearty Sweet Potato and Black Bean Freezer Burritos
Meal Prep Recipes
These hand-held meals offer a wonderful way to enjoy a filling lunch on the move. Each tortilla wrap contains a colorful mix of roasted sweet potato cubes, earthy black beans, and seasoned rice. Foil wrapping ensures they stay fresh in your freezer until you need a quick reheat.
Plant based ingredients provide plenty of fiber to keep you full throughout the workday. The texture is a satisfying blend of soft beans and slightly firm roasted vegetables. Having a batch of these ready means you never have to settle for expensive takeout when the fridge is empty.
Customizing these wraps is quite easy if you like extra heat or creaminess. You might add a side of salsa or greek yogurt after heating them up. They serve as a reliable staple for any busy person who values both health and convenience.
Ingredients
4 large flour tortillas
2 medium sweet potatoes
1 can of black beans
1 cup cooked brown rice
1 tablespoon taco seasoning
1 tablespoon vegetable oil
Aluminum foil for wrapping
Equipment
Large baking sheet
Mixing bowl
Can opener
Sieve or strainer
Sharp knife
DIY Instructions
Turn your oven on to 400 degrees Fahrenheit. Peel the sweet potatoes and cut them into small cubes about the size of a dice.
Toss the potato cubes with oil and half of the taco seasoning in a bowl. Spread them out on your baking sheet and bake for twenty minutes until they feel soft when poked with a fork.
Open the can of black beans and pour them into a strainer. Rinse them under cold water to remove the salty liquid from the can.
Mix the cooked rice, rinsed beans, and the rest of the taco seasoning in your bowl. Add the roasted sweet potatoes once they finish cooking and stir gently.
Lay a tortilla flat on your counter. Scoop a large spoonful of the mixture into the center of the wrap.
Fold the sides of the tortilla inward first, then roll it tightly from the bottom to the top. This keeps the filling from falling out while you eat.
Wrap each finished burrito tightly in a square of aluminum foil. Place them in a freezer bag and store them for up to three months.
3. Lean Turkey Meatballs with Zucchini Noodles
Meal Prep Recipes
This dish reimagines a classic pasta favorite by using fresh vegetables instead of heavy flour noodles. Three large, tender meatballs sit atop a bed of bright green zucchini spirals. A rich tomato sauce binds everything together for a comforting yet light midday meal.
Selecting zucchini noodles helps lower the calorie count while increasing your daily vegetable intake. The meatballs contain flecks of fresh herbs and zucchini bits to keep the meat moist during reheating. It is a fantastic option for anyone following a low carb lifestyle or simply wanting a refreshing change.
Each bite delivers a balance of savory protein and slightly sweet marinara. You will notice how the zucchini stays crisp if you store the sauce separately or on top. This meal looks beautiful in a bowl and tastes even better than it looks.
Ingredients
1 pound ground turkey
2 large zucchinis
2 cups marinara sauce
1 egg
1/4 cup breadcrumbs
1 tablespoon dried oregano
1/2 teaspoon salt
Equipment
Spiralizer or vegetable peeler
Large skillet
Medium mixing bowl
Baking sheet
Parchment paper
DIY Instructions
Set your oven to 375 degrees Fahrenheit and line a baking sheet with parchment paper so the meat does not stick.
Place the ground turkey, egg, breadcrumbs, oregano, and salt into a mixing bowl. Use your hands to mix everything together until the ingredients are evenly spread through the meat.
Scoop out small portions of the meat and roll them between your palms to form balls about the size of a golf ball. Place them on the baking sheet.
Bake the meatballs for fifteen to twenty minutes. You want them to be brown on the outside and no longer pink in the middle.
While the meat cooks, wash your zucchinis. Use a spiralizer tool to turn the whole zucchini into long, thin ribbons that look like spaghetti.
Heat your marinara sauce in a skillet over low heat until it starts to bubble gently.
Put the raw zucchini noodles into your meal prep containers. Pour a portion of sauce over the noodles and place three meatballs on top. The heat from the sauce and the microwave later will cook the noodles just enough.
4. Sheet Pan Lemon Herb Salmon and Asparagus
Meal Prep Recipes
Salmon provides a high quality source of healthy fats that are great for brain health. This recipe features thick fillets seasoned with dried herbs and topped with fresh lemon slices. Green asparagus spears and broccoli florets surround the fish to create a complete meal on a single tray.
Cooking everything on one pan saves a lot of time during cleanup. The lemon juice seeps into the salmon as it bakes, making the flakes tender and aromatic. It is an elegant lunch that feels like a treat but takes very little effort to prepare.
Asparagus adds a nice crunch and a distinct earthy flavor to the plate. Using fresh dill and parsley enhances the natural taste of the seafood beautifully. You can easily divide these portions into glass containers for a professional looking office lunch.
Ingredients
3 salmon fillets
1 bunch of fresh asparagus
1 cup broccoli florets
2 fresh lemons
2 tablespoons olive oil
1 teaspoon dried dill
Salt and pepper
Equipment
Large rimmed baking sheet
Small bowl
Knife
Cutting board
DIY Instructions
Preheat your oven to 400 degrees Fahrenheit. Wash the asparagus and snap off the tough, woody ends of the stalks.
Place the salmon fillets on the baking sheet with space between them. Arrange the asparagus and broccoli around the fish to fill the empty spots.
Slice one lemon into thin rounds. Squeeze the juice from the second lemon into a small bowl and mix it with olive oil and dill.
Drizzle the oil and lemon mixture over the salmon and all the vegetables. Use your hands or a brush to make sure everything has a light coating.
Sprinkle a little salt and pepper over the whole tray. Place one or two lemon slices on top of each piece of salmon.
Slide the tray into the oven and bake for twelve to fifteen minutes. The salmon should flake easily with a fork when it is done.
Let the food cool for a few minutes before moving the fish and vegetables into your storage containers.
5. Red Lentil Dal with Quinoa and Flatbread
Meal Prep Recipes
Red lentils create a creamy and comforting stew that is naturally full of protein. This bowl features a swirl of white yogurt on top to balance the warm spices in the dal. Fluffy quinoa sits on the side to soak up the delicious sauce and add a nutty texture.
Soft flatbread or naan is the best tool for scooping up every last bit of the meal. The inclusion of fresh spinach leaves adds a pop of color and extra vitamins to the dish. This recipe is a pantry staple because dried lentils and quinoa keep for a long time.
Lentils are very affordable and expand significantly when cooked, making this a budget friendly choice. The spices provide a deep flavor that actually improves after sitting in the fridge for a day. It is a warming lunch that feels like a hug in a bowl.
Ingredients
1 cup dry red lentils
1/2 cup dry quinoa
1 can of diced tomatoes
1 teaspoon turmeric powder
1 teaspoon cumin
1 bag of fresh spinach
2 pieces of flatbread
2 tablespoons plain yogurt
Equipment
Two medium pots with lids
Wooden spoon
Fine mesh strainer
DIY Instructions
Rinse the red lentils in a strainer until the water is no longer cloudy. Put them in a pot with three cups of water and the turmeric and cumin.
Bring the lentils to a boil, then turn the heat to low. Let them simmer for about twenty minutes until they turn soft and mushy.
While the lentils cook, rinse the quinoa and put it in the second pot with one cup of water. Bring it to a boil, cover it, and simmer on low for fifteen minutes.
Stir the diced tomatoes and the fresh spinach into the cooked lentils. The heat from the lentils will make the spinach wilt and turn soft in just a minute.
Taste the lentil mixture and add a pinch of salt if you think it needs it.
Divide the quinoa and the lentil stew into your containers. Place a piece of flatbread on the side or wrap it in a separate bag.
Add a small dollop of yogurt on top of the lentils before sealing the lid. Keep these in the fridge for five days or the freezer for longer storage.
6. Korean Style Beef Bowls with Pickled Vegetables
Meal Prep Recipes
Ground beef transforms into a savory delight when cooked with soy sauce and sesame oil. This bowl features the meat over a bed of white rice, decorated with toasted sesame seeds. Sliced cucumbers and shredded carrots provide a fresh, cool contrast to the warm beef.
The addition of a colorful slaw adds a satisfying crunch to every mouthful. Using ground meat makes this recipe very fast to cook compared to steak or roasts. It offers a wonderful mix of salty, sweet, and fresh elements that keep your taste buds interested.
You can adjust the level of spice by adding more or less chili sauce on the side. This meal is easy to pack and does not get soggy over time. It remains a top choice for a high protein lunch that feels light and energizing.
Ingredients
1 pound lean ground beef
2 cups cooked white rice
1 large cucumber
2 carrots
2 tablespoons soy sauce
1 tablespoon sesame oil
1 tablespoon sugar
Sesame seeds for garnish
Equipment
Large frying pan
Vegetable grater or peeler
Small jar or bowl
Cooking spoon
DIY Instructions
Put the ground beef into the frying pan over medium heat. Break the meat into small crumbles with your spoon as it cooks.
Drain any excess fat from the pan once the beef is brown. Stir in the soy sauce, sesame oil, and sugar. Let it cook for two more minutes so the flavor soaks in.
Use a grater to shred the carrots into thin strips. Slice the cucumber into thin circles using a sharp knife.
If you want the vegetables to be slightly pickled, splash them with a little vinegar and a pinch of sugar in a small bowl.
Scoop a portion of cooked rice into each of your meal prep containers. Cover half of the rice with a big spoonful of the beef.
Place the carrots and cucumbers on the other side of the bowl. Sprinkle sesame seeds over the beef to make it look professional.
Close the lids and keep the bowls in the refrigerator. This meal is best enjoyed within four days of cooking.
7. Creamy Coconut Chickpea and Pea Stew
Meal Prep Recipes
Chickpeas provide a wonderful base for this golden, sun colored stew. The sauce is thick and creamy thanks to coconut milk, which carries the flavors of ginger and garlic. Bright green peas and orange carrot chunks add sweetness and texture to the mix.
This recipe is naturally vegan and very filling because of the fiber in the legumes. A garnish of fresh cilantro on top brings a burst of herbal freshness to the dish. It is a great meal to keep in the freezer for days when you want something warm and nourishing.
The stew holds its heat well, making it a great choice for a thermos lunch. You will find that the chickpeas stay firm and satisfying even after being frozen and thawed. It is a simple way to eat more plants without sacrificing flavor.
Ingredients
2 cans of chickpeas
1 can of coconut milk
1 cup frozen peas
2 chopped carrots
1 tablespoon curry powder
1 tablespoon oil
Fresh cilantro for garnish
Equipment
Large soup pot
Can opener
Cutting board and knife
Stirring spoon
DIY Instructions
Peel your carrots and cut them into small, round coins. Open both cans of chickpeas and drain the liquid away in the sink.
Put the oil in your large pot over medium heat. Add the carrots and cook them for five minutes until they start to get soft.
Stir in the curry powder and let it smell fragrant for about thirty seconds. Do not let it burn.
Pour the chickpeas and the whole can of coconut milk into the pot. Stir everything together so the yellow spice mixes with the white milk.
Turn the heat down to low and let the stew simmer for fifteen minutes. This allows the carrots to finish cooking and the sauce to thicken.
Add the frozen peas during the last two minutes of cooking. They only need a little bit of heat to turn bright green and soft.
Ladle the stew into containers. Once cooled, add a few leaves of fresh cilantro on top for a nice finish.
8. Mediterranean Chicken and Quinoa Power Salad
Meal Prep Recipes
Shredded chicken breast mixes with fluffy quinoa to create a high protein foundation for this salad. Halved cherry tomatoes and fresh basil leaves add a summer vibe to every bite. The salad uses a simple dressing of olive oil and lemon to keep the flavors clean and bright.
Quinoa is an excellent choice for meal prep because it does not get mushy like some pasta types. You can eat this dish cold or at room temperature, which is great if you do not have access to a microwave. It is a light yet powerful meal that will not make you feel sleepy in the afternoon.
The red tomatoes look like little jewels tucked into the golden grain. This recipe is very flexible, allowing you to add olives or feta cheese if you have them on hand. It is a refreshing way to stay on track with your healthy eating goals.
Ingredients
2 cooked chicken breasts
1 cup dry quinoa
1 pint cherry tomatoes
1 bunch of fresh basil
3 tablespoons olive oil
1 lemon
Salt and pepper
Equipment
Medium pot with lid
Large mixing bowl
Knife and cutting board
Small jar for dressing
DIY Instructions
Cook the quinoa by putting it in a pot with two cups of water. Bring it to a boil, then cover it and turn the heat to low for fifteen minutes.
While the grain cooks, use two forks to pull the cooked chicken breasts apart into small, shredded pieces.
Wash the cherry tomatoes and cut each one in half. Chop the basil leaves into thin ribbons.
Put the olive oil and the juice of the lemon into a small jar. Shake it well until the oil and juice are mixed together.
Fluff the cooked quinoa with a fork and put it into a large bowl. Add the shredded chicken, tomatoes, and basil.
Pour the dressing over the salad and toss everything with a large spoon so the oil coats every piece.
Divide the salad into four containers. This meal stays fresh in the refrigerator for up to four days.
9. Sweet and Salty Chickpea Trail Bowls
Meal Prep Recipes
This unique lunch option combines the crunch of nuts with the softness of cooked chickpeas. Dried cranberries provide a chewy sweetness that contrasts with the salty pumpkin seeds and sliced almonds. It is a fantastic choice for those who enjoy variety in texture and flavor.
Sesame seeds are scattered throughout to add a delicate toasted taste to the mix. This bowl is packed with plant based fats and protein, making it a very stable source of energy. It works well as a light lunch or a very substantial snack for long days.
You can serve this over a bed of greens or eat it just as it is. The ingredients are all very durable, so this bowl travels well in a backpack or gym bag. It is a creative way to use pantry items to make a gourmet feeling meal.
Ingredients
2 cans of chickpeas
1/2 cup dried cranberries
1/4 cup sliced almonds
1/4 cup pumpkin seeds
1 tablespoon sesame seeds
2 tablespoons honey or maple syrup
1 tablespoon oil
Equipment
Large bowl
Skillet or frying pan
Spoon
Measuring cups
DIY Instructions
Open the cans of chickpeas and rinse them very well. Pat them dry with a paper towel so the oil will stick to them better.
Heat the oil in your skillet over medium heat. Add the chickpeas and cook them for about ten minutes, shaking the pan occasionally until they look golden.
Pour the honey or syrup over the chickpeas in the pan. Stir them quickly so they get a sticky coating, then remove the pan from the heat.
Let the chickpeas cool down for a few minutes so they do not melt the fruit or make the nuts soft.
In a large bowl, combine the sweet chickpeas with the dried cranberries, almonds, pumpkin seeds, and sesame seeds.
Toss the mixture together until the fruit and nuts are evenly distributed.
Divide the mixture into small containers. This does not need to be reheated and is very convenient for a fast desk lunch.
10. BBQ Pulled Chicken Sandwiches with Slaw
Meal Prep Recipes
Tender shredded chicken coated in a smoky sauce makes for a very satisfying freezer lunch. The meat is served on a soft sesame seed bun with a side of creamy coleslaw. This meal brings the flavors of a summer cookout to your weekday routine.
Storing the chicken and buns separately prevents the bread from getting soggy. The coleslaw provides a necessary vinegary bite that cuts through the sweetness of the barbecue sauce. It is a comforting meal that children and adults will both enjoy.
Using a slow cooker for the chicken makes the meat incredibly easy to shred with just a fork. You can make a large batch of the meat and freeze it in individual portions. It is a reliable way to ensure you always have a hot, delicious sandwich ready to go.
Ingredients
1 pound chicken breasts
1 cup barbecue sauce
4 sesame seed buns
2 cups shredded cabbage mix
1/4 cup mayonnaise
1 tablespoon apple cider vinegar
Equipment
Slow cooker or large pot
Two forks
Medium bowl
Small storage containers
DIY Instructions
Place the raw chicken breasts and the barbecue sauce into your slow cooker. Cover it and cook on low for six hours or on high for three hours.
Take the chicken out of the pot and put it on a plate. Use two forks to pull the meat apart until it looks like thin threads.
Put the shredded meat back into the slow cooker and stir it into the leftover sauce so it stays moist.
In a medium bowl, mix the shredded cabbage with the mayonnaise and vinegar to make your slaw. Add a tiny bit of pepper for flavor.
Put a portion of the warm BBQ chicken into a small, microwave safe container. Put a portion of the cold slaw into a different small container.
Keep your buns in their original bag or wrap them in foil to keep them soft.
When you are ready to eat, heat the chicken up and pile it onto the bun. Top the meat with the cold slaw and enjoy your sandwich.
11. Mediterranean Style Chicken Pitas with Tangy Tzatziki
Meal Prep Recipes
These handheld pockets offer a fresh and filling lunch option for your busy work week. Every bite features savory patties paired with crisp cucumbers and tangy olives nestled inside soft bread. A generous dollop of creamy white sauce brings all the ingredients together for a refreshing finish.
Preparation takes very little time since you can cook the meat in one large batch. This recipe stays fresh in the fridge and travels easily without making a mess. You will appreciate the balance of warm protein and cool vegetables during your midday break.
Ingredients
1 pound ground chicken or turkey
1 half cup breadcrumbs
1 egg
1 tablespoon dried oregano
4 whole wheat pita breads
1 cup plain greek yogurt
1 shredded cucumber
1 handful of cherry tomatoes
1 small jar of black olives
Equipment
Large mixing bowl
Nonstick frying pan
Small bowl for sauce
Sharp knife
Cutting board
DIY Instructions
Put the ground meat into a large mixing bowl and add the egg, breadcrumbs, and oregano. Use your hands to mix everything together until the spices are spread evenly through the meat.
Shape the meat into small round patties about the size of a lemon. Flatten them slightly so they cook faster.
Heat your frying pan over medium heat and place the patties inside. Cook them for about five minutes on each side until they are brown and cooked through.
Grate your cucumber into a small bowl and stir it into the greek yogurt to make your sauce. Add a pinch of salt and pepper for taste.
Slice your tomatoes and olives into small pieces using your knife and cutting board.
Cut the pita breads in half to create pockets. Slide two patties into each pocket along with some tomatoes and olives.
Spoon the yogurt sauce over the top of the meat and vegetables. Store these in airtight containers for a quick grab and go meal.
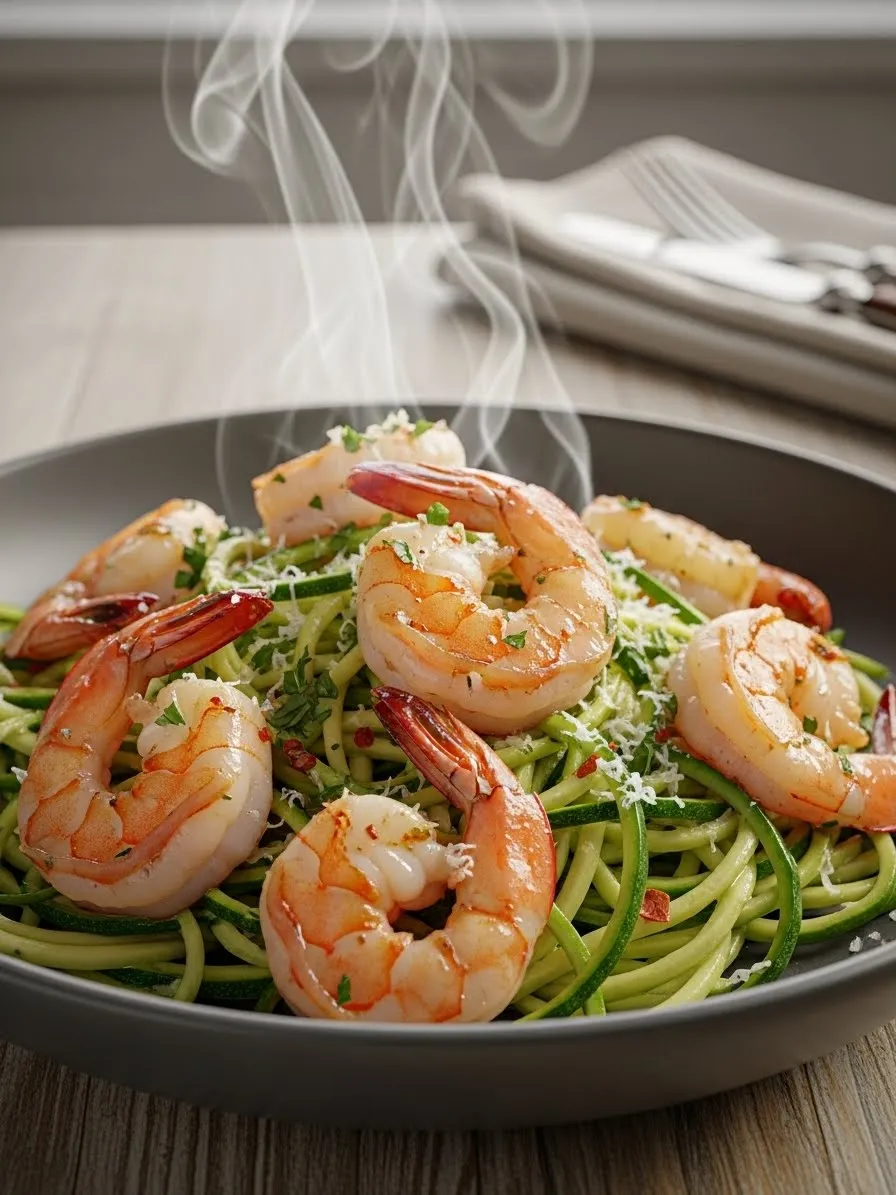
12. Zesty Lemon Garlic Shrimp with Zucchini Noodles
Meal Prep Recipes
Light and vibrant shrimp sit beautifully atop a bed of fresh zucchini ribbons. This meal feels incredibly gourmet yet remains simple enough for any weekday afternoon. A splash of lemon juice enhances the natural sweetness of the seafood while keeping the dish light and energizing.
Zucchini noodles serve as a wonderful alternative to heavy pasta because they absorb the garlic butter sauce so well. This recipe is excellent for the freezer because the shrimp reheats very quickly. You get a high protein meal that helps you stay focused throughout your daily tasks.
Ingredients
1 pound large peeled and deveined shrimp
3 medium zucchinis
3 cloves minced garlic
2 tablespoons butter
1 fresh lemon
1 teaspoon dried parsley
1 pinch of red pepper flakes
Equipment
Vegetable spiralizer
Large skillet
Tongs
Knife
DIY Instructions
Use your spiralizer tool to turn the whole zucchinis into long thin ribbons that look like green spaghetti. Set these aside on a paper towel to soak up extra moisture.
Place your large skillet over medium heat and melt the butter until it starts to bubble.
Toss the minced garlic into the butter and stir it for thirty seconds until it smells very good.
Add the shrimp to the pan in a single layer. Cook them for two minutes on each side until they turn bright pink and firm.
Squeeze the juice from half of the lemon over the shrimp and sprinkle the parsley and pepper flakes on top.
Remove the shrimp from the pan and quickly toss the zucchini noodles into the leftover garlic butter for just one minute. You only want to warm them up so they stay crunchy.
Divide the noodles into containers and place several shrimp on top of each portion. Add an extra lemon slice to each bowl for extra flavor later.
13. Spicy Buffalo Cauliflower and Quinoa Bowls
Meal Prep Recipes
Vegetarian lunches can be just as satisfying as meat dishes when you use bold flavors. These bowls feature roasted cauliflower florets coated in a zesty orange sauce that packs a nice heat. Fluffy quinoa provides a sturdy base while fresh celery sticks add a cooling crunch.
A drizzle of white dressing on top helps balance the spice and adds a creamy texture. This meal prep option is great because cauliflower stays firm even after being stored and reheated. It is a smart way to enjoy the flavors of chicken wings in a much healthier format.
Ingredients
1 large head of cauliflower
1 half cup buffalo hot sauce
2 tablespoons melted coconut oil
2 cups cooked quinoa
4 stalks of fresh celery
1 quarter cup ranch or blue cheese dressing
Equipment
Large baking sheet
Medium mixing bowl
Knife
Measuring cups
DIY Instructions
Turn your oven on to 400 degrees Fahrenheit. Cut the cauliflower into small bite sized pieces that look like tiny trees.
Mix the buffalo sauce and melted oil in a large bowl. Toss the cauliflower pieces in the liquid until every bit is coated in orange.
Spread the cauliflower out on your baking sheet. Bake for twenty minutes until the edges look slightly charred and the vegetable feels tender.
While the cauliflower roasts, wash your celery and cut it into thin sticks about four inches long.
Scoop a portion of pre cooked quinoa into the bottom of your lunch containers.
Place a generous serving of the spicy cauliflower on one side of the bowl and the celery sticks on the other side.
Drizzle a little bit of dressing over the cauliflower once it has cooled down. Seal the containers and store them in the fridge for up to four days.
14. Creamy Thai Green Curry with Crispy Tofu
Meal Prep Recipes
This aromatic curry features golden cubes of tofu swimming in a rich and silky coconut broth. Green snap peas and bamboo shoots provide a variety of textures that make every spoonful interesting. It is a warming dish that brings a touch of exotic flavor to your routine.
The sauce carries a gentle heat that is very comforting on a cold day. Using tofu makes this a budget friendly protein source that absorbs the curry flavors beautifully. You can serve this as a thick soup or pour it over a bed of rice for a more filling meal.
Ingredients
1 block of extra firm tofu
1 can of full fat coconut milk
2 tablespoons green curry paste
1 cup fresh snap peas
1 half cup sliced bamboo shoots
1 tablespoon vegetable oil
1 tablespoon soy sauce
Equipment
Large pot
Paper towels
Knife
Stirring spoon
DIY Instructions
Take the tofu out of the package and wrap it in paper towels. Place a heavy plate on top for ten minutes to squeeze out the extra water.
Cut the pressed tofu into small cubes. Heat oil in your pot and fry the tofu cubes until the outsides look golden and feel a bit crispy.
Remove the tofu from the pot and set it aside. Add the curry paste to the same pot and stir it for one minute over medium heat.
Slowly pour the coconut milk into the pot while stirring to dissolve the paste into a smooth green sauce.
Add the snap peas and bamboo shoots to the liquid. Let the mixture simmer for five minutes until the peas turn bright green.
Stir the crispy tofu back into the sauce and add the soy sauce for extra saltiness.
Ladle the curry into deep containers. This dish stays delicious for several days and the flavor actually improves as it sits.
15. Hearty Three Bean Beef Chili
Meal Prep Recipes
Chili remains the ultimate freezer meal because it keeps its texture and flavor perfectly over time. This version features a thick tomato base loaded with ground beef and three different types of beans. It is a protein powerhouse that will keep you full for many hours.
The rich red color comes from slow simmering spices and crushed tomatoes. You can top your bowl with shredded cheese or a spoonful of sour cream before eating. Having a few portions of this in your freezer ensures you always have a comforting meal ready in minutes.
Ingredients
1 pound ground beef
1 can kidney beans
1 can black beans
1 can pinto beans
1 large can of crushed tomatoes
2 tablespoons chili powder
1 chopped onion
Equipment
Large heavy pot
Can opener
Wooden spoon
Knife
DIY Instructions
Chop the onion into tiny pieces. Put the ground beef and onion into the large pot over medium heat.
Cook the meat and onions until the beef is brown and the onions look clear. Drain any greasy liquid out of the pan.
Open all three cans of beans and pour them into a strainer. Rinse them under cold water to get rid of the thick canning liquid.
Add the rinsed beans and the crushed tomatoes to the pot with the meat.
Stir in the chili powder. You can add a little bit of water if the mixture looks too thick to stir easily.
Turn the heat down to low and put a lid on the pot. Let everything bubble gently for thirty minutes so the flavors can mix together.
Let the chili cool down completely before pouring it into freezer safe bags or containers. Label them with the date and store them for a busy day.
16. Lemon Herb Roasted Chicken Thighs and Potatoes
Meal Prep Recipes
Chicken thighs stay juicy and tender even when you reheat them later in the week. This classic sheet pan meal features crispy skin seasoned with garlic and fresh herbs. Cubes of golden and purple potatoes roast alongside the meat to soak up all the flavorful juices.
Large cloves of roasted garlic become soft and sweet in the oven, providing a wonderful spread for the chicken. Lemon slices add a bright acidity that cuts through the richness of the roasted meat. It is a traditional and balanced lunch that feels like a home cooked Sunday dinner.
Ingredients
4 bone in chicken thighs
1 pound mixed baby potatoes
2 lemons
1 whole head of garlic
2 tablespoons olive oil
1 tablespoon dried rosemary
1 teaspoon salt
Equipment
Large roasting pan
Knife
Cutting board
Small bowl
DIY Instructions
Set your oven to 425 degrees Fahrenheit. Cut the baby potatoes into halves or quarters so they are all about the same size.
Slice the very top off the head of garlic so the tips of the cloves are showing. Slice one lemon into thin rounds.
Place the chicken thighs and potatoes into your roasting pan. Tuck the garlic head and lemon slices in between the meat and vegetables.
Mix the olive oil, rosemary, and salt in a small bowl. Drizzle this mixture over everything in the pan.
Use your hands to toss the potatoes and coat the chicken so the oil and herbs are everywhere. Turn the chicken so the skin side is facing up.
Bake in the oven for thirty five to forty minutes. You want the chicken skin to look brown and the potatoes to feel soft when you poke them.
Once finished, squeeze the roasted garlic out of its skin and spread it over the chicken. Divide the meat and potatoes into your lunch boxes.
17. Zesty Southwest Quinoa Salad with Avocado
Meal Prep Recipes
This colorful salad brings together the best flavors of the southwest in a light and healthy bowl. Fluffy quinoa grains are mixed with black beans, sweet corn, and chopped red peppers for a variety of nutrients. Slices of creamy avocado on the side add a rich and satisfying element.
A zesty green dressing made with fresh herbs ties all the ingredients together beautifully. This meal is fantastic for prep because the flavors blend and deepen while it sits in the fridge. It is a refreshing and filling choice that requires no reheating at all.
Ingredients
1 cup dry quinoa
1 can black beans
1 cup frozen corn
1 red bell pepper
1 avocado
1 half cup cilantro lime dressing
1 pinch of salt
Equipment
Medium pot with lid
Large mixing bowl
Knife
Strainer
DIY Instructions
Rinse the quinoa in a strainer and put it in a pot with two cups of water. Bring it to a boil, then cover and cook on low for fifteen minutes.
While the quinoa cooks, rinse the black beans and thaw the frozen corn under warm water.
Chop the red bell pepper into small squares. Cut the avocado into thin slices just before you are ready to pack the bowls.
Put the cooked quinoa into a large bowl and fluff it with a fork. Let it cool down for a few minutes so it does not cook the vegetables.
Add the beans, corn, and peppers to the bowl. Pour the cilantro lime dressing over the top and stir everything until the colors are well mixed.
Taste the salad and add a little salt if you want more flavor.
Divide the salad into containers. Place the avocado slices on top and seal the lids tightly. Keep these in the fridge for a fresh lunch tomorrow.
18. Honey Garlic Salmon Cubes with Steamed Veggies
Meal Prep Recipes
Bite sized pieces of salmon make this seafood dish very easy to eat at your desk. The fish is glazed in a sticky sauce that balances salt and sugar in a very tasty way. A colorful mix of snap peas, carrots, and spinach provides a healthy base of vegetables.
Serving the salmon over brown rice ensures you have enough energy to last until dinner time. The cubes cook very quickly in a pan, which keeps the fish from becoming dry. It is an elegant and nutritious option for anyone who loves high quality seafood.
Ingredients
1 pound salmon fillet
2 cups cooked brown rice
1 cup snap peas
1 sliced carrot
1 handful of fresh spinach
2 tablespoons honey
2 tablespoons soy sauce
1 tablespoon oil
Equipment
Frying pan
Knife
Small bowl
Cooking spoon
DIY Instructions
Remove the skin from the salmon and cut the meat into squares about one inch wide.
Mix the honey and soy sauce in a small bowl to create your glaze.
Heat the oil in your frying pan over medium heat. Add the salmon cubes and cook them for about two minutes on each side until they look opaque.
Pour the honey sauce into the pan. Let it bubble for one minute until it looks thick and sticks to the fish. Remove the salmon from the pan.
Put the snap peas and carrots into the same pan for two minutes to let them soften slightly in the leftover sauce.
Add the spinach at the very end and stir it for thirty seconds until it turns dark green and wilts.
Place a scoop of rice in your containers. Top the rice with the glazed salmon and the saucy vegetables.
19. Individual Savory Shepherd’s Pies in Jars
Meal Prep Recipes
These cute glass jars contain a full comforting meal that is perfectly portioned for one person. The bottom layer consists of savory lentils and carrots cooked in a rich brown gravy. A thick swirl of smooth mashed potatoes sits on top to create a beautiful and delicious crust.
Using jars makes these very easy to stack in your fridge or freezer without taking up much space. You can pop the whole jar in the microwave when you are ready to eat. It is a wonderful way to enjoy a classic comfort food in a modern and convenient way.
Ingredients
2 cups cooked lentils or ground meat
2 large potatoes
2 chopped carrots
1 half cup peas
1 cup vegetable or beef broth
2 tablespoons butter
1 tablespoon flour
Equipment
Large pot
Potato masher
Small saucepan
4 glass jars with lids
DIY Instructions
Peel the potatoes and cut them into big chunks. Boil them in water until they are very soft, then drain the water away.
Add butter to the hot potatoes and use your masher to squash them until they are smooth and creamy.
In your saucepan, cook the carrots and peas in the broth until they are tender. Stir in the flour to make the liquid turn into a thick gravy.
Add your cooked lentils or meat to the gravy and stir well so everything is coated.
Spoon the meat and vegetable mixture into the bottom of each glass jar until the jar is half full.
Carefully add the mashed potatoes on top of the meat. You can use a fork to make pretty swirls in the potato.
Let the jars cool down before putting the lids on. These can be kept in the freezer for several weeks.
20. Spicy Ground Turkey and Bell Pepper Soup
Meal Prep Recipes
This brothy soup offers a lighter way to enjoy bold flavors and plenty of protein. Ground turkey provides a lean base that stays tender in the spicy red tomato liquid. Slices of fresh jalapeño and bright bell peppers add a kick of heat that will wake up your senses.
The addition of fresh cilantro and a squeeze of lime makes the soup taste very bright and clean. It is a fantastic meal for prep because it is mostly liquid and freezes very well in bags or jars. You will love how the spices develop and get even better after a day or two.
Ingredients
1 pound ground turkey
1 quart chicken or vegetable broth
2 bell peppers
1 jalapeño
1 can of diced tomatoes
1 tablespoon oil
Fresh cilantro and lime for garnish
Equipment
Large soup pot
Knife
Cutting board
Ladle
DIY Instructions
Cut the bell peppers into small squares and slice the jalapeño into thin circles. Remove the seeds from the jalapeño if you do not want it too spicy.
Heat the oil in your pot and brown the ground turkey until it is no longer pink.
Add the peppers and jalapeño to the pot and cook them for three minutes until they start to smell sweet.
Pour the broth and the whole can of diced tomatoes into the pot. Stir everything together.
Bring the soup to a boil, then turn the heat down to low. Let it simmer for twenty minutes so the vegetables become soft.
Taste the broth and add a little salt or extra pepper if you think it needs more punch.
Ladle the soup into containers. Add a slice of lime and some chopped cilantro to the top before you close the lids.
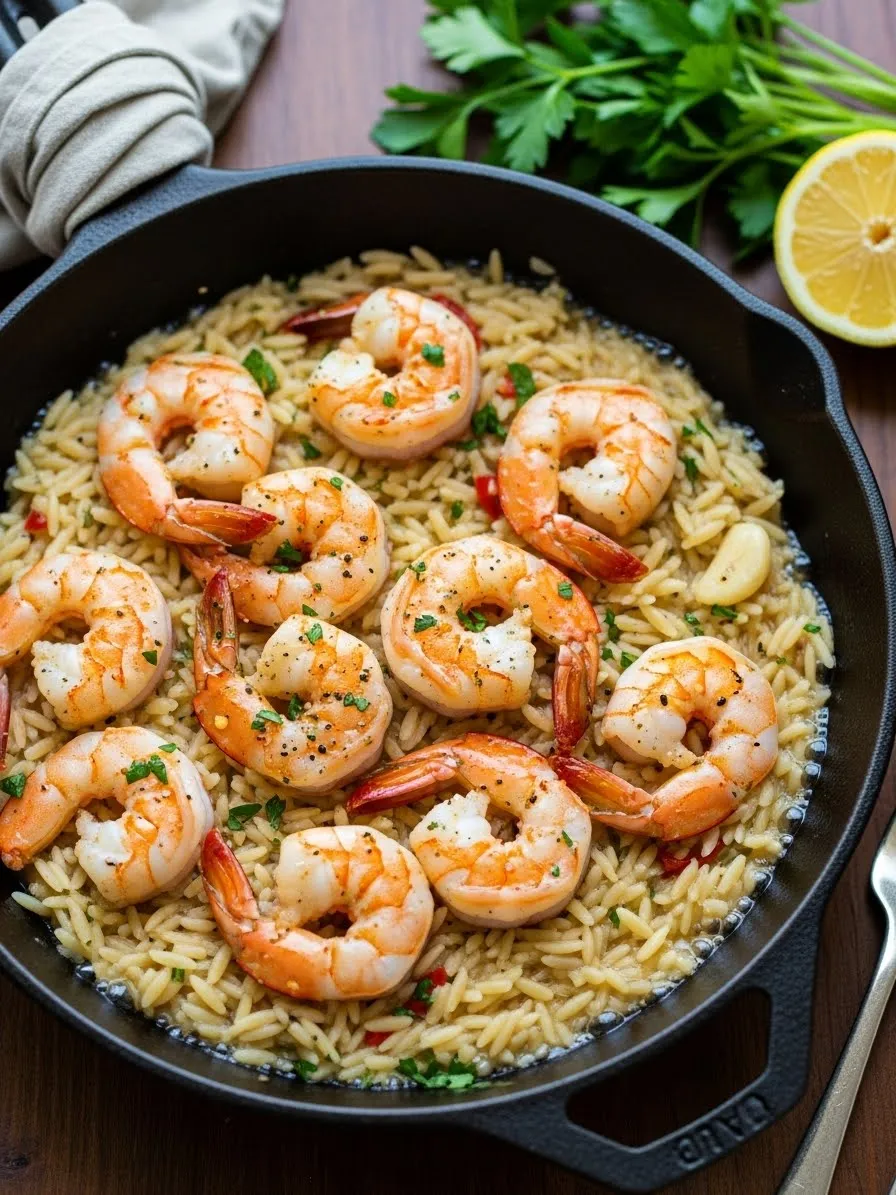
21. Mediterranean Orzo Salad with Chickpeas and Feta
Meal Prep Recipes
This bright bowl features small rice shaped pasta mixed with hearty legumes and salty cheese. Tiny cubes of feta provide a rich contrast to the fresh green cucumbers and red peppers scattered throughout. It offers a light yet satisfying bite that holds up well in your refrigerator for several days.
You will find this salad keeps its texture much better than traditional leafy greens. The simple dressing coats every piece of pasta to ensure each mouthful is full of flavor. It serves as a great base for a busy afternoon lunch.
Ingredients
1 cup dry orzo pasta
1 can chickpeas
1 cup diced cucumber
1 half cup crumbled feta cheese
1 quarter cup diced red onion
2 tablespoons olive oil
1 tablespoon lemon juice
1 teaspoon dried oregano
Equipment
Medium pot
Large mixing bowl
Strainer
Sharp knife
Cutting board
DIY Instructions
Fill a medium pot with water and a pinch of salt. Bring the water to a rolling boil on your stove.
Pour the orzo into the boiling water. Let it cook for about nine minutes or until the pasta feels soft but still has a little bite.
Drain the pasta in a strainer and rinse it with cold water to stop the cooking process.
Open the can of chickpeas and pour them into the strainer. Rinse them well and let the water drain away.
Use your knife to chop the cucumber and red onion into very small pieces.
Place the cooled pasta, chickpeas, cucumber, and onion into a large mixing bowl.
Pour the olive oil, lemon juice, and oregano over the mixture. Use a large spoon to stir everything together until the oil coats the pasta.
Add the crumbled feta cheese at the very end and stir gently so the cheese stays in small chunks.
22. Sesame Tofu Bowl with Edamame and Purple Cabbage
Meal Prep Recipes
Golden cubes of tofu sit next to bright green edamame and shredded purple cabbage in this vibrant bowl. A sprinkle of sesame seeds adds a nutty crunch to the soft protein and fluffy white rice base. This meal provides a beautiful rainbow of colors that makes eating healthy feel like a celebration.
Shredded cabbage adds a necessary crunch while the edamame brings a boost of plant protein. The combination of textures keeps your palate interested from start to finish. You can easily prep several of these bowls at once to stock your freezer.
Ingredients
1 block extra firm tofu
2 cups cooked white rice
1 cup frozen shelled edamame
2 cups shredded purple cabbage
2 tablespoons soy sauce
1 tablespoon sesame oil
1 tablespoon honey
1 teaspoon sesame seeds
Equipment
Large frying pan
Paper towels
Two small bowls
Spatula
DIY Instructions
Take the tofu out of its watery package. Wrap the block in several layers of paper towels and place a heavy plate on top for fifteen minutes to squeeze out the moisture.
Cut the dry tofu into small squares about the size of a postage stamp.
Mix the soy sauce, sesame oil, and honey in a small bowl to make a simple glaze.
Heat a frying pan over medium heat and add a tiny bit of oil. Place the tofu cubes in the pan and cook them until every side looks brown and crispy.
Pour the glaze over the tofu in the pan. Stir the cubes for one minute until the sauce becomes thick and sticky.
Put the frozen edamame in a small bowl with a splash of water. Heat it in the microwave for two minutes until the beans are warm and soft.
Place a scoop of white rice into your containers. Arrange the glazed tofu, steamed edamame, and raw shredded cabbage on top of the rice.
Sprinkle sesame seeds over the tofu for a professional look and extra flavor.
23. Spinach and Sun Dried Tomato Egg Muffins
Meal Prep Recipes
These savory breakfast muffins are a great way to start your morning or enjoy a light lunch. Each egg cup contains bright green spinach leaves and bits of tangy red sun dried tomatoes for a burst of Mediterranean flavor. They are easy to grab when you are rushing out the door.
You can bake a whole tray of these in very little time. They freeze beautifully and only need a minute in the microwave to become warm and fluffy again. It is a smart way to get your vegetables in early in the day.
Ingredients
6 large eggs
1 cup fresh spinach
1 quarter cup chopped sun dried tomatoes
1 quarter cup shredded cheese
1 tablespoon milk
Salt and pepper
Equipment
Muffin tin
Large measuring cup or bowl
Whisk or fork
Nonstick cooking spray
DIY Instructions
Set your oven to 350 degrees Fahrenheit. Spray the inside of six muffin holes with cooking spray so the eggs do not stick to the metal.
Use a knife to chop the spinach into very small ribbons. Chop the sun dried tomatoes into tiny bits as well.
Crack the eggs into a large measuring cup or bowl. Add the milk and a pinch of salt and pepper.
Use a whisk or fork to beat the eggs until the yellow yolks and clear whites are completely mixed together.
Divide the chopped spinach and sun dried tomatoes evenly among the six muffin holes.
Pour the egg mixture over the vegetables until each hole is nearly full.
Sprinkle a little bit of shredded cheese on top of each egg cup.
Place the tin in the oven and bake for twenty minutes. The muffins are done when the centers feel firm and they have puffed up like little cakes.
24. Pesto Penne with White Beans and Fresh Basil
Meal Prep Recipes
Green herbal sauce coats every piece of ridged pasta in this comforting Italian inspired dish. Plump white beans are mixed in to provide extra protein and a creamy texture that matches the basil. A single fresh leaf on top adds a beautiful touch of nature to your meal prep container.
This recipe is a fantastic choice for those who want a meatless meal that still feels very filling. The ridges on the penne help hold onto the sauce so no flavor goes to waste. It tastes wonderful whether you serve it hot or cold.
Ingredients
1 box penne pasta
1 jar prepared basil pesto
1 can cannellini beans
1 handful of fresh basil leaves
2 tablespoons parmesan cheese
Equipment
Large pot
Strainer
Large mixing bowl
Can opener
DIY Instructions
Fill a large pot with water and bring it to a boil on your stove.
Add the penne pasta to the boiling water. Cook it for about ten minutes until it is soft.
Open the can of white beans and pour them into a strainer. Rinse them under cold tap water to remove the salty liquid.
Drain the cooked pasta and put it back into the large pot or a separate mixing bowl.
Add the entire jar of pesto sauce to the warm pasta. Stir well so the green sauce gets inside the hollow centers of the noodles.
Gently fold the rinsed white beans into the pasta. You want to be careful not to squash the beans.
Divide the pasta into four or five containers. Sprinkle a little parmesan cheese over each portion.
Place one or two fresh basil leaves on top for a fresh scent and a splash of bright color.
25. Baked White Fish with Olives and Cherry Tomatoes
Meal Prep Recipes
Flaky white fish serves as a light and nutritious centerpiece for this elegant plate. It is topped with salty black olives, tangy capers, and sweet roasted cherry tomatoes that burst with juice. The olive oil dressing keeps the seafood moist and flavorful during the baking process.
Choosing a lean fish like cod or halibut provides plenty of protein without feeling heavy. The Mediterranean toppings add enough salt and acid that you do not need much extra seasoning. This meal looks like it came from a restaurant but is very simple to make at home.
Ingredients
2 large white fish fillets
1 cup cherry tomatoes
1 half cup pitted black olives
1 tablespoon capers
2 tablespoons olive oil
1 tablespoon dried parsley
1 lemon
Equipment
Glass baking dish
Knife
Cutting board
DIY Instructions
Turn your oven on and set it to 375 degrees Fahrenheit.
Wash the cherry tomatoes and cut them in half. Slice the olives into thin rings.
Place the fish fillets in the center of your glass baking dish. Pat them dry with a paper towel.
Scatter the tomato halves, olive rings, and capers all around and on top of the fish.
Drizzle the olive oil over the fish and the vegetables. Sprinkle the dried parsley over the top.
Slice the lemon in half and squeeze the juice over everything in the dish. You can also put thin lemon slices on top of the fish.
Put the dish in the oven and bake for fifteen to twenty minutes. The fish is ready when it looks white all the way through and flakes easily with a fork.
Let the meal cool for five minutes before moving the fish and the roasted vegetables into your storage containers.
26. Sheet Pan Sausage with Peppers and Onions
Meal Prep Recipes
Sliced savory sausages roast alongside sweet yellow and red bell peppers to create a colorful and easy meal. Thick rings of onion become soft and caramelized in the oven heat. Serving these on a toasted bun makes for a very satisfying and nostalgic lunch.
Cooking everything on one tray saves you a lot of time on dishes. The juices from the meat season the vegetables as they cook together. You can prepare a large batch and have several days of hearty sandwiches ready to go.
Ingredients
1 package of smoked sausages
2 large bell peppers
1 large yellow onion
2 tablespoons olive oil
1 teaspoon garlic powder
4 long sandwich buns
Equipment
Large baking sheet
Knife
Cutting board
Large bowl
DIY Instructions
Preheat your oven to 400 degrees Fahrenheit.
Cut the sausages into thick circles about half an inch wide.
Remove the seeds from the bell peppers and cut them into long strips. Peel the onion and cut it into thick wedges.
Put the sausage slices, pepper strips, and onion wedges into a large bowl.
Pour the olive oil and garlic powder over the ingredients and toss them with your hands until everything has a light coating of oil.
Spread the mixture out in a single layer on your large baking sheet.
Bake for twenty five minutes. You should use a spatula to toss the ingredients halfway through the cooking time so they brown evenly.
Once the vegetables are soft and the sausage is brown, let them cool. Pack the mixture into containers and keep the buns in a separate bag until you are ready to eat.
27. Layered Chicken and Black Bean Enchilada Bake
Meal Prep Recipes
Thin corn tortillas are stacked with shredded chicken, black beans, and sweet corn in this savory casserole. Melted cheese covers the top layer to create a gooey and delicious crust. Each slice reveals a beautiful pattern of colorful ingredients and rich red sauce.
This dish is much easier to assemble than individual rolled enchiladas. It stays moist when reheated, making it a reliable choice for your weekly meal prep. You will love how the flavors of the spices soak into the tortillas over time.
Ingredients
1 pound shredded cooked chicken
10 corn tortillas
1 can black beans
1 cup frozen corn
2 cups red enchilada sauce
2 cups shredded mexican cheese blend
Equipment
Square baking dish
Can opener
Strainer
Spoon
DIY Instructions
Heat your oven to 375 degrees Fahrenheit. Open the can of black beans, rinse them in a strainer, and mix them with the corn and shredded chicken.
Pour a small amount of enchilada sauce into the bottom of your baking dish and spread it around.
Lay two or three tortillas on the bottom of the dish to cover the surface. You can tear them to make them fit.
Spread one third of the chicken and bean mixture over the tortillas. Pour a little more sauce on top and sprinkle with a handful of cheese.
Repeat these layers two more times: tortillas, then meat and beans, then sauce and cheese.
Finish with a final layer of tortillas, the rest of the sauce, and a thick coating of cheese on the very top.
Cover the dish with foil and bake for twenty minutes. Remove the foil and bake for ten more minutes until the cheese is bubbling.
Let the bake cool completely before cutting it into squares and placing them into your lunch containers.
28. Creamy Tuna Salad with Celery and Cranberries
Meal Prep Recipes
This classic salad gets a modern update with the addition of crunchy celery and sweet dried cranberries. A thick white dressing binds the flaked tuna together for a very smooth and rich texture. Slices of red onion provide a sharp bite that balances the sweetness of the fruit.
You can serve this tuna mix with crackers or fresh cucumber slices for a low carb option. It is a very fast recipe that requires no cooking at all. Keeping a few cans of tuna in your pantry means you can make this even when your fridge is nearly empty.
Ingredients
2 cans of tuna in water
1 half cup mayonnaise or greek yogurt
2 stalks of celery
1 quarter cup dried cranberries
2 tablespoons diced red onion
1 pack of whole grain crackers
Equipment
Medium bowl
Can opener
Fork
Knife
DIY Instructions
Open the tuna cans and press the lid down hard to drain all the water into the sink.
Put the dry tuna into a medium bowl and use a fork to break the large chunks into small flakes.
Dice the celery and red onion into very tiny pieces using your knife.
Add the chopped celery, onion, and dried cranberries to the bowl with the tuna.
Spoon the mayonnaise or yogurt into the bowl. Stir everything together until the tuna is well coated and creamy.
Taste the salad and add a pinch of pepper if you like.
Scoop the tuna salad into small containers. Pack your crackers or cucumber slices in a separate bag or a different section of the box so they stay crunchy.
Keep the containers in the refrigerator until you are ready for lunch. This meal does not need to be heated.
29. Sweet and Sour Tofu with Pineapple and Peppers
Meal Prep Recipes
Crispy tofu cubes are tossed in a bright orange sauce that hits both sweet and tangy notes. Chunks of fresh pineapple and vibrant bell peppers add a tropical flair to the dish. It sits atop a bed of soft noodles that soak up all the extra glaze.
This recipe provides a wonderful alternative to takeout that is much better for your body. The contrast between the firm tofu and the juicy fruit makes every bite exciting. It is a colorful and cheerful meal to pull out of your freezer.
Ingredients
1 block extra firm tofu
1 cup pineapple chunks
2 bell peppers
1 half cup sweet and sour sauce
2 cups cooked noodles or rice
1 tablespoon vegetable oil
Equipment
Large skillet
Knife
Cutting board
Paper towels
DIY Instructions
Press the tofu with paper towels for ten minutes to remove the water. Cut the tofu block into one inch cubes.
Cut the bell peppers into squares that are about the same size as the tofu.
Heat the oil in your skillet over medium heat. Fry the tofu cubes for about eight minutes, turning them often until they are golden on all sides.
Add the pepper squares to the pan and cook them for three minutes until they start to soften.
Pour the sweet and sour sauce into the pan and stir in the pineapple chunks.
Let the sauce bubble for two minutes so it coats the tofu and the fruit with a thick glaze.
Place a serving of noodles or rice in the bottom of your meal prep containers.
Pour the tofu and pineapple mixture over the top. Close the lids and store them in the freezer for an easy meal later.
30. Quick Beef and Broccoli Stir Fry
Meal Prep Recipes
Thin strips of savory beef are seared quickly and mixed with plenty of bright green broccoli florets. A glossy brown sauce coats the entire dish to provide a rich umami flavor. Tiny bits of minced garlic are scattered throughout to add a wonderful aroma.
Broccoli is an excellent vegetable for meal prep because it stays firm and holds its color well. This dish comes together in just one pan in less than twenty minutes. It is a high protein staple that will keep you energized all afternoon.
Ingredients
1 pound flank steak or stir fry beef strips
3 cups broccoli florets
1 half cup stir fry sauce
2 cloves minced garlic
1 tablespoon oil
Sesame seeds for garnish
Equipment
Large skillet or wok
Knife
Cutting board
Spatula
DIY Instructions
If your beef is not already sliced, use a sharp knife to cut it into very thin strips.
Cut the broccoli into small, bite sized trees.
Heat the oil in your skillet over high heat until it is very hot.
Add the beef strips to the pan. Do not crowd them too much. Cook them for three minutes until they are brown and then take them out of the pan.
Put the broccoli and minced garlic into the same hot pan. Add a spoonful of water and cover the pan with a lid for two minutes to steam the broccoli.
Remove the lid and put the beef back into the pan with the broccoli.
Pour the stir fry sauce over everything. Stir the meat and vegetables for one minute while the sauce thickens and gets shiny.
Divide the stir fry into containers and sprinkle a few sesame seeds on top before the sauce cools.
31. Refreshing Chicken Salad Lettuce Cups
Meal Prep Recipes
This light lunch brings a crisp crunch to your midday routine. Shredded chicken breast mixes with sweet red grapes and snappy celery for a wonderful balance of textures. Using large green lettuce leaves as a wrap keeps the meal fresh and helps you feel energized without any heavy grains.
Grapes add a surprising burst of natural sweetness that pairs beautifully with savory poultry. You can prepare a big bowl of the filling and keep it in your fridge for several days. It is a fantastic option for those who want a low carb meal that still feels substantial and satisfying.
Small bits of green onion provide a mild bite that clears the palate. This recipe works well for office lunches because you can pack the lettuce and chicken separately to keep everything firm. You will love how easy it is to assemble these right at your desk.
Ingredients
2 cups cooked shredded chicken
1 cup red grapes halved
2 stalks diced celery
1 half cup plain greek yogurt
1 head of butter lettuce
1 tablespoon lemon juice
1 handful sliced green onions
Equipment
Large mixing bowl
Sharp knife
Cutting board
Measuring cups
Spoon
DIY Instructions
Put the shredded chicken into your large mixing bowl first. Use a fork to break up any large chunks so the meat is easy to eat.
Wash your celery and grapes under cold water. Use your knife to slice the grapes in half and cut the celery into very tiny squares.
Add the grapes and celery to the bowl with the chicken. Sprinkle the green onions on top of the mixture.
Pour the greek yogurt and lemon juice into the bowl. Use your spoon to stir everything until the chicken is well coated and creamy.
Take the head of lettuce and carefully peel away the outer leaves. Wash them and pat them dry with a paper towel so they do not get soggy.
Scoop a large spoonful of the chicken mixture into the center of a lettuce leaf.
Place the finished wraps into a container. If you are prepping for later, store the chicken salad in a jar and the lettuce leaves in a plastic bag.
32. Savory Shrimp and Vegetable Fried Rice
Meal Prep Recipes
This colorful pan features succulent pink shrimp tossed with fluffy grains of brown rice. Bright green peas and orange carrot bits add a natural sweetness to every forkful. Small pieces of scrambled egg are scattered throughout to provide extra protein and a rich flavor.
Cooking the rice ahead of time makes this recipe even faster to put together. The high heat of the pan creates a wonderful texture where the grains stay separate and firm. It is a reliable freezer meal that tastes just as good after a quick reheat in the microwave.
Sesame seeds are sprinkled over the top to add a delicate toasted aroma. You get a complete meal with seafood and vegetables in one simple bowl. This dish remains a favorite for anyone who loves the flavors of traditional takeout in a much healthier format.
Ingredients
1 pound large shrimp peeled and deveined
3 cups cooked brown rice
1 cup frozen peas and carrots
2 large eggs
3 tablespoons soy sauce
1 tablespoon sesame oil
1 teaspoon garlic powder
Equipment
Large nonstick skillet or wok
Wooden spoon
Small bowl for eggs
Measuring spoons
DIY Instructions
Place your skillet over medium high heat and add the sesame oil. Let the oil get hot for about one minute.
Crack the eggs into a small bowl and whisk them with a fork. Pour them into the hot pan and scramble them quickly until they are set.
Remove the eggs from the pan and set them on a plate for a moment.
Put the shrimp into the same pan. Cook them for two minutes on each side until they turn pink and firm.
Add the frozen peas and carrots to the pan with the shrimp. Stir them for three minutes until they are no longer frozen.
Pour the cooked rice into the pan. Use your spoon to break up any clumps and mix the rice with the shrimp and vegetables.
Pour the soy sauce and garlic powder over the rice. Add the cooked eggs back into the pan.
Stir everything together for two more minutes until the rice is hot. Divide the meal into containers and let them cool before freezing.
33. Mediterranean Zucchini and Chickpea Bowl
Meal Prep Recipes
This grain bowl offers a beautiful mix of earthy and fresh elements. Thin ribbons of green zucchini sit atop a bed of nutty brown rice and hearty chickpeas. Toasted pine nuts are scattered over the top to provide a buttery crunch that enhances the whole dish.
Fresh mint leaves add a cooling herbal note that makes this lunch feel very sophisticated. The combination of plant based protein and fiber will keep you full for many hours. It is a light and vibrant choice that celebrates simple ingredients and clean flavors.
A squeeze of fresh lemon juice brings all the components to life right before you eat. You can enjoy this meal warm or at room temperature. It is a smart way to use seasonal vegetables to create a gourmet feeling meal at home.
Ingredients
2 cups cooked brown rice
1 can of chickpeas
1 large zucchini
1 quarter cup pine nuts
1 handful of fresh mint
2 tablespoons olive oil
1 lemon
Equipment
Vegetable peeler
Small frying pan
Large mixing bowl
Can opener
DIY Instructions
Open the can of chickpeas and rinse them in your sink using a strainer. Let the water drain off completely.
Use your vegetable peeler to slice the zucchini into long and thin ribbons. Stop when you reach the middle part with the seeds.
Place the small frying pan over low heat. Add the pine nuts and shake the pan for three minutes until the nuts turn light brown and smell toasted.
Put the cooked rice into your large mixing bowl. Add the rinsed chickpeas and the zucchini ribbons.
Tear the fresh mint leaves into small pieces with your fingers and toss them into the bowl.
Pour the olive oil over the mixture and stir gently so the zucchini ribbons do not break.
Slice the lemon in half and squeeze the juice over the whole bowl.
Divide the mixture into your meal prep containers. This salad stays fresh and delicious in the fridge for up to three days.
34. Hearty Turkey Meatball and Kale Soup
Meal Prep Recipes
Warm broth provides the base for this comforting and nutritious soup. Large turkey meatballs offer a lean source of protein while white beans add a creamy texture to the liquid. Dark green kale leaves are simmered until soft to provide a boost of vitamins in every bite.
This soup is a wonderful option for cold days when you want something that feels like a hug. The flavors meld together over time, making the leftovers even better than the first serving. You can easily freeze this in individual jars for a quick grab and go lunch.
The broth remains clear and light while the vegetables provide a lot of substance. Small bits of garlic and onion hidden in the meatballs release a wonderful aroma during the cooking process. It is a balanced meal that is very easy on the stomach.
Ingredients
1 pound ground turkey
1 quart chicken broth
1 bunch of fresh kale
1 can of white cannellini beans
1 egg
1 quarter cup breadcrumbs
1 tablespoon dried thyme
Equipment
Large soup pot
Medium mixing bowl
Knife
Ladle
DIY Instructions
Put the ground turkey, egg, breadcrumbs, and thyme into a mixing bowl. Use your hands to mix them together until everything is combined.
Roll the meat into small balls about the size of a walnut. Set them on a plate.
Pour the chicken broth into your large soup pot and bring it to a gentle boil over medium heat.
Carefully drop the turkey meatballs into the boiling broth one by one. Turn the heat down to low and let them simmer for ten minutes.
While the meat cooks, wash the kale and pull the green leaves away from the tough stems. Tear the leaves into bite sized pieces.
Open the can of beans and rinse them in the sink.
Add the kale and the rinsed beans to the soup pot. Let the soup cook for five more minutes until the kale looks dark green and soft.
Use your ladle to scoop the meatballs and vegetables into containers. Make sure each bowl gets plenty of broth.
35. Creamy Peanut Noodles with Carrot Slaw
Meal Prep Recipes
Soft noodles are coated in a thick and savory peanut sauce for a very satisfying meal. Thin strips of bright orange carrots provide a refreshing crunch that cuts through the richness of the nut butter. Sliced green onions add a pop of color and a mild savory flavor to the top.
This recipe is a great choice for those who enjoy Asian inspired flavors but want a vegetarian option. The sauce is made with simple pantry staples and comes together in just a few minutes. It is a very durable meal that does not get mushy when stored in the fridge.
You can serve these noodles cold or warm depending on your preference. Adding a little bit of lime juice can brighten the flavors if you want more zing. It is a fun and filling lunch that feels much more special than a basic sandwich.
Ingredients
1 box of spaghetti or rice noodles
1 half cup creamy peanut butter
2 tablespoons soy sauce
1 tablespoon honey
2 large carrots
3 green onions
1 tablespoon warm water
Equipment
Large pot for pasta
Small bowl for sauce
Grater or peeler
Tongs or large fork
DIY Instructions
Fill your large pot with water and bring it to a boil. Cook the noodles according to the package directions until they are soft.
Use a grater or a peeler to turn the carrots into long and thin shreds. Slice the green onions into small circles.
Put the peanut butter, soy sauce, honey, and warm water into a small bowl. Stir with a spoon until the sauce is smooth and creamy.
Drain the cooked noodles in a strainer and put them back into the large pot.
Pour the peanut sauce over the warm noodles. Use your tongs to toss the pasta so every strand is covered in sauce.
Add the shredded carrots and half of the green onions to the pot. Stir them into the noodles.
Divide the mixture into four containers. Sprinkle the remaining green onions on top for a nice finish.
Seal the lids and keep the noodles in the refrigerator. They are ready to eat whenever you are hungry.
36. Moroccan Beef Stew with Dried Apricots
Meal Prep Recipes
This rich stew features tender chunks of beef slow cooked with exotic spices and sweet fruit. Golden dried apricots and plump raisins add a wonderful sweetness that balances the savory meat. Hearty chickpeas are mixed in to provide extra texture and protein.
The deep brown sauce is full of flavor from ginger and aromatic herbs. This dish is designed for long simmering, which makes the beef melt in your mouth. It is a fantastic freezer meal because the flavors only get deeper and better over time.
Fresh parsley is scattered over the top to add a bright herbal finish. You will love the combination of sweet and salty elements in this traditional north african dish. It is a warm and filling lunch that feels like a special occasion meal.
Ingredients
1 pound beef stew meat cut into cubes
1 can of chickpeas
1 half cup dried apricots
1 quarter cup raisins
2 cups beef broth
1 tablespoon ground ginger
1 tablespoon olive oil
Fresh parsley for garnish
Equipment
Large heavy pot with a lid
Knife
Cutting board
Wooden spoon
DIY Instructions
Heat the olive oil in your large pot over medium heat. Add the beef cubes and cook them for five minutes until the outsides look brown.
Slice the dried apricots into halves. Open the chickpeas and rinse them under cold water.
Pour the beef broth into the pot with the meat. Stir in the ground ginger.
Add the apricots, raisins, and chickpeas to the liquid. Stir everything together with your wooden spoon.
Turn the heat down to very low and put the lid on the pot. Let the stew simmer gently for one hour. Check it occasionally to make sure there is still enough liquid.
The beef should feel very soft and easy to break with a fork when it is done.
Let the stew cool down before you ladle it into meal prep containers.
Chop some fresh parsley and sprinkle it over the meat before you close the lids. Store this in the freezer for a long lasting lunch option.
37. BBQ Chicken and Feta Flatbread Rounds
Meal Prep Recipes
These mini pizzas offer a fun and handheld way to enjoy your lunch. Each whole wheat round is spread with smoky barbecue sauce and topped with shredded chicken and salty feta cheese. Rings of red onion and fresh cilantro add a sharp and herbal finish to the top.
The contrast between the sweet sauce and the tangy cheese is truly wonderful. You can bake a large batch of these in one go on a single tray. They are very easy to pack in a lunch box and do not require any silverware to eat.
Using pre cooked chicken makes this recipe incredibly fast to assemble. The flatbread gets slightly crispy in the oven while the cheese softens just enough. It is a creative meal that both kids and adults will find delicious.
Ingredients
4 mini whole wheat flatbreads or pitas
1 cup shredded cooked chicken
1 half cup barbecue sauce
1 quarter cup crumbled feta cheese
1 quarter red onion sliced into rings
1 handful fresh cilantro
Equipment
Large baking sheet
Spoon
Knife
Cutting board
DIY Instructions
Set your oven to 400 degrees Fahrenheit. Place the flatbread rounds on your baking sheet so they are not overlapping.
Use a spoon to spread a thin layer of barbecue sauce over each piece of bread. Leave a small space around the edge for a crust.
Divide the shredded chicken evenly among the four rounds. Press the meat down slightly into the sauce.
Sprinkle the crumbled feta cheese over the chicken. Add two or three red onion rings to the top of each mini pizza.
Place the baking sheet in the oven and bake for eight to ten minutes. You want the bread to be toasted and the onions to look slightly soft.
Remove the tray from the oven and let the flatbreads cool for a few minutes.
Wash the cilantro and pull the leaves off the stems. Scatter the green leaves over the pizzas.
Place each round in a separate container. These are great to eat cold or you can give them a quick warm up in a toaster oven.
38. Savory Mushroom and Lentil Power Bites
Meal Prep Recipes
These small brown spheres are packed with plant based nutrition and deep umami flavor. They are made from a mix of finely chopped mushrooms and cooked lentils for a very satisfying texture. Each bite is savory and firm, making them a great alternative to meat.
You can see the bits of mushroom inside, promising a rich and earthy taste. These bites are wonderful for meal prep because you can toss them into salads, wraps, or pasta dishes throughout the week. They hold their shape well and provide a steady source of energy.
Baking them in the oven creates a slightly golden exterior while keeping the inside moist. This recipe is a smart way to use humble ingredients to create something that feels very modern and healthy. They are a reliable staple for any vegetarian kitchen.
Ingredients
1 cup cooked brown lentils
2 cups finely chopped mushrooms
1 half cup breadcrumbs
1 egg
2 cloves minced garlic
1 tablespoon soy sauce
1 teaspoon dried thyme
Equipment
Large mixing bowl
Baking sheet
Parchment paper
Knife
DIY Instructions
Preheat your oven to 375 degrees Fahrenheit. Line your baking sheet with a piece of parchment paper to prevent sticking.
Use a sharp knife to chop the mushrooms into very tiny pieces. You want them to be almost the size of the lentils.
Put the cooked lentils, chopped mushrooms, breadcrumbs, and egg into a large mixing bowl.
Add the minced garlic, soy sauce, and thyme to the mixture. Use a big spoon or your hands to mix everything together until it forms a thick paste.
Scoop out a small amount of the mixture and roll it between your palms to make a ball about the size of a large grape.
Place the balls on the baking sheet with a little bit of space between them.
Bake for twenty minutes. Turn the bites over halfway through the cooking time so they brown on all sides.
Let the power bites cool completely before putting them into containers. They stay fresh in the fridge for five days.
39. Sun Dried Tomato and Hummus Tortilla Wraps
Meal Prep Recipes
This vibrant wrap assembly shows how easy it is to build a healthy lunch without any cooking. A thick layer of creamy hummus serves as the base for fresh spinach and crunchy sprouts. Tangy sun dried tomatoes are scattered across the middle to add a concentrated burst of flavor.
The white tortilla provides a clean canvas for all the colorful vegetables inside. You can see how the different layers will create a wonderful variety of textures in every bite. It is a refreshing and light option that is very high in fiber and healthy fats.
Adding a few slices of deli turkey on the side can increase the protein if you wish. These wraps stay firm for several hours, making them an excellent choice for a picnic or a travel lunch. It is a simple way to eat a rainbow of vegetables in one go.
Ingredients
2 large flour tortillas
1 half cup plain hummus
1 cup fresh baby spinach
1 half cup alfalfa sprouts
1 quarter cup sun dried tomatoes in oil
4 slices of deli turkey optional
Equipment
Butter knife
Cutting board
Paper towels
DIY Instructions
Lay your flour tortillas flat on a clean cutting board or a large plate.
Use a butter knife to spread a thick layer of hummus over the entire surface of each tortilla. Stay away from the very edge so the filling does not leak out.
Place a handful of fresh spinach over the hummus in a single layer.
Scatter the alfalfa sprouts over the spinach. They add a nice height and crunch to the wrap.
Take the sun dried tomatoes out of their jar and pat them with a paper towel to remove extra oil. Chop them into small bits and sprinkle them down the center of the wrap.
If you are using turkey, lay the slices over the top of the vegetables.
Fold the left and right sides of the tortilla inward by about one inch.
Start from the bottom and roll the tortilla upward very tightly. Slice the finished wrap in half with a sharp knife and place the pieces in your lunch box.
40. Quinoa and Black Bean Stuffed Peppers
Meal Prep Recipes
Bright bell peppers in red, yellow, and green serve as natural edible bowls for a savory filling. Each pepper is stuffed with a mix of fluffy quinoa, black beans, and sweet corn for a complete protein meal. A thick dollop of red salsa and a sprinkle of cheese on top add a zesty finish.
These peppers are baked until the vegetable walls are soft and sweet. The filling stays moist and flavorful inside the pepper during the cooking process. It is a beautiful and nutritious dish that looks wonderful when you pull it out of your bag at lunch time.
You can easily reheat these in a microwave for a hot and satisfying midday meal. The colors make the meal feel very inviting and cheerful. It is a fantastic way to enjoy the flavors of the southwest while keeping your lunch healthy and balanced.
Ingredients
4 large bell peppers any color
2 cups cooked quinoa
1 can of black beans
1 cup frozen corn
1 half cup red salsa
1 half cup shredded cheddar cheese
Equipment
Square baking dish
Knife
Large mixing bowl
Spoon
DIY Instructions
Turn your oven on and set the temperature to 375 degrees Fahrenheit.
Use a sharp knife to cut the very top off each bell pepper. Reach inside and pull out the seeds and the white ribs. Wash the peppers inside and out.
Open the can of black beans and rinse them in a strainer.
Put the cooked quinoa, rinsed beans, corn, and salsa into a large mixing bowl. Stir them together until the salsa covers all the grains.
Stand the empty peppers up in your square baking dish. If they tip over, you can slice a tiny bit off the bottom to make them flat.
Use a large spoon to scoop the quinoa mixture into each pepper. Press the filling down so the peppers are completely full.
Sprinkle a generous amount of cheese over the top of each stuffed pepper.
Pour a small splash of water into the bottom of the baking dish to help the peppers steam. Cover the dish with foil and bake for thirty minutes. Remove the foil and bake for ten more minutes until the cheese is brown and bubbly.
41. Golden Turmeric Roasted Cauliflower and Chickpeas
Meal Prep Recipes
Golden cauliflower florets and crunchy chickpeas make a stellar vegetarian base for your weekly meals. This tray bake offers a wonderful mix of earthy turmeric and warm spices that fill your kitchen with a cozy aroma. It is a smart way to get plenty of fiber while keeping things light.
You will love the contrast between the soft vegetable centers and the crispy edges of the legumes. These ingredients are very stable, so they hold up well in a container for several days. It provides a colorful and nutritious lunch that helps you avoid mid afternoon fatigue.
Ingredients
1 large head of cauliflower
1 can chickpeas
2 tablespoons olive oil
1 teaspoon turmeric powder
1 teaspoon cumin
1 half teaspoon salt
Equipment
Large baking sheet
Large mixing bowl
Can opener
Strainer
Knife
DIY Instructions
Turn your oven on to 400 degrees Fahrenheit. Use a knife to cut the cauliflower into small pieces about the size of a large grape.
Open the can of chickpeas and pour them into a strainer. Rinse them under cold water and pat them dry with a towel so they get crispy.
Put the cauliflower and chickpeas into a large mixing bowl. Add the olive oil, turmeric, cumin, and salt.
Use your hands or a big spoon to toss everything together until the yellow spices cover every piece.
Spread the mixture out on your baking sheet in a single layer.
Bake for twenty five to thirty minutes. You should use a spatula to flip the pieces halfway through so they do not burn on one side.
Let the food cool down completely before putting it into your meal prep containers.
42. Mustard Crusted Chicken with Green Beans and Potatoes
Meal Prep Recipes
This sheet pan meal brings together juicy chicken and classic garden vegetables for a very balanced lunch. The chicken is coated in a grainy mustard sauce that adds a nice tang without being too spicy. Purple and yellow baby potatoes roast alongside fresh green beans to soak up all the flavorful juices.
Preparation is very simple because everything cooks together on one tray. The mustard creates a savory crust that keeps the meat moist during the reheating process later in the week. It is a wonderful choice for anyone who enjoys a traditional meat and potatoes style meal.
Ingredients
1 pound chicken breasts
1 pound baby potatoes
1 pound fresh green beans
3 tablespoons whole grain mustard
2 tablespoons olive oil
1 teaspoon garlic powder
Salt and pepper
Equipment
Large rimmed baking sheet
Sharp knife
Cutting board
Small bowl
DIY Instructions
Preheat your oven to 425 degrees Fahrenheit. Wash the potatoes and cut them into halves or quarters so they are small enough to cook quickly.
Snap the ends off the green beans and wash them well.
Place the chicken breasts on the baking sheet. Use a knife to cut the chicken into smaller pieces if they are very thick.
Mix the mustard, olive oil, and garlic powder in a small bowl. Spread this sauce over the top of the chicken.
Place the potatoes and green beans on the tray around the chicken. Drizzle a little bit of oil over the vegetables and sprinkle them with salt.
Bake for twenty to twenty five minutes. The chicken should be white all the way through and the potatoes should be soft when poked with a fork.
Divide the chicken, potatoes, and beans into four containers for your weekly lunches.
43. Crispy Falafel Bowls with Herb Quinoa
Meal Prep Recipes
These vibrant bowls feature savory green falafel patties served over a bed of fluffy quinoa. Plenty of fresh parsley and red onion are mixed into the grain to provide a burst of herbal flavor. It is a refreshing and plant based option that feels very gourmet.
Whole chickpeas scattered throughout the bowl add an extra layer of protein and texture. The patties are baked until firm, making them very easy to pack in a lunch box. You can add a side of hummus or a tahini drizzle when you are ready to eat.
Ingredients
1 box falafel mix or 8 pre made falafel patties
2 cups cooked quinoa
1 half cup fresh parsley
1 quarter cup diced red onion
1 cup cooked chickpeas
1 tablespoon lemon juice
Equipment
Baking sheet
Large mixing bowl
Knife
Cutting board
DIY Instructions
If you are using a mix, follow the box directions to form small patties about the size of a silver dollar.
Turn your oven to 375 degrees Fahrenheit and bake the patties on a sheet for fifteen minutes until they feel firm.
While the falafel bakes, chop the fresh parsley and red onion into very small bits.
Put the cooked quinoa into a large mixing bowl. Stir in the parsley, onion, and chickpeas.
Pour the lemon juice over the quinoa mixture and toss it together.
Place a large scoop of the quinoa salad into each of your containers.
Top each bowl with two or three falafel patties. These can be eaten cold or at room temperature.
44. Sesame Ground Beef and Cabbage Stir Fry
Meal Prep Recipes
This recipe offers a fast and healthy way to enjoy the flavors of an egg roll without the deep frying. Lean ground beef is cooked with shredded cabbage and sesame seeds for a savory and satisfying crunch. Sliced green onions on top add a mild bite that balances the rich meat.
The cabbage wilts down and absorbs the sesame oil and soy sauce beautifully. This meal is very low in carbohydrates but high in flavor and volume. It remains a fantastic choice for those who want a filling lunch that won’t make them feel heavy in the afternoon.
Ingredients
1 pound lean ground beef
1 bag shredded cabbage or coleslaw mix
2 tablespoons soy sauce
1 tablespoon sesame oil
2 cloves minced garlic
3 sliced green onions
1 tablespoon sesame seeds
Equipment
Large skillet or wok
Wooden spoon
Knife
DIY Instructions
Put the ground beef into your skillet over medium heat. Use your spoon to break the meat into very small crumbles.
Cook the beef until no more pink is showing, then drain any extra grease into a jar.
Add the minced garlic to the pan and stir for thirty seconds.
Pour the whole bag of shredded cabbage into the skillet with the meat. It will look like a lot, but it will shrink as it cooks.
Pour the soy sauce and sesame oil over the cabbage. Stir everything together constantly for five minutes until the cabbage is soft.
Add the sliced green onions and sesame seeds at the very end.
Divide the stir fry into containers. This meal reheats very well and stays tasty for up to four days.
45. Savory White Bean and Spinach Broth
Meal Prep Recipes
A clear and light broth carries the flavors of garlic and herbs in this comforting soup. Large white beans provide a creamy texture that pairs wonderfully with the soft green spinach leaves. It is a simple and clean meal that is very easy to prepare in one pot.
The heat from the soup gently wilts the spinach so it stays bright and full of vitamins. You can add a piece of crusty bread on the side for a more substantial lunch. It is a great option for a light midday meal that keeps you hydrated and satisfied.
Ingredients
2 cans white beans (cannellini or navy)
1 quart vegetable broth
2 cups fresh baby spinach
2 cloves minced garlic
1 tablespoon olive oil
1 teaspoon dried oregano
Equipment
Medium soup pot
Can opener
Strainer
Stirring spoon
DIY Instructions
Put the olive oil and minced garlic into your pot over medium heat. Stir it for one minute so the garlic does not brown too much.
Open the cans of beans and rinse them in a strainer.
Add the beans, vegetable broth, and oregano to the pot.
Bring the liquid to a boil, then turn the heat down to low. Let it simmer for ten minutes.
Take the pot off the heat and stir in the fresh spinach. The leaves will turn dark green and soft in the hot liquid almost immediately.
Taste the soup and add a pinch of salt or pepper if you like.
Ladle the soup into containers or glass jars. Make sure the lids are tight before you put them in the fridge.
46. Golden Salmon Patties with Dill Yogurt Sauce
Meal Prep Recipes
These pan seared patties offer a wonderful way to enjoy seafood in a convenient handheld format. Flaked salmon is mixed with fresh herbs and formed into thick cakes that have a beautiful golden crust. A small bowl of white yogurt sauce with dill adds a cooling touch to every bite.
Using canned or pre cooked salmon makes this recipe very affordable and quick. The patties stay firm when cold, so you can eat them on a salad or inside a bun. It is a high protein choice that feels very light and healthy for a summer lunch.
Ingredients
1 pound cooked or canned salmon
1 egg
1 half cup breadcrumbs
2 tablespoons plain greek yogurt
1 tablespoon dried dill
1 tablespoon oil for frying
Equipment
Large mixing bowl
Frying pan
Spatula
Fork
DIY Instructions
If you are using canned salmon, drain the liquid away. Put the salmon in a bowl and use a fork to break it into very small pieces.
Add the egg and breadcrumbs to the bowl. Stir until the mixture is thick enough to hold its shape.
Use your hands to form the salmon into round patties about the size of your palm.
Heat the oil in your frying pan over medium heat.
Place the patties in the pan and cook them for four minutes on each side. You want them to look brown and crispy on the outside.
Mix the greek yogurt and dill in a small dish to make your dipping sauce.
Let the patties cool before placing them in your lunch boxes. Put the sauce in a tiny separate container so the patties stay crunchy.
47. Roasted Eggplant and Zucchini Grain Salad
Meal Prep Recipes
Thick slices of roasted eggplant and zucchini rounds add an earthy depth to this hearty grain bowl. Chewy farro or barley serves as a sturdy base that holds up well against the soft vegetables. Toasted walnuts are scattered throughout to provide a rich and nutty crunch.
The vegetables develop a deep flavor in the oven that works beautifully with the fresh green herbs. This salad is very filling because of the fiber in the grains and the vegetables. It is a smart and colorful way to enjoy the best of the autumn harvest.
Ingredients
1 large eggplant
2 medium zucchinis
2 cups cooked farro or barley
1 quarter cup chopped walnuts
2 tablespoons olive oil
1 tablespoon balsamic vinegar
Equipment
Baking sheet
Knife
Cutting board
Large mixing bowl
DIY Instructions
Preheat your oven to 400 degrees Fahrenheit.
Cut the eggplant and zucchini into round circles about as thick as your finger.
Lay the vegetable slices on your baking sheet. Drizzle them with olive oil and a pinch of salt.
Bake for twenty minutes until the vegetables look brown and feel very soft.
Put the cooked grains into a large mixing bowl. Use a knife to chop the roasted vegetables into smaller bits and add them to the bowl.
Add the walnuts and balsamic vinegar to the mixture.
Toss everything together until the oil and vinegar coat the grains.
Divide the salad into four containers. This meal can be enjoyed warm or cold.
48. Bunless Herb Beef Burgers with Fresh Toppings
Meal Prep Recipes
These thick beef patties are seasoned with fresh herbs and grilled to a juicy finish. Instead of a heavy bun, the meat is served on a bed of crisp lettuce with slices of red onion and tomato. It is a fantastic way to enjoy the flavors of a classic burger while keeping your lunch light.
Pickle slices on the side provide a vinegary crunch that cuts through the savory beef. You can prepare the patties in advance and keep the fresh vegetables in a separate bag until you are ready to eat. It is a high protein lunch that feels like a weekend treat.
Ingredients
1 pound ground beef
1 tablespoon dried parsley
1 head of romaine lettuce
1 large tomato
1 red onion
1 small jar of pickles
Equipment
Large frying pan or grill
Mixing bowl
Knife
Cutting board
DIY Instructions
Put the ground beef and parsley into a mixing bowl. Use your hands to mix the herbs into the meat.
Shape the beef into four thick patties. Use your thumb to press a small dent in the middle so they stay flat while cooking.
Heat your pan over medium high heat. Cook the patties for about five minutes on each side until they are brown.
While the meat cooks, wash the lettuce and pull the leaves apart. Slice the tomato and onion into thin rounds.
Place two or three large lettuce leaves at the bottom of your lunch container.
Put a cooked burger patty on top of the lettuce.
Add the tomato, onion, and a few pickles to the container.
Close the lid and keep it in the fridge. This lunch is great even if you eat it cold.
49. Southern Style Black Eyed Peas and Greens
Meal Prep Recipes
This comforting bowl features smoky black eyed peas served over a bed of dark green kale. Fluffy brown rice sits on the side to soak up the savory sauce from the legumes. A small serving of red tomato relish adds a bright and sweet finish to the meal.
The combination of peas and greens provides a lot of iron and protein for your day. Cooking the greens until they are soft makes them very easy to digest and full of flavor. It is a traditional and wholesome dish that stays fresh in the freezer for a long time.
Ingredients
2 cans black eyed peas
1 bunch of fresh kale or collard greens
2 cups cooked brown rice
1 cup vegetable broth
1 tablespoon oil
1 teaspoon smoked paprika
Equipment
Large pot with a lid
Can opener
Strainer
Knife
DIY Instructions
Wash the kale and pull the leaves away from the thick stems. Chop the leaves into small ribbons.
Open the can of peas and rinse them in a strainer.
Heat the oil in your pot over medium heat. Add the kale and the vegetable broth.
Put the lid on the pot and let the greens steam for five minutes until they look dark green.
Add the rinsed peas and the smoked paprika to the pot. Stir everything together.
Let the mixture simmer for five more minutes so the peas get warm and soak up the broth.
Place a scoop of brown rice in each of your containers.
Pour a large spoonful of the peas and greens over the rice. This meal is very filling and healthy.
50. Creamy Tomato Chicken Curry with Roasted Cauliflower
Meal Prep Recipes
Tender chunks of chicken are simmered in a rich and orange tomato sauce for this final meal prep dish. Fresh cilantro is scattered over the top to provide a bright herbal scent and flavor. A side of roasted cauliflower florets adds a wonderful vegetable element to the bowl.
The curry sauce is thick and comforting, making it a great choice for a cold day. You can serve this with a piece of flatbread or over a small portion of rice. It is a flavorful and satisfying way to finish your week of healthy lunches.
Ingredients
1 pound chicken breast
1 can tomato sauce
1 half cup plain yogurt
1 tablespoon curry powder
1 small head of cauliflower
1 handful fresh cilantro
Equipment
Large skillet
Baking sheet
Knife
Cutting board
DIY Instructions
Turn your oven to 400 degrees Fahrenheit. Cut the cauliflower into tiny trees and roast them on a baking sheet for twenty minutes.
Cut the chicken into bite sized squares using your knife and board.
Heat a tiny bit of oil in your skillet and cook the chicken until it is white on the outside.
Pour the tomato sauce and the curry powder over the chicken. Turn the heat to low and let it bubble for ten minutes.
Take the pan off the stove and stir in the yogurt. This will make the sauce turn a light orange color and get very creamy.
Divide the creamy chicken into four containers.
Place the roasted cauliflower on the side of the meat.
Chop the cilantro and sprinkle it over the top of the curry. You have now finished all fifty of your healthy meal prep lunches!
Key Takeaways for Success
Freezing meals saves you significant time during busy work weeks.
Using simple ingredients helps keep your grocery bill low while maximizing nutrition.
Properly sealed containers ensure your food stays delicious for months.
Planning ahead prevents the stress of making last minute food choices.
Building a reliable meal prep routine does not have to happen all at once. You might start by choosing just two or three recipes from this list to try this Sunday. Each container you fill is a gift to your future self when things get chaotic.
Stocking your freezer provides a sense of security and health that lasts all month long. You will feel proud knowing exactly what ingredients went into every bite of your lunch. Your body and your wallet will certainly thank you for making this change.
Keep experimenting with different flavors until you find your favorite staples. The journey toward a healthier lifestyle begins with one small step in the kitchen today.
Spread the loveSticking to your health goals often feels like a chore when the food lacks excitement. You might start the year with high hopes only to find yourself bored with plain salads and boiled…
Spread the loveFinding the time to cook a nutritious meal often feels like a second job. You likely come home after a tiring day only to face a kitchen that requires hours of your energy.…
Spread the loveStaring at the same bland chicken breast every Sunday can make anyone lose their appetite. It is easy to fall into a rut when you prioritize health over flavor. You want meals that…