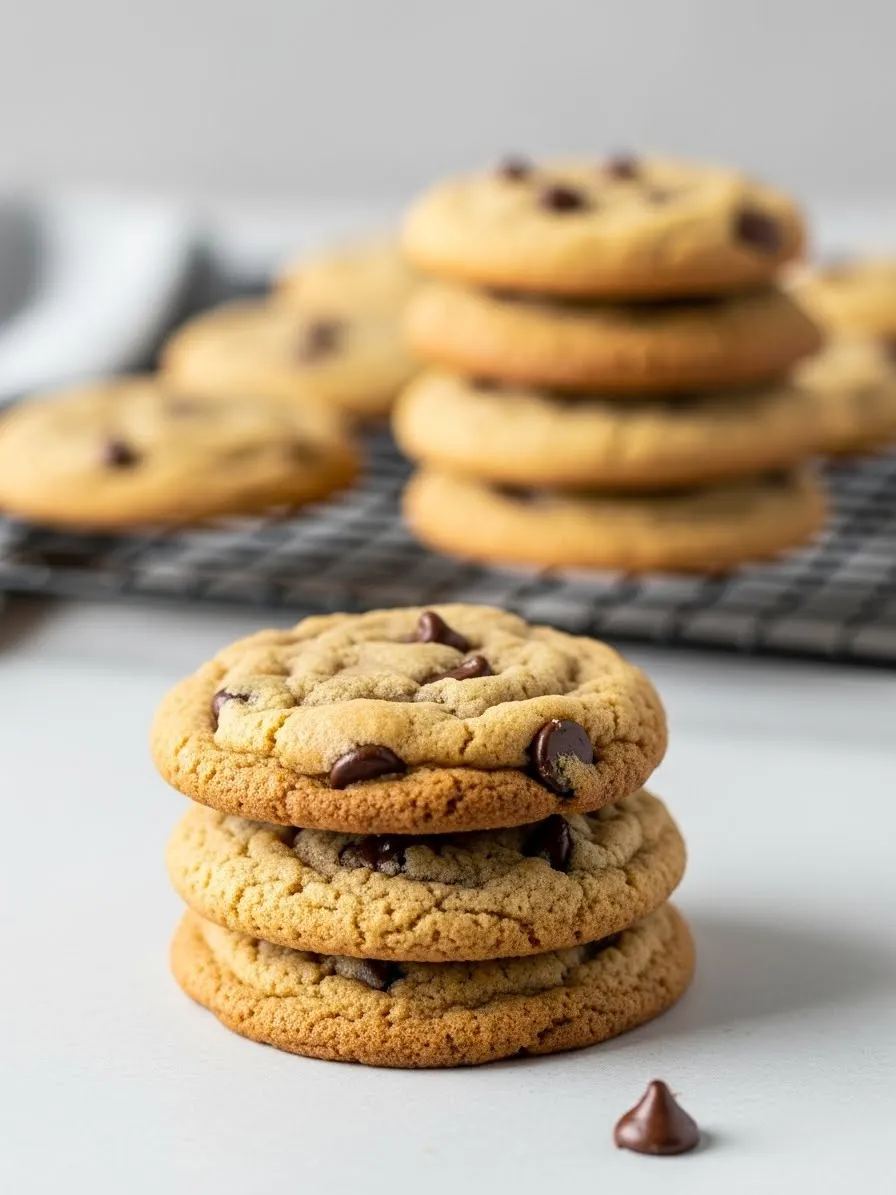
The holidays bring a special kind of joy—the lights, the music, and, of course, the parade of seasonal sweets. Baking can be wonderfully therapeutic, yet sometimes the thought of flour dust, sticky counters, and a fully booked oven feels overwhelming.
No-Bake Christmas Desserts
This year, you can ditch the cleanup headache and still be the star of the dessert table. We have gathered a collection of 45 easy, mouthwatering Christmas treats that require absolutely no baking. These recipes rely on clever techniques, chilling, and assembly to deliver decadent results.
Whether you need a quick gift, a stunning centerpiece, or simply a mess-free way to satisfy a sweet craving, this list has you covered. Get ready to embrace the holiday spirit without breaking a sweat!
These rich, layered squares are a fantastic treat for the holidays, bringing together three luscious layers of flavor. They start with a dark, fudgy base that requires absolutely no time in the oven. This makes cleanup effortless and keeps your kitchen cool for other holiday preparations.
The middle section offers a creamy, cool combination of chocolate and mint. The final touch is a smooth white layer, generously drizzled with more chocolate and sprinkled with crushed candy canes, giving every bite a satisfying crunch and festive flair. Everyone at your holiday gathering will surely ask for the recipe!
Required Ingredients
For the Crust and Base
2 cups chocolate wafer crumbs (or crushed Oreos)
$1/2$ cup melted unsalted butter
$1/4$ cup powdered sugar
1 teaspoon vanilla extract
For the Chocolate Layer
8 ounces cream cheese, softened
$1/2$ cup semi-sweet chocolate chips, melted
$1/2$ cup powdered sugar
$1/4$ cup heavy cream
For the Peppermint Layer
8 ounces cream cheese, softened
$1/2$ cup powdered sugar
$1/2$ teaspoon peppermint extract
A few drops of red food coloring (optional, for color variation)
$1/4$ cup crushed candy canes, plus extra for topping
For the Topping and Garnish
$1/4$ cup white chocolate chips, melted
1 tablespoon shortening (optional, for smoother drizzle)
Extra crushed candy canes
Equipment List
9×9 inch square baking pan
Parchment paper
Large mixing bowls (2)
Electric mixer or stand mixer
Spatula
Small saucepan or microwave safe bowl (for melting butter/chocolate)
Ziploc bag and rolling pin (for crushing candy canes)
DIY Instructions
Step 1: Preparing the Crust
Line your 9×9 inch baking pan completely with parchment paper, leaving a slight overhang on the sides. This will help you lift the squares out easily later.
In a large mixing bowl, combine the chocolate wafer crumbs, melted butter, powdered sugar, and vanilla extract. Stir these ingredients together thoroughly until the mixture is evenly moist and resembles wet sand.
Press the mixture firmly and evenly into the bottom of the prepared pan using the back of a measuring cup or a flat spatula. Make sure the crust is compact.
Place the crust in the freezer while you prepare the fillings. Chill for at least 15 minutes.
Step 2: Making the Chocolate Layer
Melt the semi-sweet chocolate chips using a double boiler or in the microwave in short, 30-second intervals until smooth. Set aside to cool slightly.
In a separate large bowl, beat the softened cream cheese until it is smooth and lump-free.
Add the powdered sugar and beat until the mixture is light and fluffy.
Gently mix in the slightly cooled melted chocolate and the heavy cream until the color is uniform and the filling is smooth.
Carefully spread this chocolate mixture over the chilled crust in an even layer.
Return the pan to the freezer for another 15 minutes to set this layer.
Step 3: Creating the Peppermint Layer
In the cleaned mixing bowl, beat the second batch of softened cream cheese until smooth.
Add the powdered sugar and peppermint extract. Beat until fully incorporated. If using red food coloring, add a couple of drops now and mix.
Fold in the $1/4$ cup of crushed candy canes using a spatula. Do this gently so the mixture does not become soupy.
Remove the pan from the freezer. Spread this peppermint filling evenly over the top of the set chocolate layer.
Place the pan back into the freezer to chill and set for at least 4 hours, or preferably overnight, for the best results when cutting.
Step 4: Decorating and Serving
Once the dessert is completely firm, carefully lift it out of the pan using the parchment paper overhang.
Melt the white chocolate chips (and shortening, if using) until smooth. Transfer the melted chocolate to a piping bag or a Ziploc bag with a tiny corner snipped off.
Drizzle the melted white chocolate across the top of the slab in a decorative, zig-zag pattern.
Immediately sprinkle the top liberally with extra crushed candy canes before the chocolate hardens.
Use a sharp knife that has been run under hot water and wiped dry to cut the dessert into 16 even squares. Wipe the knife after each cut for the cleanest slices.
Store any leftovers in an airtight container in the refrigerator.
2. Spiced Gingerbread Mousse Shooters
No-Bake Christmas Desserts
These stunning individual desserts capture the warmth of the holidays in a cool, creamy cup. A rich, crumbly base of crushed gingerbread cookies forms the foundation for this delicious treat. It gives a satisfying, spicy crunch with every spoonful.
The main event is a light, airy mousse that beautifully balances the robust spice of ginger and molasses. Serving these delightful cups takes the stress out of slicing a large dessert. A tiny cookie crumb sprinkle and a cute star garnish make these small glasses look incredibly elegant and festive.
They offer a simplified approach to holiday entertaining. You can prepare these charming shooters entirely ahead of time, freeing you up to enjoy your guests when the celebration begins.
Required Ingredients
For the Gingerbread Base
1 cup crushed gingerbread cookies (or gingersnap cookies)
$1/4$ cup unsalted butter, melted
For the Spiced Mousse
8 ounces cream cheese, softened
$1/2$ cup brown sugar, packed
1 teaspoon vanilla extract
1 teaspoon ground ginger
$1/2$ teaspoon ground cinnamon
$1/4$ teaspoon ground cloves
1 cup heavy cream, chilled
For Garnish
Extra crushed gingerbread cookies
Small, star-shaped fruit pieces (like star fruit or carved pineapple) or star-shaped cookies
Equipment List
6 to 8 small serving glasses (shot glasses, small tumblers, or dessert cups)
Medium mixing bowl
Small microwave safe bowl (for melting butter)
Electric mixer or stand mixer with whisk attachment
Rubber spatula
Piping bag with a large star tip (optional, for decorative swirl)
DIY Instructions
Step 1: Making the Gingerbread Crust
In a small bowl, combine the crushed gingerbread cookies and the melted butter. Mix well until the crumbs are evenly coated and moist.
Spoon about 1 to 2 tablespoons of this crumb mixture into the bottom of each of your 6 to 8 serving glasses.
Press the crumbs down gently with the back of a spoon to create a solid, even base.
Place the glasses in the refrigerator to chill while you prepare the mousse filling.
Step 2: Preparing the Cream Cheese Base
In a medium mixing bowl, beat the softened cream cheese using an electric mixer until it is smooth and completely lump-free.
Add the packed brown sugar, vanilla extract, ground ginger, cinnamon, and cloves to the cream cheese mixture. Beat until all the spices and sugar are fully incorporated and the mixture is light in color.
Step 3: Whipping the Heavy Cream
In a separate, chilled bowl, pour in the cold heavy cream.
Whip the cream using the electric mixer on medium-high speed until firm peaks form. This means when you lift the whisk, the peaks of cream stand straight up. Do not overmix, or it will turn buttery.
Step 4: Combining the Mousse
Gently fold about one-third of the whipped cream into the cream cheese mixture using a rubber spatula. This lightens the cream cheese base.
Carefully fold in the remaining whipped cream, working gently to keep as much air in the mousse as possible. Stop folding as soon as the mixture is uniform and streak-free.
Step 5: Assembly and Chill
Spoon the mousse mixture into a large piping bag fitted with a star tip for a beautiful swirl, or simply use a spoon to fill the glasses.
Pipe or spoon the mousse evenly into the prepared glasses, filling them up to the top.
Place the finished shooters in the refrigerator. Chill for at least 2 hours to allow the mousse to firm up nicely.
Step 6: Garnish and Serve
Before serving, sprinkle a few extra gingerbread crumbs over the top of the mousse in each glass.
Place one small star-shaped garnish on top of the crumbs in the center of the mousse.
Serve immediately.
3. White Chocolate Cranberry Orange Truffles
No-Bake Christmas Desserts
These gorgeous, festive truffles are little jewels of flavor, presenting a lovely contrast of sweet and tart. They start with a creamy white chocolate base combined with crushed vanilla wafers, creating a delightful, dense texture.
The center of each truffle features chewy dried cranberries, which burst with a bright, fruity taste. A generous infusion of fresh orange zest throughout the mixture provides a wonderful citrus aroma and a true holiday feeling.
A selection of decorative coatings makes these treats beautiful additions to any holiday platter. Some are rolled in shredded coconut for a snowy look, others are drizzled with dark chocolate, and many are simply topped with more vibrant orange zest. They are simple to prepare and require only chilling, keeping the oven completely off.
Required Ingredients
For the Truffle Base
8 ounces white chocolate, finely chopped or chips
$1/2$ cup heavy cream
$1/2$ cup dried cranberries, chopped (optional, for uniform texture)
Zest of 1 large orange (about 1 tablespoon)
Pinch of salt
For Coating and Garnish
Shredded sweetened coconut
$1/4$ cup dark chocolate chips, melted (for drizzling)
Extra orange zest
Equipment List
Small saucepan (for heating cream)
Heatproof mixing bowl
Rubber spatula
Small cookie scoop or melon baller
Two baking sheets
Parchment or wax paper
Small bowls for rolling coatings
Fork or piping bag for drizzling
DIY Instructions
Step 1: Preparing the Truffle Mixture
Place the chopped white chocolate in a heatproof mixing bowl.
Pour the heavy cream into the saucepan and heat it over medium heat just until it begins to simmer around the edges. Do not let it boil vigorously.
Pour the hot cream immediately over the white chocolate. Let the mixture sit undisturbed for 5 minutes to allow the chocolate to melt completely.
Gently stir the mixture with a rubber spatula until it is completely smooth and creamy. This mixture is called ganache.
Stir in the chopped dried cranberries, orange zest, and the pinch of salt.
Cover the bowl and place the mixture in the refrigerator. Chill for at least 3 to 4 hours, or until the mixture is firm enough to roll.
Step 2: Rolling the Truffles
Line your baking sheets with parchment or wax paper.
Use a small cookie scoop or a melon baller to portion out the chilled mixture.
Quickly roll each portion into a smooth, compact ball between your palms. Work fast so the mixture does not soften too much.
Place the rolled truffles onto the prepared baking sheets.
Step 3: Coating the Truffles
Divide the truffles based on how you want to coat them.
For the Coconut Coating: Place the shredded coconut in a shallow bowl. Roll the truffles through the coconut, gently pressing the flakes to adhere all over the surface.
For the Chocolate Drizzle: Melt the dark chocolate chips and transfer the melted chocolate to a piping bag with a tiny corner snipped off, or simply drizzle it off a fork. Drizzle lines over the truffles and immediately sprinkle with a tiny pinch of sea salt, if desired.
For the Zest Topping: Simply place the truffle in a mini cupcake liner and sprinkle the top with fresh orange zest.
Step 4: Final Chill and Serve
Return all the finished truffles to the refrigerator for a final chill of at least 30 minutes to set the coatings.
Serve chilled. They can be stored in an airtight container in the refrigerator for up to one week.
4. Salted Caramel Pretzel Bark
No-Bake Christmas Desserts
This treat is a wonderful collision of textures and tastes, proving that sometimes the simplest recipes deliver the biggest impact. The base is built from crunchy, salty pretzels, giving the dessert a fun, irregular shape.
A thick, homemade caramel layer blankets the pretzels, adding a chewy, buttery sweetness that is absolutely addicting. This delightful middle section provides a great depth of flavor that complements the saltiness.
The entire creation is topped with a generous layer of smooth, rich dark chocolate, creating a beautiful contrast in color. A final dusting of flaky sea salt elevates the entire dessert, ensuring a salty, sweet, crunchy bite every single time. This bark makes a delightful last-minute holiday gift.
Required Ingredients
For the Pretzel Caramel Base
3 cups mini pretzel twists or snaps
1 cup (2 sticks) unsalted butter
1 cup packed light brown sugar
$1/2$ teaspoon vanilla extract
For the Topping
1 cup semi-sweet or dark chocolate chips
1 teaspoon vegetable shortening or coconut oil (optional, for melting smooth)
Flaky sea salt (such as Maldon) for finishing
Equipment List
13×9 inch baking sheet
Parchment paper or non-stick silicone mat
Medium saucepan
Wooden spoon or rubber spatula
Spreading spatula
DIY Instructions
Step 1: Preparing the Pretzel Layer
Line the 13×9 inch baking sheet completely with parchment paper or a silicone mat. This step is extremely important for easy removal.
Arrange the pretzels in a single, relatively tight layer across the bottom of the prepared sheet. Do your best to cover as much of the surface as possible. Set this aside.
Step 2: Making the Caramel
In the medium saucepan, melt the butter over medium heat.
Once the butter is melted, stir in the brown sugar.
Bring the mixture to a rolling boil, stirring constantly.
Once boiling, continue to boil, stirring occasionally, for 3 to 5 minutes. The mixture should thicken slightly and turn a darker caramel color. Do not scrape down the sides of the pan during this stage.
Remove the pan from the heat and immediately stir in the vanilla extract.
Step 3: Pouring and Chilling
Carefully and quickly pour the hot caramel mixture evenly over the arranged pretzels. Use the back of a spoon or spatula to encourage the caramel to spread, ensuring all the pretzels are coated.
Let the pan sit on the counter for about 10 minutes to cool slightly.
Step 4: Adding the Chocolate and Salt
In a microwave-safe bowl, combine the chocolate chips and shortening (if using). Heat in 30-second intervals, stirring after each, until the chocolate is completely smooth and melted.
Pour the melted chocolate over the cooled caramel layer. Use a spatula to gently spread the chocolate into an even layer, making sure the entire surface is covered.
Immediately sprinkle the top generously with the flaky sea salt.
Place the baking sheet into the refrigerator. Chill for at least 2 hours, or until the chocolate and caramel are fully hardened and set.
Step 5: Breaking and Serving
Once completely set, lift the bark from the pan using the parchment paper.
Place the slab on a cutting board. Use a sharp knife to cut it into large triangles or simply break the bark into irregular pieces with your hands.
Store the bark in an airtight container at room temperature or in the refrigerator.
5. Cinnamon Snickerdoodle Snowballs
No-Bake Christmas Desserts
These creamy little snowballs are a fantastic addition to any holiday cookie platter, blending rich, buttery flavor with the comforting taste of cinnamon. They feature a soft, spiced dough base made from crushed vanilla or snickerdoodle cookies, giving them a lovely, cohesive texture.
The mixture is rolled into smooth, bite-sized balls and finished with a few delightful coatings. Some are dusted heavily in powdered sugar, giving them that wonderful snowy appearance. Others boast a lovely swirl of white chocolate drizzle and a sprinkle of cinnamon powder, adding a subtle warmth.
Making these truffles involves minimal effort but yields a dessert that tastes complex and incredibly festive. The richness of the cookie base combined with the spice makes these a quick favorite at any gathering.
$1/4$ cup white chocolate chips, melted (for drizzling)
Extra ground cinnamon
Equipment List
Food processor (for crushing cookies) or Ziploc bag and rolling pin
Medium mixing bowl
Electric mixer
Small cookie scoop or melon baller
Two baking sheets
Parchment or wax paper
Small bowls for rolling
DIY Instructions
Step 1: Preparing the Base
In a food processor, process the vanilla wafers or cookies until they form fine crumbs. If you do not have a food processor, place the cookies in a sealed Ziploc bag and crush them thoroughly with a rolling pin.
In a large mixing bowl, beat the softened cream cheese until it is smooth and completely lump-free.
Add the powdered sugar, vanilla extract, and cinnamon to the cream cheese. Beat until all the spices and sugar are fully incorporated and the mixture is light in color.
Gradually add the cookie crumbs, mixing on low speed or using a rubber spatula until the crumbs are fully incorporated and a stiff, dough-like mixture forms.
Step 2: Rolling and Chilling
Line two baking sheets with parchment or wax paper.
Use a small cookie scoop to portion out the mixture.
Roll each portion quickly and firmly between your palms to form smooth, compact balls.
Place the rolled truffles onto the prepared baking sheets.
Place the baking sheets in the freezer for at least 30 minutes, or until the balls are firm enough to handle for coating.
Step 3: Coating the Snowballs
Place the powdered sugar for rolling in a shallow bowl.
Remove the truffles from the freezer. Roll half of the truffles in the powdered sugar until they are completely coated, resembling small snowballs. Place them back on the baking sheet.
Melt the white chocolate chips until smooth. Transfer the melted chocolate to a piping bag with a tiny corner snipped off, or use a fork.
For the remaining truffles, place them in mini cupcake liners. Drizzle the melted white chocolate over the tops in a decorative zig-zag pattern. Immediately sprinkle the melted chocolate with a small dusting of ground cinnamon.
Step 4: Final Set and Serve
Return the finished truffles to the refrigerator for about 15 minutes to allow the white chocolate to set.
Serve chilled. These truffles are best stored in an airtight container in the refrigerator.
6. Holiday S’mores Skewers
No-Bake Christmas Desserts
These delightful stacked treats take the classic campfire dessert and transform it into a chic, mess-free holiday appetizer. They are built on a base of rich, fudgy chocolate squares, which provide a deep, decadent flavor.
Layered on top are crisp graham cracker pieces and soft, chewy marshmallows, offering a fun play on textures. A colorful drizzle of pink or red candy melt on the top marshmallow and the dark chocolate layer makes these look extra festive and bright.
These s’mores skewers are simple to assemble and require no baking, torching, or open flames. They are a wonderful, kid-friendly option that adds height and whimsy to your dessert table, making them much easier to eat than traditional gooey s’mores.
Required Ingredients
For the Layers
1 box graham crackers, broken into quarters
1 bag large marshmallows
1 box store-bought no-bake fudge or solid chocolate squares (or you can use a no-bake chocolate base recipe)
4 ounces melting chocolate (brown or dark)
For Garnish
4 ounces pink or red candy melts
Wooden or bamboo skewers (at least 6 inches long)
Equipment List
Baking sheet
Parchment paper
Small bowls for melting chocolate/candy melts
Fork or piping bag (for drizzling)
DIY Instructions
Step 1: Preparing the Base and Melt
Line a baking sheet with parchment paper.
Melt the brown or dark melting chocolate. You can do this in the microwave in 30-second intervals until it is smooth.
Place a chocolate fudge square onto the parchment paper. Dip one side of a graham cracker quarter lightly into the melted chocolate and place it directly on top of the fudge square. Allow this base assembly to set for 5 minutes.
Melt the pink or red candy melts in a separate small bowl until smooth.
Step 2: Stacking the Skewers
Take a wooden skewer. Gently push the skewer through the center of a marshmallow, leaving about half an inch of skewer poking out the top.
Now, start building the stack on the pre-set base: Pierce the skewer through the graham cracker quarter, then the fudge base, ensuring the skewer holds everything together.
Carefully add a second small marshmallow or a half marshmallow onto the skewer, resting it on the fudge.
Add a second graham cracker quarter.
Finally, top the stack with a thin square of milk chocolate or a small chocolate bar piece.
Step 3: Drizzling and Setting
Take the finished skewer stacks. Use a fork dipped in the pink or red candy melts to drizzle the mixture artfully over the chocolate square and the marshmallow at the very top.
Immediately return the decorated skewers to the parchment-lined baking sheet.
Place the skewers in the refrigerator. Chill for at least 15 minutes to allow the chocolate and candy melt drizzle to fully harden.
Step 4: Serving
Serve these chilled, standing upright for a stunning presentation. They are best enjoyed within a few hours of assembly.
7. Holiday Pomegranate Pistachio Icebox Cake
No-Bake Christmas Desserts
This breathtaking icebox cake provides a stunning centerpiece for any holiday meal, layering cool creaminess with vibrant festive colors. The structure uses thin vanilla wafers, which soften as the cake chills, mimicking the texture of a truly moist layer cake without any baking.
The filling is a rich, tangy mix, often featuring cream cheese or mascarpone, which contrasts beautifully with the tartness of the pomegranate seeds. Inside, you will find layers of bright red pomegranate jam or seeds and crunchy, salty pistachios, creating a wonderful depth of texture.
The crowning glory is a thick coating of creamy frosting, completely covered with a colorful mosaic of whole pistachios and brilliant pomegranate arils. This simple assembly process results in an elegant dessert that only improves as it rests in the refrigerator.
Required Ingredients
For the Cake Layers
1 box vanilla wafer cookies (approximately 7 ounces)
1 jar (about 10 ounces) pomegranate jam or preserves
$1/2$ cup pistachios, shelled and roughly chopped
For the Cream Filling
8 ounces cream cheese, softened
1 cup powdered sugar, sifted
1 teaspoon vanilla extract
2 cups heavy cream, chilled
For Garnish
$1/2$ cup pomegranate arils (seeds)
$1/2$ cup pistachios, shelled and whole or roughly chopped
Equipment List
Loaf pan (about 9×5 inches)
Plastic wrap
Large mixing bowl
Electric mixer or stand mixer with whisk attachment
Rubber spatula
DIY Instructions
Step 1: Preparing the Cream Filling
In a large mixing bowl, beat the softened cream cheese, sifted powdered sugar, and vanilla extract until the mixture is completely smooth and fluffy.
In a separate, chilled bowl, whip the heavy cream until stiff peaks form.
Gently fold the whipped cream into the cream cheese mixture using a rubber spatula, working carefully to keep the mixture light and airy.
Step 2: Assembling the Icebox Cake
Line the loaf pan with plastic wrap, leaving plenty of overhang on all sides. This helps immensely when lifting the finished cake out.
Spread a thin layer of the cream filling on the bottom of the plastic-wrapped loaf pan.
Create the first cookie layer: Place the vanilla wafers in a single, tight layer over the cream filling. You may need to break some cookies to fill gaps completely.
Spread a layer of the pomegranate jam evenly over the cookies.
Sprinkle about one-third of the chopped pistachios over the jam layer.
Spread a thick layer of the cream filling over the pistachios.
Repeat the layering process: cookies, jam, pistachios, cream, until the pan is full, ending with a layer of the cream filling.
Wrap the entire cake tightly using the plastic wrap overhang.
Step 3: Chilling and Setting
Place the loaf pan in the refrigerator. Chill the cake for a minimum of 6 hours, or preferably overnight, for the best results when cutting.
Step 4: Decorating and Serving
When ready to serve, unwrap the top of the plastic wrap. Invert the pan onto a serving platter and carefully lift the pan off. Peel away the plastic wrap.
If desired, lightly frost the sides of the cake with any leftover cream filling or use the remaining portion of the top layer.
Cover the top generously with the remaining whole or chopped pistachios and the bright pomegranate arils.
Use a sharp knife to slice and serve the beautiful chilled dessert.
8. Crunchy Butterscotch Haystacks
No-Bake Christmas Desserts
These appealing treats are wonderfully easy to prepare, relying on a simple combination of chewy noodles and rich, melted coating. They deliver a satisfying crunch that makes them feel hearty and substantial.
The base is made from crunchy chow mein noodles, which provide an airy, tangled structure for the dessert. These noodles are fully coated in a creamy, sweet butterscotch and peanut butter mixture that hardens perfectly when chilled.
This simple recipe requires only a few minutes of melting and stirring, making it one of the quickest no-bake options available. A light dusting of powdered sugar or mini chocolate chips adds a delightful finish to these golden, rustic cookies. They are a beloved classic for their simple preparation and delicious, nostalgic flavor.
Required Ingredients
For the Haystacks
6 ounces butterscotch chips
$1/2$ cup smooth peanut butter
1 tablespoon unsalted butter
5 cups chow mein noodles
For Garnish
Powdered sugar for dusting
Mini chocolate chips (optional)
Equipment List
Large saucepan or microwave safe bowl
Wooden spoon or rubber spatula
Two baking sheets
Parchment or wax paper
DIY Instructions
Step 1: Melting the Coating
Line two baking sheets with parchment or wax paper.
In a large saucepan, combine the butterscotch chips, peanut butter, and the tablespoon of butter.
Melt the ingredients together over low heat, stirring constantly until the mixture is entirely smooth and lump-free. Alternatively, you can melt this mixture in a large, microwave-safe bowl, heating in 30-second intervals until smooth.
Step 2: Combining the Haystacks
Remove the melted mixture from the heat.
Quickly pour the chow mein noodles into the melted coating mixture.
Gently fold the noodles into the butterscotch and peanut butter using a wooden spoon or spatula. Work carefully but quickly until all the noodles are evenly coated.
Step 3: Shaping and Chilling
Using two forks or a small cookie scoop, drop spoonfuls of the coated noodles onto the prepared baking sheets, forming small, rustic mounds that resemble miniature haystacks.
If you want a more compact shape, you can press the mixture lightly into a small measuring cup and invert it onto the baking sheet.
Place the baking sheets into the refrigerator. Chill for at least 1 hour, or until the haystacks are completely firm and set.
Step 4: Finishing and Serving
Once fully set, remove the haystacks from the refrigerator.
Use a fine mesh sieve to dust the tops lightly with powdered sugar, or press a few mini chocolate chips into the tops for garnish.
Serve chilled or at room temperature.
9. Mint Chocolate Chip Delight Bars
No-Bake Christmas Desserts
These layered squares are visually striking and deliver a refreshing minty twist, making them a festive addition to any dessert table. They feature a dark, fudgy cookie crust that offers a robust chocolate base without ever touching the oven.
Above the base are beautiful, contrasting layers of cream cheese filling. The alternating green and white layers, studded with generous amounts of mini chocolate chips, look incredibly appealing. The green layer is brightened with a hint of cooling mint extract.
The entire loaf is finished with a crown of fluffy whipped cream and extra cookies and chocolate chips for decoration. The slices are tall and elegant, providing a complex flavor profile that appeals to anyone who loves the combination of chocolate and mint.
Required Ingredients
For the Crust
2 cups crushed chocolate sandwich cookies (like Oreos)
$1/2$ cup melted unsalted butter
For the Mint Fillings
16 ounces cream cheese, softened
2 cups powdered sugar, sifted
1 teaspoon vanilla extract
1 teaspoon peppermint extract (divided)
Green food coloring
1 cup mini chocolate chips (divided)
1 cup heavy cream, chilled (for stability)
For Garnish
Whipped cream
Whole chocolate sandwich cookies
Extra mini chocolate chips
Equipment List
9×5 inch loaf pan
Plastic wrap
Large mixing bowls (2)
Electric mixer or stand mixer
Rubber spatula
Spreading spatula
DIY Instructions
Step 1: Making and Chilling the Crust
Line the loaf pan with plastic wrap, leaving a generous overhang.
In a bowl, combine the chocolate wafer crumbs and the melted butter. Mix until evenly moistened.
Press the crumb mixture firmly and evenly into the bottom of the prepared loaf pan.
Place the crust in the freezer to chill while you prepare the filling, about 15 minutes.
Step 2: Preparing the Cream Cheese Base
In a large mixing bowl, beat the softened cream cheese until it is light and smooth.
Add the sifted powdered sugar and vanilla extract and beat until fully incorporated and fluffy.
Divide the cream cheese mixture into two equal portions in separate bowls.
Step 3: Creating the Mint Layers
Mint Layer: To the first bowl, add $1/2$ teaspoon of the peppermint extract and a few drops of green food coloring until you reach a festive mint color. Gently fold in half ($1/2$ cup) of the mini chocolate chips.
White Layer: To the second bowl, add the remaining $1/2$ teaspoon of peppermint extract (or skip if you prefer a pure vanilla/cream flavor) and fold in the remaining $1/2$ cup of mini chocolate chips.
Whip the heavy cream until soft peaks form. Divide the whipped cream in half and gently fold one portion into the green mix and the other into the white mix.
Step 4: Assembly and Final Chill
Remove the crust from the freezer. Spread the green mint layer evenly over the crust.
Return the pan to the freezer for 10 minutes to firm up slightly.
Spread the white layer evenly over the green layer.
Cover the pan tightly with the remaining plastic wrap overhang. Place the loaf pan back into the refrigerator to chill and set for at least 6 hours, or overnight.
Step 5: Decorating and Serving
Lift the chilled dessert out of the pan using the plastic wrap overhang and peel off the plastic.
Slice the loaf into thick, uniform bars using a sharp, hot knife (run under hot water and wiped dry).
Top each bar slice with a dollop of whipped cream, a mini chocolate chip sprinkle, and a garnish of half a chocolate sandwich cookie.
Keep stored in the refrigerator.
10. Snowdrift Coconut Cream Truffles
No-Bake Christmas Desserts
These beautiful white truffles are simplicity personified, resembling delicate snowballs ready for a holiday landscape. The interior is made from a rich, creamy mixture of crushed cookies and a sweetened binder, resulting in a dense, velvety bite.
The truffles are rolled and then heavily dusted with a generous amount of powdered sugar, creating that inviting, snowdrift appearance. Many of these treats are given an extra layer of decadence by dipping their base into melted white chocolate.
They are incredibly easy to make, relying only on a brief chilling time to set their shape. The pure white color and soft, melt-in-your-mouth texture make them a popular choice for a refined yet simple holiday confection.
Finely crush the cookies in a food processor or by placing them in a Ziploc bag and crushing them with a rolling pin. The finer the crumbs, the smoother the truffles will be.
In a large mixing bowl, beat the softened cream cheese until it is smooth.
Add the sifted powdered sugar and vanilla extract to the cream cheese mixture. Beat until fully incorporated and the mixture is light.
Gradually add the cookie crumbs, mixing on low speed or using a rubber spatula until a stiff, cohesive dough forms.
Step 2: Rolling and Chilling
Line two baking sheets with parchment or wax paper.
Use a small cookie scoop or an ice cream scoop to portion out the mixture evenly.
Roll each portion quickly and firmly between your palms to form smooth, compact balls.
Place the rolled truffles onto the prepared baking sheets.
Place the baking sheets in the freezer for at least 30 minutes, or until the balls are firm enough to handle for coating.
Step 3: Coating the Truffles
Place the powdered sugar for rolling in a shallow bowl.
Remove the truffles from the freezer. Roll each truffle in the powdered sugar until it is completely coated, resembling a snowball. Place them back on the baking sheet.
Melt the white chocolate chips until smooth.
For an extra touch, dip the very bottom edge of each powdered sugar-coated truffle into the melted white chocolate. This creates a small, solid base.
Place the truffles back on the parchment paper and allow the dipped white chocolate base to set completely at room temperature or in the refrigerator for about 10 minutes.
Step 4: Serving
Stack the finished, chilled truffles on a mirror or platter for a striking presentation.
Store the truffles in an airtight container in the refrigerator for up to one week.
11. Ruby Raspberry Jello Terrine
No-Bake Christmas Desserts
This dessert is a showstopper, offering layers of vibrant color and a fresh, light texture that cleanses the palate after a heavy holiday meal. Its elegant presentation comes from multiple bands of creamy, sweet filling alternating with clear, jewel-toned raspberry gelatin.
The top layer is fully loaded with fresh raspberries suspended in clear gelatin, creating a gorgeous mosaic effect. Throughout the middle, you find both whole raspberries and softer cream layers, which introduce a welcome richness to the bright fruit flavors.
Served chilled, this terrine holds its shape beautifully when sliced, making it a wonderful way to impress guests without ever turning on the oven. It is a stunning, naturally festive dessert that everyone will enjoy.
Required Ingredients
For the Layers
3 small boxes (about 3 ounces each) raspberry gelatin
In a large bowl, whisk together the contents of two boxes of raspberry gelatin with 2 cups of boiling water until the powder is fully dissolved.
Stir in 2 cups of cold water. Divide this mixture equally into two separate bowls.
In the third bowl, dissolve the contents of the final box of raspberry gelatin with 1 cup of boiling water. Stir in 1 cup of cold water. Set this last bowl aside to cool to room temperature.
Step 2: Creating the Cream Layer
To one of the first bowls of gelatin mixture (from Step 1), slowly whisk in the entire can of sweetened condensed milk until the mixture is uniform and opaque pink. This will be your creamy layer.
Step 3: Layering the Terrine
Pour a thin layer of the cream mixture (about $1/2$ inch thick) into the bottom of the loaf pan. Place the pan in the refrigerator for 20 minutes, or until just firm but still sticky.
Once set, pour a layer of the clear gelatin (from the second bowl in Step 1) over the cream layer. Carefully arrange a few raspberries over this clear layer. Chill for 20 minutes until set.
Continue alternating layers, starting with cream, then clear gelatin with raspberries, chilling briefly between each layer to prevent mixing. Aim for 5 to 6 distinct layers.
Step 4: Adding the Final Top Layer
The final layer should be the clear gelatin (from the third bowl in Step 1). Pour this mixture over the last set layer.
Arrange the remaining fresh raspberries beautifully across the top, ensuring they are mostly submerged in the gelatin.
Refrigerate the completed terrine for at least 6 hours, or preferably overnight, until it is completely firm.
Step 5: Serving
To remove the terrine from the pan, fill a sink or large bowl with warm water. Dip the bottom of the pan into the warm water for about 10 seconds (no more).
Invert the pan onto a serving platter. The terrine should release easily.
Slice the terrine using a sharp knife that has been dipped in hot water and wiped dry. Serve immediately.
12. Walnut Spice Cookie Loaf
No-Bake Christmas Desserts
This deeply flavorful loaf is a rustic, homemade-style treat that relies on the natural sweetness of dates and the crunch of walnuts for its satisfying texture. It is dense and moist, offering a robust, nutty flavor profile reminiscent of classic holiday fruitcakes.
The entire loaf is held together with a simple syrup or a condensed milk mixture, which binds the finely ground walnuts and crumbs into a cohesive structure. When sliced, the cross-section reveals an attractive pattern of whole and broken walnuts suspended throughout the dough.
A dusting of powdered sugar and a few whole walnuts placed on top give this dessert a simple, elegant finish. It requires only a food processor and a loaf pan, making it an incredibly easy, hands-off dessert that tastes far more complicated than it is to prepare.
Required Ingredients
For the Loaf
2 cups walnut halves, divided
1 cup vanilla wafer crumbs (or shortbread cookies)
1 cup pitted, chopped dates
$1/2$ cup sweetened condensed milk
1 teaspoon vanilla extract
$1/2$ teaspoon ground cinnamon
For Garnish
Powdered sugar for dusting
Whole walnut halves
Equipment List
9×5 inch loaf pan
Plastic wrap
Food processor
Mixing bowl
Rubber spatula
DIY Instructions
Step 1: Preparing the Nut and Crumb Base
Line the loaf pan with plastic wrap, leaving plenty of overhang for lifting.
In a food processor, pulse 1.5 cups of the walnuts until they are finely ground, resembling a coarse meal.
Add the vanilla wafer crumbs and pulse a few times to combine.
Add the chopped dates and pulse until the dates are finely chopped and incorporated into the mixture.
Step 2: Mixing the Dough
Pour the walnut and crumb mixture into a large mixing bowl.
Add the sweetened condensed milk, vanilla extract, and ground cinnamon.
Stir vigorously with a rubber spatula until all ingredients are thoroughly combined and a very stiff, sticky dough forms.
If the dough feels too dry, add a small splash more condensed milk, $1$ tablespoon at a time. The dough must be able to hold its shape when pressed.
Step 3: Shaping and Chilling
Spoon the dough mixture into the prepared loaf pan.
Press the mixture down very firmly using the back of a spatula or your hands to ensure it is compact and smooth across the top.
Fold the plastic wrap overhang over the top of the loaf to seal it tightly.
Place the pan in the refrigerator. Chill for at least 8 hours, or preferably overnight, to allow the dough to set completely.
Step 4: Decorating and Serving
When ready to serve, unwrap the top of the plastic wrap. Invert the pan onto a serving board and carefully lift the pan off. Peel away the plastic wrap.
Dust the entire top surface liberally with powdered sugar using a fine mesh sieve.
Arrange the remaining whole walnut halves neatly down the center of the loaf.
Slice into thin pieces using a sharp knife. Store any leftovers wrapped tightly in the refrigerator.
13. Spiced Apple Ginger Trifle Shooters
No-Bake Christmas Desserts
These beautiful layered cups bring the comforting flavor of apple pie into an easy, sophisticated, single-serving dessert. The base is a crumbly layer of crushed ginger or snickerdoodle cookies, adding a warm, spicy foundation.
Alternating layers of creamy vanilla mousse or whipped topping provide a lovely contrast to the chunky, spiced apple filling. The soft, cooked apples carry hints of cinnamon and nutmeg, giving them that classic holiday taste.
Each small glass is topped with extra cookie crumbs and a garnish of the apple mixture. These elegant shooters are light, flavourful, and simple to assemble, offering guests a delightful portion-controlled dessert that is easy to enjoy.
Required Ingredients
For the Apple Filling
2 medium apples (such as Granny Smith or Fuji), peeled and diced
In the small saucepan, melt the butter over medium heat.
Add the diced apples, brown sugar, cinnamon, and nutmeg. Stir to coat the apples.
Add the tablespoon of water. Cover the pan and let the apples simmer for 5 to 7 minutes, stirring occasionally, until they are tender but still hold their shape.
Remove from heat and let the apple mixture cool completely to room temperature.
Step 2: Assembling the Shooters
Spoon about 1 tablespoon of the crushed ginger snap cookies into the bottom of each serving glass.
Next, layer about 2 tablespoons of the whipped topping or vanilla mousse over the crumbs.
Follow the cream layer with 1 to 2 tablespoons of the cooled spiced apple mixture, ensuring some apple pieces show through the glass.
Repeat the layering process: cream, then apples, until the glass is nearly full, ending with a layer of the cream topping.
Step 3: Garnish and Chill
Sprinkle a few extra cookie crumbs over the final cream layer of each glass.
Place a small spoonful of the remaining apple mixture on top of the crumbs for garnish.
Place the finished shooters in the refrigerator. Chill for at least 1 hour to allow the flavors to meld and the dessert to firm up.
Serve chilled.
14. Black Forest Chocolate Log
No-Bake Christmas Desserts
This impressive holiday log is a no-bake interpretation of a classic cake, offering a rich chocolate exterior and a creamy, cherry-studded interior. The outer shell is a dense, fudgy mixture of chocolate cookie crumbs, powdered sugar, and melted butter.
Inside, the log features a striking swirl of bright white filling, often containing cream cheese or mascarpone, which contrasts beautifully with the dark chocolate. Sweet cherry halves are embedded throughout the light filling, providing bursts of tart, juicy flavor.
The exterior is dusted with cocoa powder for a matte, velvety finish. A line of maraschino cherries and slivered almonds down the center makes the log look beautifully festive, delivering a truly elegant slice without the fuss of baking.
Required Ingredients
For the Chocolate Log Shell
3 cups chocolate wafer crumbs (or crushed Oreos)
$1/2$ cup powdered sugar
$1/2$ cup unsalted butter, melted
$1/4$ cup milk (or cherry juice from the jar)
2 tablespoons cocoa powder
For the Creamy Filling
8 ounces cream cheese, softened
$1/2$ cup powdered sugar, sifted
1 teaspoon vanilla extract
1 cup maraschino cherries, drained and quartered (reserve 5 whole for garnish)
For Garnish
Extra cocoa powder for dusting
Slivered almonds
Reserved whole maraschino cherries
Equipment List
Large mixing bowls (2)
Electric mixer
Rubber spatula
Parchment paper
Rolling pin
DIY Instructions
Step 1: Making the Chocolate Dough
In a large mixing bowl, combine the chocolate crumbs, $1/2$ cup powdered sugar, and 2 tablespoons of cocoa powder.
Add the melted butter and milk (or cherry juice). Stir until a stiff, dark dough forms. If it feels too dry, add a tiny bit more liquid.
Step 2: Rolling the Dough
Lay a large sheet of parchment paper on your work surface. Lightly dust it with cocoa powder.
Place the chocolate dough onto the paper. Cover it with a second sheet of parchment.
Use a rolling pin to roll the dough out into a large rectangle, about $1/4$ inch thick (approximately 14×10 inches). Set aside.
Step 3: Preparing the Filling
In a separate bowl, beat the softened cream cheese, $1/2$ cup sifted powdered sugar, and vanilla extract until completely smooth and creamy.
Step 4: Assembling the Log
Remove the top sheet of parchment paper from the chocolate dough.
Spread the cream cheese filling evenly over the chocolate rectangle, leaving about an inch clear along the longer edge farthest from you.
Sprinkle the quartered, drained cherries evenly over the cream cheese filling.
Starting with the long edge closest to you, tightly roll the dough up, using the bottom parchment paper to help guide and lift the log. Press gently to seal the edges as you roll.
Step 5: Chilling and Finishing
Wrap the finished log tightly in the parchment paper, twisting the ends like a candy wrapper.
Place the log in the refrigerator. Chill for at least 4 hours, or overnight, until it is completely firm.
Before serving, unwrap the log and dust it generously with cocoa powder.
Garnish the top with whole maraschino cherries and slivered almonds arranged decoratively down the center.
Slice and serve cold.
15. Mini Biscoff Cheesecake Bites
No-Bake Christmas Desserts
These charming, individual dessert bites are presented in small muffin liners, making them simple to serve and enjoy. The base is a rich, fudgy chocolate cookie crust, providing a dark, contrasting color and satisfying crunch.
The star of the show is the creamy, airy topping, which features a fluffy cheesecake or cream cheese mousse infused with a hint of vanilla. The cups are crowned with a sprinkle of crushed Biscoff (or Speculoos) cookies, adding a delightful cinnamon-spice flavor.
The mini size is incredibly appealing for a dessert platter. They are straightforward to assemble using a standard muffin tin, creating a beautiful presentation with minimal effort and no actual baking required.
Required Ingredients
For the Crust
1 $1/2$ cups crushed chocolate wafer cookies (or crushed Oreos)
$1/4$ cup melted unsalted butter
1 tablespoon granulated sugar
For the Topping
8 ounces cream cheese, softened
$1/2$ cup powdered sugar, sifted
1 teaspoon vanilla extract
1 cup heavy cream, chilled
For Garnish
$1/4$ cup crushed Biscoff or ginger snap cookies
Equipment List
Mini muffin pan (24 cups)
Mini cupcake liners
Large mixing bowl
Electric mixer or stand mixer with whisk attachment
Small cookie scoop or melon baller
Piping bag with a star tip (optional)
DIY Instructions
Step 1: Preparing the Mini Crusts
Line the mini muffin pan with paper liners.
In a small bowl, combine the crushed chocolate cookies, melted butter, and sugar. Mix until evenly moistened.
Place about 1 teaspoon of the crumb mixture into the bottom of each lined muffin cup.
Press the crumbs down firmly to create a compact, flat base.
Place the pan in the refrigerator while you prepare the filling.
Step 2: Making the Creamy Topping
In a large mixing bowl, beat the softened cream cheese until it is smooth and lump-free.
Add the sifted powdered sugar and vanilla extract. Beat until fully combined.
In a separate, chilled bowl, whip the heavy cream until stiff peaks form.
Gently fold the whipped cream into the cream cheese mixture using a rubber spatula. Mix carefully until no streaks remain.
Step 3: Filling and Chilling
Spoon the creamy filling into a piping bag fitted with a star tip for a beautiful swirl, or simply use a small spoon.
Pipe or dollop the filling generously onto the chilled crusts in each mini muffin cup, creating a nice swirl or dome.
Place the filled mini cheesecake bites back into the refrigerator. Chill for at least 2 hours to allow the filling to set.
Step 4: Garnish and Serve
Just before serving, take the crushed Biscoff cookies and sprinkle a generous pinch over the top of the cream swirl on each mini cup.
Peel the paper liner away before eating, or leave it for easy transport.
Store these delicious bites in the refrigerator.
16. Cinnamon Apple Caramel Bites
No-Bake Christmas Desserts
These charming little spheres are a creative, no-bake twist on a caramel apple, offering all the festive flavor in a handheld, bite-sized form. They feature a soft, doughy center made from crushed vanilla wafers or dried apple chips, giving them a cake-like consistency.
The interior is generously spiked with warm spices like cinnamon and nutmeg, and filled with a small pocket of thick, chewy caramel. The rich, sweet filling adds a wonderful gooey surprise to every bite.
Each ball is rolled in a generous coating of cinnamon-sugar, creating a soft, warm exterior that resembles a fresh doughnut. These treats are simple to assemble and perfect for serving on a stick or in a mini basket for a rustic, fun presentation.
Required Ingredients
For the Dough
2 cups finely crushed vanilla wafers
8 ounces cream cheese, softened
1 teaspoon vanilla extract
1 teaspoon ground cinnamon
$1/2$ cup powdered sugar, sifted
For the Filling and Coating
$1/2$ cup chewy store-bought caramel squares, softened or melted slightly
$1/4$ cup granulated sugar
1 tablespoon ground cinnamon
Equipment List
Food processor (optional)
Medium mixing bowl
Rubber spatula
Small cookie scoop
Two baking sheets
Parchment or wax paper
Small bowl for coating
DIY Instructions
Step 1: Making the Vanilla Wafer Dough
In a medium mixing bowl, combine the crushed vanilla wafers, softened cream cheese, vanilla extract, 1 teaspoon of cinnamon, and powdered sugar.
Mix thoroughly until a stiff, cohesive dough forms.
Step 2: Stuffing and Rolling
Line a baking sheet with parchment paper.
Take a small scoop of the dough (about 1 tablespoon). Flatten it slightly in the palm of your hand.
Place a small dollop or a tiny, softened piece of the caramel in the center of the dough circle.
Carefully fold the edges of the dough over the caramel, pinching to seal it completely inside. Roll the dough into a smooth, compact ball.
Place the finished ball onto the parchment-lined baking sheet. Repeat with the remaining dough and caramel.
Step 3: Chilling
Place the baking sheet into the refrigerator. Chill the balls for at least 30 minutes to allow them to firm up.
Step 4: Coating and Serving
In a shallow bowl, mix together the $1/4$ cup of granulated sugar and 1 tablespoon of ground cinnamon to create the cinnamon-sugar coating.
Remove the chilled balls from the refrigerator. Roll each ball in the cinnamon-sugar mixture until it is fully coated.
If desired, you can insert a small wooden skewer into each ball for easier serving.
Serve at room temperature or slightly chilled.
17. Mint Chocolate Layer Cheesecake
No-Bake Christmas Desserts
This striking, round cheesecake is a magnificent centerpiece, boasting tall, distinct layers of cool, refreshing flavor. It starts with a rich, dark chocolate cookie crust that provides a solid foundation for the creamy fillings.
The filling consists of three lush layers: a bottom chocolate layer, a bright middle layer of mint-green cheesecake mousse, and a final creamy white cheesecake layer. The cool mint flavor combines beautifully with the rich chocolate, creating a classic seasonal blend.
The top is finished with a shiny, dark chocolate ganache and an attractive pattern created by swirling melted mint and white chocolate. Finished with chocolate shavings around the edge, this dessert delivers elegance without needing oven time.
Required Ingredients
For the Crust
2 cups crushed chocolate wafer cookies
$1/2$ cup melted unsalted butter
For the Cheesecake Layers
24 ounces cream cheese, softened (divided)
3 cups powdered sugar, sifted (divided)
3 teaspoons vanilla extract (divided)
2 cups heavy cream, chilled (divided)
$1/2$ cup cocoa powder
1 teaspoon peppermint extract
Green food coloring
For the Ganache Topping
$1/2$ cup semi-sweet chocolate chips
$1/4$ cup heavy cream
Optional: Mint candy melts for swirling
Equipment List
9-inch springform pan
Parchment paper
Large mixing bowls (3)
Electric mixer or stand mixer
Spreading spatula
DIY Instructions
Step 1: Making the Crust
Line the bottom of the 9-inch springform pan with a round of parchment paper. Do not grease the sides.
Combine the crushed chocolate cookies and melted butter. Press the mixture firmly and evenly into the bottom of the pan.
Place the crust in the freezer for at least 30 minutes.
Step 2: Preparing the Cheesecake Base
In a large bowl, beat all 24 ounces of softened cream cheese until smooth.
Beat in all 3 cups of powdered sugar and 3 teaspoons of vanilla extract.
Step 3: Creating the Three Fillings
Divide the cream cheese mixture into three equal portions in separate bowls.
Whip the 2 cups of heavy cream until stiff peaks form. Divide this whipped cream into three equal portions.
Chocolate Layer (Bottom): To the first cream cheese portion, stir in the cocoa powder until fully combined. Gently fold in one portion of the whipped cream. Spread this mixture evenly over the chilled crust. Freeze for 20 minutes.
Mint Layer (Middle): To the second cream cheese portion, stir in the peppermint extract and a few drops of green food coloring. Gently fold in the second portion of whipped cream. Spread this layer over the set chocolate layer. Freeze for 20 minutes.
Vanilla Layer (Top): Leave the third cream cheese portion as is. Gently fold in the last portion of whipped cream. Spread this final layer over the set mint layer. Refrigerate the entire cheesecake for at least 6 hours, or overnight.
Step 4: Making the Ganache
In a small saucepan, heat the $1/4$ cup of heavy cream until it simmers. Remove from heat and pour over the semi-sweet chocolate chips. Let it sit for 5 minutes.
Stir until smooth. If using, melt the mint candy melts separately.
Step 5: Decorating and Serving
Pour the cooled ganache over the set vanilla layer, smoothing it quickly with a spatula. If using mint candy melts, drizzle them over the ganache and use a skewer to create a swirl pattern before the ganache sets.
Once the ganache is set, carefully release the sides of the springform pan.
Decorate the edges with chocolate shavings. Slice with a hot, sharp knife for the cleanest cuts.
18. Cardamom Orange Cheesecake Squares
No-Bake Christmas Desserts
These elegant squares offer a delightful fusion of creamy texture and bright, exotic spices. They feature a simple, pressed cookie crust, likely made from vanilla wafers or shortbread, providing a subtle, buttery base.
The star is the luscious, tall creamy filling, which is deeply infused with the warm, complex aroma of cardamom. A burst of fresh orange zest or extract brightens the mixture, creating a sophisticated and refreshing flavor profile.
Each square is topped with a simple garnish of a candied orange peel and a small basil leaf, adding an artisanal touch. The rich, two-toned dessert is chilled until firm, making slicing easy and presenting a beautiful, clean line of flavor layers.
Required Ingredients
For the Crust
1 $1/2$ cups finely crushed vanilla wafers or shortbread cookies
$1/4$ cup unsalted butter, melted
For the Cheesecake Filling
16 ounces cream cheese, softened
1 cup powdered sugar, sifted
1 teaspoon vanilla extract
1 teaspoon ground cardamom
Zest of 1 orange
1 cup heavy cream, chilled
For Garnish
Thin orange peel ribbons (candied or fresh)
Pinch of ground cardamom
Equipment List
8×8 inch square baking pan
Parchment paper
Large mixing bowl
Electric mixer or stand mixer
Spreading spatula
DIY Instructions
Step 1: Preparing the Crust
Line the 8×8 inch pan with parchment paper, leaving overhangs.
Combine the crushed cookies and melted butter. Press the mixture firmly into the bottom of the prepared pan.
Chill the crust in the refrigerator while preparing the filling.
Step 2: Making the Cardamom Filling
In a large mixing bowl, beat the softened cream cheese until it is completely smooth.
Add the sifted powdered sugar, vanilla extract, ground cardamom, and orange zest. Beat until the mixture is uniform and fluffy.
In a separate bowl, whip the cold heavy cream until stiff peaks form.
Gently fold the whipped cream into the cream cheese mixture using a rubber spatula. Work gently to keep the mousse light.
Step 3: Assembly and Chilling
Pour the cardamom orange filling over the chilled crust.
Use a spreading spatula to ensure the top is smooth and even.
Cover the pan loosely and place it in the refrigerator. Chill for at least 4 hours, or preferably overnight, until the filling is very firm.
Step 4: Cutting and Serving
Lift the chilled dessert out of the pan using the parchment paper overhang.
Use a sharp knife that has been run under hot water and wiped dry to cut the dessert into 16 even squares.
Before serving, garnish the center of each square with a thin orange peel ribbon and a small dusting of extra ground cardamom.
Serve chilled.
19. Salted Caramel Truffle Bites
No-Bake Christmas Desserts
These rich, intensely flavored truffles are a decadent handheld treat, combining deep chocolate with a luxurious caramel coating. The interior is a dense, fudgy ball made from a combination of cocoa powder, crushed cookies, and chopped nuts.
The texture is delightfully chewy and substantial, providing a wonderful contrast to the smooth exterior. A crowning pour of gooey, luscious salted caramel coats each truffle, allowing the caramel to drizzle attractively down the sides.
The entire dessert is elevated by a slight sprinkle of coarse sea salt, which perfectly balances the intense sweetness of the chocolate and caramel. Serving them in mini cups or a teacup adds an elegant, charming presentation.
Required Ingredients
For the Truffle Base
2 cups crushed vanilla wafers or graham crackers
$1/4$ cup cocoa powder
$1/2$ cup finely chopped pecans or walnuts
$1/2$ cup butter, melted
$1/2$ cup powdered sugar
1 teaspoon vanilla extract
For the Topping
$1/2$ cup store-bought or homemade thick salted caramel sauce
Fresh rosemary sprigs (optional, for garnish)
Equipment List
Food processor (optional)
Large mixing bowl
Rubber spatula
Small cookie scoop
Two baking sheets
Parchment paper
DIY Instructions
Step 1: Preparing the Truffle Dough
In a large mixing bowl, combine the crushed cookies, cocoa powder, chopped nuts, powdered sugar, and vanilla extract.
Pour the melted butter over the dry ingredients.
Stir vigorously with a rubber spatula until the mixture is completely combined and a thick, fudge-like dough forms.
Step 2: Rolling and Chilling
Line a baking sheet with parchment paper.
Use a small cookie scoop to portion out the dough.
Roll each portion firmly between your palms to form smooth, compact balls.
Place the rolled truffles onto the prepared baking sheet.
Place the truffles in the refrigerator or freezer for at least 30 minutes to set their shape.
Step 3: Coating and Serving
Remove the chilled truffles from the refrigerator. Arrange them on a serving platter or stack them in a small cup.
Gently warm the salted caramel sauce in a microwave or small saucepan until it is runny enough to drizzle easily.
Spoon the warm salted caramel sauce generously over the top of the stacked truffles, allowing the sauce to drip down the sides.
Garnish with a tiny sprig of fresh rosemary, if desired, for a beautiful, aromatic touch.
Serve at room temperature.
20. Pistachio Cranberry White Chocolate Fudge
No-Bake Christmas Desserts
This beautifully colored fudge is a festive, quick-set holiday candy that makes a wonderful treat or gift. The base is an incredibly simple, creamy white chocolate mixture, which requires only melting and stirring.
Bright red dried cranberries are studded generously throughout the white fudge, offering delightful bursts of tartness that complement the sweetness. The mixture is also loaded with vibrant green pistachios, adding a satisfying crunch and a lovely, contrasting color.
The finished fudge is cut into thick squares, revealing a beautiful mosaic of red and green that looks incredibly appealing on a holiday platter. It is a no-thermometer, two-step dessert that is ready to slice after a short chilling time.
Required Ingredients
For the Fudge
3 cups white chocolate chips or finely chopped white chocolate
1 (14 ounce) can sweetened condensed milk
$1/2$ teaspoon vanilla extract
1 cup dried cranberries, roughly chopped (plus extra for topping)
$1/2$ cup shelled pistachios, roughly chopped (plus extra for topping)
Equipment List
8×8 inch square baking pan
Parchment paper
Medium saucepan or microwave safe bowl
Rubber spatula
DIY Instructions
Step 1: Preparing the Pan and Melting
Line the 8×8 inch pan completely with parchment paper, leaving an overhang on the sides for easy lifting.
In a medium saucepan, combine the white chocolate chips and the sweetened condensed milk.
Melt the mixture over low heat, stirring constantly until the chocolate is entirely smooth and the mixture is well-combined. Alternatively, you can melt this mixture in a large, microwave-safe bowl, heating in 30-second intervals and stirring thoroughly after each.
Remove the mixture from the heat and stir in the vanilla extract.
Step 2: Mixing the Inclusions
Quickly stir in the chopped dried cranberries and the chopped pistachios. Mix only until the inclusions are evenly distributed throughout the creamy fudge mixture. Do not overmix.
Step 3: Setting and Chilling
Pour the fudge mixture into the prepared pan.
Use the rubber spatula to spread the fudge into an even layer.
Immediately press the extra cranberries and pistachios onto the top surface of the fudge for decoration.
Place the pan into the refrigerator. Chill for at least 3 hours, or until the fudge is completely firm.
Step 4: Cutting and Serving
Lift the chilled fudge out of the pan using the parchment paper overhang. Place the block on a cutting board.
Use a sharp knife to cut the fudge into 16 even squares.
Store the fudge in an airtight container at room temperature or in the refrigerator.
21. Gingerbread House Jar Trifles
No-Bake Christmas Desserts
These individual dessert jars are charming, layered masterpieces that capture the cozy spirit of the holidays. Each glass jar features alternating stripes of crushed gingerbread cookies and a smooth, spiced vanilla mousse or cream cheese filling.
The creamy layers offer a delightful, cool contrast to the warm, molasses-rich spice of the cookie crumbs. Tying a festive ribbon around the jar adds a beautiful, homemade touch, making them easy to give as edible gifts or serve individually.
Crowning each jar is a tiny, pre-made gingerbread house and colorful gumdrops, creating a stunning, miniature holiday scene. They are simple to assemble ahead of time, ensuring a stress-free dessert presentation when guests arrive.
Required Ingredients
For the Layers
2 cups crushed gingerbread cookies (or gingersnap cookies)
16 ounces cream cheese, softened
1 cup powdered sugar, sifted
1 teaspoon vanilla extract
1 teaspoon ground cinnamon
1 cup heavy cream, chilled
For Garnish
Small, pre-made gingerbread house pieces (or thick cookies cut into shapes)
Festive gumdrops, sprinkles, and candy canes
Christmas ribbon
Equipment List
6 to 8 small mason jars (about 8 ounces each)
Medium mixing bowls (2)
Electric mixer
Rubber spatula
Piping bag with a large round tip (optional)
DIY Instructions
Step 1: Preparing the Cream Filling
In a large mixing bowl, beat the softened cream cheese, sifted powdered sugar, vanilla extract, and cinnamon until the mixture is completely smooth and fluffy.
In a separate, chilled bowl, whip the heavy cream until stiff peaks form.
Gently fold the whipped cream into the cream cheese mixture using a rubber spatula, taking care to keep the mixture light and airy.
Step 2: Layering the Jars
Spoon about 2 to 3 tablespoons of the crushed gingerbread cookies into the bottom of each mason jar. Press gently to create a firm layer.
Next, pipe or spoon a thick layer of the cream filling over the cookie crumbs, using about one-third of the filling.
Add another layer of crushed gingerbread cookies over the cream.
Top with a final generous layer of the cream filling, filling the jar up to about one inch from the rim.
Step 3: Decorating and Chilling
Place a small piece of the gingerbread house standing upright on top of the final cream layer in each jar. Secure it with a little extra cream, if needed.
Arrange festive gumdrops, sprinkles, and mini candy cane pieces around the base of the gingerbread house.
Tie a festive ribbon around the neck of each jar.
Place the finished trifles in the refrigerator. Chill for at least 2 hours before serving to allow the flavors to meld beautifully.
22. Lemon Curd Mousse Martinis
No-Bake Christmas Desserts
These sophisticated, single-serving desserts are a light and tangy option, providing a refreshing break from heavier holiday sweets. They are artfully layered in small martini or coupe glasses, enhancing their elegant appearance.
The dessert features a tart, creamy layer of lemon curd at the base, delivering a bright, intense citrus flavor. On top of the curd sits a tall, fluffy swirl of lemon mousse, which is lightened with whipped cream or meringue.
Garnishing the top with a simple strip of lemon zest and a tiny fresh basil leaf adds a professional, contrasting touch. These beautiful martini glasses are easy to prepare and present a striking yellow and white display on your dessert table.
Required Ingredients
For the Layers
1 $1/2$ cups high-quality store-bought lemon curd
8 ounces cream cheese, softened
1 cup powdered sugar, sifted
Zest of 1 lemon, plus extra for garnish
1 cup heavy cream, chilled
For Garnish
Thin lemon peel strips
Fresh basil leaves (optional)
Equipment List
6 to 8 martini or coupe glasses
Large mixing bowls (2)
Electric mixer
Rubber spatula
Piping bag with a large star tip (optional)
DIY Instructions
Step 1: Preparing the Base Layer
Place about 2 tablespoons of the lemon curd into the bottom of each martini glass.
Use a spoon to spread the curd slightly up the sides of the glass, if desired, to create a visible band of yellow.
Place the glasses in the refrigerator to chill while preparing the mousse.
Step 2: Making the Lemon Mousse
In a large mixing bowl, beat the softened cream cheese until it is smooth and lump-free.
Add the sifted powdered sugar and the zest of 1 lemon. Beat until the mixture is light and creamy.
Gently fold in about $1/2$ cup of the remaining lemon curd into the cream cheese mixture until swirled.
In a separate, chilled bowl, whip the heavy cream until stiff peaks form.
Gently fold the whipped cream into the lemon cream cheese mixture using a rubber spatula, taking care to keep the mixture light.
Step 3: Assembly and Chilling
Spoon the lemon mousse into a piping bag fitted with a star tip for a beautiful presentation, or simply use a spoon.
Pipe or spoon the mousse into the glasses, filling them generously over the curd layer.
Place the finished mousses in the refrigerator. Chill for at least 2 hours to allow the mousse to set firmly.
Step 4: Garnish and Serve
Just before serving, garnish each mousse with a thin, attractive strip of lemon peel laid across the top.
Sprinkle a tiny bit of fresh lemon zest over the mousse. Add a small basil leaf next to the lemon peel for a touch of green contrast.
Serve chilled.
23. Peppermint Patty Squares
No-Bake Christmas Desserts
These irresistible squares feature three distinct, clean layers of flavor that combine to recreate the beloved taste of a peppermint patty. The solid base is a rich, dense layer of fudgy chocolate, often made from crushed cookies or cocoa powder and butter.
Above the base is a bright white layer of creamy mint filling, which is sweetened and strongly flavored with peppermint extract. Small specks of green food coloring within the white layer often give it a festive appearance.
The entire square is finished with a smooth, shiny coat of dark chocolate ganache, which cracks satisfyingly when sliced. These tidy, festive bars are easy to cut and make a wonderful, clean-edged addition to any holiday cookie box.
Required Ingredients
For the Chocolate Base
2 cups chocolate wafer crumbs (or crushed Oreos)
$1/2$ cup unsalted butter, melted
For the Mint Filling
2 cups powdered sugar, sifted
$1/2$ cup unsalted butter, softened
2 tablespoons milk or cream
1 teaspoon peppermint extract
1 drop green food coloring (optional)
For the Chocolate Topping
1 cup semi-sweet or dark chocolate chips
2 tablespoons vegetable shortening or coconut oil
Equipment List
8×8 inch square baking pan
Parchment paper
Medium mixing bowls (2)
Electric mixer
Rubber spatula
DIY Instructions
Step 1: Making and Chilling the Base
Line the 8×8 inch pan with parchment paper, leaving overhangs.
Combine the chocolate crumbs and melted butter. Press the mixture firmly and evenly into the bottom of the prepared pan.
Place the pan in the refrigerator while preparing the filling.
Step 2: Making the Peppermint Filling
In a medium mixing bowl, beat the softened butter until it is light and fluffy.
Gradually beat in the sifted powdered sugar, alternating with the milk or cream, until the filling is smooth and spreadable.
Stir in the peppermint extract and the optional drop of green food coloring.
Remove the crust from the refrigerator. Carefully spread the mint filling evenly over the chocolate base.
Return the pan to the refrigerator to chill for at least 1 hour, or until the mint layer is firm.
Step 3: Adding the Chocolate Topping
In a microwave-safe bowl, combine the chocolate chips and shortening. Heat in 30-second intervals, stirring after each, until the chocolate is completely smooth and melted.
Let the chocolate cool for about 5 minutes until it is slightly thickened, but still pourable. This prevents it from melting the mint layer.
Pour the melted chocolate over the set mint filling. Use a quick, gentle movement to spread it evenly.
Return the pan to the refrigerator immediately. Chill for at least 2 hours until the topping is completely hard.
Step 4: Cutting and Serving
Lift the chilled dessert out of the pan using the parchment paper overhang.
Use a sharp knife that has been run under hot water and wiped dry to cut the block into even squares. Wipe the knife after each cut.
Store the bars in an airtight container in the refrigerator.
24. Red Velvet Holiday Mousse Shooters
No-Bake Christmas Desserts
These vibrant, individual desserts offer a festive flair with their rich, red and white color scheme, reminiscent of candy canes and holiday cheer. The base of each shooter is a dark, fudgy layer of crushed chocolate cookies or brownie crumbs.
The rest of the glass is filled with beautiful, contrasting stripes of airy white vanilla mousse and a rich, deep red velvet mousse. The red layer typically includes cocoa powder and food coloring, giving it that classic subtle chocolate flavor.
A delightful swirl of white whipped topping and a generous sprinkle of bright green holiday sprinkles crown the top. These single-serving treats are visually appealing and simple to assemble, offering an elegant, mess-free option for your dessert spread.
Required Ingredients
For the Layers
1 cup crushed chocolate sandwich cookies
16 ounces cream cheese, softened
2 cups powdered sugar, sifted (divided)
1 teaspoon vanilla extract
2 tablespoons cocoa powder
Red food coloring (gel works best)
2 cups heavy cream, chilled
For Garnish
Extra whipped topping or fresh whipped cream
Green holiday sprinkles
Equipment List
6 to 8 small serving glasses (shot glasses or small tumblers)
Medium mixing bowls (3)
Electric mixer
Rubber spatula
Piping bag with a star tip (optional)
DIY Instructions
Step 1: Preparing the Base and Cream
Spoon about 1 to 2 tablespoons of the crushed chocolate cookies into the bottom of each serving glass. Press down lightly.
In a large bowl, beat the softened cream cheese until smooth. Add the vanilla extract and all the powdered sugar. Beat until fluffy.
Whip the cold heavy cream until stiff peaks form.
Step 2: Creating the Layers
Divide the cream cheese mixture into two equal portions.
Divide the whipped cream into three equal portions.
Red Velvet Mousse: To the first cream cheese portion, add the cocoa powder and several drops of red food coloring until you achieve a rich red hue. Gently fold in one portion of the whipped cream.
White Vanilla Mousse: To the second cream cheese portion, add a tiny bit more vanilla, if desired. Gently fold in the second portion of the whipped cream.
Step 3: Assembly and Chill
Using a piping bag or a spoon, layer the White Vanilla Mousse over the cookie base in each glass.
Follow immediately with a layer of the Red Velvet Mousse.
Repeat the layers if your glass height allows, ending with a final layer of the white mousse.
Cover the glasses and place them in the refrigerator to chill for at least 2 hours.
Step 4: Finishing and Serving
Just before serving, use the reserved third portion of plain whipped cream (or a store-bought whipped topping) to pipe a final decorative swirl on top of each shooter.
Garnish with a generous sprinkle of green holiday sprinkles.
Serve chilled.
25. Butterscotch Pumpkin Custards
No-Bake Christmas Desserts
These appealing, small custards offer the comforting, warm flavors of the fall and winter holidays in a creamy, cool format. They are presented in small, elegant black ramekins, which beautifully contrast with the warm color of the filling.
The filling is a rich, chilled mixture, typically featuring pumpkin puree and warm spices like cinnamon and ginger, all bound together in a creamy custard or pudding. A delightful layer of caramelized butterscotch or toffee pieces is scattered throughout the base and on top.
A dollop of whipped cream and a shard of brittle or candied nut cluster crowns the top, providing a fantastic crunch. These custards are a sophisticated, portion-controlled dessert that requires only chilling to set the rich flavors.
Required Ingredients
For the Custard
1 (15 ounce) can pure pumpkin puree (not pie filling)
1 (14 ounce) can sweetened condensed milk
1 teaspoon pumpkin pie spice (cinnamon, nutmeg, ginger blend)
1 teaspoon vanilla extract
$1/2$ cup store-bought or homemade butterscotch pudding mix (optional, for thickening)
For Garnish
Whipped cream
Salted caramel or butterscotch brittle, crushed
Flaky sea salt (optional)
Equipment List
4 to 6 small ramekins or custard cups
Medium mixing bowl
Whisk
Rubber spatula
DIY Instructions
Step 1: Mixing the Custard Base
In a medium mixing bowl, combine the pumpkin puree, sweetened condensed milk, pumpkin pie spice, and vanilla extract. Whisk thoroughly until the mixture is uniform and smooth.
If you want a thicker, pudding-like consistency, stir in the butterscotch pudding mix now until fully incorporated.
Step 2: Filling and Setting
Pour the mixture evenly into the 4 to 6 small ramekins, filling them almost to the brim.
Cover the ramekins lightly with plastic wrap.
Place the custards in the refrigerator. Chill for at least 4 hours, or overnight, until they are firm and well-set.
Step 3: Garnish and Serve
Just before serving, top each chilled custard generously with a decorative dollop of whipped cream.
Break the butterscotch or caramel brittle into small, attractive shards or crush it roughly.
Place a shard of the brittle upright into the whipped cream on each custard.
Sprinkle a tiny pinch of flaky sea salt over the brittle for a fantastic sweet and salty contrast.
Serve chilled.
26. Gingerbread Cheesecake Cookie Pizza
No-Bake Christmas Desserts
This festive, flat dessert is a crowd-pleaser, providing all the flavor of a gingerbread cookie in an easily sliced, shareable format. The base is made from a thin, pressed layer of gingerbread cookie crumbs, creating a soft yet sturdy “crust” without any oven time.
A thick, creamy layer of cheesecake filling is spread generously over the crust, providing a cool, tangy contrast to the warm spices. The cream layer is often lightly spiced with cinnamon or nutmeg to complement the gingerbread base.
The entire dessert is beautifully finished with a decorative swirl of melted white chocolate drizzle and a light dusting of cinnamon powder. Since it’s cut into rustic, irregular triangles, it offers a fun, casual way to serve a large group.
Required Ingredients
For the Crust
3 cups crushed gingerbread cookies (or ginger snaps)
$1/2$ cup unsalted butter, melted
For the Cheesecake Topping
16 ounces cream cheese, softened
1 cup powdered sugar, sifted
1 teaspoon vanilla extract
1 teaspoon ground cinnamon
For Garnish
$1/4$ cup white chocolate chips, melted
Extra ground cinnamon
Equipment List
10-inch round pizza pan or sheet pan
Parchment paper
Large mixing bowl
Electric mixer
Spreading spatula
Piping bag or fork (for drizzling)
DIY Instructions
Step 1: Making and Chilling the Crust
Line the pizza pan or sheet pan with parchment paper.
In a bowl, combine the crushed gingerbread cookies and melted butter. Mix until evenly moistened.
Press the crumb mixture firmly and evenly onto the lined pan, forming a large circle or rectangle, about $1/4$ inch thick.
Place the crust in the freezer to chill and set for at least 30 minutes.
Step 2: Preparing the Cheesecake Topping
In a large mixing bowl, beat the softened cream cheese until it is smooth.
Add the sifted powdered sugar, vanilla extract, and cinnamon. Beat until the mixture is fluffy and smooth.
Step 3: Spreading and Chilling
Remove the chilled crust from the freezer.
Spread the creamy cheesecake topping generously and evenly over the crust, leaving a small, clean “crust” border if desired.
Return the dessert to the refrigerator. Chill for at least 3 hours, or until the topping is firm.
Step 4: Decorating and Serving
Melt the white chocolate chips until smooth. Transfer to a piping bag with a tiny corner snipped off, or use a fork.
Drizzle the melted white chocolate over the chilled cheesecake topping in a decorative zig-zag pattern.
Dust the entire surface lightly with extra ground cinnamon.
Use a sharp knife or pizza cutter to slice the chilled “pizza” into large, rustic triangles.
Serve chilled.
27. Toasted Coconut Mini Tarts
No-Bake Christmas Desserts
These delightful miniature tarts are incredibly appealing, offering a sweet, tropical flavor in a small, portion-controlled size. The base is a crumbly, pressed crust, often made from vanilla wafers or graham crackers, formed neatly inside small tart shells or cookie cutters.
The filling is a rich, creamy white mixture, typically a blend of cream cheese or pastry cream, heavily infused with coconut. It creates a beautiful, smooth mound inside each tart shell.
The final touch is a generous, golden crown of toasted coconut flakes, which adds a warm, nutty aroma and a wonderful crunch. These little tarts are simple to serve and their charming size makes them a welcome addition to any holiday sweet display.
Required Ingredients
For the Crust
1 $1/2$ cups finely crushed graham crackers or vanilla wafers
$1/4$ cup granulated sugar
$1/4$ cup unsalted butter, melted
For the Filling
8 ounces cream cheese, softened
$1/2$ cup powdered sugar, sifted
$1/2$ teaspoon coconut extract
$1/2$ cup heavy cream, chilled
$1/4$ cup sweetened shredded coconut
For Garnish
$1/2$ cup sweetened shredded coconut, toasted
Equipment List
Mini tart pans or mini muffin pans (12 cups)
Small mixing bowl
Large mixing bowl
Electric mixer
Rubber spatula
DIY Instructions
Step 1: Making the Mini Crusts
In a small bowl, combine the crushed graham crackers, granulated sugar, and melted butter. Mix until evenly moistened.
Press about 1 tablespoon of the crumb mixture firmly and evenly into the bottom and up the sides of the mini tart pan cavities.
Place the crusts in the refrigerator to chill while preparing the filling.
Step 2: Preparing the Coconut Filling
In a large mixing bowl, beat the softened cream cheese until it is smooth and lump-free.
Add the sifted powdered sugar and coconut extract. Beat until fully combined.
In a separate, chilled bowl, whip the heavy cream until stiff peaks form.
Gently fold the whipped cream and the $1/4$ cup of shredded coconut into the cream cheese mixture using a rubber spatula.
Step 3: Filling and Chilling
Remove the chilled crusts from the refrigerator.
Spoon the coconut cream filling into the tart shells, mounding the filling slightly on top.
Place the filled tarts back into the refrigerator. Chill for at least 2 hours to allow the filling to set.
Step 4: Toasting Coconut and Serving
To Toast Coconut: Spread the remaining $1/2$ cup of shredded coconut in a thin layer on a small baking sheet. Bake in a toaster oven or standard oven for 5 to 7 minutes at $350^{\circ}\text{F}$ (check frequently, as it browns fast) until golden brown and fragrant. Let cool completely.
Just before serving, remove the tarts from the pans (if using removable bottoms).
Sprinkle a generous amount of the cooled toasted coconut over the top of each mini tart.
Serve chilled.
28. Peanut Butter Chocolate Wreath
No-Bake Christmas Desserts
This stunning, festive wreath is a great way to showcase classic holiday flavors in a fun shape. The entire base is a solid ring of creamy, rich peanut butter fudge, which requires only chilling to set.
The peanut butter base is drizzled generously with a pattern of melted dark chocolate, which serves as the backdrop for the holiday decorations. The chocolate drizzle creates a beautiful, rustic, branch-like appearance.
Mini holiday candies, colored like berries and holly leaves, are artfully placed on the chocolate drizzle, transforming the ring into a beautiful Christmas wreath. This dessert is easy to make in a ring or bundt pan and offers a wonderful blend of sweet and salty flavors.
Required Ingredients
For the Peanut Butter Base
1 cup (2 sticks) unsalted butter
1 $1/2$ cups smooth peanut butter
1 teaspoon vanilla extract
4 cups powdered sugar, sifted
For the Decoration
1 cup semi-sweet chocolate chips
2 tablespoons vegetable shortening or coconut oil
Assorted mini holiday candies (like red and green mini M&Ms or sprinkles)
Red licorice rope (for the bow)
Equipment List
9 or 10-inch ring mold, springform pan, or bundt pan
Plastic wrap
Large saucepan or microwave safe bowl
Large mixing bowl
Rubber spatula
Piping bag with a small star tip (optional, for holly leaves)
DIY Instructions
Step 1: Making the Peanut Butter Dough
Line the ring pan with plastic wrap, leaving plenty of overhang for lifting. Place a small, narrow glass or can in the center hole to keep the dough from collapsing inward.
In a large saucepan, melt the butter over low heat. Once melted, stir in the peanut butter until completely smooth. Remove from heat.
Stir in the vanilla extract and gradually add the sifted powdered sugar. Stir vigorously until a thick, stiff dough forms.
Step 2: Shaping and Chilling
Press the peanut butter dough firmly and evenly into the prepared ring pan, smoothing the top with a spatula.
Cover the dough with the plastic wrap overhang.
Place the pan in the refrigerator. Chill for at least 4 hours, or overnight, until the base is very firm.
Step 3: Decorating the Wreath
Lift the chilled peanut butter wreath out of the pan using the plastic wrap overhang and peel off the plastic. Place it on a serving platter.
Melt the chocolate chips and shortening until smooth. Transfer the melted chocolate to a piping bag with a tiny corner snipped off, or simply use a fork.
Drizzle the melted chocolate across the top of the peanut butter ring in a messy, criss-cross pattern, resembling branches.
While the chocolate is still wet, carefully arrange the red and green candies in clusters to look like holly berries and leaves around the ring.
Use a piece of red licorice rope to create a bow and place it at the top of the wreath.
Serve chilled or at room temperature.
29. Ruby Raspberry Jello Cubes
No-Bake Christmas Desserts
These sparkling, two-toned dessert cubes are a light, festive, and visually appealing treat, cut into individual square portions. The base of each cube is a solid white layer of cream or coconut milk, providing a cool, opaque foundation.
The top half is a clear, brilliant raspberry-flavored gelatin, where whole raspberries are suspended, looking like jewels. The clean line where the creamy white meets the clear red creates a stunning color contrast.
Cutting the gelatin into precise squares makes them easy to stack and serve. The addition of a small, edible glitter or sugar sparkle on the top enhances the frosty, celebratory look of these fun, jiggly cubes.
Required Ingredients
For the Layers
2 boxes (about 3 ounces each) raspberry gelatin
2 cups boiling water
1 $1/2$ cups cold water
1 cup heavy cream or full-fat coconut milk (for the white layer)
1 cup fresh raspberries
Edible glitter or sanding sugar (optional)
Equipment List
9×9 inch square baking pan
Small mixing bowls (2)
Whisk
Rubber spatula
DIY Instructions
Step 1: Making the Cream Base
In a small bowl, dissolve 1 box of raspberry gelatin in 1 cup of boiling water.
Whisk in the cold cream or coconut milk. This creates the opaque, creamy white layer.
Pour this creamy mixture into the 9×9 inch pan.
Place the pan in the refrigerator for about 45 minutes to 1 hour, or until the layer is firm to the touch but still slightly sticky.
Step 2: Preparing the Top Layer
In the second bowl, dissolve the remaining box of raspberry gelatin in 1 cup of boiling water.
Stir in $1/2$ cup of cold water. Allow this mixture to cool to room temperature. Do not let it chill or set.
Arrange the fresh raspberries evenly over the top of the set white layer in the pan.
Step 3: Final Layering and Chilling
Carefully pour the cooled, clear raspberry gelatin mixture over the raspberries and the white layer. Pour very slowly, perhaps over the back of a spoon, to avoid breaking the set base.
Sprinkle the top lightly with edible glitter or sanding sugar, if using.
Return the pan to the refrigerator. Chill for at least 4 hours, or overnight, until the top layer is completely firm.
Step 4: Cutting and Serving
To serve, dip the bottom of the pan in warm water for about 10 seconds.
Use a sharp knife to cut the gelatin into neat, uniform squares.
Use a small spatula to carefully lift the cubes out of the pan.
Serve chilled.
30. Salted Caramel Pecan Clusters
No-Bake Christmas Desserts
These delightful clusters are a simple and satisfying no-bake treat that delivers big on salty, sweet, and nutty crunch. They are built around a crispy, airy cereal, likely rice cereal or oatmeal flakes, coated in a luscious, chewy binder.
The entire mixture is held together by a rich, buttery caramel or brown sugar mixture that hardens perfectly when chilled. Abundant pecans are generously mixed in, with whole pecan halves pressed decoratively into the top of each mound.
A light dusting of flaky sea salt finishes the clusters, providing a burst of flavor that perfectly cuts through the caramel sweetness. These rustic mounds are easy to prepare and are a wonderful addition to a holiday cookie plate.
Required Ingredients
For the Clusters
$1/2$ cup (1 stick) unsalted butter
$1/2$ cup brown sugar, packed
$1/4$ cup milk or cream
1 teaspoon vanilla extract
3 cups crispy rice cereal or oatmeal flakes
1 $1/2$ cups pecan halves (divided)
For Garnish
Flaky sea salt (such as Maldon)
Equipment List
Large saucepan
Wooden spoon
Two baking sheets
Parchment or wax paper
DIY Instructions
Step 1: Preparing the Caramel Base
Line two baking sheets with parchment paper. Reserve $1/2$ cup of the pecan halves for decorating the tops.
In a large saucepan, melt the butter over medium heat.
Stir in the brown sugar and milk or cream. Bring the mixture to a rolling boil, stirring constantly.
Once boiling, continue to boil, stirring occasionally, for 1 minute.
Remove the saucepan from the heat and immediately stir in the vanilla extract.
Step 2: Mixing the Clusters
Quickly stir the cereal and 1 cup of the pecan halves into the hot caramel mixture.
Stir gently but rapidly until all the cereal and nuts are fully coated.
Step 3: Shaping and Chilling
Working quickly before the mixture sets, drop large spoonfuls of the coated mixture onto the prepared baking sheets, forming rustic, round mounds.
Gently press 2 to 3 of the reserved whole pecan halves onto the top of each cluster.
Immediately sprinkle the top of each cluster lightly with flaky sea salt.
Place the baking sheets into the refrigerator. Chill for at least 1 hour, or until the clusters are completely firm and set.
Step 4: Serving
Serve chilled or at room temperature. Store in an airtight container.
31. Spiced Cardamom Cone Truffles
No-Bake Christmas Desserts
These charming, handheld treats are a creative take on a traditional holiday candy, presenting a unique blend of spice and creamy texture inside a tiny cone. The base is a dense, fudge-like ball made from crushed cookies or nuts, often incorporating molasses or cocoa for a darker color.
The flavor is dominated by warm, complex spices like cardamom and cinnamon, giving the truffle a sophisticated, mature taste. Whole cardamom pods and green pistachio slivers are pressed into the surface of the ball for visual appeal before it is placed atop a miniature ice cream cone.
A tiny star anise is often placed on top as a delicate, fragrant garnish, completing the presentation. These elegant cones are simple to assemble and serve, making them an unexpected, delightful addition to a dessert spread.
Required Ingredients
For the Truffle Base
2 cups finely crushed vanilla wafers or shortbread cookies
8 ounces cream cheese, softened
1 cup powdered sugar, sifted
1 teaspoon vanilla extract
1 teaspoon ground cardamom
$1/2$ teaspoon ground cinnamon
For Presentation
12 mini ice cream cones
Star anise pieces (for garnish)
Green cardamom pods or slivered pistachios (for garnish)
Equipment List
Food processor (optional)
Medium mixing bowl
Electric mixer
Small cookie scoop
Baking sheet
Parchment paper
Small plate or platter
DIY Instructions
Step 1: Preparing the Spiced Truffle Dough
In a large mixing bowl, beat the softened cream cheese until it is smooth and lump-free.
Add the sifted powdered sugar, vanilla extract, ground cardamom, and cinnamon. Beat until the mixture is uniform and light.
Gradually add the crushed cookies, mixing on low speed or using a rubber spatula until a stiff, cohesive dough forms.
Step 2: Shaping the Truffles
Line a baking sheet with parchment paper.
Use a small cookie scoop to portion out the dough into balls slightly larger than the mouth of the mini ice cream cones.
Roll each portion quickly and firmly between your palms to form smooth, compact balls.
Gently press a few green cardamom pods or slivered pistachios onto the surface of each ball for decoration.
Place the rolled truffles onto the prepared baking sheet and chill in the refrigerator for at least 30 minutes.
Step 3: Assembly and Garnish
Remove the chilled truffles from the refrigerator.
Place one chilled truffle ball on top of each mini ice cream cone, pressing gently to make sure it sits securely.
Dust the top of the truffle with a light sprinkle of cinnamon or cardamom powder.
Carefully place one star anise piece in the center of the dusted truffle for a finished look.
Arrange the finished cones upright on a platter for serving. Store in the refrigerator until ready to present.
32. Lemon Blueberry Layer Cloud Cake
No-Bake Christmas Desserts
This dramatic, towering dessert is a light and airy spectacle, featuring layers of delicate, creamy fillings and vibrant fruit. It is constructed to look like a fluffy, multi-tiered cake, built on a base of crushed cookies or simple cake pieces.
The layers alternate between a tart, smooth lemon curd and a light, airy blueberry mousse. The blueberry layer features a swirl of bright purple fruit, offering both visual appeal and a burst of juicy flavor.
The entire structure is crowned with a generous coating of white whipped cream, piled high with fresh, plump blueberries and a sprinkle of bright yellow lemon zest. This no-bake assembly offers a showstopping presentation that is incredibly refreshing.
Required Ingredients
For the Layers
2 cups cubed store-bought angel food cake or ladyfingers, cut into pieces
6-inch springform pan (optional, for shaping) or deep serving dish
Large mixing bowls (2)
Electric mixer
Rubber spatula
DIY Instructions
Step 1: Preparing the Blueberry Mousse
In a small bowl, gently mash the 1 cup of blueberries with a fork until juicy. Set aside.
In a large mixing bowl, beat the softened cream cheese, powdered sugar, and $1/2$ cup of the lemon curd until smooth.
In a separate bowl, whip 1 cup of the heavy cream until stiff peaks form.
Gently fold the whipped cream and the mashed blueberries into the cream cheese mixture until swirled.
Step 2: Preparing the Cream Topping
Whip the remaining 1 cup of heavy cream until stiff peaks form. Refrigerate.
Step 3: Assembling the Cake
If using a springform pan, line the bottom with parchment paper. Arrange a layer of the cubed cake pieces tightly on the bottom. If using a serving dish, simply layer.
Spread half of the blueberry mousse evenly over the cake pieces.
Drizzle $1/2$ cup of the remaining lemon curd over the blueberry mousse layer.
Add a second layer of cake pieces, followed by the remaining blueberry mousse.
Top the final mousse layer with the last $1/2$ cup of lemon curd.
Step 4: Chilling and Finishing
Cover the cake loosely and chill in the refrigerator for at least 6 hours, or overnight.
If using a springform pan, carefully release the sides. Transfer the cake to a serving plate.
Spread or pipe the reserved whipped cream over the top of the cake.
Pile the extra fresh blueberries generously over the whipped cream and sprinkle with fresh lemon zest.
Serve chilled.
33. Caramel Popcorn Crunch Squares
No-Bake Christmas Desserts
These hearty squares are a wonderfully chewy and crunchy sweet treat, combining the salty goodness of popcorn with rich, buttery caramel. They are simple to make and offer a satisfying texture that is great for party favors.
The base is a dense mixture of popcorn, toasted nuts like pecans, and often mini marshmallows, all bound together by a gooey, thick caramel sauce. The inclusion of nuts and the crispy popcorn ensures a complex, exciting bite.
The squares are cut into large, rustic pieces, showcasing the texture of the ingredients within the amber caramel binder. They are a simple, nostalgic dessert that travels well and requires only melting and stirring.
Required Ingredients
For the Squares
8 cups popped popcorn
1 cup mixed nuts (pecans, peanuts), roughly chopped
$1/2$ cup mini marshmallows (optional)
$1/2$ cup (1 stick) unsalted butter
1 cup brown sugar, packed
$1/2$ cup corn syrup
$1/2$ teaspoon vanilla extract
$1/2$ teaspoon salt
Equipment List
9×9 inch square baking pan
Parchment paper
Very large mixing bowl
Medium saucepan
Wooden spoon
DIY Instructions
Step 1: Preparing the Pan and Dry Ingredients
Line the 9×9 inch pan with parchment paper, leaving overhangs. Lightly butter or spray the paper.
In the very large mixing bowl, combine the popped popcorn, chopped nuts, and mini marshmallows (if using). Set this bowl aside.
Step 2: Making the Caramel Binder
In the medium saucepan, combine the butter, brown sugar, and corn syrup.
Bring the mixture to a boil over medium heat, stirring constantly until the butter is melted and the sugar is dissolved.
Once boiling, stop stirring and allow the caramel to boil for exactly 4 minutes. Do not stir during this time.
Remove the saucepan from the heat and immediately stir in the vanilla extract and salt.
Step 3: Combining and Setting
Quickly pour the hot caramel mixture over the popcorn and nut mixture in the large bowl.
Working quickly with a wooden spoon, fold the mixture gently until the popcorn and nuts are completely coated in the caramel.
Immediately transfer the mixture to the prepared baking pan.
Use a rubber spatula or buttered hands to press the mixture firmly and evenly into the pan.
Allow the squares to cool completely at room temperature, or chill in the refrigerator for 1 hour to set faster.
Step 4: Cutting and Serving
Lift the hardened square out of the pan using the parchment paper overhang.
Use a large, sharp knife to cut the slab into individual squares or bars.
Store at room temperature in an airtight container.
34. Chocolate Hazelnut Mocha Log
No-Bake Christmas Desserts
This elegant, cocoa-dusted log is a stunning no-bake dessert, featuring the rich combination of coffee and chocolate. It is constructed from a dark, pliable cookie dough shell, which is easy to roll and shape into a handsome log.
The interior is a gorgeous, creamy filling, lightened with whipped cream and flavored with strong hazelnut essence and a hint of espresso powder. This creamy center provides a beautiful color contrast to the dark outer shell.
A light dusting of cocoa powder covers the exterior, giving it a soft, matte finish reminiscent of a traditional Yule log. Whole roasted hazelnuts are often placed along the top for decoration, adding a final, inviting crunch.
Required Ingredients
For the Chocolate Dough Shell
3 cups chocolate wafer crumbs (or crushed Oreos)
$1/2$ cup powdered sugar
$1/2$ cup unsalted butter, melted
$1/4$ cup milk
2 tablespoons cocoa powder
For the Mocha Hazelnut Filling
8 ounces cream cheese, softened
1 cup powdered sugar, sifted
1 teaspoon hazelnut extract
1 teaspoon espresso powder (or instant coffee)
1 cup heavy cream, chilled
For Garnish
Cocoa powder for dusting
Whole toasted hazelnuts
Equipment List
Large mixing bowls (2)
Electric mixer
Rubber spatula
Parchment paper
Rolling pin
DIY Instructions
Step 1: Making the Chocolate Dough
In a large mixing bowl, combine the chocolate crumbs, $1/2$ cup powdered sugar, and cocoa powder.
Add the melted butter and milk. Stir until a stiff, dark dough forms.
Step 2: Making the Mocha Filling
In a separate bowl, beat the softened cream cheese, 1 cup powdered sugar, hazelnut extract, and espresso powder until completely smooth.
In a separate, chilled bowl, whip the heavy cream until stiff peaks form.
Gently fold the whipped cream into the cream cheese mixture.
Step 3: Rolling and Assembling the Log
Lay a large sheet of parchment paper on your work surface. Dust it with cocoa powder.
Place the chocolate dough onto the paper. Cover it with a second sheet of parchment.
Roll the dough out into a large rectangle, about $1/4$ inch thick.
Remove the top sheet of parchment. Spread the mocha hazelnut filling evenly over the chocolate rectangle, leaving about an inch clear along the farthest long edge.
Starting with the long edge closest to you, tightly roll the dough up, using the bottom parchment paper to guide the roll.
Step 4: Chilling and Finishing
Wrap the finished log tightly in the parchment paper.
Place the log in the refrigerator. Chill for at least 4 hours, or overnight, until it is completely firm.
Before serving, unwrap the log and dust it generously with cocoa powder.
Decorate the top with a neat line of whole toasted hazelnuts.
Slice and serve cold.
35. Spiced Eggnog Crème Brûlée (No-Torch)
No-Bake Christmas Desserts
These individual custards deliver the sophisticated flavor of crème brûlée but utilize a no-bake, no-torch method for the crunchy topping. The creamy base is a rich, chilled eggnog-flavored custard or pudding, often thickened with cornstarch or gelatin.
The custard is heavily spiced with nutmeg, clove, and rum extract, capturing the true taste of holiday eggnog. It is poured into elegant white ramekins for a classic look.
The beautiful crackle top is achieved using melted butter mixed with brown sugar and possibly crushed ginger snaps, which hardens when chilled. Alternatively, a small kitchen torch can be used lightly, as shown, to crystallize the sugar sprinkled on top, creating a true brittle.
Required Ingredients
For the Custard
2 cups store-bought eggnog
$1/4$ cup cornstarch
$1/4$ cup granulated sugar
1 teaspoon vanilla extract
$1/2$ teaspoon rum extract (optional)
Freshly grated nutmeg
For the Topping
$1/4$ cup packed brown sugar (or granulated sugar for torching)
1 tablespoon unsalted butter, melted (only if not torching)
Equipment List
4 to 6 small ramekins
Medium saucepan
Whisk
Small bowl (for topping)
Kitchen torch (optional)
DIY Instructions
Step 1: Making the Eggnog Custard
In a small bowl, whisk the cornstarch with $1/4$ cup of the cold eggnog until a smooth slurry forms. Set aside.
In the saucepan, combine the remaining eggnog and granulated sugar. Heat over medium heat, stirring occasionally, until the mixture is steaming hot but not boiling.
Slowly whisk the cornstarch slurry into the hot eggnog mixture. Continue whisking constantly until the mixture thickens significantly and coats the back of a spoon (about 2 to 3 minutes).
Remove from heat. Stir in the vanilla and rum extracts and a pinch of nutmeg.
Step 2: Setting the Custards
Pour the hot custard mixture evenly into the 4 to 6 ramekins.
Allow the ramekins to cool slightly on the counter. Cover them loosely with plastic wrap.
Place the custards in the refrigerator. Chill for at least 4 hours, or overnight, until they are very firm and set.
Step 3: Creating the Brûlée Top (No-Torch Method)
If not using a torch, combine the brown sugar and melted butter in a small bowl. The mixture should resemble wet sand.
Press this mixture firmly onto the surface of the chilled custards right before serving. The cold surface will help it adhere and provide a lovely crunch.
Step 4: Creating the Brûlée Top (Torch Method)
If using a torch, sprinkle an even layer of plain granulated sugar over the chilled custards.
Use a kitchen torch to melt and caramelize the sugar until a hard, amber-colored crust forms.
Serve immediately while the topping is still warm and brittle.
36. White Chocolate Raspberry Roll
No-Bake Christmas Desserts
This striking dessert roll is a beautiful blend of creamy white chocolate and tart raspberry, presenting a clean, festive color palette. The outer layer is a smooth, pliable white chocolate cookie dough, which holds its shape perfectly when sliced.
The interior features a stunning, tight swirl of bright red raspberry jam or preserves, which is both sweet and tangy. The very center of the swirl often contains a thin band of creamy, plain white chocolate ganache or cream cheese filling, creating a bullseye effect.
The roll is often dusted with powdered sugar for a snowy appearance before slicing. The vivid contrast between the white and red layers makes this an elegant and simple centerpiece for a holiday dessert platter.
Required Ingredients
For the White Chocolate Dough Shell
2 cups finely crushed vanilla wafers or shortbread cookies
4 ounces white chocolate, melted and cooled
8 ounces cream cheese, softened
$1/2$ cup powdered sugar, sifted
1 teaspoon vanilla extract
For the Filling
$1/2$ cup high-quality raspberry jam or preserves
4 ounces white chocolate, melted and cooled (for the center swirl)
Equipment List
Large mixing bowl
Electric mixer
Rubber spatula
Parchment paper
Rolling pin
Spreading spatula
DIY Instructions
Step 1: Making the White Chocolate Dough
In a large mixing bowl, beat the softened cream cheese, $1/2$ cup powdered sugar, and vanilla extract until smooth.
Add the 4 ounces of melted and cooled white chocolate, mixing until combined.
Stir in the crushed cookies until a stiff, cohesive dough forms.
Step 2: Rolling and Filling
Lay a large sheet of parchment paper on your work surface. Dust it lightly with powdered sugar.
Place the white chocolate dough onto the paper. Cover it with a second sheet of parchment.
Use a rolling pin to roll the dough out into a large rectangle, about $1/4$ inch thick.
Remove the top sheet of parchment. Spread the raspberry jam evenly over the dough, leaving about a 1-inch border on all sides.
Drizzle the remaining 4 ounces of melted white chocolate down the center of the jam-covered dough.
Step 3: Shaping and Chilling
Starting with the long edge closest to you, tightly roll the dough up, using the bottom parchment paper to help guide and lift the log. Roll as tightly as possible to create a clean swirl.
Wrap the finished log tightly in the parchment paper, twisting the ends.
Place the log in the refrigerator. Chill for at least 4 hours, or overnight, until it is completely firm.
Step 4: Slicing and Serving
Before serving, unwrap the log and dust it generously with powdered sugar.
Use a sharp knife that has been run under hot water and wiped dry to cut the log into thick, even slices, revealing the beautiful red and white swirl.
Serve chilled.
37. Swirled Peppermint Bark Triangles
No-Bake Christmas Desserts
This iconic holiday sweet is one of the easiest and most impressive no-bake creations, combining crunchy peppermint with layers of contrasting chocolate. It features a solid layer of dark chocolate combined with an opaque layer of sweet white chocolate.
The layers are often lightly swirled together to create an attractive marbled effect before setting. The entire surface is completely covered in a generous layer of crushed red and white candy canes, adding a massive crunch and intense mint flavor.
Once chilled, the bark is broken into large, irregular pieces, highlighting its rustic appeal and the vivid colors of the crushed candy. This treat is simple to package and is a favored confection for holiday gifting.
Required Ingredients
For the Bark
1 cup semi-sweet or dark chocolate chips
1 cup white chocolate chips
1 teaspoon vegetable shortening or coconut oil (divided, optional)
1 cup crushed candy canes (divided)
Equipment List
Large baking sheet
Parchment paper
Microwave safe bowls (2)
Rubber spatula or spreading knife
DIY Instructions
Step 1: Melting the Dark Chocolate
Line a large baking sheet with parchment paper.
In the first microwave-safe bowl, combine the dark chocolate chips and $1/2$ teaspoon of shortening (if using). Heat in 30-second intervals, stirring after each, until completely smooth.
Pour the melted dark chocolate onto the parchment paper. Use a spreading knife or spatula to quickly spread the chocolate into a thin, even rectangle, about $1/8$ inch thick.
Immediately sprinkle half of the crushed candy canes over the surface of the dark chocolate. Allow this layer to set partially at room temperature while you melt the white chocolate.
Step 2: Melting the White Chocolate
In the second microwave-safe bowl, combine the white chocolate chips and the remaining $1/2$ teaspoon of shortening. Heat in 30-second intervals, stirring after each, until completely smooth.
Step 3: Layering and Swirling
Pour the melted white chocolate over the slightly set dark chocolate layer. Quickly spread it evenly across the surface.
For a swirl effect, immediately drizzle a small amount of the remaining dark chocolate over the white layer. Use a thin skewer or knife tip to gently swirl the colors together.
Immediately sprinkle the remaining crushed candy canes liberally over the surface of the white chocolate.
Step 4: Setting and Breaking
Place the entire baking sheet into the refrigerator. Chill for at least 1 hour, or until the bark is completely hard and snaps cleanly.
Once set, lift the bark off the parchment paper. Break it into large, irregular pieces or use a sharp knife to cut it into rustic triangles.
Store the bark in an airtight container in a cool, dry place.
38. Gingerbread Orange Trifle
No-Bake Christmas Desserts
This magnificent, towering trifle is a classic holiday presentation, beautifully showcasing layers of flavor in a clear glass bowl. It features alternating layers of crumbled gingerbread or ginger snap cookies, giving the dessert a warm, spiced base.
The cream layers are a smooth, vanilla custard or cream cheese mousse, which provides a cooling contrast to the spice. Bright, juicy sections of mandarin oranges are suspended between the cream layers, introducing a refreshing citrus element.
The entire trifle is crowned with a thick layer of whipped cream, crumbled gingerbread pieces, and delicate orange zest curls. This make-ahead dessert allows the flavors to meld beautifully, softening the cookies into a moist, cake-like texture.
Required Ingredients
For the Layers
4 cups crushed gingerbread cookies (or ginger snaps)
16 ounces cream cheese, softened
2 cups powdered sugar, sifted
2 teaspoons vanilla extract
3 cups heavy cream, chilled (divided)
2 cans (11 ounces each) mandarin oranges, drained well
For Garnish
Extra whipped cream
Gingerbread man cookies
Orange zest curls
Equipment List
Large trifle dish (clear glass bowl)
Large mixing bowls (2)
Electric mixer
Rubber spatula
DIY Instructions
Step 1: Preparing the Cream Filling
In a large mixing bowl, beat the softened cream cheese, sifted powdered sugar, and vanilla extract until completely smooth.
Whip 2 cups of the heavy cream until stiff peaks form.
Gently fold the whipped cream into the cream cheese mixture using a rubber spatula. Reserve a small portion of this cream filling for the very top garnish, if desired.
Step 2: Assembling the Trifle
Spoon about $1/4$ of the crushed gingerbread cookies into the bottom of the trifle dish to form the first layer.
Spread $1/3$ of the cream filling evenly over the cookie layer.
Gently arrange half of the drained mandarin orange segments over the cream.
Add another layer of cookies, followed by $1/3$ of the cream filling.
Add the remaining mandarin orange segments.
Finish with a final layer of cookies, topped with the last portion of the cream filling.
Step 3: Chilling and Finishing
Whip the remaining 1 cup of heavy cream into stiff peaks.
Cover the trifle loosely and place it in the refrigerator. Chill for at least 6 hours, or overnight, to allow the flavors to marry and the cookies to soften.
Just before serving, dollop or spread the reserved fresh whipped cream over the top layer.
Garnish with extra crumbled gingerbread, orange zest curls, and a small gingerbread man cookie placed artfully on top.
Serve chilled with a long-handled spoon.
39. Pistachio Cherry Fluff
No-Bake Christmas Desserts
This brightly colored, whimsical dessert is a light and fluffy holiday salad, appealing due to its vibrant green hue and simple preparation. It is often served in small glasses or a large bowl, mounded high like a miniature Christmas tree.
The texture is light and airy, made from a base of whipped topping and green-colored pistachio pudding mix. Miniature white marshmallows are folded throughout the fluff, adding a soft, chewy sweetness.
Tart, ruby-red maraschino cherries and chopped pistachios are generously mixed in, providing beautiful bursts of red and green color and a welcome crunch. The top is finished with extra pistachios and a bright red cherry.
1 (10 ounce) jar maraschino cherries, drained and halved
$1/2$ cup pistachios, chopped
For Garnish
Whole maraschino cherries
Extra chopped pistachios
Equipment List
Large mixing bowl
Rubber spatula
Medium bowl (for draining)
Serving dish or individual glasses
DIY Instructions
Step 1: Combining the Base
In a large mixing bowl, combine the instant pistachio pudding mix and the entire can of crushed pineapple (including the juice). Stir until the pudding powder is fully dissolved and the mixture begins to thicken.
Allow the mixture to sit for 5 minutes to fully set the pudding.
Step 2: Folding in Inclusions
Gently fold in the thawed whipped topping until the entire mixture is a uniform light green color. Work gently to keep the volume light and airy.
Fold in the mini marshmallows, the halved maraschino cherries, and the chopped pistachios.
Step 3: Setting and Shaping
Spoon the mixture into a large serving dish or individual dessert glasses, mounding the mixture slightly to create height.
Place the finished fluff in the refrigerator. Chill for at least 2 hours to set the structure and allow the flavors to meld.
Step 4: Garnish and Serve
Before serving, place a bright red whole maraschino cherry on top of the mound of fluff in the center.
Garnish the sides with a few extra mini marshmallows and a sprinkle of chopped pistachios.
Serve chilled.
40. Chocolate Salami (Cookie Roll)
No-Bake Christmas Desserts
This classic Italian dessert is a fun, no-bake creation shaped and sliced to resemble a cured meat, though it is purely sweet. The base is a dark, fudgy chocolate dough that is incredibly rich and easy to handle.
The chocolate dough is loaded with pieces of crunchy vanilla wafers or shortbread cookies and chopped nuts, which create an attractive white and brown mosaic pattern when the roll is sliced. The contrasting textures make every bite interesting.
The log is rolled in powdered sugar, giving it a final, snowy white coating that enhances the appearance of a ‘salami.’ Slicing this dessert reveals the beautiful, speckled cross-section, making it a conversation piece on any holiday platter.
Required Ingredients
For the Salami
1 cup (2 sticks) unsalted butter, softened
1 $1/2$ cups powdered sugar, sifted (divided)
$1/4$ cup cocoa powder
1 teaspoon vanilla extract
1 cup chopped walnuts or pecans
2 cups broken vanilla wafer cookies (broken into large pieces)
2 tablespoons milk (optional, for binding)
For Coating
Extra powdered sugar
Equipment List
Large mixing bowl
Electric mixer
Rubber spatula
Parchment paper
Small sieve (for dusting)
DIY Instructions
Step 1: Preparing the Chocolate Base
In a large mixing bowl, beat the softened butter until creamy.
Gradually add 1 cup of the sifted powdered sugar, cocoa powder, and vanilla extract. Beat until the mixture is uniform and smooth.
If the mixture seems too stiff, add the milk one tablespoon at a time until it reaches a soft, workable consistency.
Step 2: Mixing the Inclusions
Use a rubber spatula to gently fold in the chopped nuts and the broken cookie pieces. Mix until they are evenly distributed throughout the chocolate mixture.
Step 3: Shaping the Salami
Lay a large piece of parchment paper on your work surface.
Scrape the entire mixture onto the center of the parchment paper.
Use your hands to shape the dough into a compact log, about 10 to 12 inches long and 2 $1/2$ inches thick.
Wrap the log tightly in the parchment paper, rolling it back and forth a few times to smooth the shape.
Twist the ends of the parchment paper like a candy wrapper to seal.
Step 4: Chilling and Finishing
Place the log in the refrigerator. Chill for at least 4 hours, or overnight, until it is very firm.
Before serving, unwrap the log. Place the remaining powdered sugar in a shallow dish.
Roll the entire log in the powdered sugar until it is completely coated.
Use a sharp knife to slice the log into thick, round pieces, revealing the beautiful cookie and nut pattern.
Serve chilled or at room temperature.
41. Caramel Eggnog Tiramisu Squares
No-Bake Christmas Desserts
This stunning chilled dessert offers a festive twist on the classic Italian tiramisu, replacing the traditional coffee flavor with rich, comforting eggnog and caramel. It uses layers of soft ladyfinger cookies, which soak up the creamy liquid, giving the dessert a moist, tender texture.
The layers alternate between the ladyfingers and a lush, white filling, typically a mascarpone or cream cheese blend heavily infused with eggnog spice. A thick layer of salted caramel is swirled into the filling, adding a buttery, decadent chewiness.
The entire square is finished with a generous dusting of cocoa powder and spices, mimicking the traditional dessert. Cut into elegant squares, this complex, flavorful treat requires only chilling to set.
Required Ingredients
For the Layers
1 (14 ounce) can sweetened condensed milk
8 ounces cream cheese, softened
1 cup eggnog
1 teaspoon rum extract (optional)
2 cups heavy cream, chilled
2 packages ladyfinger cookies (about 48 cookies)
$1/2$ cup thick caramel sauce (plus extra for layering)
$1/2$ cup strong coffee or more eggnog (for dipping)
For Garnish
Cocoa powder and ground cinnamon for dusting
Whole cloves (optional)
Equipment List
9×13 inch baking dish
Large mixing bowls (2)
Electric mixer
Rubber spatula
Shallow bowl (for dipping)
DIY Instructions
Step 1: Preparing the Cream Filling
In a large mixing bowl, beat the softened cream cheese and sweetened condensed milk until completely smooth.
Add the eggnog and rum extract (if using). Beat until just combined.
In a separate, chilled bowl, whip the heavy cream until stiff peaks form.
Gently fold the whipped cream into the eggnog-cream cheese mixture.
Step 2: Layering the Tiramisu
Pour the $1/2$ cup of coffee or eggnog into a shallow bowl.
Quickly dip the bottom side of one ladyfinger cookie into the liquid (do not soak, just a quick dip) and arrange it, dipped-side up, in a single layer on the bottom of the 9×13 inch dish. Repeat until the bottom is fully covered.
Spread half of the cream filling evenly over the first cookie layer.
Drizzle half of the thick caramel sauce randomly over the cream layer.
Repeat the process: dip the second set of ladyfingers and arrange them over the cream layer.
Spread the remaining cream filling over the top, then drizzle with the remaining caramel.
Step 3: Chilling and Finishing
Cover the dish tightly with plastic wrap. Place the tiramisu in the refrigerator. Chill for at least 8 hours, or overnight, to allow the ladyfingers to soften completely.
Before serving, use a small sieve to dust the top generously with cocoa powder and cinnamon.
Cut the tiramisu into squares. Garnish each piece with a small cluster of whole cloves, if desired.
Serve chilled.
42. Macadamia Coconut Dream Bars
No-Bake Christmas Desserts
These chewy, dense bars offer a lovely tropical flavor with a hearty, nutty crunch, making them a unique option for holiday treats. The foundation is a buttery, simple pressed cookie crust, often made from vanilla wafers or shortbread.
The main layer is a thick, chewy filling loaded with crunchy macadamia nuts and sweet, shredded coconut. The filling is bound together with a creamy white chocolate or condensed milk base, giving it a rich texture.
The top of the bars is covered with a decorative mix of toasted coconut flakes and whole macadamia nuts, adding both visual appeal and a satisfying chew. Cut into neat bars, this dessert provides a great alternative to traditional holiday flavors.
Required Ingredients
For the Crust
1 $1/2$ cups finely crushed vanilla wafers or shortbread cookies
$1/4$ cup unsalted butter, melted
For the Filling
1 (14 ounce) can sweetened condensed milk
1 teaspoon vanilla extract
1 cup macadamia nuts, roughly chopped
1 cup shredded sweetened coconut
For Garnish
$1/2$ cup macadamia nuts, whole or halved
$1/4$ cup shredded coconut, toasted
Equipment List
8×8 inch square baking pan
Parchment paper
Medium mixing bowl
Rubber spatula
DIY Instructions
Step 1: Making and Chilling the Crust
Line the 8×8 inch pan with parchment paper, leaving overhangs.
Combine the crushed cookies and melted butter. Press the mixture firmly and evenly into the bottom of the prepared pan.
Chill the crust in the refrigerator while preparing the filling.
Step 2: Mixing the Filling
In a medium mixing bowl, combine the sweetened condensed milk and vanilla extract. Stir well.
Fold in the chopped macadamia nuts and the shredded coconut. Stir until all the nuts and coconut are fully coated in the milk mixture.
Step 3: Assembly and Setting
Remove the chilled crust from the refrigerator.
Spoon the macadamia coconut filling over the crust. Use the rubber spatula to spread the mixture evenly.
Press the reserved whole macadamia nuts and toasted coconut onto the top surface for decoration.
Cover the pan loosely and place it in the refrigerator. Chill for at least 4 hours, or overnight, until the bars are firm and set.
Step 4: Cutting and Serving
Lift the chilled slab out of the pan using the parchment paper overhang.
Use a sharp knife that has been run under hot water and wiped dry to cut the block into neat, uniform bars. Wipe the knife after each cut.
Serve chilled.
43. Layered Cherry Cheesecake Squares
No-Bake Christmas Desserts
These beautiful, tri-layered squares are a celebratory and visually appealing dessert that combines creamy filling with vibrant fruit topping. The base is a classic, thin graham cracker or vanilla wafer crust, providing a crisp, subtle sweetness.
The main body of the square consists of two distinct creamy layers: a bottom layer of plain vanilla cheesecake mousse, and a top layer of cherry-flavored cheesecake mousse, creating a lovely pink and white band.
Crowning the entire square is a smooth, thick layer of cherry pie filling or glaze, studded with bright red whole cherries. The clean layers and festive colors make these squares a popular choice for holiday dessert platters.
Required Ingredients
For the Crust
1 $1/2$ cups finely crushed graham crackers or vanilla wafers
$1/4$ cup unsalted butter, melted
For the Filling
16 ounces cream cheese, softened
1 cup powdered sugar, sifted
1 teaspoon vanilla extract
2 cups heavy cream, chilled
$1/2$ teaspoon almond extract (optional)
Red food coloring (gel works best)
For the Topping
1 (21 ounce) can cherry pie filling or cherry glaze
Equipment List
8×8 inch square baking pan
Parchment paper
Large mixing bowls (2)
Electric mixer
Rubber spatula
DIY Instructions
Step 1: Making and Chilling the Crust
Line the 8×8 inch pan with parchment paper, leaving overhangs.
Combine the crushed graham crackers and melted butter. Press the mixture firmly into the bottom of the prepared pan.
Chill the crust in the freezer for 15 minutes.
Step 2: Preparing the Cream Filling
In a large mixing bowl, beat the softened cream cheese and sifted powdered sugar until smooth. Add the vanilla and almond extracts.
Whip the cold heavy cream until stiff peaks form.
Divide the cream cheese mixture into two equal portions in separate bowls. Divide the whipped cream in half.
Step 3: Creating and Layering the Mousse
Vanilla Layer (Bottom): Gently fold one portion of the whipped cream into the first cream cheese portion. Spread this layer evenly over the chilled crust. Freeze for 10 minutes.
Cherry Layer (Middle): To the second cream cheese portion, add a few drops of red food coloring until you achieve a festive pink color. Gently fold in the second portion of whipped cream. Spread this pink layer evenly over the set vanilla layer.
Refrigerate the dessert for at least 2 hours to set the mousse layers.
Step 4: Finishing and Serving
Remove the dessert from the refrigerator. Gently spread the cherry pie filling or glaze evenly over the top pink layer.
Return to the refrigerator for another hour to chill the topping.
Lift the chilled slab out of the pan using the parchment paper overhang.
Use a sharp knife that has been run under hot water and wiped dry to cut the block into neat squares.
Serve chilled.
44. Reindeer Pretzel Rods
No-Bake Christmas Desserts
These charming, fun pretzel rods are a wonderful kid-friendly treat that requires only simple dipping and decorating. They combine the salty crunch of a thick pretzel rod with sweet chocolate, creating an excellent contrast.
The pretzel rods are partially dipped in melted white chocolate, creating the “face” area, and then topped with a band of milk or dark chocolate to form the “antlers” and “ears.” This clever design makes them look like adorable reindeer.
Each pretzel is decorated with small candy eyes, a red candy nose (like an M&M), and two pecan halves placed at the top to serve as the antlers. These are easy to hold and make a fantastic contribution to a holiday sweet bouquet.
Red mini candies (like M&Ms or sprinkles) for the nose
Pecan halves (for antlers)
Equipment List
Baking sheet
Parchment paper
Tall drinking glasses (2)
Small microwave safe bowls (2)
DIY Instructions
Step 1: Melting the White Chocolate
Line a baking sheet with parchment paper.
Melt the white chocolate chips and $1/2$ teaspoon of shortening in a small, deep, microwave-safe bowl until completely smooth.
Pour the melted white chocolate into one of the tall drinking glasses—the height of the glass is important for dipping.
Step 2: Dipping and Setting the Face
Take one pretzel rod and dip it into the white chocolate, coating it about halfway up the rod.
Lay the dipped pretzel on the parchment-lined baking sheet. Repeat with all the rods.
Immediately, while the white chocolate is still wet, press two candy eyes onto the front of the dipped white section of each pretzel.
Place a red mini candy (the nose) just below the eyes.
Allow the white chocolate to set completely (about 20 minutes at room temperature, or 5 minutes in the refrigerator).
Step 3: Adding Antlers and Ears
Melt the milk or dark chocolate chips and the remaining shortening in the second small, deep bowl until smooth.
Dip the top, rounded tip of the white chocolate-coated pretzel into the dark chocolate, creating a small “hat” or brown head.
Quickly, before the dark chocolate sets, press two pecan halves slightly into the wet dark chocolate area, positioning them as the reindeer’s antlers.
Allow the dark chocolate to set completely before handling.
Arrange the finished reindeer rods in a tall glass for presentation.
45. Spiced Chocolate Dome Cakes
No-Bake Christmas Desserts
These elegant, individual dome cakes are a stunning finale, offering a sleek, polished look without any baking. Each dessert sits atop a small base of dense chocolate cookie crumbs, providing a rich, sturdy foundation.
The dome itself is a chilled chocolate mousse or ganache, beautifully molded into a smooth, curved shape. The chocolate is deeply infused with warm holiday spices like cinnamon, nutmeg, and clove, adding a sophisticated depth to the rich cocoa flavor.
The exterior is finished with a thin, shiny layer of chocolate glaze, which gives the dome a beautiful sheen. A dusting of cinnamon powder or cocoa powder provides the final, aromatic touch.
Required Ingredients
For the Base
1 cup chocolate wafer crumbs (or cocoa powder)
$1/4$ cup unsalted butter, melted
For the Dome
1 cup dark chocolate chips or chopped chocolate
$1/2$ cup heavy cream
8 ounces cream cheese, softened
$1/2$ cup powdered sugar, sifted
1 teaspoon vanilla extract
1 teaspoon ground cinnamon
$1/4$ teaspoon ground clove or cayenne pepper (optional)
For Glaze (Optional)
$1/2$ cup semi-sweet chocolate chips
2 tablespoons corn syrup
For Garnish
Cocoa powder or ground cinnamon
Equipment List
Silicone dome molds (about 6 cavities) or rounded teacups
Small cookie cutter (for the base)
Medium mixing bowls (2)
Electric mixer
Rubber spatula
DIY Instructions
Step 1: Preparing the Base and Molds
Combine the chocolate crumbs and melted butter. Press the mixture onto a sheet of parchment paper and use a round cookie cutter to cut 6 small circular bases, about the diameter of the dome molds. Place these in the freezer.
Use a small amount of melted chocolate to coat the inside of the dome molds thinly (optional, for easier release).
Step 2: Making the Spiced Mousse
In a microwave-safe bowl, melt the 1 cup of chocolate chips and $1/2$ cup of heavy cream together until smooth to make a ganache. Let cool slightly.
In a large mixing bowl, beat the softened cream cheese, powdered sugar, and vanilla extract until smooth.
Add the spices (cinnamon, clove, etc.).
Fold the slightly cooled ganache into the cream cheese mixture until completely combined.
Step 3: Assembly and Chilling
Spoon the spiced chocolate mousse mixture into the dome molds, filling them entirely.
Gently press one of the chilled cookie bases onto the top of the mousse in each mold.
Place the molds in the freezer to chill for at least 4 hours, or until completely solid.
Step 4: Glazing and Serving (Optional Glaze)
Unmold the frozen domes by gently peeling the silicone away. Place them base-down on a wire rack over a baking sheet.
To make the glaze: Melt the $1/2$ cup of chocolate chips with the corn syrup until smooth. If needed, add a teaspoon of hot water to thin.
Pour the warm glaze over the frozen domes, ensuring they are entirely coated. The glaze will set quickly.
Dust the top of each dome with a sprinkle of cocoa powder or cinnamon.
Let thaw in the refrigerator for 1 to 2 hours before serving.
Key Takeaways
Ease and Efficiency: No-bake recipes significantly reduce kitchen cleanup and free up oven space, making holiday entertaining much simpler.
Versatile Textures: These desserts offer a wide range of textures, from creamy mousses and dense fudges to crunchy barks and soft, chilled layers.
Festive Flavors: The collection focuses on classic seasonal tastes like peppermint, gingerbread, chocolate, eggnog, and citrus.
Ideal for Gifting: Many of these chilled treats, like truffles, fudge, and bark, are easy to package, store, and share as homemade gifts.
High Visual Impact: Layering, chilling, and decorating results in stunning, magazine-worthy presentations without needing complex baking skills.
Creating unforgettable holiday desserts does not require hours spent battling flour, yeast, and hot ovens. As you have seen with these 45 recipes, spectacular sweets are achievable simply through smart mixing, rolling, and chilling.
These no-bake options ensure your kitchen stays cool, your cleanup remains minimal, and your holiday schedule stays manageable. From towering trifles and creamy fudge to cute individual truffles, these quick recipes prove that effortlessness can still be incredibly elegant.
Enjoy the freedom of a clean kitchen and the joy of sharing handmade treats this season. Making memories should always be easier than making meringue.
Spread the loveFinding a tray of thin, greasy puddles in your oven is a heartbreaking sight for any baker. You follow the recipe, yet your treats refuse to hold their shape. This common struggle usually…
Spread the loveThe holiday season often feels like a parade of the same gingerbread men and sugar rounds. While those classics hold a special place in our hearts, your dessert table might be craving a…
Spread the loveNothing ruins a holiday baking session faster than a heart shaped cookie that looks like a blob. You spend hours chilling the dough only to watch it melt into a puddle in the…