
The Thanksgiving countdown creates stress. Main courses like turkey and stuffing take up all the oven time. Dessert often becomes an afterthought. It does not have to be that way.
This year, skip the baking anxiety entirely. We gathered forty two simple recipes designed for easy assembly. Every single one saves valuable oven space.
These chilled treats look gorgeous. They taste incredible. Get ready to impress your family and still enjoy a relaxing holiday. You deserve a stress free celebration.
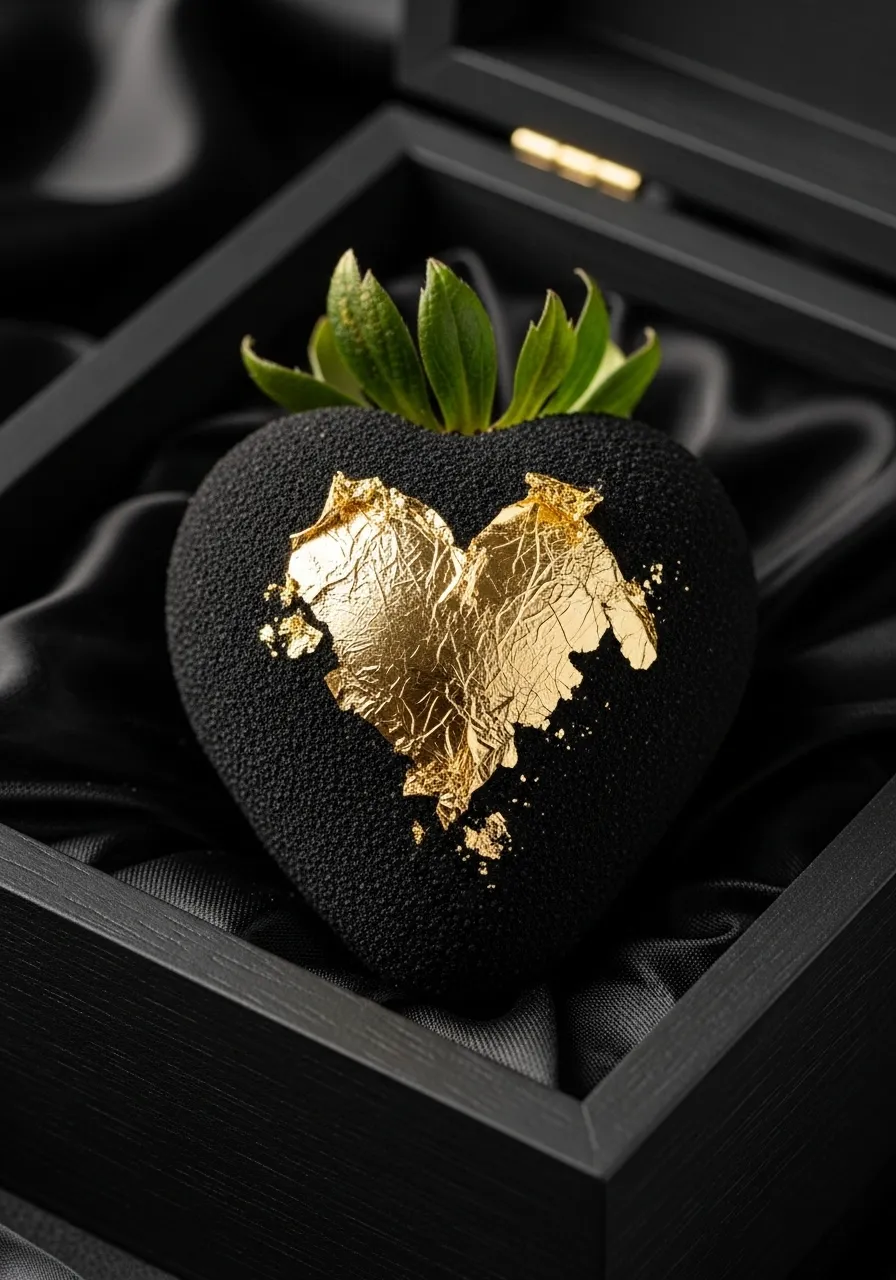
1. Speculoos Cookie Butter Cheesecake Pops

- A Festive Bite on a Stick
These delightful little balls look like holiday cheer ready to be served. They offer a gorgeous presentation, standing tall and proud on a platter. The gingerbread cookie base creates a rich, spiced crust that truly evokes the season. They are generously coated in a shimmering layer of white chocolate, which adds a lovely sweetness and smooth texture. A sprinkle of crumbled cookies provides the final touch, delivering both visual appeal and a satisfying crunch. This is the easy dessert that will disappear first from your Thanksgiving dessert table.
Required Ingredients
- 8 ounces cream cheese, softened to room temperature
- 1/4 cup powdered sugar (confectioners’ sugar)
- 1 teaspoon vanilla extract
- 1/4 teaspoon ground cinnamon
- 2 cups finely crushed gingerbread or speculoos cookies (about one 8.8 oz package)
- 1/4 cup (4 tablespoons) unsalted butter, melted
- 12 ounces white chocolate melting wafers or bark
- 2 tablespoons extra crushed gingerbread or speculoos cookies for topping
- Optional: 1/4 cup cookie butter spread (like Biscoff) for an extra flavor boost
Required Equipment
- Mixing bowl (medium)
- Electric mixer or sturdy whisk
- Rubber spatula or spoon
- Small saucepan or microwave-safe bowl for melting butter
- Baking sheet
- Parchment paper or silicone mat
- Lollipop sticks (around 6 inches long)
- Shallow, deep mug or small bowl for dipping
- A piece of styrofoam block or thick cardboard for standing the pops
DIY Instruction Steps
- Prepare the Cookie Base: Crush your cookies until they resemble fine sand. You can do this by pulsing them in a food processor or placing them in a sealed plastic bag and crushing them with a rolling pin. In a medium bowl, combine the cookie crumbs and the melted butter. Stir well until the crumbs are evenly moistened.
- Make the Cheesecake Filling: In a separate mixing bowl, beat the softened cream cheese until it is completely smooth and fluffy. Add the powdered sugar, vanilla extract, and cinnamon. Continue to beat until everything is well combined and the mixture has no lumps. If using, fold in the extra cookie butter spread now.
- Combine and Chill: Add the crushed, buttered cookies into the cream cheese mixture. Use your rubber spatula to fold the two parts together gently. You want a consistent, scoopable dough. Cover the bowl and place the mixture in the refrigerator to chill for at least 30 minutes. This chilling makes the mixture easier to roll.
- Shape the Pops: Line a baking sheet with parchment paper. Scoop or roll the chilled mixture into balls, each about 1 to 1.5 inches in diameter. Place these balls on the lined baking sheet. Insert the lollipop sticks about halfway into each ball.
- Freeze Firmly: Transfer the baking sheet to the freezer. Allow the pops to freeze for at least 4 hours, or until they are very firm. This step is crucial; if they are too soft, they will fall apart when you dip them into the warm chocolate.
- Melt the Chocolate: Place the white chocolate wafers in a deep, small bowl or mug. Melt the chocolate in the microwave in 30-second intervals, stirring thoroughly after each interval, until the chocolate is completely smooth. You want the chocolate to be fluid but not too hot.
- Dip and Decorate: Working quickly, dip one frozen cheesecake pop into the melted white chocolate, turning it gently to coat the entire surface. Tap the stick lightly against the side of the mug to shake off any excess chocolate.
- Finish the Topping: Immediately after dipping, sprinkle the top of the pop with the reserved crushed cookie crumbs.
- Set and Serve: Place the finished pops into the styrofoam block to stand upright while the chocolate sets. Allow the chocolate to harden completely (this takes about 15 minutes at room temperature). Store any leftovers in an airtight container in the refrigerator.
2. Caramel Pecan Pumpkin Pie Dip

- A Delightfully Shareable Dip
This beautiful, creamy creation offers all the flavors of pumpkin pie without the fuss of baking. The festive orange hue of the pumpkin base peeks out beneath a luxurious blanket of whipped topping. A generous drizzle of shimmering caramel sauce creates a stunning, appealing swirl across the center. Crunchy, toasted pecans add texture and a nutty warmth that complements the holiday spice blend. Serving this dip alongside fresh apple slices and graham crackers makes it a memorable centerpiece for any appetizer or dessert spread.
Required Ingredients
- 8 ounces cream cheese, softened to room temperature
- 1 cup canned pumpkin puree (not pumpkin pie filling)
- 1/2 cup powdered sugar (confectioners’ sugar)
- 1 teaspoon vanilla extract
- 2 teaspoons pumpkin pie spice
- 1/4 cup pre-made caramel sauce (or dulce de leche)
- 1/2 cup chopped, toasted pecans
- Dippers: Apple slices, graham crackers, pretzels, vanilla wafers
Required Equipment
- Large mixing bowl
- Electric mixer (handheld or stand mixer) or sturdy whisk
- Rubber spatula
- Serving bowl or decorative dish
DIY Instruction Steps
- Soften the Base: Ensure your cream cheese is fully softened to room temperature. This is crucial for achieving a smooth, lump-free dip. Place the softened cream cheese in your large mixing bowl.
- Combine the Sweeteners: Add the powdered sugar and vanilla extract to the cream cheese. Use an electric mixer to beat these ingredients together on medium speed until the mixture is light, fluffy, and completely smooth.
- Mix in Pumpkin and Spice: Gently fold in the pumpkin puree and the pumpkin pie spice. Continue mixing until the color and consistency are uniform. Make sure no streaks of plain cream cheese remain.
- Chill to Set: Transfer the mixture into your serving bowl or decorative dish. Cover the dish tightly with plastic wrap. Place the dip in the refrigerator for at least 2 hours to allow the flavors to deepen and the dip to firm up slightly.
- Decorate Before Serving: Just before serving, drizzle the entire top of the dip generously with the caramel sauce. Sprinkle the chopped, toasted pecans over the caramel swirl.
- Arrange the Dippers: Artfully arrange your chosen dippers—apple slices, graham crackers, and pretzels—around the serving bowl to create a beautiful, edible wreath effect.
3. Spiced Sweet Potato Energy Bites

- A Global Twist on Holiday Flavors
These small, naturally sweet truffles introduce an exciting blend of textures and tastes to the dessert table. The interior is rich, dense, and deeply spiced, hinting at traditional holiday preparations. These balls are dusted with a delicate layer of powdered sugar, giving them a snowy, rustic appearance. Other pops are coated in a creamy white chocolate shell, adding elegance and a contrasting sweet note. Garnishes like a pistachio or a whole cardamom pod signal a sophisticated, global inspiration in this effortless sweet treat.
Required Ingredients
- 1 cup cooked, mashed sweet potato (or canned pumpkin puree), chilled
- 1 cup finely crushed vanilla wafers or graham crackers
- 1/2 cup finely chopped dates (or raisins)
- 1/4 cup natural peanut butter or almond butter
- 1 teaspoon ground cardamom (or pumpkin pie spice)
- 1/2 teaspoon ground ginger
- 1/4 cup unsweetened shredded coconut (optional)
- 4 ounces white chocolate melting wafers (for coating)
- Optional: Powdered sugar and chopped pistachios for garnish
Required Equipment
- Medium mixing bowl
- Rubber spatula or spoon
- Small baking sheet
- Parchment paper
- Small microwave-safe bowl for melting chocolate
DIY Instruction Steps
- Prepare the Sweet Potato Base: Ensure your cooked sweet potato mash is cool and relatively dry. Measure it into the medium mixing bowl.
- Combine Dry Ingredients: Add the crushed vanilla wafers, chopped dates, cardamom, ginger, and optional coconut to the sweet potato. Stir everything together using your rubber spatula until the mixture is sticky and evenly combined.
- Bind the Dough: Add the natural peanut butter. Mix thoroughly. You are looking for a cohesive dough that holds its shape when squeezed. If the mixture feels too wet, add a tablespoon more crushed cookies; if too dry, add a splash of milk or water.
- Roll the Bites: Line the small baking sheet with parchment paper. Scoop small portions of the mixture (about 1 inch in diameter) and roll them between your palms to form smooth, round balls. Place them on the lined sheet.
- Chill Firmly: Place the tray of bites into the refrigerator or freezer for at least 60 minutes. They must be firm before moving to the next step.
- Melt and Dip (Optional Coating): If you choose to coat them, melt the white chocolate wafers in the microwave in short bursts, stirring until smooth. Dip half of the chilled balls completely into the melted chocolate.
- Decorate: Before the chocolate sets, gently dust the uncoated balls with powdered sugar. Place a chopped pistachio or a sprinkle of cinnamon on top of the chocolate-coated balls. Let the chocolate set completely before serving.
4. Raspberry Cream Trifle Cups

- Layered Comfort in a Glass
These elegant single-serving desserts offer a beautiful visual display of color and texture. Soft vanilla wafers form the base, offering a tender cake element. A rich, vibrant layer of raspberry preserve adds a beautiful crimson color and a tart counterpoint to the sweetness. The top layer is a thick, cloudlike mound of creamy vanilla mousse or whipped cream cheese. Dark chocolate shavings and a mini cookie garnish finish these cups, making them look sophisticated yet totally approachable for any holiday gathering.
Required Ingredients
- 1 block (8 ounces) cream cheese, softened
- 1/2 cup powdered sugar
- 1 teaspoon vanilla extract
- 1 cup heavy whipping cream
- 1 jar (about 12 ounces) high-quality raspberry preserves or jam
- 2 cups crumbled vanilla wafers or pound cake pieces
- Garnish: Mini chocolate sandwich cookies, chocolate shavings, or extra cookies
Required Equipment
- Electric mixer or whisk
- Medium mixing bowl
- Rubber spatula
- Small serving glasses (about 6-8 ounces each)
DIY Instruction Steps
- Make the Cream Layer: Pour the heavy whipping cream into a clean, cold mixing bowl. Beat the cream on high speed until soft peaks begin to form. Set this aside.
- Create the Cheesecake Base: In a separate bowl, beat the softened cream cheese with the powdered sugar and vanilla extract until the mixture is very smooth and has no lumps.
- Fold the Cream: Gently fold the whipped cream into the cream cheese mixture using your rubber spatula. Be careful not to overmix, as you want to keep the mixture light and airy. This forms your creamy filling.
- Layer the Cups: Get your serving glasses ready. Start by spooning about 1-2 tablespoons of the crumbled vanilla wafers into the bottom of each glass. Press them down lightly.
- Add the Fruit Layer: Next, spoon a generous layer of the raspberry preserves over the cookie crumbs in each glass.
- Top with Cream: Add a final, thick layer of the cream cheese/whipped cream mixture on top of the preserves. You can use a piping bag for a neater look or simply spoon it in.
- Chill and Garnish: Place the filled glasses into the refrigerator for at least 1 hour to set. Before serving, top each cup with a sprinkle of chocolate shavings and one of the mini chocolate sandwich cookies.
5. Mocha Espresso Truffles

- Rich and Intense Coffee Treats
These luxurious, dark chocolate truffles are packed with deep, intense flavor, offering a welcome break from traditional holiday spice. Their exterior is coated in a shiny, smooth layer of dark chocolate, giving them a sleek appearance. Elegant white chocolate lines drizzle across the top, providing a striking contrast against the dark shell. The mocha filling is smooth and creamy, while the decoration of cacao nibs adds a bitter, crunchy textural element. These little bites are a sophisticated conclusion to any heavy meal.
Required Ingredients
- 8 ounces semi-sweet or dark chocolate, finely chopped
- 1/2 cup (4 ounces) heavy whipping cream
- 1 tablespoon instant espresso powder
- 1/4 teaspoon sea salt
- 1/2 teaspoon vanilla extract
- 8 ounces good quality dark chocolate melting wafers or bark (for outer coating)
- 2 ounces white chocolate melting wafers (for drizzle)
- Garnish: Cacao nibs or finely chopped coffee beans
Required Equipment
- Small saucepan
- Medium heatproof bowl
- Whisk and rubber spatula
- Small baking sheet
- Parchment paper
- Small microwave-safe bowl for melting the outer chocolate
DIY Instruction Steps
- Infuse the Cream: In the small saucepan, heat the heavy whipping cream and instant espresso powder over medium heat. Stir constantly until the powder dissolves and the mixture is just about to simmer. Remove the pan from the heat immediately.
- Create the Ganache: Place the finely chopped dark chocolate into the heatproof bowl. Pour the hot espresso cream mixture over the chocolate. Let it sit undisturbed for 5 minutes to allow the chocolate to melt.
- Whisk and Flavor: Add the sea salt and vanilla extract. Gently whisk the mixture, starting in the center and working your way out, until you have a smooth, glossy, homogenous ganache.
- Chill to Firm: Cover the bowl and place the ganache in the refrigerator for at least 3 hours, or until it is firm enough to easily roll into balls.
- Roll the Truffles: Line the baking sheet with parchment paper. Use a small scoop or teaspoon to portion the chilled ganache. Quickly roll the portions between your palms to form smooth, 1-inch balls. Place them back on the lined sheet.
- Coat the Truffles: Melt the dark chocolate wafers in a small, deep bowl, following the melting instructions (microwave in 30-second bursts, stirring until smooth). Dip each truffle completely into the melted chocolate. Allow the excess to drip off before placing it back on the parchment paper.
- Drizzle and Garnish: Melt the white chocolate wafers separately. Transfer the melted white chocolate into a small plastic bag and snip a tiny corner off. Drizzle thin lines of white chocolate across the top of each truffle. Immediately sprinkle a few cacao nibs on top before the chocolate sets.
- Set Completely: Allow the chocolate coating to set completely before serving.
6. Honey Fig and Mascarpone Parfaits

- Rustic Mediterranean Delight
These elegant, individual desserts present a beautiful contrast of textures and colors. A rustic base of crumbled almond biscotti provides a delightful crunch and nutty flavor. Resting above the cookies is a generous dollop of creamy, airy whipped mascarpone cheese. The entire treat is crowned with rich, jewel-toned wedges of fresh fig, which look luxurious. A bright drizzle of golden honey and a few strips of lemon zest complete this fresh and simple no bake creation. This is a lighter, sophisticated option for your holiday table.
Required Ingredients
- 8 ounces mascarpone cheese, chilled
- 1/2 cup heavy whipping cream, chilled
- 1/4 cup powdered sugar (confectioners’ sugar)
- 1 teaspoon vanilla extract
- 1 cup crumbled almond biscotti or shortbread cookies
- 4 fresh figs, sliced into quarters
- 2 tablespoons good quality honey
- Zest of 1/2 lemon
- Optional: Fresh mint leaves for garnish
Required Equipment
- Medium mixing bowl
- Electric mixer or sturdy whisk
- Rubber spatula
- Small serving glasses (about 6-8 total)
DIY Instruction Steps
- Prepare the Cream: Place the cold mascarpone cheese and cold heavy whipping cream into the mixing bowl. Whip them together using an electric mixer until the mixture thickens and forms soft peaks. Do not overmix, or it may become grainy.
- Sweeten the Cream: Gently fold in the powdered sugar and vanilla extract using the rubber spatula. The cream should remain light and airy.
- Assemble the Base: Spoon or gently drop about 1 to 2 tablespoons of the crumbled biscotti into the bottom of each serving glass.
- Layer the Cream: Scoop a generous amount of the prepared mascarpone cream over the cookie layer in each glass. You can use a piping bag for a tidier look if you wish.
- Garnish and Finish: Place two to three fig slices artfully on top of the cream layer. Drizzle each dessert with a small amount of honey. Finish by sprinkling a tiny bit of lemon zest and adding a small mint leaf for color, if desired.
- Chill Time: Refrigerate the parfaits for at least 30 minutes to allow the flavors to meld before serving.
7. Pomegranate Mint Jiggle Shots

- A Refreshing, Festive Cooler
These tiny, vibrant treats offer a light, clean contrast to heavy holiday meals. The lower layer features a translucent, pale color, suggesting a hint of lime or lemon zest. Above this rests a bright red, shimmering layer, packed with glistening pomegranate seeds. A fresh, bright mint sprig is nestled into the top, adding a beautiful pop of green. These desserts, served in small shot glasses, are a stunning way to bring festive red and green colors to your dessert spread. They are incredibly easy to make ahead of time.
Required Ingredients
- 1 package (3 ounces) unflavored gelatin
- 1 cup cold water, divided
- 1/2 cup granulated sugar
- 1 cup white cranberry juice or light-colored juice
- 1/2 cup freshly squeezed lime juice
- 1 cup pomegranate seeds (arils)
- Garnish: Fresh mint leaves
Required Equipment
- Small saucepan
- Whisk
- Measuring cups and spoons
- Small shot glasses (around 12 to 15 total)
DIY Instruction Steps
- Bloom the Gelatin: Pour 1/2 cup of cold water into a small saucepan. Sprinkle the unflavored gelatin powder evenly over the water. Allow the mixture to “bloom” (sit and soften) for about 5 minutes.
- Dissolve the Gelatin: Place the saucepan over low heat. Whisk continuously until the gelatin crystals are completely dissolved and the mixture is clear. Do not allow it to boil. Remove the pan from the heat.
- Create the Base Layer: Stir in the remaining 1/2 cup of cold water, the sugar, the white cranberry juice, and the lime juice into the gelatin mixture. Continue stirring until the sugar is fully dissolved.
- Set the Base: Pour the mixture evenly into all the small shot glasses, filling each only about halfway. Carefully transfer the glasses to the refrigerator. Allow this layer to chill and set for at least 1 hour, or until it is firm enough that it does not stick to your finger when touched.
- Add the Topping: Once the bottom layer is set, gently sprinkle a generous amount of pomegranate seeds on top of the gelatin in each glass. The seeds should be well distributed.
- Garnish and Serve: Place a small, fresh mint leaf on the very top of each serving. Keep the jiggle shots refrigerated until just before you are ready to serve them.
8. Poached Pear and Custard Verrines

- A Subtle and Elegant Dessert
These refined, single-serving cups showcase classic, gentle flavors. The base layer features crisp Ladyfinger cookies, offering a soft cake texture that quickly absorbs flavor. Layers of a pale, fluffy custard cream alternate with a light-colored fruit. The fruit layer consists of tender, finely diced pears, which contrast nicely with the cream. The top of the cup is finished with a swirl of cream, a dusting of cinnamon, and a sliver of fresh pear for extra freshness. This dessert offers a wonderful balance of cool creaminess and subtle fruit flavor.
Required Ingredients
- 1 package (3 ounces) Ladyfinger cookies
- 1 can (15 ounces) pears in light syrup, drained and diced (reserve 1/4 cup of the syrup)
- 8 ounces frozen whipped topping (like Cool Whip), thawed
- 4 ounces cream cheese, softened
- 1/4 cup powdered sugar
- 1 teaspoon almond extract (optional, but recommended)
- Garnish: Ground cinnamon and thin slices of fresh pear
Required Equipment
- Medium mixing bowl
- Electric mixer or sturdy whisk
- Rubber spatula
- Small serving glasses (about 6 to 8 total)
DIY Instruction Steps
- Prepare the Cream: In the medium mixing bowl, beat the softened cream cheese with the powdered sugar until smooth and creamy. Add the reserved pear syrup and the almond extract, mixing until just combined.
- Fold the Topping: Gently fold the thawed whipped topping into the cream cheese mixture using the rubber spatula. Work carefully to keep the mixture light and airy.
- Assemble the Layers: Start by placing 2-3 whole Ladyfinger cookies broken into pieces at the bottom of each glass.
- Moisten the Cookies: Drizzle a tiny amount of the leftover pear syrup (if you have any) over the cookies to soften them slightly.
- Alternate the Layers: Follow the cookies with a scoop of the cream mixture, then a layer of the diced, drained pears. Repeat the cream and pear layers until the glass is full, ending with a layer of the fluffy cream.
- Garnish and Set: Top each glass with a final small swirl of cream. Dust the surface lightly with ground cinnamon and insert a thin slice of fresh pear for a dramatic presentation.
- Chill Thoroughly: Cover the glasses and refrigerate for a minimum of 4 hours, or preferably overnight. This resting time allows the cookies to fully soften and the flavors to fully develop.
9. Chocolate Walnut Brownie Trifle

- A Decadent Tower of Chocolate
This impressive, towering trifle is a chocolate lover’s fantasy and an effortless centerpiece for your gathering. Rich, dark fudge brownie chunks are layered generously throughout the glass bowl. Alternating with the brownies are thick, billowy layers of vanilla bean cream or frosting. Crunch and saltiness are introduced by large pieces of whole walnuts, which are visible in every layer. The entire dessert is crowned with a mound of whipped cream, more walnuts, and plenty of mini chocolate chips. This dessert requires zero baking, relying on store-bought brownie bites for its stunning structure.
Required Ingredients
- 2 pounds pre-made fudge brownies (cubed into bite-sized pieces)
- 2 containers (8 ounces each) frozen whipped topping (like Cool Whip), thawed
- 1 package (3.4 ounces) instant vanilla pudding mix
- 1 cup cold milk (whole or 2%)
- 1 teaspoon vanilla extract
- 1.5 cups chopped or whole walnuts, toasted lightly
- Garnish: Mini chocolate chips and extra whole walnuts
Required Equipment
- Large trifle bowl (clear glass is strongly preferred)
- Medium mixing bowl
- Whisk
- Rubber spatula
DIY Instruction Steps
- Prepare the Cream: In the medium mixing bowl, whisk together the instant vanilla pudding mix, cold milk, and vanilla extract until the mixture begins to thicken. It should be thick after about 2 minutes of whisking.
- Fold the Topping: Gently fold both containers of thawed whipped topping into the pudding mixture using your rubber spatula. Be careful not to deflate the topping; fold just until no streaks of pudding remain. This is your trifle cream.
- Begin Layering: Place a layer of the cubed fudge brownies into the very bottom of the trifle bowl.
- Add Cream and Nuts: Spoon a layer of the prepared trifle cream over the brownies. Sprinkle a generous amount of walnuts over the cream.
- Build the Tower: Repeat the layering pattern: brownies, then cream, then walnuts. Continue this process until you have used all the ingredients, ending with a final thick layer of the cream mixture at the very top.
- Chill and Garnish: Cover the trifle bowl loosely with plastic wrap. Refrigerate the trifle for a minimum of 4 hours or overnight. This allows the creamy mixture to soften the brownies, creating a cake like texture. Before serving, decorate the top of the cream layer lavishly with whole walnuts and mini chocolate chips.
10. Individual Ginger Pumpkin Mousse Jars

- A Spiced Twist on the Classic Pie
These adorable desserts in a jar are a charming alternative to serving a traditional pie. The bottom layer is a thick crust made from crushed ginger snap cookies, which offer an intense, spicy base. Above this is a pale, creamy layer of vanilla mousse or lightened cream cheese. The top layer is a thick, vibrant orange swirl of pumpkin mousse, which stands out beautifully. A final crown of white whipped cream and a sprinkle of crystallized ginger finishes the look. Tying a simple piece of twine around the jar adds a delightful rustic touch.
Required Ingredients
- 2 cups finely crushed ginger snap cookies
- 1/4 cup (4 tablespoons) unsalted butter, melted
- 8 ounces cream cheese, softened
- 1 cup canned pumpkin puree (not pie filling)
- 1/2 cup powdered sugar
- 1 tablespoon pumpkin pie spice
- 1 teaspoon vanilla extract
- 1.5 cups heavy whipping cream (for the topping and mousse lightener)
- Garnish: Crystallized ginger pieces and extra cinnamon
Required Equipment
- Medium mixing bowl
- Electric mixer
- Rubber spatula
- Small jars with lids (about 6 to 8 ounces each)
- Piping bag with star tip (optional, for neat topping)
DIY Instruction Steps
- Prepare the Crust: In a small bowl, combine the crushed ginger snap cookies and the melted butter. Stir until the crumbs are fully moistened. Press about 2 tablespoons of this crumb mixture into the bottom of each small jar to create the crust.
- Make the Mousse Base: In the medium mixing bowl, beat the softened cream cheese with the powdered sugar and vanilla extract until completely smooth.
- Whip the Cream: In a separate clean, cold bowl, whip 1 cup of the heavy whipping cream until stiff peaks form. Set aside.
- Create the Pumpkin Mousse: Gently fold the pumpkin puree and pumpkin pie spice into the cream cheese mixture using the rubber spatula. Then, carefully fold half of the whipped cream into this pumpkin mixture to create a light mousse.
- Create the Vanilla Mousse: Fold the remaining half of the whipped cream into the remaining plain cream cheese mixture. This gives you two complementary layers.
- Layer the Jars: Pipe or spoon a layer of the pale vanilla cream over the ginger snap crust. Follow this with a generous layer of the vibrant pumpkin mousse.
- Top and Chill: Whip the remaining 1/2 cup of heavy cream with a tablespoon of powdered sugar for the final topping. Pipe or dollop this whipped cream onto the pumpkin layer. Garnish each jar with a sprinkle of cinnamon and a few pieces of crystallized ginger.
- Refrigerate: Seal the jars loosely and refrigerate for a minimum of 3 hours to ensure the layers are firm.
11. Honeyed Pear and Walnut Tart

- A Stunning Centerpiece Tart
This beautiful, rustic tart makes for an elegant no bake statement piece on your holiday table. The base is a crumbly, textured nut crust, likely made from graham crackers and walnuts, which provides a sturdy foundation. The filling is a smooth, tangy layer of light cream, perhaps a whipped mascarpone or cream cheese mixture. Slices of tender, caramelized pears are arranged meticulously on top, forming lovely, delicate rose patterns. A final scattering of chopped walnuts and a shimmering honey glaze completes this sophisticated, fruit forward dessert.
Required Ingredients
- 1.5 cups finely crushed graham crackers or shortbread cookies
- 1/2 cup finely chopped walnuts
- 6 tablespoons unsalted butter, melted
- 8 ounces cream cheese, softened
- 1/2 cup powdered sugar
- 1 teaspoon vanilla extract
- 1 cup heavy whipping cream, cold
- 3 medium pears (such as Bosc or Anjou), sliced very thinly
- 1/4 cup honey
- 2 tablespoons lemon juice
Required Equipment
- 9-inch tart pan with a removable bottom
- Medium mixing bowl
- Electric mixer or whisk
- Small saucepan
- Rubber spatula
DIY Instruction Steps
- Prepare the Crust: Combine the crushed graham crackers, chopped walnuts, and melted butter in the medium mixing bowl. Mix thoroughly until the crumbs are evenly moistened. Press this mixture firmly into the bottom and up the sides of the tart pan. Use the bottom of a measuring cup to ensure a compact, level base. Place the crust in the refrigerator to chill for at least 30 minutes.
- Make the Cream Filling: In the same mixing bowl (no need to wash), beat the softened cream cheese with the powdered sugar and vanilla extract until the mixture is light and smooth. In a separate bowl, whip the cold heavy cream until stiff peaks form. Gently fold the whipped cream into the cream cheese mixture until fully combined.
- Create the Honey Glaze: Combine the honey and lemon juice in the small saucepan. Warm over low heat just until the honey is fluid and easy to stir. Remove from the heat and set aside.
- Arrange the Pears: Take your very thinly sliced pears. To make the roses, slightly overlap the slices in a circle, starting from the outside edge and working your way in toward the center. This layered look gives the illusion of a bloom.
- Assemble and Chill: Spoon the cream filling into the chilled crust and spread it evenly. Arrange the pear slices and roses on top of the cream layer. Brush the honey and lemon mixture gently over all the pears for shine and flavor. Refrigerate the tart for a minimum of 4 hours before serving.
12. Key Lime Pie Jars

- Tangy, Tropical Mini Desserts
These bright, zesty treats bring a welcome contrast of flavor to a rich Thanksgiving spread. They are presented beautifully in small mason jars, making them easy to serve and transport. The bottom layer is a generous, golden crust made from graham crackers and butter. A thick, pale layer of creamy filling sits atop the crust, boasting a strong lime flavor. Each jar is crowned with a dollop of sweet whipped cream and a vibrant slice of fresh lime. The ribbon tied around the jar adds a charming, rustic homemade look.
Required Ingredients
- 1.5 cups finely crushed graham crackers
- 6 tablespoons unsalted butter, melted
- 1 can (14 ounces) sweetened condensed milk
- 1/2 cup freshly squeezed Key lime juice
- 8 ounces cream cheese, softened
- 1 teaspoon lime zest
- 1 cup heavy whipping cream
- 2 tablespoons powdered sugar (for the topping)
Required Equipment
- Small mixing bowl
- Medium mixing bowl
- Electric mixer or whisk
- Rubber spatula
- Small mason jars (4-6 ounces, 6 to 8 total)
DIY Instruction Steps
- Prepare the Crust: In the small mixing bowl, combine the graham cracker crumbs and melted butter. Stir until the mixture is uniform. Press about 2 tablespoons of this mixture firmly into the bottom of each mason jar.
- Make the Filling: In the medium mixing bowl, beat the softened cream cheese, creamy condensed milk, and the lime zest, mixing until just combined.
- Add the Juice: Slowly pour in the Key lime juice while the mixer is running on low speed. The mixture will thicken almost immediately due to the acidity of the lime juice. Do not overmix.
- Layer and Chill: Divide the lime filling evenly among the jars, spooning it directly over the crust layer. Place the jars in the refrigerator to chill for at least 4 hours, or until the filling is fully set.
- Make the Topping: Just before serving, combine the cold heavy whipping cream and powdered sugar in a clean bowl. Beat on high speed until stiff peaks form.
- Garnish: Pipe or dollop the whipped cream onto the top of each chilled pie jar. Finish each one with a thin slice of fresh lime and a tiny sprinkle of extra lime zest.
13. Salty Caramel Peanut Clusters

- Crunchy, Sweet, and Salty Bites
These irresistible little clusters provide a beautiful mix of salty, crunchy, and smooth textures. Each bite is primarily composed of crisp cereal and salty peanuts, held together with a sweet, sticky coating. The bottom of each cluster is generously dipped in smooth, dark chocolate, forming a sturdy base. A drizzle of golden caramel sauce is laced across the top, followed by a generous sprinkle of coarse sea salt. These tiny treats are quick to assemble and make a highly satisfying, contrasting texture addition to your dessert display.
Required Ingredients
- 1 cup pre-made caramel sauce (or store bought caramel candies, melted)
- 1/2 cup creamy peanut butter
- 1 cup mini marshmallows
- 2 cups crisp rice cereal
- 1 cup roasted peanuts (salted)
- 12 ounces dark chocolate melting wafers or bark
- 1 teaspoon coarse sea salt (like Maldon flakes)
Required Equipment
- Large saucepan
- Large heatproof bowl
- Rubber spatula
- Small baking sheet
- Parchment paper
- Small bowl for melting chocolate
DIY Instruction Steps
- Melt the Caramel: In the large saucepan, gently heat the pre-made caramel sauce and peanut butter over low heat. Stir until both ingredients are fully melted and smoothly combined. Alternatively, if using caramel candies, melt them with 1 tablespoon of milk until smooth, then stir in the peanut butter.
- Combine the Mix-ins: Remove the caramel mixture from the heat. Quickly stir in the mini marshmallows, crisp rice cereal, and roasted peanuts. Mix gently but thoroughly until everything is evenly coated in the sticky sauce.
- Shape the Clusters: Line the baking sheet with parchment paper. Drop spoonfuls of the mixture onto the prepared sheet to form clusters about 1.5 inches wide. Press them lightly into round shapes.
- Chill to Set: Place the clusters in the refrigerator for at least 30 minutes to firm up.
- Dip in Chocolate: Melt the dark chocolate wafers in a small bowl. Dip the bottom of each chilled cluster into the melted chocolate, coating about two thirds of the way up. Place them back on the parchment paper.
- Garnish: Immediately after dipping and before the chocolate sets, drizzle a small amount of extra caramel sauce (warm it slightly if needed) over the top of each cluster. Sprinkle with coarse sea salt. Allow the chocolate to set completely before serving.
14. Golden Mango Coconut Mousse

- A Bright, Exotically Spiced Treat
This stunningly vibrant yellow dessert offers a refreshing, non traditional flavor profile. The presentation is simple and elegant in clear stemless glasses. The mousse itself is creamy and deeply colored, suggesting saffron or turmeric mixed with sweet mango puree. The top is beautifully garnished with toasted, crisp coconut flakes and a sprinkle of spices, perhaps cardamom. A round, shortbread cookie sits neatly alongside, ready for scooping. This mousse is a lighter option that provides a lovely palate cleanser after a big meal.
Required Ingredients
- 1 cup full-fat coconut milk (canned, chilled overnight)
- 1 cup frozen or fresh mango chunks, pureed
- 1/4 cup granulated sugar (or preferred sweetener)
- 1 teaspoon ground cardamom
- 1 teaspoon agar agar powder or 1 package unflavored gelatin (see instructions for substitution)
- 2 tablespoons hot water (if using gelatin)
- Garnish: Toasted coconut flakes, a drizzle of honey, or a pinch of saffron
Required Equipment
- Blender or food processor
- Small saucepan
- Whisk
- Rubber spatula
- Small serving glasses (4 to 6 total)
DIY Instruction Steps
- Prepare the Coconut Cream: Open the can of chilled coconut milk carefully. Scoop out the thick layer of coconut cream that has solidified at the top. Measure out 1 cup of this thick cream.
- Puree the Fruit: Combine the pureed mango, sugar, and cardamom in the blender. Blend until completely smooth.
- Dissolve Agar Agar (Option A): If using agar agar, combine the powder with the pureed mango mixture in the small saucepan. Bring to a boil over medium heat, whisking constantly. Reduce to a simmer and cook for 1 minute. Remove from heat.
- Dissolve Gelatin (Option B): If using unflavored gelatin, dissolve the powder in 2 tablespoons of hot water, stirring until clear. Stir this liquid gelatin into the cold mango puree.
- Fold the Cream: Gently fold the prepared coconut cream into the mango mixture using a rubber spatula. Mix until the color and consistency are uniform.
- Pour and Chill: Pour the mousse evenly into the small serving glasses. Refrigerate for at least 4 hours, or until fully set and firm.
- Garnish: Before serving, top each mousse with a sprinkle of toasted coconut flakes and a light drizzle of honey or agave syrup.
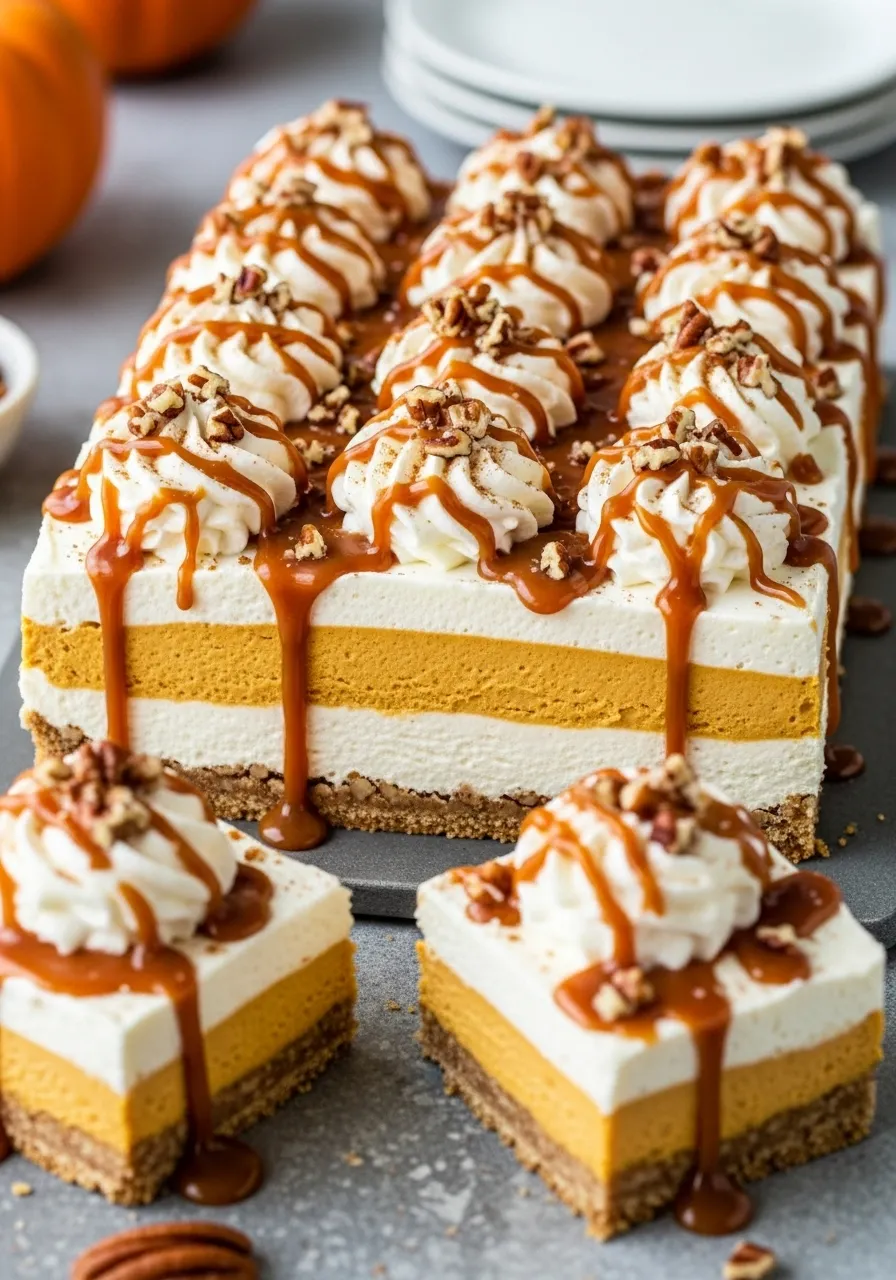
15. Layered Pumpkin Cheesecake Bars

- A Gorgeous, Spiced Slab Dessert
This impressive layered bar dessert offers a creamy, substantial alternative to pie. It features a thick, ginger snap or graham cracker crust that provides a stable, spicy base. Above the crust sits a distinct, thin layer of creamy pumpkin filling, beautifully orange-colored and rich with holiday spices. This is topped with a generous, thick layer of vanilla cheesecake filling. The entire surface is covered in perfectly piped mounds of whipped cream, each drizzled with dark caramel and finished with a pecan half. These bars are easy to slice and serve for a crowd.
Required Ingredients
- 2 cups finely crushed ginger snap cookies or graham crackers
- 1/2 cup (1 stick) unsalted butter, melted
- Cream Layer: 16 ounces cream cheese, softened
- 1/2 cup powdered sugar
- 1 teaspoon vanilla extract
- Pumpkin Layer: 1 cup canned pumpkin puree
- 1 tablespoon pumpkin pie spice
- 1 cup heavy whipping cream (for the topping)
- 1/2 cup pre-made caramel sauce
- Whole pecans for garnish
Required Equipment
- 9×13 inch baking dish
- Parchment paper
- Large mixing bowl
- Electric mixer
- Rubber spatula
- Piping bag with star tip (optional)
DIY Instruction Steps
- Make the Crust: Line the 9×13 inch baking dish with parchment paper, leaving an overhang on the sides for easy lifting. Combine the crushed cookies and melted butter. Press the mixture firmly into the bottom of the prepared dish. Chill the crust for 30 minutes.
- Prepare the Base Layer: In the large mixing bowl, beat the softened cream cheese, powdered sugar, and vanilla until smooth and creamy. Divide this mixture in half, placing one half in a separate bowl.
- Make the Pumpkin Layer: To one bowl of cream cheese mixture, stir in the pumpkin puree and the pumpkin pie spice until the color is uniform. Spread this pumpkin mixture evenly over the chilled crust. Return to the freezer for 1 hour.
- Add the Vanilla Layer: Take the remaining half of the plain cream cheese mixture and spread it gently over the hardened pumpkin layer. Place the entire dish back into the refrigerator to chill for at least 4 hours or until fully set.
- Whip the Topping: Just before serving, whip the heavy whipping cream until stiff peaks form. Pipe or spread this whipped cream generously over the chilled bars.
- Slice and Garnish: Cut the dessert into squares or bars. Drizzle each square lavishly with the caramel sauce. Top each serving with a whole pecan.
16. Eggnog Custard Shooters

- Seasonal Spiced Pudding Cups
These fun, festive shooters capture the classic eggnog flavor in a convenient, creamy form. The custard base is a pale, rich yellow, suggesting notes of nutmeg and vanilla. A dark layer of something rich, perhaps a molasses syrup or chocolate ganache, sits at the bottom of the glass. The glasses themselves features a distinctive star design, adding to the holiday feel. Each shooter is finished with a swirl of white whipped cream and a generous dusting of cinnamon. These are a delightful, sip-sized way to enjoy a favorite winter beverage.
Required Ingredients
- 2 cups store-bought high-quality eggnog
- 1 package (3.4 ounces) instant vanilla pudding mix
- 1/2 teaspoon freshly grated nutmeg
- 1/4 teaspoon ground cinnamon
- 1/4 cup pre-made dark chocolate syrup or caramel sauce
- 1 cup heavy whipping cream (for topping)
- 2 tablespoons powdered sugar (for topping)
Required Equipment
- Medium mixing bowl
- Whisk
- Rubber spatula
- Small shot glasses or decorative tumblers (about 8 total)
- Piping bag with star tip (optional)
DIY Instruction Steps
- Prepare the Base: In the medium mixing bowl, whisk together the cold eggnog, the instant vanilla pudding mix, the grated nutmeg, and cinnamon. Whisk vigorously for about 2 minutes until the mixture begins to thicken considerably.
- Add the Bottom Layer: Spoon about 1 tablespoon of the dark chocolate syrup into the bottom of each small serving glass.
- Fill the Glasses: Carefully spoon the thickened eggnog mixture over the syrup, filling each glass almost to the top.
- Chill to Set: Place the glasses in the refrigerator to chill for at least 2 hours, or until the custard is completely firm.
- Prepare the Topping: In a clean, cold bowl, beat the heavy whipping cream with the powdered sugar until stiff peaks form.
- Garnish: Just before serving, pipe or dollop the whipped cream onto the top of each chilled custard. Finish each with an extra sprinkle of grated nutmeg or cinnamon.
17. Caramel Pecan Layered Cups

- No Bake Layered Squares
These visually striking, individual squares stack creamy and crunchy elements beautifully. They feature a layer of crisp butter cookies providing a tender base. A generous layer of creamy vanilla cheesecake filling sits above the cookies. A scattering of toasted, crunchy pecan pieces separates the cream and cookie layers. The entire presentation is topped with a large swirl of cream, lavishly drizzled with rich caramel sauce, and finished with a whole pecan half. These desserts look fancy but are unbelievably easy to prepare.
Required Ingredients
- 2 cups pre-made vanilla wafer cookies or shortbread cookies
- 16 ounces cream cheese, softened
- 1 cup powdered sugar
- 1 teaspoon vanilla extract
- 2 cups heavy whipping cream, cold
- 1 cup chopped, toasted pecans
- 1/2 cup pre-made caramel sauce
- Garnish: Whole pecans
Required Equipment
- Medium mixing bowl
- Electric mixer or whisk
- Rubber spatula
- Small, clear square serving cups (about 8 total)
DIY Instruction Steps
- Prepare the Cream: In the medium mixing bowl, beat the softened cream cheese, powdered sugar, and vanilla extract until the mixture is very smooth. Set aside.
- Whip the Topping: In a separate, clean bowl, whip the cold heavy whipping cream until stiff peaks form. Gently fold half of the whipped cream into the cream cheese mixture until fully incorporated. Reserve the remaining whipped cream for the final topping.
- Begin the Layers: Place 2 or 3 whole vanilla wafer cookies in the bottom of each square serving cup.
- Build the Layers: Spoon a layer of the cream cheese filling over the cookies. Sprinkle a generous layer of the toasted, chopped pecans over the cream. Repeat the layers, ending with the cream cheese filling.
- Chill Time: Refrigerate the cups for a minimum of 2 hours to allow the layers to settle and the cookies to soften slightly.
- Final Garnish: Just before serving, pipe or dollop a swirl of the reserved plain whipped cream onto the top of each cup. Drizzle the caramel sauce generously over the cream and finish with a single, whole pecan.
18. Black Forest Chocolate Cheesecake

- A Rich, Decadent Round Cake
This dark, dramatically styled cake is a showstopper, offering intense cherry and chocolate flavors. It rests on a thick, dark cookie crust, likely made from chocolate sandwich cookies. The body of the cake is a dense, smooth chocolate cheesecake filling that requires absolutely no oven time. The top is covered in a glossy, thick layer of cherry pie filling or preserve. White whipped cream rosettes dot the outer edge, surrounding the deep red cherry topping. It is a stunning, deeply flavored dessert that satisfies serious chocolate cravings.
Required Ingredients
- 24 chocolate sandwich cookies, finely crushed
- 6 tablespoons unsalted butter, melted
- 16 ounces cream cheese, softened
- 1/2 cup powdered sugar
- 1/2 cup unsweetened cocoa powder
- 1 teaspoon vanilla extract
- 1 cup heavy whipping cream, cold
- 1 can (21 ounces) cherry pie filling or high-quality cherry preserves
Required Equipment
- 9-inch springform pan
- Medium mixing bowl
- Large mixing bowl
- Electric mixer
- Rubber spatula
DIY Instruction Steps
- Make the Crust: In the medium mixing bowl, combine the crushed chocolate cookies and melted butter. Press the mixture firmly and evenly into the bottom of the springform pan. Chill in the refrigerator for 30 minutes.
- Whip the Cream: In the large mixing bowl, beat the cold heavy whipping cream until stiff peaks form. Reserve about 1/2 cup for the final garnish and set the rest aside.
- Make the Filling: In the medium mixing bowl, beat the softened cream cheese, powdered sugar, vanilla extract, and cocoa powder until the mixture is completely smooth and fluffy.
- Fold and Fill: Gently fold the bulk of the whipped cream into the chocolate cream cheese mixture until the color is uniform and the filling is light. Spoon the chocolate cheesecake mixture over the chilled crust and smooth the top.
- Chill Thoroughly: Refrigerate the cake for a minimum of 6 hours, or preferably overnight, until the filling is very firm.
- Top and Garnish: Once firm, spread the cherry pie filling evenly over the top of the cheesecake. Using a piping bag and the reserved whipped cream, pipe small rosettes around the outer edge of the cake. Place a whole cherry on top of each cream rosette.
19. Cinnamon Toast Crunch Parfaits

- Nostalgic Cereal Treat Jars
These fun, texture filled jars capture the comforting taste of a favorite morning cereal. They are layered generously with square pieces of cinnamon cereal, which retain their satisfying crunch. The cereal is layered with thick dollops of vanilla cream, which is likely a cream cheese or pudding mixture. The top is finished with a swirl of cream, a dark chocolate drizzle, and a sprinkle of cinnamon sugar. A whole square of cereal stands up from the cream as a cute, final garnish. These parfaits offer a delicious mix of spice, crunch, and cream.
Required Ingredients
- 2 cups Cinnamon Toast Crunch cereal (or similar cinnamon squares)
- 16 ounces cream cheese, softened
- 1/2 cup powdered sugar
- 1 teaspoon vanilla extract
- 1 cup heavy whipping cream, cold
- 1/4 cup pre-made chocolate sauce (thick variety)
- 2 tablespoons cinnamon sugar (for dusting)
Required Equipment
- Medium mixing bowl
- Electric mixer
- Rubber spatula
- Small mason jars (4-6 ounces, 6 to 8 total)
DIY Instruction Steps
- Prepare the Cream: In the medium mixing bowl, beat the softened cream cheese with the powdered sugar and vanilla extract until very smooth.
- Whip the Topping: In a separate clean bowl, whip the cold heavy whipping cream until soft peaks form. Gently fold the whipped cream into the cream cheese mixture until fully combined.
- Begin Layering: Start by placing a generous handful of the cinnamon cereal squares into the bottom of each mason jar.
- Build the Layers: Follow the cereal with a scoop of the vanilla cream mixture. Repeat the layering process: cereal, then cream. Continue until the jar is almost full, ending with a layer of cream.
- Chill Time: Place the assembled jars in the refrigerator for at least 1 hour. The cream will start to soften some of the cereal pieces, creating a slight cake-like texture.
- Garnish: Just before serving, drizzle the top cream layer with a circle of chocolate sauce. Pipe or dollop a final swirl of cream in the center, dust with the cinnamon sugar, and stick one whole cereal square into the side of the cream.
20. Speculoos Cookie Butter Cheesecake

- A Spiced Whole Cheesecake
This magnificent, towering cheesecake is a holiday marvel, featuring the deep, spiced flavor of cookie butter. It sits on a thick crust of crushed Speculoos cookies, which provides a delicious ginger and cinnamon base. The filling is a smooth, creamy vanilla cheesecake that is rich and decadent. A layer of bright raspberry jam creates a lovely visual border between the cream and the toppings. The entire cake is crowned with a beautiful drizzle of cookie butter sauce and several whole Speculoos cookies standing upright. This impressive cake offers flavor and ease in one beautiful presentation.
Required Ingredients
- 2.5 cups finely crushed Speculoos cookies (like Biscoff)
- 1/2 cup (1 stick) unsalted butter, melted
- 24 ounces cream cheese, softened
- 1 cup powdered sugar
- 1 cup pre-made cookie butter spread, melted slightly
- 1 teaspoon vanilla extract
- 1/4 cup heavy whipping cream
- 1/2 cup raspberry jam or preserve
Required Equipment
- 9-inch springform pan
- Medium mixing bowl
- Large mixing bowl
- Electric mixer
- Rubber spatula
DIY Instruction Steps
- Prepare the Crust: In the medium mixing bowl, combine the crushed Speculoos cookies and melted butter. Press the mixture firmly and evenly into the bottom of the springform pan. Chill in the refrigerator for 30 minutes.
- Make the Filling: In the large mixing bowl, beat the softened cream cheese, powdered sugar, and vanilla extract until the mixture is completely smooth and fluffy. Add the heavy whipping cream and beat until the mixture is thick and voluminous.
- Assemble and Chill: Spoon the cream cheese filling over the chilled crust and smooth the top. Refrigerate the cake for a minimum of 6 hours, or preferably overnight, until the filling is completely set.
- Add the Topping Layer: Once the cake is firm, gently warm the raspberry jam until it is easily spreadable. Pour and spread the jam carefully over the top of the set cheesecake, leaving a small, clean border around the edge.
- Garnish: Melt the cookie butter spread until it is easily pourable. Drizzle it generously in a decorative pattern over the jam layer. Arrange whole Speculoos cookies and optional walnuts upright around the edge of the cake. Remove the springform ring just before serving.
21. Almond Tiramisu Slab

- Easy Family Style Tiramisu
This wide, casserole style dessert offers a simpler approach to the classic Italian treat. It features layers of a light, fluffy mascarpone cream alternating with soft, coffee soaked cookies or biscuits. The entire surface is dusted liberally with rich, unsweetened cocoa powder, providing a welcome bitterness. Generous amounts of sliced, crunchy almonds are scattered across the top, adding a lovely texture contrast. This is a wonderfully deep and comforting dessert, perfect for serving a large Thanksgiving group directly from the dish.
Required Ingredients
- 1.5 cups strong brewed coffee or espresso, cooled
- 1/4 cup almond liqueur (Amaretto) or vanilla extract
- 3 large eggs, separated (or 1 cup pasteurized egg whites and 2 egg yolks)
- 1/2 cup granulated sugar
- 16 ounces mascarpone cheese, chilled
- 1 package (7 ounces) Ladyfinger cookies
- 1/4 cup unsweetened cocoa powder
- 1/2 cup sliced almonds
Required Equipment
- 9×13 inch baking dish
- Large mixing bowl (2 total)
- Electric mixer or sturdy whisk
- Rubber spatula
- Shallow plate or bowl
DIY Instruction Steps
- Prepare the Coffee Soak: In the shallow plate or bowl, combine the cooled brewed coffee and the almond liqueur (or vanilla extract). Set this aside.
- Make the Zabaglione Base: In the large mixing bowl, beat the egg yolks with the sugar until the mixture is pale yellow and thick, resembling a custard. Gradually beat in the chilled mascarpone cheese until the cream is smooth.
- Whip the Whites: In a separate, clean large mixing bowl, beat the egg whites (or pasteurized whites) until stiff, glossy peaks form.
- Fold the Cream: Gently fold the beaten egg whites into the mascarpone mixture using your rubber spatula. You want the mixture to remain light and airy; fold until just combined.
- Assemble the Tiramisu: Quickly dip one side of a Ladyfinger cookie into the coffee mixture. Do not fully soak it, just a quick dip. Arrange a layer of the dipped cookies in the bottom of the prepared baking dish.
- Layer and Finish: Spread half of the mascarpone cream mixture evenly over the cookie layer. Add a second layer of coffee dipped cookies. Top with the remaining mascarpone cream and smooth the surface.
- Chill and Dust: Cover the dish and refrigerate for a minimum of 6 hours, or preferably overnight, to allow the flavors to meld and the cream to set. Just before serving, sprinkle the top generously with cocoa powder and sliced almonds.
22. Miniature Pumpkin Cheesecake Shooters

- Spice Cake Style Desserts
These bite sized treats offer a delightful, concentrated dose of holiday flavor. Each clear glass features a thick layer of a dark, crunchy base, likely crushed ginger snaps or graham crackers. Above the crust is a generous layer of pale, smooth vanilla cheesecake filling. A smaller, contrasting swirl of vibrant orange pumpkin mousse sits on top. A final dollop of whipped cream, a dusting of cinnamon, and a few bright green pumpkin seeds complete these adorable, layered desserts.
Required Ingredients
- 1 cup finely crushed ginger snaps or graham crackers
- 3 tablespoons unsalted butter, melted
- 8 ounces cream cheese, softened
- 1/4 cup powdered sugar
- 1 teaspoon vanilla extract
- 1/2 cup canned pumpkin puree (not pie filling)
- 1 teaspoon pumpkin pie spice
- 1/2 cup heavy whipping cream (for the topping)
- Garnish: Pepitas (green pumpkin seeds) and ground cinnamon
Required Equipment
- Small mixing bowl
- Electric mixer
- Rubber spatula
- Shot glasses or small tumblers (about 8 total)
DIY Instruction Steps
- Prepare the Crust: In the small mixing bowl, combine the cookie crumbs and melted butter. Press about 1 tablespoon of this mixture firmly into the bottom of each shot glass.
- Make the Filling Base: In a separate medium bowl, beat the softened cream cheese, powdered sugar, and vanilla extract until the mixture is very smooth.
- Divide the Filling: Transfer half of the cream cheese mixture into a second bowl. Spread the plain half evenly over the crust layer in each shot glass. Chill these immediately for 30 minutes.
- Make the Pumpkin Layer: To the remaining cream cheese mixture, stir in the pumpkin puree and the pumpkin pie spice until the mixture is a uniform orange color.
- Layer and Chill Again: Spoon or pipe the pumpkin mixture over the chilled vanilla layer in each glass. Return all the glasses to the refrigerator for at least 2 hours, or until the layers are completely firm.
- Garnish: Just before serving, whip the heavy whipping cream until stiff peaks form. Pipe a small dollop of whipped cream onto the top of the pumpkin layer. Dust with cinnamon and place 2 or 3 green pepitas on the whipped cream for color.
23. Salty Peanut Butter Swirl Pie

- Sweet, Salty, and Crowd Pleasing
This appealing no bake pie is a fun blend of classic flavors with an added crunch. The crust is a rich, salty base made from crushed pretzels and possibly cookies, providing a fantastic contrast to the sweet filling. The body of the pie is a thick, pale peanut butter mousse that sets up beautifully in the fridge. A swirl of bright red jam or preserve decorates the center, offering a pop of color and fruitiness. The crust edge is decorated with an entire ring of mini pretzels and elegant swirls of piped cream and chocolate.
Required Ingredients
- 2 cups finely crushed pretzels
- 1/2 cup finely crushed graham crackers
- 6 tablespoons unsalted butter, melted
- 16 ounces cream cheese, softened
- 1 cup creamy peanut butter
- 1 cup powdered sugar
- 1 teaspoon vanilla extract
- 1 cup heavy whipping cream, cold
- 1/4 cup raspberry jam or preserve, warmed slightly
- Garnish: Whole mini pretzels, mini peanut butter cups, chocolate syrup
Required Equipment
- 9-inch pie dish
- Medium mixing bowl
- Electric mixer
- Rubber spatula
- Piping bag with star tip
DIY Instruction Steps
- Prepare the Crust: Combine the crushed pretzels, graham cracker crumbs, and melted butter in the medium mixing bowl. Press this mixture firmly into the bottom and up the sides of the pie dish. Chill the crust in the refrigerator for 30 minutes.
- Make the Filling: In the medium mixing bowl, beat the softened cream cheese, creamy peanut butter, powdered sugar, and vanilla extract until the mixture is smooth.
- Whip the Cream: In a separate, clean bowl, whip the cold heavy whipping cream until stiff peaks form. Gently fold the whipped cream into the peanut butter mixture until it is light and fluffy.
- Fill the Pie: Spoon the peanut butter filling into the chilled crust and smooth the top.
- Create the Swirl: Gently spoon 2 tablespoons of the warmed raspberry jam onto the center of the pie. Use a toothpick or skewer to swirl the jam into the peanut butter filling in a decorative pattern.
- Chill: Refrigerate the pie for a minimum of 4 hours, or until the filling is completely set.
- Garnish: Just before serving, pipe rosettes of leftover whipped cream around the edge of the pie. Set whole mini pretzels into the cream around the entire border. Drizzle with chocolate syrup and place a few mini peanut butter cups on the cream rosettes.
24. Cranberry Orange Cheesecake Bars

- Bright, Festive, and Zesty
These beautiful cheesecake squares are topped with a thick, glossy layer of crimson fruit preserve. The bottom layer is a standard graham cracker crust that provides a stable, buttery base. The main layer is a creamy, bright white vanilla cheesecake filling that sets up firmly. A stunning layer of cranberry jam or preserve covers the cream. Each square is individually topped with a piece of candied orange peel or a slice of mandarin orange. The bright red and orange colors make these bars immediately appealing for any holiday buffet.
Required Ingredients
- 1.5 cups finely crushed graham crackers
- 6 tablespoons unsalted butter, melted
- 16 ounces cream cheese, softened
- 1/2 cup granulated sugar
- 1 teaspoon vanilla extract
- 1/4 cup freshly squeezed orange juice
- 1 jar (12 ounces) cranberry preserve or thick cranberry sauce
- Garnish: Canned mandarin orange segments
Required Equipment
- 8×8 inch baking dish
- Parchment paper
- Medium mixing bowl
- Electric mixer
- Rubber spatula
DIY Instruction Steps
- Prepare the Crust: Line the 8×8 inch baking dish with parchment paper, allowing an overhang on the sides. Combine the crushed graham crackers and melted butter. Press the mixture firmly into the bottom of the dish. Chill for 30 minutes.
- Make the Cheesecake Filling: In the medium mixing bowl, beat the softened cream cheese, sugar, vanilla extract, and orange juice until the mixture is completely smooth and creamy.
- Spread and Chill: Spread the cream cheese filling evenly over the chilled crust. Place the entire dish back in the refrigerator for at least 4 hours, or until the filling is firm.
- Add the Topping: Gently warm the cranberry preserve until it is easily spreadable, but not hot. Carefully spoon and spread the preserve evenly over the set cheesecake layer.
- Final Chill and Slice: Return the bars to the refrigerator for 1 hour to allow the jam to firm up. Lift the entire dessert out of the pan using the parchment paper overhang. Slice the slab into small squares.
- Garnish: Place one mandarin orange segment on the corner of each square before arranging them on your serving platter.
25. Gingerbread Truffles and Pops

- Assorted Spiced Chocolate Balls
This image displays a delightful variety of gingerbread truffles, some presented as pops and others in small paper cups. The dark, rich brown base of the ball indicates a foundation of spiced cookie or crumbled cake. Half the truffles are generously coated in a shimmering layer of creamy white chocolate and topped with crunchy, coarse white sprinkles. The other half are dipped in dark chocolate and finished with a dusting of gingerbread crumbs. These individual treats offer a rich spice and chocolate experience in every bite.
Required Ingredients
- 2 cups crumbled gingerbread cookies (about 1 package)
- 4 ounces cream cheese, softened
- 1/4 cup molasses or honey
- 1 teaspoon ground ginger
- 12 ounces white chocolate melting wafers
- 6 ounces dark chocolate melting wafers
- Garnish: White sprinkles and extra crushed gingerbread crumbs
- Optional: Lollipop sticks
Required Equipment
- Medium mixing bowl
- Rubber spatula
- Small baking sheet
- Parchment paper
- Small bowls for melting chocolate
DIY Instruction Steps
- Prepare the Base: In the medium mixing bowl, combine the crumbled gingerbread cookies, softened cream cheese, molasses, and ground ginger. Stir everything together using your rubber spatula until you have a thick, uniform dough.
- Roll and Chill: Roll the mixture into balls, each about 1 to 1.5 inches in diameter. Place the balls on the lined baking sheet. If making pops, insert the lollipop sticks now. Place the sheet in the freezer for at least 3 hours, or until very firm.
- Melt the Chocolate: Melt the white chocolate wafers in one small bowl and the dark chocolate wafers in another. Microwave each in 30 second bursts, stirring well after each one, until smooth.
- Dip Half in White: Dip half of the chilled pops or balls into the melted white chocolate, coating them completely. Immediately sprinkle the tops with white sprinkles while the chocolate is still wet. Place them back on the parchment paper.
- Dip Half in Dark: Dip the remaining half of the balls into the melted dark chocolate. Dust the tops immediately with the extra crushed gingerbread crumbs.
- Set Completely: Allow all the pops and truffles to set completely at room temperature or in the refrigerator before serving.
26. Apple Cinnamon Pie

- Creamy Pie with Fruit and Spice
This generously sized pie offers a creamy, cool twist on the classic fall dessert. It sits on a thick, dark crust made from pecans and possibly graham crackers, giving it a delightful crunch. The filling is a thick, fluffy layer of sweetened cream, dusted with rich cinnamon. The top is finished with a large swirl of whipped cream in the center, garnished with thin slices of fresh, red apple, and two whole cinnamon sticks. This is a beautiful, easy option when you crave that warm apple spice without turning on the oven.
Required Ingredients
- 1.5 cups finely crushed graham crackers
- 1/2 cup finely chopped pecans
- 6 tablespoons unsalted butter, melted
- 8 ounces cream cheese, softened
- 1/2 cup powdered sugar
- 1 teaspoon vanilla extract
- 1 teaspoon ground cinnamon
- 1 cup heavy whipping cream, cold
- 1 large apple, thinly sliced (for garnish)
- 2 tablespoons apple butter (optional, for extra flavor)
Required Equipment
- 9-inch pie dish
- Medium mixing bowl
- Electric mixer
- Rubber spatula
DIY Instruction Steps
- Prepare the Crust: Combine the crushed graham crackers, chopped pecans, and melted butter. Press this mixture firmly into the bottom and up the sides of the pie dish. Chill for 30 minutes.
- Make the Filling: In the medium mixing bowl, beat the softened cream cheese, powdered sugar, and vanilla extract until smooth. Beat in the apple butter and 1/2 teaspoon of the ground cinnamon if using.
- Whip and Fold: In a separate, clean bowl, whip the cold heavy whipping cream until stiff peaks form. Gently fold the whipped cream into the cream cheese mixture until the filling is light and voluminous.
- Fill and Chill: Spoon the cream filling into the chilled crust and smooth the top. Refrigerate the pie for a minimum of 4 hours, or until the filling is fully set.
- Garnish: Just before serving, whip a small amount of extra cream if desired. Pipe or dollop a swirl of cream in the center of the pie. Arrange the thin apple slices around the cream. Dust the entire top lightly with the remaining ground cinnamon and place the cinnamon sticks on the center swirl.
27. Holiday Cranberry Pistachio Bark

- Simple, Colorful Edible Art
This vibrant, stunning candy bark is perhaps the easiest dessert on this entire list. It features a base of creamy white chocolate, spread thinly and unevenly, giving it a rustic look. The white chocolate is generously topped with a beautiful assortment of holiday colors and textures. Bright red, chewy dried cranberries are scattered across the top. The bold green of coarsely chopped pistachios provides a striking color contrast against the red. A sprinkle of sea salt adds a salty complexity. Break the bark into large shards for a dazzling, effortless treat.
Required Ingredients
- 16 ounces good quality white chocolate melting wafers or bars
- 1 cup dried cranberries
- 1 cup shelled, roughly chopped pistachios
- 1/2 teaspoon coarse sea salt (optional, for sprinkling)
Required Equipment
- Small saucepan (for double boiler) or large microwave-safe bowl
- Large baking sheet
- Parchment paper
- Rubber spatula
DIY Instruction Steps
- Prepare the Pan: Line a large baking sheet with parchment paper. This is essential for easy removal of the set bark.
- Melt the Chocolate: Place the white chocolate in a heatproof bowl set over a small saucepan of simmering water (a double boiler) or melt it in the microwave in 30-second bursts, stirring in between. Melt until the chocolate is completely smooth and fluid.
- Spread the Chocolate: Pour the melted white chocolate onto the prepared baking sheet. Use your rubber spatula to spread it out into a thin, even layer, aiming for a rectangle or square shape about 1/4 inch thick.
- Top the Bark: Immediately and evenly sprinkle the dried cranberries and the chopped pistachios across the surface of the wet chocolate. Gently press the toppings down slightly with the back of the spatula to ensure they adhere.
- Sprinkle Salt (Optional): If using, sprinkle the coarse sea salt very lightly over the entire surface.
- Chill to Set: Place the baking sheet in the refrigerator for at least 1 hour, or until the chocolate is completely hard and snaps easily when broken. Once set, break the large piece of bark into smaller, serving size shards.
28. Oreo Chocolate Silk Pie

- Ultimate Dark Chocolate Indulgence
This deeply rich, smooth pie is designed for the serious chocolate enthusiast. It sits on a thick, dark crust made entirely from crushed chocolate sandwich cookies, providing a contrasting crunch. The filling is a dark, glistening chocolate mousse or silk pudding that is velvety smooth and sets up perfectly. A generous border of white, piped whipped cream rosettes encircles the pie’s edge. Tiny chocolate shavings are scattered over the cream, adding both texture and visual appeal to this stunning, no bake classic.
Required Ingredients
- 30 chocolate sandwich cookies (Oreo type), finely crushed
- 6 tablespoons unsalted butter, melted
- 8 ounces cream cheese, softened
- 1 cup powdered sugar
- 1/2 cup unsweetened cocoa powder
- 1 teaspoon vanilla extract
- 1.5 cups heavy whipping cream, cold
- 1/4 cup extra mini chocolate chips or shaved chocolate (for garnish)
Required Equipment
- 9-inch pie dish
- Medium mixing bowl
- Electric mixer
- Rubber spatula
- Piping bag with star tip
DIY Instruction Steps
- Prepare the Crust: Combine the crushed chocolate cookies and melted butter. Press this mixture firmly into the bottom and up the sides of the pie dish. Place the crust in the refrigerator to chill for 30 minutes.
- Make the Silk Filling: In the medium mixing bowl, beat the softened cream cheese, powdered sugar, cocoa powder, and vanilla extract until the mixture is completely smooth and intensely chocolatey.
- Whip and Fold: In a separate, clean bowl, whip 1 cup of the cold heavy whipping cream until stiff peaks form. Gently fold this whipped cream into the chocolate cream cheese mixture until the filling is light and uniform.
- Fill and Chill: Spoon the chocolate silk filling into the chilled crust and smooth the surface. Refrigerate the pie for a minimum of 6 hours, or until the filling is very firm.
- Garnish: Just before serving, whip the remaining 1/2 cup of heavy whipping cream until stiff peaks form. Pipe a decorative border of rosettes around the edge of the pie. Sprinkle the whipped cream generously with the mini chocolate chips or shavings.
29. Sweet Cinnamon Rollups

- Nutty, Spiced Finger Food
These charming, pinwheel style slices are incredibly fun and easy to eat, offering a spiced, nutty interior. The exterior layer is a soft, pale tortilla or crepe, which serves as the wrapping. The interior filling is a dark, dense mixture, likely made from crushed nuts, spices, and a binding agent like honey. Each slice reveals a beautiful cinnamon swirl pattern in the center. The finished platter is drizzled with a simple glaze and garnished with bright green pistachios and strands of orange zest. These are a unique and delicious hand-held dessert.
Required Ingredients
- 8 soft flour tortillas (medium size)
- 1 cup finely ground walnuts or pecans
- 1/2 cup packed light brown sugar
- 2 teaspoons ground cinnamon
- 1/4 cup pre-made cookie butter spread or softened cream cheese
- 1/4 cup honey or maple syrup
- Garnish: Chopped pistachios and orange zest strips
Required Equipment
- Small mixing bowl
- Rubber spatula
- Plastic wrap
- Sharp knife
DIY Instruction Steps
- Make the Filling: In the small mixing bowl, combine the ground nuts, brown sugar, and cinnamon. Stir well.
- Prepare the Tortillas: Lay one tortilla flat. Spread a very thin layer of the cookie butter spread or cream cheese evenly across the entire surface.
- Add the Nut Mixture: Sprinkle a generous layer of the nut and sugar mixture over the cream cheese layer, pressing down lightly so the mixture adheres.
- Roll and Chill: Tightly roll the tortilla into a log shape. Wrap the log tightly in plastic wrap. Repeat this process for all 8 tortillas. Refrigerate the wrapped logs for at least 2 hours, or until they are firm enough to slice easily.
- Slice and Serve: Use a sharp knife to unwrap the logs and slice them into pinwheels about 1/2 to 3/4 inch thick.
- Garnish: Arrange the slices on a serving platter. Drizzle the entire platter lightly with honey or maple syrup. Sprinkle generously with chopped pistachios and decorate with a few bright strips of orange zest.
30. Cherry Vanilla Panna Cotta

- Smooth, Creamy, and Elegant
These delightful, rounded desserts are simple yet look incredibly refined in clear glass tumblers. The body of the dessert is a smooth, milky white base, indicating a vanilla panna cotta or light custard. A vibrant, dark crimson layer of cherry puree or thick syrup sits neatly on top of the white base. The entire dessert is crowned with a single, dark whole cherry. A toothpick or small skewer inserted into the cherry adds a charming, thoughtful touch, emphasizing the easy, individual serving size.
Required Ingredients
- 2 cups heavy whipping cream
- 1/4 cup granulated sugar
- 1 teaspoon vanilla extract or vanilla bean paste
- 1 package (3 ounces) unflavored gelatin
- 1/4 cup cold milk
- 1/2 cup pre-made cherry pie filling or cherry preserves
- Garnish: Whole maraschino or fresh cherries
Required Equipment
- Small saucepan
- Whisk
- Rubber spatula
- Small round serving glasses (about 6 total)
DIY Instruction Steps
- Bloom the Gelatin: Pour the cold milk into a small bowl. Sprinkle the unflavored gelatin powder evenly over the milk. Allow the mixture to “bloom” (sit and soften) for about 5 minutes.
- Heat the Cream: In the small saucepan, combine the heavy whipping cream, sugar, and vanilla extract. Heat over medium-low heat, stirring until the sugar is completely dissolved. Do not let the mixture boil.
- Dissolve the Gelatin: Remove the cream mixture from the heat. Stir in the bloomed gelatin until the crystals are completely dissolved and the mixture is smooth and clear.
- Pour and Chill: Pour the cream mixture evenly into all the small serving glasses. Place the glasses carefully in the refrigerator and chill for at least 4 hours, or until the panna cotta is firm and sets completely.
- Add the Topping: Gently warm the cherry pie filling or preserve until it is easily spreadable, but not hot. Spoon about 1-2 tablespoons of the warm cherry topping over the set panna cotta layer in each glass.
- Garnish: Place a single, whole cherry right in the center of the cherry topping on each glass. Insert a small toothpick or skewer into the cherry for a simple flourish.
31. Lavender White Chocolate Cheesecake Bars

- Delicate Floral Cheesecake Squares
These visually unique cheesecake bars present a sophisticated flavor profile that stands out on any dessert table. The base is a crumbly, golden crust, likely made from graham crackers or shortbread. Above this sits a thick, pale yellow layer of creamy cheesecake, offering a subtle tang. The top of each square is generously sprinkled with delicate dried lavender buds, which provide a beautiful purple contrast. A dusting of coarse sea salt adds a surprising savory note, balancing the sweetness. These bars are a chic, easy no bake option for a grown-up holiday dessert.
Required Ingredients
- 1.5 cups finely crushed graham crackers or vanilla wafers
- 6 tablespoons unsalted butter, melted
- 16 ounces cream cheese, softened
- 1/2 cup powdered sugar
- 1 teaspoon vanilla extract
- 1 cup good quality white chocolate melting wafers, melted and cooled slightly
- 1 tablespoon culinary lavender buds, divided
- 1/2 teaspoon coarse sea salt (like Maldon flakes)
Required Equipment
- 8×8 inch baking dish
- Parchment paper
- Medium mixing bowl (2 total)
- Electric mixer
- Rubber spatula
DIY Instruction Steps
- Prepare the Crust: Line the 8×8 inch baking dish with parchment paper, leaving an overhang on the sides. In a medium mixing bowl, combine the crushed graham crackers and melted butter. Press this mixture firmly into the bottom of the dish. Chill for 30 minutes.
- Make the Filling: In a separate medium mixing bowl, beat the softened cream cheese with the powdered sugar and vanilla extract until smooth and creamy. Gradually beat in the slightly cooled melted white chocolate until fully incorporated.
- Add Lavender: Stir in 1 teaspoon of the culinary lavender buds into the cheesecake mixture.
- Spread and Chill: Spread the lavender white chocolate cheesecake filling evenly over the chilled crust. Place the entire dish back in the refrigerator for at least 4 hours, or until the filling is firm.
- Slice and Garnish: Lift the entire dessert out of the pan using the parchment paper overhang. Slice the slab into small squares. Just before serving, sprinkle the remaining lavender buds and coarse sea salt over the top of each bar.
32. Pistachio Raspberry Cookie Sandwiches

- Rich, Vibrant, and Creamy
These visually striking cookie sandwiches are a testament to beautiful presentation and flavor combinations. Each dessert features two round, light-colored cookies, which are likely shortbread or vanilla wafers, dusted with powdered sugar. Between the cookies, a thick layer of bright green pistachio cream is generously piped, studded with chopped pistachios along the edge. A vivid red layer of raspberry jam adds a tart and fruity counterpoint in the very center. These rich, individual desserts are a delightful and memorable addition to any holiday table.
Required Ingredients
- 1.5 cups finely ground pistachios (unsalted, shelled)
- 1/2 cup powdered sugar
- 1/4 cup unsalted butter, softened
- 4 ounces cream cheese, softened
- 1/2 teaspoon almond extract
- 1/4 cup raspberry jam or preserve
- 10-12 store-bought round shortbread cookies or vanilla wafers
- Garnish: Extra chopped pistachios and powdered sugar for dusting
Required Equipment
- Food processor (for grinding pistachios, optional)
- Medium mixing bowl
- Electric mixer or sturdy whisk
- Rubber spatula
- Piping bag with round tip (optional, for neat filling)
DIY Instruction Steps
- Prepare the Pistachio Cream: In the medium mixing bowl, beat the softened butter and cream cheese together until smooth. Gradually add the powdered sugar and almond extract, beating until light and fluffy. Stir in 1 cup of the finely ground pistachios until the mixture is a uniform green color.
- Assemble the Cookies: Take one shortbread cookie. Pipe or spread a generous ring of the pistachio cream around the outer edge of the cookie. Leave the center empty.
- Add Raspberry Filling: Spoon a small amount of the raspberry jam into the center of the pistachio cream ring on each cookie.
- Top and Finish: Place a second shortbread cookie on top, gently pressing down to create a sandwich. The jam should remain contained within the pistachio cream.
- Garnish: Roll the outer edge of each cookie sandwich in the remaining chopped pistachios. Dust the tops lightly with powdered sugar.
- Chill: Refrigerate the cookie sandwiches for at least 30 minutes to allow the cream to firm up slightly.
33. Berry Citrus Cornflake Parfaits

- Bright, Zesty, and Layered Cups
These cheerful, individual parfaits showcase a vibrant blend of fruity and creamy textures. The base is a surprisingly crunchy layer of cornflake cereal, offering a unique textural element. Above the cereal are alternating layers of a bright, pale yellow citrus cream or pudding, likely infused with lemon or orange. Deep red and black mixed berries (raspberries and blackberries) provide a beautiful pop of color and tartness in every layer. The top is garnished with fresh berries, tiny pine nuts, and delicate strips of lemon zest, making them a refreshingly light holiday option.
Required Ingredients
- 1 cup cornflake cereal, lightly crushed
- 1 package (3.4 ounces) instant lemon or vanilla pudding mix
- 1.5 cups cold milk (whole or 2%)
- 8 ounces cream cheese, softened
- 1/2 cup powdered sugar
- 1 teaspoon lemon zest
- 1 cup fresh raspberries
- 1 cup fresh blackberries
- Garnish: Pine nuts, extra lemon zest, and fresh berries
Required Equipment
- Medium mixing bowl
- Whisk
- Electric mixer (optional, for cream cheese)
- Rubber spatula
- Small clear serving glasses (about 6 total)
DIY Instruction Steps
- Prepare the Pudding: In the medium mixing bowl, whisk together the instant lemon (or vanilla) pudding mix and cold milk for about 2 minutes until it begins to thicken.
- Make the Cream Cheese Layer: In a separate small bowl, beat the softened cream cheese with the powdered sugar and lemon zest until smooth. Gently fold this into the thickened pudding mixture until well combined.
- Assemble the Parfaits: Start by placing a spoonful of the lightly crushed cornflakes at the bottom of each serving glass.
- Layer the Cream and Berries: Spoon a layer of the creamy lemon mixture over the cornflakes. Follow this with a layer of fresh raspberries and blackberries.
- Build the Layers: Repeat the layers: lemon cream, then berries. Continue until the glasses are full, ending with a generous layer of berries.
- Chill and Garnish: Refrigerate the parfaits for at least 1 hour to allow the flavors to meld. Just before serving, sprinkle with pine nuts and extra lemon zest, and place a few fresh berries on top.
34. Raspberry Vanilla Mousse Cups

- Elegant Raspberry Cheesecake Delights
These exquisite, individual desserts are a celebration of vibrant color and smooth textures. They feature a light, golden crust made from crushed cookies at the bottom of each glass. Above this sits a thick, smooth layer of creamy, pale vanilla cheesecake or mousse. The top layer is a vivid, bright red raspberry puree, which looks like a glistening jewel. Each cup is finished with a whole, fresh raspberry and a tiny sprig of mint, making for a refreshingly elegant holiday treat.
Required Ingredients
- 1 cup finely crushed graham crackers or shortbread cookies
- 3 tablespoons unsalted butter, melted
- 16 ounces cream cheese, softened
- 1/2 cup powdered sugar
- 1 teaspoon vanilla extract
- 1 cup heavy whipping cream, cold
- 1.5 cups fresh or frozen raspberries, pureed and strained (to remove seeds)
- 1/4 cup granulated sugar (for raspberry topping)
- Garnish: Fresh raspberries and mint leaves
Required Equipment
- Small mixing bowl
- Medium mixing bowl
- Electric mixer
- Rubber spatula
- Small clear serving glasses (about 6 total)
DIY Instruction Steps
- Prepare the Crust: In the small mixing bowl, combine the crushed graham crackers and melted butter. Press about 1.5 tablespoons of this mixture firmly into the bottom of each serving glass. Chill for 30 minutes.
- Make the Cream Filling: In the medium mixing bowl, beat the softened cream cheese with the powdered sugar and vanilla extract until smooth and creamy.
- Whip and Fold: In a separate, clean bowl, whip the cold heavy whipping cream until stiff peaks form. Gently fold the whipped cream into the cream cheese mixture until the filling is light and airy.
- Layer the Cream: Spoon or pipe the vanilla cream filling evenly over the chilled crust in each glass. Return the glasses to the refrigerator for at least 2 hours, or until the cream is firm.
- Prepare the Raspberry Topping: In a small saucepan, combine the pureed raspberries and granulated sugar. Heat over medium-low heat, stirring until the sugar dissolves and the mixture slightly thickens. Let it cool completely.
- Top and Garnish: Once the cream layer is set and the raspberry topping is cool, spoon a generous layer of the raspberry puree over the cream in each glass. Place a single fresh raspberry and a small mint leaf on top of each for garnish.
35. Festive Peppermint Swirl Bark

- Holiday Candy Cane Crunch
This visually dynamic chocolate bark is packed with festive cheer and contrasting textures. It features a dark, rich chocolate base, which is spread unevenly, creating a rustic feel. Swirls of bright white chocolate are artfully marbled throughout the dark, creating an eye-catching pattern. The entire surface is generously sprinkled with crushed candy canes, adding vibrant red and white flecks and a refreshing peppermint crunch. This is an effortless yet impressive holiday treat that can be broken into shards for easy serving.
Required Ingredients
- 16 ounces good quality dark chocolate melting wafers or bars
- 6 ounces good quality white chocolate melting wafers or bars
- 1 cup crushed peppermint candies or candy canes (reserve some for garnish)
Required Equipment
- Large microwave-safe bowl (2 total)
- Large baking sheet
- Parchment paper
- Rubber spatula
DIY Instruction Steps
- Prepare the Pan: Line a large baking sheet with parchment paper. This ensures the bark will not stick and is easy to remove.
- Melt Dark Chocolate: Place the dark chocolate in one of the large microwave-safe bowls. Melt in 30-second intervals, stirring well after each, until completely smooth and fluid.
- Melt White Chocolate: In the second microwave-safe bowl, melt the white chocolate in the same manner until smooth and fluid.
- Spread the Base: Pour the melted dark chocolate onto the prepared baking sheet. Use your rubber spatula to spread it evenly into a thin layer.
- Create the Swirl: Immediately drizzle spoonfuls of the melted white chocolate over the dark chocolate base. Use a skewer, knife, or toothpick to gently swirl the white chocolate into the dark, creating a marbled effect. Do not overmix, or the colors will blend too much.
- Add Peppermint: Sprinkle the crushed peppermint candies evenly and generously over the entire surface of the swirled chocolate.
- Chill to Set: Place the baking sheet in the refrigerator for at least 1 hour, or until the chocolate is completely hard. Once set, break the large piece of bark into smaller, serving size shards.
36. Blackberry Lavender Parfaits

- Sophisticated and Aromatic Dessert Cups
These elegant, individual parfaits offer a harmonious blend of fruit and floral notes. The bottom features a rustic layer of crushed graham crackers or shortbread, providing a subtle sweetness. Above this, a generous, fluffy layer of white, creamy filling suggests a mascarpone or cream cheese base. A vibrant swirl of deep purple blackberry puree adds a beautiful color and a tart contrast. Fresh, plump blackberries and delicate lavender buds crown each glass, making them a visually stunning and aromatic dessert. A wafer cookie adds a playful touch.
Required Ingredients
- 1 cup finely crushed graham crackers or shortbread cookies
- 3 tablespoons unsalted butter, melted
- 16 ounces cream cheese, softened
- 1/2 cup powdered sugar
- 1 teaspoon vanilla extract
- 1 cup fresh or frozen blackberries, pureed and strained (to remove seeds)
- 1/4 cup granulated sugar (for blackberry topping)
- 1 tablespoon culinary lavender buds (divided)
- Garnish: Fresh blackberries, extra lavender buds, and wafer cookies
Required Equipment
- Small mixing bowl
- Medium mixing bowl
- Electric mixer
- Rubber spatula
- Martini glasses or elegant clear stemware (about 6 total)
DIY Instruction Steps
- Prepare the Crust: In the small mixing bowl, combine the crushed graham crackers and melted butter. Press about 1.5 tablespoons of this mixture firmly into the bottom of each serving glass. Chill for 30 minutes.
- Make the Cream Filling: In the medium mixing bowl, beat the softened cream cheese with the powdered sugar and vanilla extract until smooth and creamy.
- Prepare the Blackberry Topping: In a small saucepan, combine the pureed blackberries and granulated sugar. Heat over medium-low heat, stirring until the sugar dissolves and the mixture slightly thickens. Stir in 1/2 teaspoon of the lavender buds. Let it cool completely.
- Layer the Cream: Spoon or pipe the cream cheese filling evenly over the chilled crust in each glass.
- Add the Blackberry Layer: Drizzle or spoon a generous layer of the cooled blackberry-lavender topping over the cream in each glass. Use a toothpick to create a gentle swirl if desired.
- Chill and Garnish: Refrigerate the parfaits for at least 2 hours to allow the layers to set. Just before serving, top each glass with a few fresh blackberries, a light sprinkle of extra lavender buds, and a small wafer cookie.
37. Caramel Pecan Bread Pudding Trifle

- A Hearty, Indulgent Holiday Trifle
This substantial trifle is a beautiful centerpiece, filled with layers of comforting flavors and textures. It features generous cubes of what looks like a light, vanilla pound cake or sponge cake, forming sturdy layers. Between the cake, a creamy, pale custard or vanilla cream adds richness. The dessert is also studded with plenty of crunchy walnuts, which contribute a nutty depth. A glistening, dark caramel sauce is drizzled throughout the layers and over the top. The trifle is crowned with piped cream, more walnuts, and extra caramel, making it a truly decadent, no bake treat.
Required Ingredients
- 1 large (16 ounces) pre-made pound cake, cut into 1-inch cubes
- 1 package (3.4 ounces) instant vanilla pudding mix
- 2 cups cold milk (whole or 2%)
- 8 ounces cream cheese, softened
- 1/2 cup powdered sugar
- 1 teaspoon vanilla extract
- 1.5 cups chopped walnuts, lightly toasted
- 1 cup pre-made caramel sauce
- 1 cup heavy whipping cream (for topping, optional)
Required Equipment
- Large trifle bowl (clear glass is preferred)
- Medium mixing bowl
- Whisk
- Electric mixer (optional, for cream cheese)
- Rubber spatula
DIY Instruction Steps
- Prepare the Pudding: In the medium mixing bowl, whisk together the instant vanilla pudding mix and cold milk for about 2 minutes until it begins to thicken.
- Make the Cream Cheese Layer: In a separate small bowl, beat the softened cream cheese with the powdered sugar and vanilla extract until smooth. Gently fold this into the thickened pudding mixture until well combined.
- Begin Layering: Place a layer of pound cake cubes in the bottom of the trifle bowl.
- Add Cream and Nuts: Spoon a layer of the prepared cream mixture over the cake cubes. Sprinkle a generous amount of toasted walnuts over the cream. Drizzle some of the caramel sauce over this layer.
- Build the Trifle: Repeat the layering pattern: pound cake, then cream, then walnuts, then caramel. Continue this process until you have used all ingredients, ending with a generous layer of cream on top.
- Chill and Garnish: Cover the trifle bowl and refrigerate for a minimum of 4 hours, or preferably overnight. This allows the cake to soften and the flavors to meld. Just before serving, whip the heavy cream if using, and pipe or dollop it on top. Decorate with extra walnuts and a final drizzle of caramel sauce.
38. Hazelnut Chocolate Cherry Tart

- A Rich, Nutty, and Fruity Tart
This stunning, dark chocolate tart is a showstopper, boasting rich flavors and textures. The crust is a beautiful, light brown, suggesting graham cracker or cookie crumbs. Above this, a thin layer of vibrant raspberry jam or cherry preserves adds a tart, fruity note. The main filling is a thick, dark, and glossy chocolate hazelnut ganache or mousse, creating a deeply indulgent center. The entire tart is generously adorned with roasted hazelnuts and a light dusting of powdered sugar, adding a delightful crunch. A slice cut out reveals the beautiful layering inside.
Required Ingredients
- 1.5 cups finely crushed graham crackers or chocolate wafers
- 6 tablespoons unsalted butter, melted
- 1/2 cup raspberry jam or cherry preserves
- 1.5 cups heavy whipping cream
- 1.5 cups good quality dark chocolate chips
- 1/2 cup Nutella or other chocolate hazelnut spread
- 1 teaspoon vanilla extract
- Garnish: Whole roasted hazelnuts and a dusting of powdered sugar
Required Equipment
- 9-inch tart pan with a removable bottom
- Medium mixing bowl
- Small saucepan
- Rubber spatula
- Whisk
DIY Instruction Steps
- Prepare the Crust: In the medium mixing bowl, combine the crushed graham crackers and melted butter. Press this mixture firmly into the bottom and up the sides of the tart pan. Chill for 30 minutes.
- Add the Fruit Layer: Gently warm the raspberry jam until it is easily spreadable. Spread a thin, even layer of the jam over the chilled crust. Return to the refrigerator for 15 minutes.
- Make the Ganache: In the small saucepan, heat the heavy whipping cream over medium heat until it just begins to simmer. Remove from heat immediately. Add the dark chocolate chips, Nutella, and vanilla extract. Let sit for 5 minutes to allow the chocolate to melt.
- Whisk Smooth: Whisk the chocolate mixture until it is completely smooth and glossy.
- Fill the Tart: Pour the chocolate hazelnut ganache over the chilled jam layer in the tart pan. Smooth the top with a spatula.
- Chill Thoroughly: Refrigerate the tart for a minimum of 6 hours, or preferably overnight, until the ganache is fully set and firm.
- Garnish: Just before serving, carefully remove the tart from the pan. Arrange the whole roasted hazelnuts decoratively around the edge. Dust lightly with powdered sugar.
39. Mini Chocolate Cherry Tarts

- Bite Sized Fruit and Chocolate Treats
These charming, individual tarts are perfect for a dessert buffet, offering a rich flavor in a compact size. Each tart is nestled in a crisp, golden shortbread cookie crust. The bottom of the tart holds a thin, bright layer of cherry jam or preserves, providing a burst of tart fruit. Above this, a thick, glossy layer of dark chocolate ganache or mousse creates a decadent contrast. Each tart is crowned with a generous swirl of white, fluffy whipped cream and sprinkled with tiny chocolate shavings. These elegant miniatures are a delightful way to enjoy classic flavors.
Required Ingredients
- 1 package (about 12) pre-made mini shortbread tart shells
- 1/2 cup cherry jam or preserves
- 1/2 cup heavy whipping cream
- 1/2 cup good quality dark chocolate chips
- 1 teaspoon vanilla extract
- 1 cup heavy whipping cream (for topping, cold)
- 2 tablespoons powdered sugar (for topping)
- Garnish: Mini chocolate chips or chocolate shavings
Required Equipment
- Small saucepan
- Whisk
- Rubber spatula
- Piping bag with star tip
DIY Instruction Steps
- Prepare the Jam Layer: Spoon about 1 teaspoon of cherry jam into the bottom of each pre-made tart shell, spreading it gently to cover the base.
- Make the Ganache: In the small saucepan, heat 1/2 cup of heavy whipping cream over medium heat until it just begins to simmer. Remove from heat. Add the dark chocolate chips and vanilla extract. Let sit for 3 minutes to allow the chocolate to melt.
- Whisk Smooth: Whisk the chocolate mixture until it is completely smooth and glossy.
- Fill the Tarts: Pour or spoon the chocolate ganache over the jam layer in each tart shell. Fill them almost to the top.
- Chill: Refrigerate the tarts for at least 2 hours, or until the chocolate ganache is firm.
- Prepare the Topping: In a clean, cold bowl, beat 1 cup of heavy whipping cream with the powdered sugar until stiff peaks form.
- Garnish: Just before serving, pipe a generous swirl of whipped cream on top of each chilled tart. Sprinkle with mini chocolate chips or chocolate shavings.
40. Caramel Pecan Cheesecake Bars

- Rich Caramel Nutty Slices
These substantial, no bake bars offer a satisfying combination of creamy, crunchy, and sweet. The base is a thick, golden crust made from graham crackers or shortbread. Above this sits a generous, pale layer of creamy vanilla cheesecake filling, studded with tiny chocolate chips. The top of each bar is coated in a glistening drizzle of rich caramel sauce and topped with whole, toasted pecan halves. A light dusting of powdered sugar finishes the presentation. These bars are easy to cut and serve for a larger gathering.
Required Ingredients
- 2 cups finely crushed graham crackers
- 1/2 cup (1 stick) unsalted butter, melted
- 16 ounces cream cheese, softened
- 1 cup powdered sugar
- 1 teaspoon vanilla extract
- 1 cup heavy whipping cream, cold
- 1/2 cup mini chocolate chips
- 1/2 cup pre-made caramel sauce
- 1 cup whole pecans, lightly toasted
- Garnish: Extra powdered sugar
Required Equipment
- 9×13 inch baking dish
- Parchment paper
- Large mixing bowl
- Electric mixer
- Rubber spatula
DIY Instruction Steps
- Prepare the Crust: Line the 9×13 inch baking dish with parchment paper, leaving an overhang on the sides. In a medium mixing bowl, combine the crushed graham crackers and melted butter. Press this mixture firmly into the bottom of the prepared dish. Chill the crust for 30 minutes.
- Make the Filling: In the large mixing bowl, beat the softened cream cheese, powdered sugar, and vanilla extract until smooth and creamy.
- Whip and Fold: In a separate, clean bowl, whip the cold heavy whipping cream until stiff peaks form. Gently fold the whipped cream into the cream cheese mixture until the filling is light and airy. Fold in the mini chocolate chips.
- Spread and Chill: Spoon the cheesecake filling evenly over the chilled crust and smooth the top. Place the entire dish back into the refrigerator for at least 4 hours, or until the filling is firm.
- Slice and Garnish: Lift the entire dessert out of the pan using the parchment paper overhang. Slice the slab into individual bars. Drizzle each bar generously with the caramel sauce. Place one or two whole toasted pecans on top of each bar. Dust lightly with powdered sugar before serving.
41. Tropical Mango Passionfruit Parfaits

- Bright, Fruity, and Zesty Layers
These vibrant, individual parfaits offer a refreshing burst of tropical flavor, perfect for a lighter holiday option. The base is a crunchy layer of granola or crushed cookies, providing a textural contrast. Alternating layers of creamy, white vanilla yogurt or light cream cheese with bright, diced mango chunks create a beautiful visual appeal. The top is generously garnished with glistening passionfruit pulp, toasted coconut flakes, and a sprinkle of lime zest, adding extra tang and aroma. Miniature tropical umbrellas make these treats extra festive and fun.
Required Ingredients
- 1.5 cups granola or crushed vanilla wafers
- 8 ounces cream cheese, softened
- 1/2 cup powdered sugar
- 1 teaspoon vanilla extract
- 1 cup heavy whipping cream, cold
- 2 large ripe mangoes, peeled and diced
- 3-4 ripe passionfruits, pulp scooped out
- 1/4 cup toasted coconut flakes
- Zest of 1/2 lime
- Optional: Miniature cocktail umbrellas for garnish
Required Equipment
- Medium mixing bowl
- Electric mixer
- Rubber spatula
- Small clear serving glasses (about 4-6 total)
DIY Instruction Steps
- Prepare the Cream: In the medium mixing bowl, beat the softened cream cheese with the powdered sugar and vanilla extract until smooth and creamy.
- Whip and Fold: In a separate, clean bowl, whip the cold heavy whipping cream until stiff peaks form. Gently fold the whipped cream into the cream cheese mixture until the cream is light and airy.
- Begin Layering: Place a generous handful of granola or crushed cookies at the bottom of each serving glass.
- Add Cream and Fruit: Spoon a layer of the prepared cream mixture over the granola. Follow this with a layer of the diced mango chunks.
- Build the Parfaits: Repeat the layering pattern: granola, then cream, then mango. Continue until the glasses are full, ending with a layer of diced mango on top.
- Garnish: Spoon a generous amount of fresh passionfruit pulp over the top mango layer in each glass. Sprinkle with toasted coconut flakes and lime zest. Insert a miniature cocktail umbrella into each for a fun, tropical touch.
- Chill: Refrigerate the parfaits for at least 1 hour before serving to allow the flavors to meld.
42. Grapefruit Rosemary Parfaits

- Bright, Zesty, and Herbaceous
These unique, elegant parfaits offer a sophisticated blend of bright citrus and aromatic herbs. The base is a crunchy layer of graham cracker crumbs, providing a sweet, buttery foundation. Above this, a thin layer of pale yellow lemon curd or vanilla pudding adds a zesty sweetness. The main layers are creamy, white vanilla cream or yogurt, alternating with segments of fresh, pink grapefruit, which bring a refreshing bitterness. Each glass is crowned with additional grapefruit segments and a fresh sprig of rosemary, adding an unexpected, fragrant touch that elevates this dessert beyond the ordinary.
Required Ingredients
- 1.5 cups finely crushed graham crackers
- 3 tablespoons unsalted butter, melted
- 1/2 cup store-bought lemon curd or vanilla pudding
- 16 ounces cream cheese, softened
- 1/2 cup powdered sugar
- 1 teaspoon vanilla extract
- 2 medium grapefruits, peeled and segmented (remove all white pith)
- Garnish: Fresh rosemary sprigs and extra grapefruit segments
Required Equipment
- Small mixing bowl
- Medium mixing bowl
- Electric mixer
- Rubber spatula
- Small clear serving glasses (about 4-6 total)
DIY Instruction Steps
- Prepare the Crust: In the small mixing bowl, combine the crushed graham crackers and melted butter. Press about 1.5 tablespoons of this mixture firmly into the bottom of each serving glass. Chill for 30 minutes.
- Add Lemon Layer: Spoon about 1 tablespoon of lemon curd or vanilla pudding over the chilled crust in each glass. Return to the refrigerator for 15 minutes.
- Make the Cream: In the medium mixing bowl, beat the softened cream cheese with the powdered sugar and vanilla extract until smooth and creamy.
- Layer the Parfaits: Spoon a layer of the prepared cream mixture over the lemon layer. Follow this with a layer of fresh grapefruit segments.
- Build the Layers: Repeat the layering pattern: cream, then grapefruit. Continue until the glasses are full, ending with a generous layer of grapefruit segments on top.
- Chill and Garnish: Refrigerate the parfaits for at least 2 hours before serving to allow the flavors to meld. Just before serving, place a fresh sprig of rosemary into the top of each parfait for an aromatic and elegant garnish.
The dessert dilemma is solved. Forty two easy recipes are now ready for your holiday meal. You can confidently claim your kitchen freedom this year. - These treats prove you do not need an oven to create spectacular sweets. Use the clear ingredient lists and detailed steps for stress free cooking. Choose a variety of textures, from creamy puddings to crunchy, nutty clusters.
- You can focus on enjoying time with your loved ones while still serving a stunning meal. Keep these easy ideas handy for years to come.
- Key Takeaways
- Maximize Oven Space: Use your oven solely for the main meal and sides.
- Embrace Holiday Spice: Choose recipes with strong seasonal flavor like cinnamon, pumpkin, and ginger.
- Easy Serving Solutions: Make individual desserts like shooters and parfaits for faster plating.
- Prep Ahead Power: Preparation can happen days ahead of time without losing freshness.
- Enjoy the Holiday: Relax and enjoy the company of friends and family without last minute kitchen chaos.