Finding a tray of thin, greasy puddles in your oven is a heartbreaking sight for any baker. You follow the recipe, yet your treats refuse to hold their shape. This common struggle usually stems from small errors in temperature, measurement, or technique.
Simple Baking Hacks
Understanding the science behind the spread is the first step to fixing your kitchen results. Every ingredient plays a role in how the dough reacts to heat. When the balance is off, your cookies lose their vertical height and turn into flat discs.
These 38 simple hacks will transform your baking routine forever. We cover everything from ingredient selection to professional shaping tricks. Say goodbye to puddles and hello to the thick, chewy delights you deserve to share with your family.
Many bakers struggle with cookies that spread too much during the baking process. A common reason for this frustration involves inaccurate flour measurements. Using a measuring cup often leads to packing too much flour into the container, which ruins the texture of your treats.
Switching to a digital kitchen scale changes everything for your kitchen results. This method ensures you use the exact amount of dry ingredients every single time. It eliminates the guesswork that leads to flat, greasy discs instead of thick, chewy delights.
Consistency is the secret to why your cookies are always flat or uneven. When you weigh your ingredients, you control the structure of the dough. This simple shift in your routine creates professional results that look wonderful on any platter.
Required Ingredients
1 bag of All-purpose flour
1 bag of Granulated sugar
1 bag of Brown sugar
Equipment List
Digital kitchen scale
Large metal mixing bowl
Measuring scoop or large spoon
DIY Instructions
Place your digital kitchen scale on a flat, sturdy surface like a granite countertop.
Turn the scale on and wait for the display to show a zero reading.
Set your empty metal mixing bowl directly onto the center of the scale platform.
Press the “Tare” or “Zero” button to subtract the weight of the bowl so the screen reads zero again.
Check your recipe for the required weight of flour in grams, as grams provide the most accuracy.
Use a scoop to gently add flour into the bowl while watching the digital numbers climb.
Stop adding flour once the scale reaches the exact number mentioned in your recipe.
Remove the bowl from the scale and proceed with mixing your other ingredients.
2. Oven Temperature Calibration
Simple Baking Hacks
Many bakers wonder why their cookies are always flat despite following every direction. Often the culprit is a hidden heat issue inside the machine. Built-in dials rarely show the true internal heat levels accurately.
Using a secondary thermometer reveals the actual environment where your dough sits. Heat that is too low causes the fat to melt before the edges set. This leads to a thin and greasy mess rather than a thick treat.
Monitoring the heat ensures your snacks bake exactly as the recipe intended. You can adjust your settings based on the live reading from the metal gauge. This small tool prevents your hard work from spreading too thin on the pan.
Required Ingredients
1 Batch of cookie dough
Room temperature butter (for the recipe)
Equipment List
Independent oven thermometer
Standard baking sheet
Heat-resistant oven mitts
DIY Instructions
Open your oven door and locate the center of the middle rack.
Clip or stand your independent thermometer directly on the rack wires.
Close the door and set your oven to the temperature required by your recipe.
Wait for the oven light to signal it is ready, but do not start baking yet.
Look through the glass door to see if the thermometer matches the dial setting.
Increase or decrease the oven dial until the internal thermometer reaches your target number.
Place your tray inside once the gauge stays steady at the correct heat level.
Check the gauge halfway through the baking time to ensure the heat remains stable.
3. The 24 Hour Dough Chill
Simple Baking Hacks
Patience stands as the secret weapon for anyone tired of seeing their dough turn into puddles. Chilling the mixture allows the flour to hydrate fully and the fats to firm up. This process creates a much deeper flavor profile in every bite.
Cold dough enters the oven with a solid structure that resists immediate melting. It holds its shape much longer during the first few minutes of heat exposure. You get a taller result with a soft center and crisp outer ring.
Covering your bowl with plastic wrap prevents the surface from drying out in the fridge. This rest period transforms a basic recipe into something truly special. Your friends will notice the professional texture and rich golden color.
Required Ingredients
Freshly mixed cookie dough
Plastic wrap or airtight lid
Equipment List
Large mixing bowl
Refrigerator with clear shelf space
Wooden spoon
DIY Instructions
Mix your dough according to your favorite recipe until all ingredients combine.
Gather the dough into a large ball in the center of your mixing bowl.
Tear off a piece of plastic wrap large enough to cover the entire opening.
Press the wrap down so it touches the surface of the dough to prevent a crust.
Place the bowl in the refrigerator on a shelf that stays consistently cold.
Leave the dough inside for a full day to allow the moisture to settle.
Remove the bowl from the fridge about ten minutes before you plan to scoop.
Scoop the cold dough onto your tray and bake as usual for a better shape.
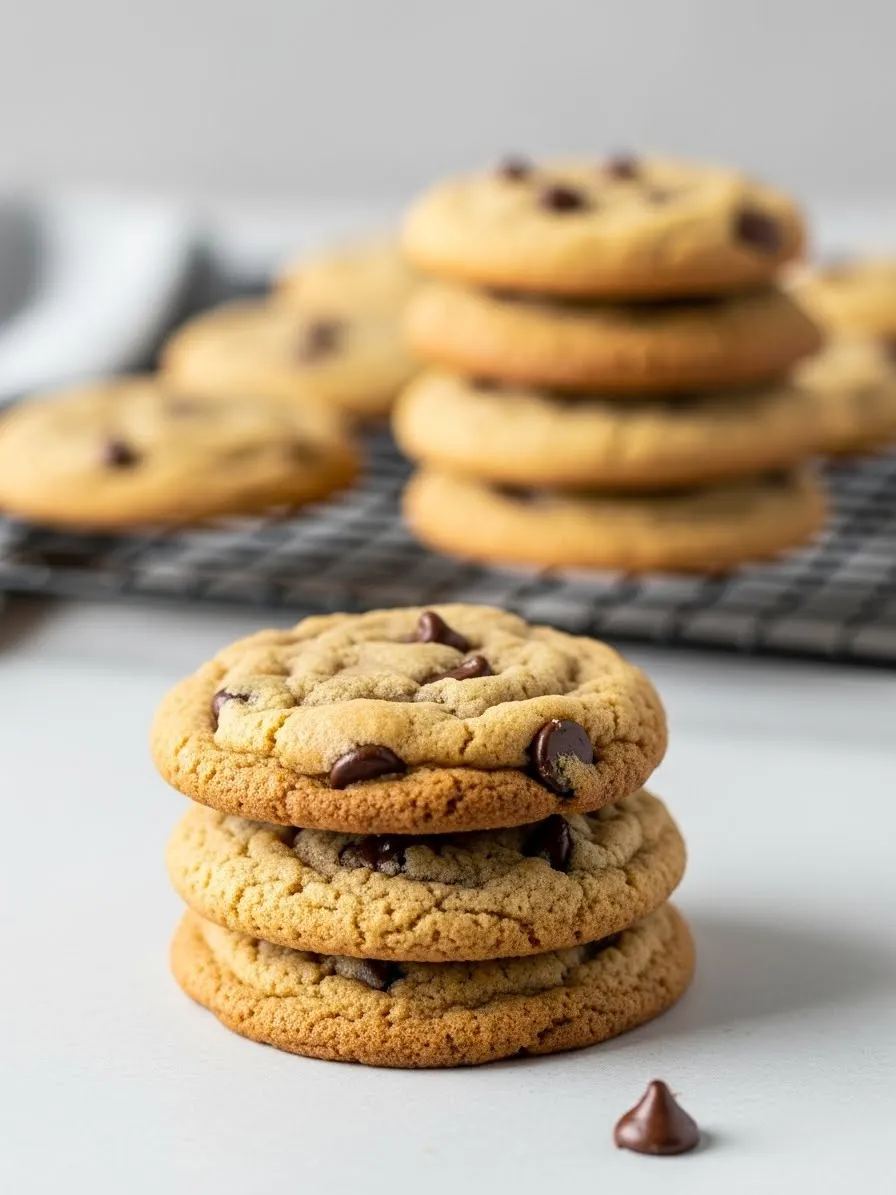
4. Professional Stack Height
Simple Baking Hacks
Achieving a beautiful stack of treats requires more than just a good recipe. It starts with how you handle the dough before it ever touches the heat. Keeping the fat cold is the most important rule for height.
When cookies stay thick, they stack without crumbling or breaking under their own weight. This look is what separates home bakes from high-end bakery displays. Proper cooling on a wire rack also helps lock in that vertical structure.
Notice how these discs hold their round shape without jagged, thin edges. This happens when the oven provides even heat and the dough has enough strength. A sturdy cookie makes the best gift for neighbors or family gatherings.
Required Ingredients
High-quality chocolate chips
Unsalted butter (chilled)
Large eggs
Equipment List
Wire cooling rack
Metal spatula
Flat serving plate
DIY Instructions
Take your baking sheet out of the oven once the edges look golden brown.
Let the cookies sit on the hot pan for exactly five minutes to firm up.
Slide a thin metal spatula under each cookie to lift it gently.
Move the cookies to a wire rack so air can circulate underneath them.
Wait for them to reach room temperature before you try to stack them.
Pick three or four cookies of the same size for the most stable pile.
Place the largest one on the bottom of the stack to act as a base.
Set the remaining cookies on top carefully to show off the thick texture.
5. Testing Leavening Agents
Simple Baking Hacks
Old baking soda is a silent thief of volume in your kitchen. If your chemical leaveners have lost their power, your cookies will never rise correctly. This leads to a heavy and flat texture that no amount of mixing can fix.
Testing your powder or soda before you start mixing saves time and money. A quick fizzing reaction tells you the product is fresh and ready to work. Without this reaction, your dough lacks the air bubbles needed for a light crumb.
Fresh ingredients react with the moisture and heat to lift the dough upwards. This simple water test provides peace of mind before you waste expensive butter and sugar. Keep your pantry updated to ensure your baking remains top-tier.
Required Ingredients
1 teaspoon of Baking soda or powder
1/2 cup of warm water
1 tablespoon of vinegar (if testing baking soda)
Equipment List
Small clear glass bowl
Measuring spoon
DIY Instructions
Pour half a cup of warm water into a small clear glass bowl.
Add a splash of vinegar to the water if you are testing baking soda.
Scoop a small amount of the leavening agent with your measuring spoon.
Drop the powder directly into the liquid and watch closely.
Look for immediate, aggressive bubbling and fizzing on the surface.
Toss the product in the trash if the powder sinks without making bubbles.
Replace the old box with a fresh one from the store immediately.
Store your new box in a cool, dry place to keep it active longer.
6. Proper Sheet Preparation
Simple Baking Hacks
The surface of your pan dictates how much the bottom of your cookie spreads. Using a greasy surface encourages the dough to slide outward as it gets hot. This creates the very flat shape that most bakers want to avoid.
Parchment paper provides a neutral surface that grips the dough just enough. It also creates a barrier between the metal and the delicate sugars. This prevents burning and makes cleanup faster than ever before.
Lining your trays ensures every batch comes out with a consistent golden bottom. You no longer need to scrub burnt bits off your expensive metal sheets. This small step leads to a much more professional look for every single batch.
Required Ingredients
Non-stick cooking spray (optional)
Butter (for the pan if not using paper)
Equipment List
Standard rimmed baking sheet
Roll of parchment paper
Scissors
DIY Instructions
Pull a length of parchment paper out of the box that matches your pan size.
Cut the paper cleanly so it fits inside the rim without folding up the sides.
Spray a tiny dot of cooking oil in the corners of the pan if the paper slides.
Press the paper down firmly so it sticks to the metal surface.
Ensure the paper lies completely flat without any wrinkles or air bubbles.
Place your dough balls directly onto the paper with even spacing.
Bake your treats as directed without worrying about them sticking.
Lift the entire sheet of paper off the pan once the cookies are cool.
7. Shaping the Perfect Cylinder
Simple Baking Hacks
The way you mold your dough influences the final diameter of the cookie. Rolling dough into a tall cylinder instead of a flat ball helps maintain height. This shape forces the heat to work harder to melt the center.
Handling the dough with light pressure keeps the air pockets intact inside the structure. If you squeeze too hard, the cookie becomes dense and tough. A gentle touch ensures a soft and pillowy interior after baking.
This technique is a favorite among professional pastry chefs for thick results. It allows the edges to set firmly while the top stays high. You will see a noticeable difference in the side profile of your finished snacks.
Required Ingredients
Chilled cookie dough
Light dusting of flour for hands
Equipment List
Clean countertop or silicone mat
Kitchen timer
DIY Instructions
Take a golf-ball-sized portion of dough from your mixing bowl.
Place the dough between your palms and roll it into a basic sphere.
Lengthen the sphere by rolling it slightly into a tall oval or cylinder.
Stand the cylinder upright on the baking sheet so the tall side faces up.
Avoid pressing the dough down with your fingers or a fork.
Space each cylinder at least two inches apart to allow for some natural spread.
Chill the tray for five minutes if the dough feels soft after shaping.
Slide the tray into the oven and watch the dough transform into a thick disc.
8. The Creaming Method Mastered
Simple Baking Hacks
Mixing butter and sugar correctly builds the foundation of a great cookie. Many people stop mixing too early, leaving the batter dense and heavy. You want to incorporate enough air to give the dough a structural lift.
When the butter and sugar reach a pale, fluffy state, you have succeeded. This trapped air expands in the heat and prevents the cookie from collapsing. It creates that classic texture that feels light yet satisfyingly chewy.
Watch for the color change from yellow to a light cream shade. This visual cue tells you the sugar has started to dissolve into the fat. Mastering this step is the biggest jump you can make in your baking skills.
Required Ingredients
1 cup of Softened unsalted butter
1 cup of Granulated sugar
1 cup of Brown sugar
Equipment List
Electric stand mixer or hand mixer
Large ceramic mixing bowl
Flexible rubber spatula
DIY Instructions
Place your softened butter into the large bowl of your electric mixer.
Pour both types of sugar over the butter before starting the machine.
Turn the mixer on to a medium speed and let it run for three minutes.
Stop the mixer and use your rubber spatula to scrape the sides of the bowl.
Turn the mixer back on and continue for another two minutes of mixing.
Look for a texture that resembles thick frosting or whipped cream.
Check that the color has turned noticeably lighter than when you started.
Add your eggs one at a time only after this fluffy stage is reached.
9. Espresso Pairing for Bakers
Simple Baking Hacks
Baking is hard work and requires a focused mind for the best results. A fresh shot of espresso provides the energy needed to manage multiple batches. The rich aroma also complements the sweet smell of vanilla in your kitchen.
Sipping a warm drink while your cookies cool makes the process more enjoyable. It turns a chore into a relaxing hobby that you can share with others. A strong coffee balances the sugar of a warm chocolate chip treat.
High-quality machines create a smooth crema that looks as good as it tastes. Taking a break to enjoy your creation is the best part of the day. You deserve a moment of peace before the family rushes in for a snack.
Required Ingredients
Freshly ground espresso beans
Filtered water
1 Warm cookie for dipping
Equipment List
Espresso machine
Portafilter and tamper
Small glass espresso cups
DIY Instructions
Fill the water reservoir of your machine with fresh, filtered water.
Grind your coffee beans to a very fine texture like table salt.
Scoop the grounds into the portafilter until it is slightly overfilled.
Press the tamper down with firm, even pressure to pack the coffee.
Wipe any stray grounds off the rim of the metal filter.
Lock the portafilter into the machine and place a cup underneath.
Start the brew and watch for a dark liquid that turns into golden foam.
Serve the drink immediately alongside a fresh tray of warm cookies.
10. Batch Consistency Check
Simple Baking Hacks
Large-scale baking requires organized trays to ensure every cookie bakes the same way. Crowding a pan leads to uneven airflow and cookies that join together. Spacing them out allows the heat to hit every edge at the same time.
Professional kitchens use identical trays to keep the results predictable batch after batch. If you use thin pans and thick pans together, the timing will change. Stick to one style of equipment for the most reliable cookie height.
A full cooling rack is the ultimate reward for a day spent in the kitchen. Seeing dozens of uniform, thick cookies proves your technique is working. You can now package these up for gifts or enjoy them throughout the week.
Required Ingredients
Multiple batches of prepared dough
Extra chocolate chips for topping
Equipment List
Three matching aluminum baking sheets
Large wire cooling rack
Oven mitts
DIY Instructions
Preheat your oven and ensure the racks are spaced out evenly.
Scoop your dough into equal sizes using a spring-loaded cookie scoop.
Place exactly twelve cookies on each tray in a grid of three by four.
Ensure there is plenty of open space between the cookies and the pan edges.
Rotate the pans halfway through the baking time for even browning.
Remove the trays one by one as the cookies reach a golden color.
Transfer the finished treats to a cooling rack to prevent soggy bottoms.
Repeat the process until all your dough is turned into beautiful cookies.
11. Selecting Large Eggs Not Jumbo
Simple Baking Hacks
Size matters when it comes to the liquid ratio in your cookie dough. Using jumbo eggs adds too much moisture, which is a primary reason why your cookies are always flat. Large eggs provide the exact amount of protein and fat needed to bind ingredients without causing an oily spread.
Consistency in your egg choice ensures the structural integrity of every batch. Most recipes are developed specifically for the volume of a standard large egg. Changing this variable can lead to a thin, cakey texture that lacks the chewiness you desire.
Always check the carton carefully at the grocery store. Keeping the moisture levels balanced is a simple way to maintain the shape of your treats. This small detail prevents the dough from becoming too runny to hold its form in the heat.
Required Ingredients
1 Carton of grade A large eggs
1 Bowl of room temperature water (to take the chill off)
Equipment List
Small glass bowl
Room temperature storage container
DIY Instructions
Look at the front of your egg carton to confirm it says “Large” and not “Jumbo” or “Medium.”
Take the number of eggs required for your recipe out of the refrigerator.
Place the cold eggs into a bowl of warm water for five minutes to reach room temperature.
Crack each egg into a separate small glass bowl before adding it to your main mixture.
Check for any pieces of shell that might have fallen into the liquid.
Verify the yolk is bright and the white is thick, which indicates freshness.
Pour the room temperature egg into your butter and sugar mixture slowly.
Beat the mixture until the egg is fully incorporated before adding the next one.
12. Monitoring Internal Bake Temps
Simple Baking Hacks
Pulling a heavy tray out of the oven at the right moment is a skill every baker must learn. If you leave the treats in too long, they lose the soft center that makes them delicious. Under-baking slightly allows for the carryover heat to finish the job on the counter.
The edges should look set and slightly golden while the center remains soft to the touch. This contrast in texture creates the best eating experience. Watching the color change through the oven window helps you avoid opening the door too often.
Heat management is the key to preventing a hard, flat disc. A golden brown ring around the base signals that the structure is strong enough to stand. Let the tray rest for a few minutes before moving anything to a wire rack.
Required Ingredients
Prepared cookie dough
Optional sea salt for topping
Equipment List
Heavy-duty oven mitts
Rimmed baking sheet
Kitchen timer
DIY Instructions
Slide your baking sheet onto the middle rack of a preheated oven.
Set your kitchen timer for two minutes less than the recipe suggests.
Peer through the oven glass once the timer beeps to check the progress.
Look for the edges of the cookies to turn a light sandy brown color.
Touch the very center of one cookie gently with a finger to feel for softness.
Remove the pan immediately if the edges are firm but the middle still looks a bit pale.
Set the hot pan on a heat-safe surface like a wooden board or trivet.
Allow the cookies to stay on the hot pan for five minutes to finish setting.
13. Uniform Flour Distribution
Simple Baking Hacks
Dusting your work surface evenly prevents the dough from sticking without adding too much extra weight. If you dump a pile of flour in one spot, it creates dry patches in your finished treats. A light, snowy layer is all you need for easy handling.
Proper distribution ensures that every piece of dough has the same texture. This prevents some cookies from being tough while others are too soft. It also keeps your hands clean and the dough manageable as you shape each piece.
Uniformity starts with the preparation of your station. Using a sifter or a light hand makes a huge difference in the final product. Your cookies will have a smooth, professional finish that looks beautiful on camera.
Required Ingredients
1/2 Cup of all-purpose flour (for dusting)
1 Batch of prepared dough
Equipment List
Small fine-mesh sieve
Clean, dry countertop
DIY Instructions
Clear your countertop of any clutter and wipe it down with a dry cloth.
Put a small amount of flour into a fine-mesh sieve or sifter.
Hold the sieve a few inches above the counter and tap the side gently.
Move your hand in a wide circle to create a thin, even layer of white powder.
Place your dough in the center of the floured area.
Coat your hands with a tiny bit of flour to prevent the dough from clinging to your skin.
Roll or shape the dough as needed for your specific recipe.
Brush away any excess flour from the bottom of the dough before placing it on the pan.
14. Mixing In The Chips
Simple Baking Hacks
Folding in your chocolate chips by hand is better than using a high-speed mixer. This prevents the chips from breaking and keeps the dough from becoming overworked. Overworking the dough develops too much gluten, which can cause cookies to spread poorly.
Using a flexible spatula allows you to reach the bottom of the bowl where flour often hides. You want the chips distributed evenly so every bite has a burst of chocolate. This manual step gives you better control over the final texture of the mixture.
A gentle folding motion keeps the air you worked so hard to incorporate during the creaming stage. This volume is what prevents your cookies from looking like flat pancakes. Take your time to ensure the chips are swirled through every inch of the dough.
Required Ingredients
1 Bag of semi-sweet chocolate chips
1 Bowl of prepared cookie dough base
Equipment List
Large flexible rubber spatula
Wide mixing bowl
DIY Instructions
Pour the entire bag of chocolate chips into the center of your dough bowl.
Insert your rubber spatula along the side of the bowl until it hits the bottom.
Lift the dough from the bottom and fold it over the top of the chips.
Turn the bowl a quarter of a turn and repeat the folding motion.
Continue this process until you no longer see large pockets of plain dough.
Scrape the very bottom of the bowl to ensure no dry flour is trapped there.
Stop mixing as soon as the chips appear evenly spread throughout the mass.
Chill the dough for at least thirty minutes before you start scooping.
15. The Benefits of Bread Flour
Simple Baking Hacks
Switching to bread flour is a great hack for those who love a chewy, substantial cookie. Bread flour has a higher protein content than standard all-purpose varieties. This extra protein creates more gluten, which provides a stronger internal skeleton for the dough.
A stronger structure means the cookie can hold its height even when the butter melts in the oven. This is a top secret for why some bakery cookies look so much thicker than home-baked ones. You get a satisfying bite that pulls apart rather than crumbling.
You can use all bread flour or mix it half-and-half with your regular flour. This simple swap changes the physics of your baking without changing the flavor. Your cookies will stand tall and proud on the cooling rack.
Required Ingredients
1 Bag of high-protein bread flour
Standard salt and leavening agents
Equipment List
Digital kitchen scale
Large storage container for flour
DIY Instructions
Locate a bag of bread flour at the store, usually found near the all-purpose flour.
Weigh out the amount of flour your recipe requires using your digital scale.
Substitute the bread flour for the all-purpose flour in a one-to-one ratio.
Sift the bread flour to ensure there are no lumps before mixing.
Combine the dry ingredients in a separate bowl as you normally would.
Follow your standard mixing procedure, being careful not to over-mix the dough.
Notice that the dough might feel slightly stiffer than what you are used to.
Bake at the usual temperature and enjoy the extra height and chewiness.
16. The Cookie Scoot Technique
Simple Baking Hacks
Professional bakers use a simple trick called the “cookie scoot” to fix wonky shapes. If your cookies spread into irregular ovals, you can fix them while they are still hot. Using a round cutter to swirl the cookie creates a perfect circle every time.
This movement bunches up the edges and increases the thickness of the cookie. It hides any uneven spreading that happened during the baking process. Doing this immediately after the tray leaves the oven is the only way it works.
Your treats will look like they came from a high-end boutique with this five-second fix. It is the easiest way to ensure a uniform look across the entire batch. Your family will wonder how you made every single piece look exactly the same.
Required Ingredients
1 Tray of freshly baked, hot cookies
No extra ingredients needed
Equipment List
Round metal cookie cutter (larger than the cookie)
Heat-safe surface
DIY Instructions
Remove your tray of cookies from the oven and set it on the counter.
Pick a round cookie cutter that is slightly larger than the diameter of your baked treats.
Place the cutter over a hot cookie so the cookie is inside the metal ring.
Move the cutter in a rapid circular motion without lifting it off the pan.
Watch as the edges of the cookie hit the metal and pull inward into a circle.
Repeat this for every cookie on the tray while the dough is still soft.
Let the cookies cool completely in their new, perfectly round shape.
Clean your metal cutter with warm soapy water after the tray has cooled.
17. Rich Browned Butter Base
Simple Baking Hacks
Browned butter adds a nutty, toasted flavor that regular butter simply cannot match. It also changes the water content of the fat, which impacts how the dough spreads. Removing the water through simmering helps the cookies stay thick and rich.
The aroma of browning butter will fill your kitchen with a scent like toasted hazelnuts. Watch the golden liquid carefully as it develops dark flecks at the bottom of the pan. These toasted milk solids are where all the intense flavor lives.
Using this liquid gold in your recipe creates a sophisticated profile that impresses everyone. It is a simple step that elevates a basic chocolate chip recipe to gourmet status. Just ensure you let the butter cool slightly before mixing it with your sugars.
Required Ingredients
2 Sticks of unsalted high-quality butter
A pinch of patience
Equipment List
Small light-colored stainless steel saucepan
Wooden spoon or heat-proof spatula
DIY Instructions
Cut your sticks of butter into small, even chunks for faster melting.
Place the butter in a light-colored saucepan over medium heat.
Stir the butter constantly as it melts and begins to bubble and pop.
Watch for a layer of foam to form on the surface of the liquid.
Look through the foam for the liquid to turn a deep amber or golden color.
Notice the small brown bits forming at the bottom of the pan.
Remove the pan from the heat immediately once you smell a nutty aroma.
Pour the browned butter into a heat-safe bowl to stop the cooking process.
18. Don’t Skip The Salt
Simple Baking Hacks
Salt is the most underrated ingredient in a sweet cookie recipe. It does not make the treat salty, but it balances the sugar and enhances the chocolate. A lack of salt is often why home-baked goods taste flat or one-dimensional.
Adding a bit of flaky salt on top of the dough before baking adds a beautiful crunch. It provides a professional finish that highlights the richness of the butter. You only need a tiny amount to make the flavors truly pop.
Fine sea salt inside the dough helps strengthen the protein bonds. This contributes to a better structure that holds its shape under heat. Never leave this out if you want a complex and satisfying result.
Required Ingredients
Fine sea salt (for the dough)
Flaky finishing salt (for the top)
Prepared cookie dough
Equipment List
Small measuring spoon
Airtight salt cellar
DIY Instructions
Measure your fine sea salt exactly as the recipe dictates.
Whisk the salt into your dry flour mixture to ensure it is spread evenly.
Taste a tiny bit of your dough to ensure the flavors feel balanced.
Scoop your dough onto the prepared baking sheet as usual.
Take a small pinch of flaky salt between your thumb and forefinger.
Sprinkle the salt from a few inches above the dough for even coverage.
Avoid over-salting; three or four flakes per cookie is usually enough.
Bake as directed and enjoy how the salt cuts through the sweetness.
19. Using a Spring-Loaded Scoop
Simple Baking Hacks
Consistency in size is the easiest way to ensure your cookies bake at the same rate. A spring-loaded scoop allows you to drop identical mounds of dough every time. This prevents small cookies from burning while large ones stay raw.
Using a scoop also keeps the heat from your hands away from the dough. Keeping the fat cold until the last second is vital for preventing flat cookies. The mechanical action of the scoop creates a tight ball that holds its shape.
This tool makes the process much faster and less messy than using two spoons. You can fill a whole tray in seconds with perfectly round portions. It is an essential investment for anyone who bakes regularly.
Required Ingredients
1 Bowl of chilled cookie dough
No extra ingredients needed
Equipment List
Medium spring-loaded cookie scoop
Prepared baking sheet
DIY Instructions
Dip your cookie scoop into the bowl of dough and press it against the side.
Fill the metal cup completely so the dough is flush with the edges.
Scrape any excess dough off the bottom using the rim of the bowl.
Hold the scoop about an inch above your parchment-lined baking sheet.
Squeeze the handle firmly to engage the metal bar that releases the dough.
Let the dough ball fall directly onto the sheet without pressing it down.
Space your dough balls two inches apart in straight rows.
Rinse the scoop in warm water if it becomes too sticky during the process.
20. Sifting For Aeration
Simple Baking Hacks
Sifting your dry ingredients removes lumps and introduces air into the mixture. This lightens the flour, which helps the cookies rise more effectively in the oven. It also ensures that the leavening agents like baking soda are perfectly distributed.
A clump of baking soda can cause a bitter taste in one spot and no rise in another. Sifting prevents this mistake and leads to a more uniform crumb. It only takes a minute but significantly improves the quality of your bake.
The resulting texture is much more delicate and professional. You will notice that the dough is easier to mix when the flour is fine and airy. This is a hallmark of an expert baker who cares about the finer details.
Required Ingredients
All-purpose or bread flour
Baking soda and powder
Fine sea salt
Equipment List
Large fine-mesh metal sifter
Large mixing bowl
DIY Instructions
Place a large empty mixing bowl on your work surface.
Hold your sifter or fine-mesh sieve over the center of the bowl.
Pour your pre-measured flour and leavening agents into the sifter.
Tap the side of the sifter with the palm of your hand or a spoon.
Watch as the fine powder falls into the bowl like a soft cloud.
Break up any large remaining lumps of flour with your fingers.
Discard any hard bits that refuse to pass through the mesh.
Give the sifted pile a quick whisk to ensure everything is combined.
21. Authentic Vanilla Paste Over Imitation
Simple Baking Hacks
Many home bakers use imitation vanilla because it is cheap and easy to find. However, these liquids are mostly water and alcohol which evaporate quickly in a hot oven. This leaves your cookies tasting bland and contributes to a lack of structure.
Switching to a thick, high-quality vanilla paste adds “body” to your dough. You can see the tiny black bean specks throughout the mixture, which signals a gourmet finish. The flavor stays locked inside the cookie during the bake for a much richer experience.
Investing in real vanilla transforms the aroma of your entire kitchen. It provides a complex sweetness that bridges the gap between the butter and sugar. Your snacks will taste like they came from a professional pastry shop.
Required Ingredients
1 Jar of high-quality vanilla bean paste
Standard cookie dough base
Equipment List
Small measuring spoon
Glass mixing bowl
DIY Instructions
Prepare your wet ingredients by creaming the butter and sugar together until fluffy.
Open your jar of vanilla bean paste and notice the thick, syrupy consistency.
Dip your measuring spoon into the paste and level it off to the exact amount.
Add the paste directly into the butter mixture before adding any eggs.
Scrape the spoon with a spatula to ensure every bit of the thick paste enters the bowl.
Mix for thirty seconds to distribute the tiny bean specks evenly throughout the fat.
Proceed with the rest of your recipe as you normally would.
Seal the jar tightly and store it in a cool, dark pantry to keep it fresh.
22. Real Butter Over Tub Margarine
Simple Baking Hacks
Using margarine from a plastic tub is a leading reason why your cookies are always flat. Tub margarine contains a high percentage of water and oil designed for spreading on toast. This extra moisture turns into steam and causes your dough to collapse into a puddle.
Real sticks of unsalted butter provide the solid fats needed to hold the cookie’s shape. Butter has a specific melting point that allows the edges to set while the center stays tall. The flavor of real dairy is also vastly superior to any oily substitute.
Notice the difference in the final texture when you use a solid block of fat. The cookies have a distinct chew and a golden-brown finish that margarine cannot replicate. Always look for the word “Butter” on the packaging rather than “Vegetable Spread.”
Required Ingredients
2 Sticks of unsalted real butter
Standard dry ingredient mix
Equipment List
Butter knife
Small ceramic dish for softening
DIY Instructions
Purchase high-quality unsalted butter sticks from the dairy aisle of your store.
Take the butter out of the fridge at least thirty minutes before you start baking.
Cut the sticks into small cubes to help them reach room temperature faster.
Press your finger against a cube; it should leave an indent without sliding through.
Place the softened cubes into your mixing bowl.
Avoid using a microwave to soften the butter, as this often creates oily liquid spots.
Beat the solid butter with your sugar until the mixture looks pale and light.
Discard any tub margarine and keep it far away from your baking sheets.
23. Proper Rack Placement
Simple Baking Hacks
Heat distribution inside an oven is never perfectly even throughout the entire space. If you place your cookies too close to the bottom heating element, they will melt too fast. This sudden heat causes the bottom to spread wide before the top has any time to rise.
Sliding your tray into the middle rack position is the secret for a balanced bake. This allows the hot air to circulate around the top and bottom of the pan equally. You get a controlled rise and a consistent color across the whole batch.
Watching your cookies through the glass window helps you see if the rack height is correct. If the edges are browning too fast, your rack might be too low. Simple adjustments to the metal shelving can save an entire tray from becoming flat discs.
Required Ingredients
1 Tray of prepared cookie dough balls
Equipment List
Oven with adjustable wire racks
Heat-resistant oven mitts
DIY Instructions
Open your oven door while the unit is still cold and turned off.
Locate the metal wire racks inside the oven cavity.
Move one rack so that it sits exactly in the center of the oven space.
Ensure there is enough room above the rack for air to move freely.
Preheat your oven to the temperature stated in your cookie recipe.
Wait for the oven to reach the full heat before sliding your tray inside.
Place the baking sheet directly in the center of the middle rack.
Avoid baking two trays at once on different levels unless you have a convection setting.
24. Doubling Up Baking Sheets
Simple Baking Hacks
Delicate doughs often struggle with “bottom-heat” that causes the fat to separate and leak. If your pans are thin, they transfer heat too aggressively to the base of the cookie. This creates a greasy, flat result with burnt bottoms and raw tops.
Stacking one baking sheet inside another creates a protective air gap between the two layers of metal. This gap acts as an insulator that slows down the heat transfer to the dough. It allows the cookie to bake gently and maintain a much better height.
This hack is especially useful for high-butter recipes like shortbread or chocolate chip. You will notice the bottoms stay a beautiful light golden color. The extra insulation gives the leavening agents more time to work their magic.
Required Ingredients
1 Batch of high-fat cookie dough
Equipment List
2 Identical rimmed aluminum baking sheets
Parchment paper
DIY Instructions
Take two identical baking sheets from your kitchen cupboard.
Place one sheet directly inside the other so they are nested together.
Line the top sheet with a piece of parchment paper to prevent sticking.
Scoop your dough balls onto the parchment paper with even spacing.
Pick up the doubled-up pans together as if they were a single unit.
Slide the entire stack into the center of your preheated oven.
Bake for the time recommended, but check a minute early since heat travels slower.
Remove both pans at once and let the cookies cool on the top sheet.
25. Fresh Baking Powder Power
Simple Baking Hacks
Many people assume baking powder lasts forever in the pantry, but it actually loses its strength. Unlike baking soda, baking powder contains its own acid and starts reacting as soon as it touches liquid. If the powder is old, it will provide zero “lift” to your dough.
Without that chemical lift, your cookies feel heavy and sink into a flat shape. Testing the freshness of your tin before you start mixing is a vital step for success. A quick sizzle in a cup of water will tell you if the product is active.
Fresh powder creates tiny air bubbles that expand in the oven heat. This creates a fluffy, thick texture that holds up against the melting butter. Keep your tin in a cool place and replace it every six months for the best rise.
Required Ingredients
1 Tin of baking powder
1 Cup of hot tap water
Equipment List
Measuring spoon
Small clear glass
DIY Instructions
Check the expiration date printed on the bottom of your baking powder container.
Fill a small glass with about half a cup of hot water from your faucet.
Scoop out half a teaspoon of the baking powder using a clean spoon.
Drop the powder into the hot water and watch the surface of the liquid.
Look for immediate and vigorous bubbling that looks like a fizzy drink.
Note that if the powder just sinks or bubbles weakly, it is time to buy a new tin.
Always keep the lid of your baking powder tightly snapped shut after use.
Add the fresh powder to your flour and whisk it thoroughly before mixing.
26. Avoiding Common Dough Fixes
Simple Baking Hacks
Baking is a science where every tiny mistake can lead to a flat and disappointing result. Sometimes, the issue isn’t just one thing, but a combination of small “fixas” needed in your routine. Seeing the difference between a failed cookie and a success helps you learn.
Visualizing how dough spreads when it lacks structure is the first step toward improvement. If your cookies look like lace or have holes, the sugar levels might be too high. If they leak oil, the butter was likely too warm during the mixing phase.
Mastering these details ensures you never have to throw away a batch of dough again. Every tray becomes an opportunity to refine your craft and produce thick, chewy treats. Consistency is the hallmark of a baker who pays attention to the little things.
Required Ingredients
All-purpose flour
Unsalted butter
Brown sugar
Equipment List
Silicone baking mat
Cooling rack
DIY Instructions
Observe the shape of your cookies as they come out of the oven.
Look for thin, transparent edges that break easily when touched.
Increase your flour by two tablespoons in the next batch if the current one is too thin.
Chill your dough for a longer period if the cookies spread into each other.
Reduce the amount of granulated sugar if the cookies are browning too fast.
Check that your oven temperature is not set higher than the recipe requires.
Use a cooling rack to let steam escape so the cookies don’t get soggy.
Keep a small notebook in the kitchen to record which changes worked for you.
27. Using Cold Eggs Correctly
Simple Baking Hacks
Most recipes ask for room temperature eggs to help with emulsification in the batter. However, if your kitchen is very hot or your butter is slightly too soft, using cold eggs is a clever hack. The cold liquid from the egg can bring the temperature of the fat back down.
This prevents the dough from becoming too greasy before it even reaches the oven. Cold eggs help maintain a firmer dough structure that resists spreading too fast. It is a simple way to “fix” a mixture that feels a bit too runny or warm.
Only use this trick if you notice your dough is becoming glossy or melting in the bowl. It helps keep the air pockets trapped inside the creamed butter. This leads to a taller cookie with a much better internal crumb.
Required Ingredients
1 or 2 Cold eggs (straight from the fridge)
Softened butter and sugar mixture
Equipment List
Small bowl for cracking
Electric mixer
DIY Instructions
Start creaming your butter and sugar as directed by your favorite recipe.
Feel the side of the mixing bowl with your hand to check the temperature.
Take your eggs out of the refrigerator only when you are ready to add them.
Crack one cold egg into a separate small bowl to check for shells.
Pour the cold egg into the mixer while it is running on a low speed.
Watch as the cold egg firms up the butter slightly as it incorporates.
Add the second egg only after the first one has completely disappeared.
Proceed to add your dry ingredients immediately while the dough is still cool.
28. Adding an Extra Egg Yolk
Simple Baking Hacks
The secret to a “fudgy” and thick center often lies in the ratio of yolk to white. Egg whites contain a lot of water, which creates steam and can lead to a thinner, crispier cookie. The yolk provides fat and natural emulsifiers that add richness and density.
Adding one extra yolk to your standard recipe creates a much more satisfying chew. It helps bind the ingredients together without adding the thinning effect of more water. Your cookies will feel heavier and stay soft for much longer on the counter.
This hack is especially popular for chocolate chip recipes that need to stand up to heavy toppings. The extra fat in the yolk helps the cookie hold its height against the weight of the chips. You will see a deeper golden color in every finished piece.
Required Ingredients
1 Extra large egg
Standard cookie dough ingredients
Equipment List
Small bowl
Your clean hands or an egg separator
DIY Instructions
Follow your recipe until it is time to add the eggs to the butter and sugar.
Add the number of whole eggs requested by the instructions first.
Take one additional egg and crack it gently against a flat surface.
Separate the yolk from the white by passing the yolk back and forth between the shell halves.
Alternatively, drop the egg into your clean hand and let the white slide through your fingers.
Drop only the round yellow yolk into your mixing bowl.
Discard the extra egg white or save it in the fridge for an omelet later.
Mix the dough until the yellow yolk is fully blended for a richer texture.
29. Stand Mixer Speed Control
Simple Baking Hacks
Using a high-end stand mixer is a dream for any baker, but speed control is very important. If you run the mixer on high for too long, you can actually melt the butter with friction heat. This creates a greasy dough that will inevitably turn into flat cookies.
The goal is to whip in air without heating up the ingredients in the metal bowl. Start slow when adding flour to avoid a “flour cloud” in your face. Only use the medium speeds for the initial creaming of the butter and sugar.
A heavy-duty mixer can overwork the gluten in the flour very quickly. Overworked dough becomes tough and loses the delicate lift needed for a thick cookie. Use the lowest setting once you add the dry ingredients to keep the texture soft.
Required Ingredients
All-purpose flour
Softened butter
Sugar and vanilla
Equipment List
Electric stand mixer
Paddle attachment
Flexible bowl scraper
DIY Instructions
Attach the flat paddle to your stand mixer rather than the whisk attachment.
Place your butter and sugar into the stainless steel bowl.
Turn the dial to a medium speed (usually setting 4 or 6) for three minutes.
Stop the machine and use a scraper to push the dough down from the sides.
Turn the speed down to the lowest setting before you pour in the flour.
Mix only until you see the last streaks of white flour disappear into the dough.
Stop the mixer immediately to prevent the dough from becoming tough.
Finish mixing any chocolate chips by hand with a spatula for the best control.
30. Coating Chips in Flour
Simple Baking Hacks
Have you ever wondered why all your chocolate chips sink to the bottom of the cookie? When chips sink, they melt against the hot pan and cause the bottom of the cookie to spread. This leads to an uneven shape and a very flat, greasy base.
Tossing your chocolate chips in a tiny bit of flour before adding them to the dough fixes this. The flour creates a rough surface that helps the chips “grab” onto the dough. This keeps them suspended in the middle of the cookie where they belong.
Every bite will have an even distribution of chocolate from top to bottom. This small step ensures the structural integrity of the dough stays strong during the bake. It is a pro-level hack that makes a huge visual difference.
Required Ingredients
1 Bag of chocolate chips or chunks
1 Tablespoon of all-purpose flour
Equipment List
Small mixing bowl
Spoon or spatula
DIY Instructions
Open your bag of chocolate chips and pour them into a small separate bowl.
Sprinkle one tablespoon of dry flour over the top of the chips.
Stir the chips with a spoon until every piece has a light, dusty white coating.
Shake the bowl gently to remove any large clumps of excess flour.
Pour the floured chips into your main cookie dough at the very end of mixing.
Fold them in gently using a rubber spatula to avoid breaking the coating.
Scoop the dough as usual, noticing how the chips stay right where you put them.
Bake the cookies and enjoy the perfectly even chocolate distribution.
31. Skipping Non-Stick Sprays
Simple Baking Hacks
Relying on greasy sprays is a frequent trap that explains why your cookies are always flat. These oils create a slick surface that encourages the dough to slide outward the second it hits the heat. This lack of friction means the edges cannot grip the pan to hold their shape.
A dry pan or parchment paper provides the necessary resistance for a taller bake. Using a paper towel to wipe away excess oil ensures the base stays firm. You will achieve a much more defined edge and a thicker center without the oily residue.
Keeping the bottom of your treats clean allows for a better golden crust. This simple adjustment prevents the dreaded “puddle effect” in your oven. Your kitchen results will look much more professional with this one small change.
Required Ingredients
1 Batch of cookie dough
Small amount of neutral cooking oil (only if not using parchment)
Equipment List
Cast iron skillet or baking sheet
Clean paper towel
Tongs
DIY Instructions
Place your baking pan or cast iron skillet on a clean workspace.
Pour a tiny drop of oil onto a folded paper towel.
Wipe the surface of the pan to create an extremely thin, nearly invisible layer.
Use a fresh, dry paper towel to buff away any visible beads of oil.
Ensure the pan feels smooth but not slippery to the touch.
Drop your dough portions onto the buffed surface with proper spacing.
Place the pan in the oven and monitor the spread of the edges.
Clean the pan thoroughly between batches to remove any built-up grease.
32. High Altitude Adjustments
Simple Baking Hacks
Baking at high elevations presents a unique challenge for cookie structure. Lower air pressure allows leavening gases to expand too quickly before the dough sets. This rapid expansion is a major reason why your cookies are always flat in mountain regions.
Slightly increasing your oven heat can help the structure set faster. You might also need to reduce the amount of sugar or leavening agents slightly. These small tweaks balance the atmospheric pressure for a much better rise.
Understanding your environment is key to consistent results in the kitchen. A pressure gauge or altimeter can help you determine if you need these specific modifications. You can still enjoy thick, chewy snacks even miles above sea level.
Required Ingredients
Standard cookie dough ingredients
2 Tablespoons extra flour (for structure)
1 Tablespoon less sugar (to prevent spreading)
Equipment List
Oven thermometer
Altitude pressure gauge
Measuring spoons
DIY Instructions
Check your local elevation using a phone app or a dedicated gauge.
Preheat your oven about 15 to 20 degrees higher than the recipe suggests.
Add an extra tablespoon or two of flour to your dry ingredient mix.
Reduce the granulated sugar by one tablespoon to strengthen the dough.
Decrease the baking powder or soda by a tiny pinch to slow down gas expansion.
Bake a single “test cookie” first to see how it reacts to the heat.
Adjust the baking time, as things often bake faster in thinner air.
Let the cookies cool completely on the pan to lock in the height.
33. The Power of Dark Brown Sugar
Simple Baking Hacks
The type of sugar you choose directly impacts the moisture and acidity of your dough. Dark brown sugar contains more molasses, which is naturally acidic. This acid reacts more vigorously with baking soda to create a significant “lift.”
Using this ingredient results in a thicker, moister cookie with a deeper color. It provides a robust flavor that complements chocolate and nuts beautifully. The extra moisture keeps the center soft while the acid helps the cookie stand tall.
Switching from light to dark brown sugar is an easy way to fix thin treats. You will notice a richer aroma as soon as the tray enters the oven. It is a favorite trick for bakers who want a gourmet, bakery-style finish.
Required Ingredients
1 Jar of dark brown sugar
1 Box of fresh baking soda
Standard flour and butter
Equipment List
Airtight storage jar
Wooden mixing spoon
Large mixing bowl
DIY Instructions
Measure out the dark brown sugar as required by your recipe.
Pack the sugar firmly into the measuring cup to ensure an accurate amount.
Combine the dark sugar with your softened butter in a large bowl.
Whisk your baking soda into the flour to prepare for the acidic reaction.
Mix the wet and dry ingredients together until a thick dough forms.
Notice how the dough is darker and more fragrant than usual.
Chill the dough for at least an hour to let the moisture settle.
Bake at the standard temperature and enjoy the extra rise and richness.
34. Even Spacing Strategy
Simple Baking Hacks
Crowding your baking sheet is a recipe for uneven heat and flat results. If cookies are too close, they trap steam between them, which softens the dough too much. This causes them to run into each other and lose their individual height.
Providing at least two inches of space allows hot air to hit the sides of every cookie. This air circulation sets the edges quickly, trapping the center in a tall position. You get uniform circles instead of a giant sheet of baked dough.
A well-organized tray is the mark of a disciplined and successful baker. It ensures that every single piece in the batch has the same texture. Your patience in spacing them out will be rewarded with a beautiful presentation.
Required Ingredients
1 Bowl of prepared cookie dough
Parchment paper
Equipment List
Large aluminum baking sheet
Kitchen ruler or tape measure (optional)
DIY Instructions
Line your baking sheet with a clean piece of parchment paper.
Use a scoop to place your first dough ball in the top-left corner.
Move two inches to the right before dropping the second dough ball.
Continue this pattern to create a straight row across the top.
Start the next row at least two inches below the first one.
Stagger the rows like bricks if you have extra large cookies.
Double-check that no two dough balls are touching before baking.
Slide the tray into the oven and enjoy the perfectly separated results.
35. The Finger Dent Test
Simple Baking Hacks
Knowing exactly when to pull your cookies out of the heat is a delicate art. The “finger dent” test is a reliable way to check the internal structure without a clock. A gentle tap on the edge tells you if the cookie has set enough to hold its shape.
If the edge feels firm but the center leaves a slight mark, it is ready. This ensures you don’t over-bake them into hard, thin crackers. It preserves the thick, soft interior that everyone loves in a fresh bake.
Using your senses is better than relying on a timer that might be inaccurate. This hands-on approach connects you more deeply to the baking process. You will soon develop an instinct for the perfect moment of completion.
Required Ingredients
1 Tray of cookies currently in the oven
Equipment List
Heat-resistant oven mitts
Cooling rack
DIY Instructions
Put on your oven mitts and open the oven door slightly.
Carefully pull the rack out just enough to reach the front cookies.
Use one finger to very lightly press the outer edge of a cookie.
Feel for a slight resistance that suggests the crust has formed.
Gently tap the center to see if it feels soft but not liquid.
Remove the pan if the edge holds its shape against your finger.
Place the pan on a heat-safe surface for five minutes of rest.
Transfer to a wire rack once the cookies are firm enough to lift.
36. Transferring to Wire Racks
Simple Baking Hacks
Leaving cookies on a hot metal pan for too long causes them to continue cooking. This “carryover heat” can dry out the base and cause the cookie to flatten further. Moving them to a wire rack stops the process and locks in the height.
The rack allows cool air to flow under the cookie, which firms up the bottom quickly. This prevents steam from building up and making the snack soggy or thin. It is the final step in securing a professional, thick texture.
A wire rack also prevents the cookies from sticking to the parchment as they cool. You get a clean release and a beautiful underside every time. This simple tool is essential for anyone serious about their baking hobby.
Required Ingredients
1 Tray of warm, set cookies
Equipment List
Metal wire cooling rack
Thin metal spatula
DIY Instructions
Set your wire cooling rack on a flat countertop near the oven.
Let the cookies rest on the hot baking pan for about five minutes after removal.
Slide a thin metal spatula under the first cookie to ensure it isn’t stuck.
Lift the cookie gently and place it onto the wire rack.
Space the cookies out on the rack so they don’t touch while cooling.
Leave them undisturbed for at least ten minutes to fully firm up.
Feel the bottom of a cookie to ensure it is cool before stacking.
Store the finished treats in an airtight container to keep them fresh.
37. Sifting Dry Additives
Simple Baking Hacks
Adding cocoa powder or spices can sometimes lead to lumps that ruin your dough. These clumps absorb moisture unevenly and can cause the cookie to spread in strange ways. Sifting these dry additives ensures a smooth and consistent mixture.
A fine-mesh sieve breaks up any hard pieces of sugar or powder. This allows the ingredients to blend seamlessly with the flour and butter. You get a uniform flavor and a structural integrity that prevents flattening.
This step is especially important for chocolate cookies that use heavy cocoa. It ensures the dark color is spread evenly without any bitter white spots. Your dough will be much easier to handle and shape after sifting.
Required Ingredients
All-purpose flour
Unsweetened cocoa powder
Ground cinnamon or nutmeg
Equipment List
Fine-mesh metal sieve
Large glass mixing bowl
Balloon whisk
DIY Instructions
Place a large mixing bowl on your counter and set the sieve on top.
Pour your measured flour and cocoa powder into the center of the sieve.
Use a spoon to push the powder through the mesh in a circular motion.
Tap the sides of the sieve to release any trapped flour.
Discard any hard lumps that are too big to pass through the holes.
Use a whisk to stir the sifted powders together until the color is even.
Add these dry ingredients to your wet mixture as directed.
Mix gently to maintain the aeration created by the sifting process.
38. High-Heat Searing Method
Simple Baking Hacks
Some bakers use a high-heat “sear” at the start to lock in a cookie’s shape. By starting with a very hot pan, the bottom and edges set almost instantly. This creates a structural “wall” that prevents the rest of the dough from spreading.
This technique is great for creating a crisp exterior and a very soft middle. It mimics the environment of a professional stone oven. You get a dramatic height and a contrast in textures.
Be careful to monitor the cookies closely, as high heat can lead to burning quickly. This advanced method is for those who have mastered their oven’s personality. It is the ultimate way to ensure your cookies never turn out flat again.
Required Ingredients
1 Batch of chilled cookie dough
High-quality butter
Equipment List
Heavy cast iron skillet
Gas stovetop or high-heat oven
Spatula
DIY Instructions
Place a heavy cast iron skillet on your stovetop over a medium-high flame.
Let the pan get very hot until a drop of water sizzles and disappears.
Place a cold dough ball directly into the center of the hot pan.
Listen for the sizzle as the bottom of the dough sears immediately.
Transfer the entire skillet into a preheated oven to finish baking.
Watch the edges to ensure they don’t get too dark too fast.
Remove the skillet once the top of the cookie looks matte and set.
Slide the cookie out of the pan onto a rack to stop the intense cooking.
Key Takeaways
Temperature is everything: Always monitor your oven with an independent thermometer to ensure the heat is high enough to set the dough edges quickly.
Precision beats guesswork: Using a digital scale for flour prevents the heavy, dry, or overly oily textures that cause cookies to collapse.
Chill for success: Letting your dough rest in the refrigerator for 24 hours hydrates the flour and firms up the fats for maximum height.
Size and spacing: Using a spring-loaded scoop and leaving two inches of room on the pan ensures even airflow and consistent thickness.
Baking the ultimate cookie is a journey of small, intentional steps rather than luck. By implementing these hacks, you take control of the physics inside your oven. You no longer have to wonder why your cookies are always flat when they come out of the heat.
Consistency comes from paying attention to the details that most people skip. Whether it is sifting your cocoa or switching to real butter sticks, every choice matters. These professional techniques empower you to bake with confidence every time you preheat the oven.
Now that you have the secrets of the masters, it is time to get back into the kitchen. Grab your digital scale and start chilling that dough for your next big batch. Your friends and neighbors will certainly notice the professional difference in every bite.
Spread the loveThe holiday season means it is time for making cherished memories in the kitchen. There is something truly special about the smell of cinnamon and sugar filling your home on a cold winter…
Spread the loveThe holiday season is here, bringing with it the cherished tradition of Christmas baking. While scrolling through social media, it is easy to feel intimidated by those complicated, multi-layered cookie designs. Many people…
Spread the loveThe Thanksgiving countdown creates stress. Main courses like turkey and stuffing take up all the oven time. Dessert often becomes an afterthought. It does not have to be that way. This year, skip…