The holiday season brings joy, but it also brings a mountain of dishes and a crowded stovetop. Many home cooks feel the squeeze when trying to fit a turkey, three sides, and two pies into a kitchen the size of a closet. You might feel like your small space is a barrier to hosting the perfect family gathering.
Small Kitchen Cooking Hacks
Limited counter space does not have to mean limited flavor or high stress. Successful holiday hosting in a tiny area is all about strategy and clever organization. You can reclaim your kitchen by changing how you move, store, and prep your favorite seasonal ingredients.
This guide provides 40 practical ways to expand your workspace without a renovation. We will explore how to use vertical space, stager your cooking times, and keep your surfaces clear. Follow these tips to turn your compact kitchen into a high-efficiency holiday workshop.
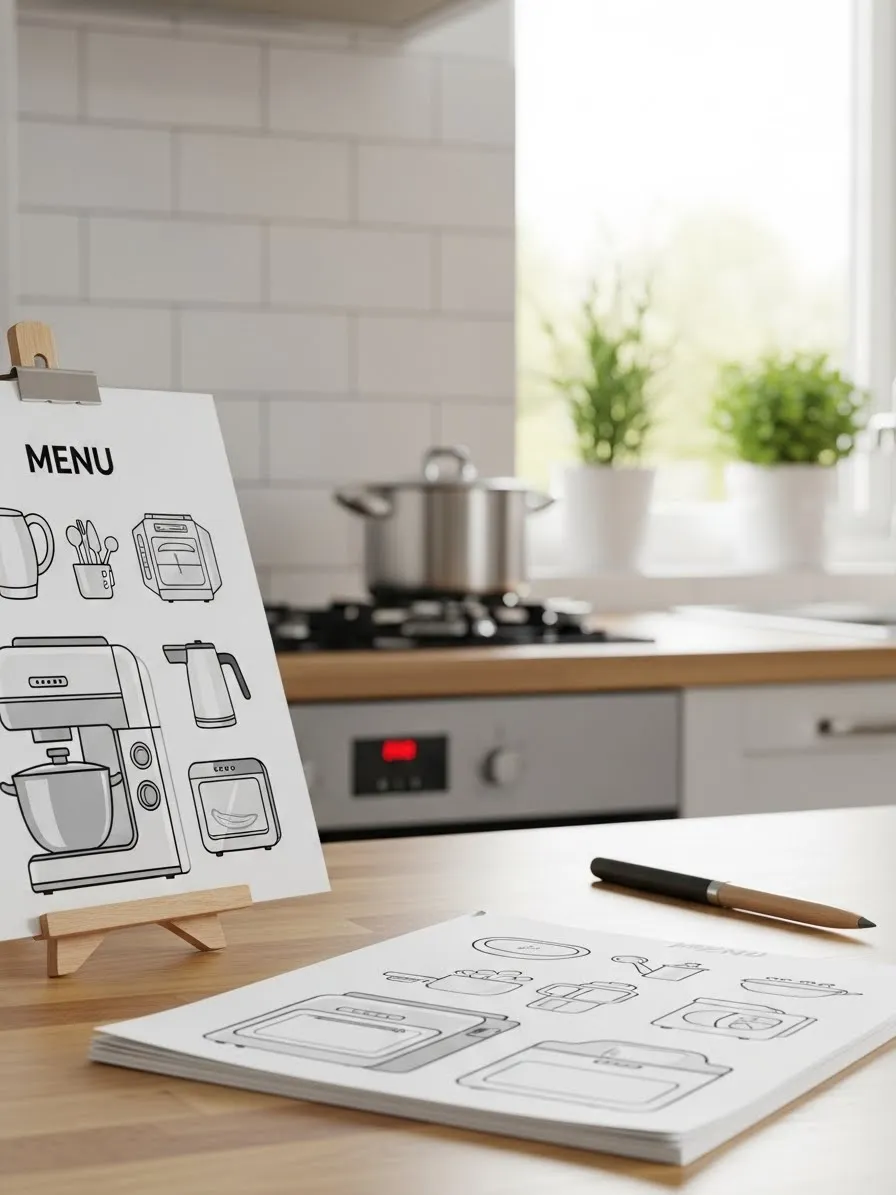
Cooking in a tiny kitchen requires a high level of organization to keep things moving. Visual meal planners help you see exactly what gear you need before you even start your holiday prep. You can quickly spot which appliances take up the most counter space so you can plan your workflow accordingly.
Small areas become chaotic when too many pots and pans are out at once. Using a simple menu board allows you to stagger your cooking times. This method ensures your stove stays clear and your stress levels remain low while hosting guests.
Digital or hand-drawn guides work equally well for this task. They serve as a constant reminder of your plan so you never feel lost in the middle of a recipe. Keeping your goals visible makes the entire process feel manageable and calm.
Ingredients
Large sketchbook or cardstock
Fine tip black marker
Colored pencils for highlighting
Adhesive magnets or a small wooden easel
Equipment
Clear ruler for straight lines
Pencil for initial sketching
Eraser
Flat surface like a kitchen table
DIY Instructions
Clear a flat workspace where you can focus on your layout.
Sketch a list of the holiday dishes you plan to make during the day.
Draw small icons for the appliances needed for each specific dish.
Include symbols for slow cookers, mixers, and toaster ovens to visualize space.
Group tasks by time to see what needs to be cooked first.
Outline your pencil drawings with the black marker to make them stand out.
Add color to specific items to indicate which recipes are finished.
Place the finished planner on an easel or stick it to the fridge with magnets.
Refer to this board throughout the day to stay on track.
2. Make-Ahead Flavor Station
Small Kitchen Cooking Hacks
Cooking in a tiny kitchen during the holidays often feels like a race against the clock. Preparing your sauces and dressings a full day early changes the entire energy of your prep session. This simple shift keeps your main workspace clear of bulky vinegar bottles and oil jars when you actually start roasting.
Small bowls filled with premixed flavors allow you to focus on the main course without distraction. You avoid the mess of measuring spoons and sticky lids while your oven is full. Storing these components in the fridge makes the final assembly of salads and sides incredibly fast.
Everything stays organized and ready for the big meal. This method reduces the number of dishes you have to wash at the end of the night. You gain more time to spend with your family instead of being trapped at the sink.
Ingredients
1 cup extra virgin olive oil
1/4 cup balsamic vinegar
2 cloves fresh garlic
1 tablespoon dried herbs
Salt and black pepper to taste
Equipment
Set of small glass bowls or ramekins
Metal measuring spoons
Whisk or small fork
Plastic wrap for sealing
DIY Instructions
Set out all your small bowls on a flat counter space.
Peel and mince your garlic cloves into very tiny pieces using a sharp knife.
Pour your measured oil and vinegar into a central mixing bowl first.
Add the minced garlic and dried herbs into the liquid mixture.
Whisk the ingredients together vigorously until the oil and vinegar combine well.
Pour small portions of the dressing into individual ramekins for different salads.
Season each bowl with a pinch of salt and pepper.
Cover every bowl tightly with a piece of plastic wrap to keep the flavors fresh.
Place the bowls in the refrigerator until you are ready to serve your meal.
3. Countertop Declutter Strategy
Small Kitchen Cooking Hacks
Managing a holiday feast means you must reclaim every inch of your workspace. A “Clutter Audit” helps you identify which appliances are actually helping and which are just taking up room. Removing non-essential items like toasters or fruit bowls opens up vital territory for rolling out dough.
Clear surfaces provide a sense of calm in the middle of a busy cooking day. You can easily move from chopping vegetables to assembling desserts when nothing blocks your path. Keeping only the necessities on the counter ensures you have a safe spot for hot pans.
Bright, open counters also make the room feel larger than it really is. This trick prevents the cramped feeling that often leads to kitchen accidents. You will find that a clean slate makes your creative process much more enjoyable.
Ingredients
Large storage bin or cardboard box
Cleaning spray
Microfiber cloth
Label maker or masking tape
Equipment
Sturdy step stool for reaching high cabinets
Empty shelf space in a pantry or closet
DIY Instructions
Look at every single item currently sitting on your kitchen counters.
Pick up items you do not need for the specific holiday meal you are making.
Place these extra items into a large storage bin or box.
Move the bin to a different room or a high shelf out of the way.
Spray the empty countertop with your cleaning solution.
Wipe the surface thoroughly with a microfiber cloth until it shines.
Arrange your essential tools, like a knife block, in the very back corners.
Leave the front part of the counter completely empty for active food prep.
Return the stored items to the counter only after the holiday cleanup is finished.
4. Gravity-Defying Pantry Storage
Small Kitchen Cooking Hacks
Vertical space is your best friend when cooking in a tiny kitchen for the holidays. Wall-mounted dispensers for dry goods like flour, sugar, and grains keep your cabinets from overflowing. This setup allows you to see exactly how much of an ingredient you have left at a glance.
Baking becomes much faster when you can just pull a lever instead of digging through heavy bags. You eliminate the risk of flour spills that often happen with floppy paper packaging. Keeping these staples on the wall frees up your lower shelves for heavy pots and pans.
Tidiness is easier to maintain when every ingredient has a permanent, visible home. Your kitchen will look professional and organized even when things get busy. This system turns your storage into a functional piece of art.
Ingredients
5 lbs all-purpose flour
2 lbs granulated sugar
1 lb dried lentils or beans
1 lb rice or quinoa
Equipment
Wall-mounted dry food dispenser set
Electric drill or screwdriver
Level tool
Measuring cup
DIY Instructions
Choose a clear section of wall inside a pantry or above a counter.
Hold the dispenser mounting bracket against the wall and mark the holes with a pencil.
Use a level to ensure the marks are straight before you start drilling.
Drill holes into the wall and tap in plastic anchors if needed.
Screw the mounting bracket firmly into the wall.
Slide the clear canisters onto the bracket until they click into place.
Open the top lids and pour your dry ingredients into each separate bin.
Label each canister so you do not confuse salt with sugar.
Place a bowl under the nozzle and turn the handle to test the flow.
5. Floating Recipe Command Center
Small Kitchen Cooking Hacks
Cooking in a tiny kitchen often leaves no room for bulky cookbooks or tablets on the counter. Taping your recipes to the upper cabinet doors keeps your instructions at eye level and away from messy spills. This simple trick ensures you can read your next steps while your hands are covered in flour or dough.
Vertical surfaces are frequently ignored but offer valuable real estate for holiday planning. You can group several pages together to see your entire menu at once. This setup prevents you from constantly searching for a misplaced phone or a stained recipe card.
Your workspace remains open and functional for heavy tasks like rolling out pastry. Keeping the paper high up protects it from heat and water damage near the stove. You will feel more organized and confident as you move through your holiday checklist.
Ingredients
Printed recipe pages
Blue painter’s tape or masking tape
Clear plastic sheet protectors (optional)
Fine-point pen for notes
Equipment
Clean cabinet doors or a refrigerator surface
Damp cloth for wiping surfaces
DIY Instructions
Wipe the outside of your cabinet doors with a damp cloth to remove any grease.
Dry the surface completely so the tape sticks properly.
Place your recipe page inside a clear plastic sleeve if you want to reuse it later.
Cut four small pieces of blue painter’s tape for each corner of the paper.
Position the paper at eye level on the cabinet door directly above your prep area.
Press the tape firmly to secure the recipe without damaging the wood finish.
Use your pen to cross off ingredients as you add them to your mixing bowl.
Peel the tape off gently once you finish the dish to avoid leaving sticky residue.
Store the recipes in a folder after the meal for your next holiday event.
6. The Sink Bridge Workspace
Small Kitchen Cooking Hacks
Maximizing a small kitchen requires creative thinking about every available surface. Placing a sturdy cutting board directly over your sink creates an instant extension of your countertop. This clever hack allows you to chop vegetables or prep meat in space that would otherwise be wasted.
Scraps can be swiped directly into the basin or a disposal unit to keep the board clean. This method keeps your main counters free for cooling racks or serving platters. You stay close to the water source for quick rinses without moving across the room.
Small kitchens feel much larger when you add these temporary work zones. The wooden surface provides a stable and safe area for heavy-duty slicing. You can easily remove the board when it is time to wash the dishes.
Ingredients
Large wooden or bamboo cutting board (must be wider than your sink)
Food-grade mineral oil
Mild dish soap
Equipment
Kitchen sink
Clean towel
Measuring tape
DIY Instructions
Measure the width of your kitchen sink from one outer edge to the other.
Select a cutting board that is at least two inches wider than your sink opening.
Rub a small amount of mineral oil into the wood to protect it from moisture.
Set the board across the sink so it rests firmly on the countertop edges.
Push the board slightly to ensure it does not slide or wobble.
Place a damp paper towel under the edges if you need extra grip.
Start your food prep on this new elevated surface.
Wipe the board clean with mild soap and a damp cloth after each use.
Stand the board upright against the wall to dry and store it away.
7. Multi-Tier Cooling Tower
Small Kitchen Cooking Hacks
Baking multiple batches of treats can quickly overwhelm a tiny kitchen. Using a three-tier cooling rack allows you to stack cookies and pies vertically instead of spreading them across the counter. This vertical approach saves a massive amount of space while ensuring proper airflow for your baked goods.
Crispy edges stay perfect when air can circulate around the entire dish. You can fit dozens of cookies in the same footprint usually taken up by just one tray. This organized look also makes it easier to decorate your holiday sweets in one central spot.
Collapsible racks are easy to store when the holiday season ends. They fold flat and slide into a narrow gap next to your oven or inside a cabinet. Investing in vertical gear is the best way to handle large volumes in a small home.
Ingredients
Freshly baked cookies
Warm fruit pies
Gingerbread men
Cooling racks
Equipment
Three-tier wire cooling rack set
Oven mitts
Spatula
DIY Instructions
Unfold the legs of each wire rack level until they lock into place.
Stack the racks on top of each other on a flat, heat-safe surface.
Use oven mitts to remove your baking sheet from the hot oven.
Let the cookies sit on the hot pan for two minutes to firm up.
Slide a thin spatula under each cookie and lift it carefully.
Place the cookies on the top tier of the rack first to allow heat to rise.
Fill the middle and bottom tiers as you continue baking more batches.
Leave space between each item so air can move freely between them.
Allow everything to cool completely before moving the treats to storage containers.
8. Over-Stove Pastry Station
Small Kitchen Cooking Hacks
Reclaiming the space above your stovetop is a game changer for holiday baking. A large, thick noodle board or stove cover provides a massive flat surface for rolling out dough. This setup is excellent for kitchens with almost no counter space, as it utilizes the largest unused area in the room.
Heavy wooden boards stay in place while you apply pressure to your rolling pin. You can work comfortably at a natural height without leaning over small, cramped corners. This temporary station is also great for assembling complex pastries or decorating large pies.
Safety is important when using this method, so always ensure the burners are completely cool. The wood protects your stove from scratches and flour buildup. It turns a cooking appliance into a functional workbench in seconds.
Ingredients
Pie crust dough
All-purpose flour for dusting
Chilled butter
Equipment
Large wooden noodle board or oversized cutting board
Traditional wooden rolling pin
Pie tin
Pastry brush
DIY Instructions
Confirm that all stove burners are turned off and the surface is cold to the touch.
Place the large noodle board directly over the grates of your stovetop.
Check that the board is level and does not tilt when you press on the corners.
Sprinkle a light layer of flour over the center of the wooden board.
Place your chilled dough in the middle of the floured area.
Roll the dough from the center outward using steady, even pressure.
Rotate the dough frequently to prevent it from sticking to the wood.
Lift the finished crust and drape it gently over your pie tin.
Remove the board and clean the stove surface once you are finished baking.
9. Portable Island Prep Zone
Small Kitchen Cooking Hacks
Moving your prep work to a kitchen island or a dining table can save your sanity. A central table provides 360-degree access, which is great if you have a helper in the kitchen. You can spread out ingredients for several recipes without feeling trapped against a wall.
Small kitchens often lack a central hub, so creating a temporary one works wonders. Using a table allows you to sit down while performing repetitive tasks like peeling potatoes or snapping beans. This change of posture reduces fatigue during long days of holiday cooking.
Keeping your most frequent tasks in the center of the room streamlines your movement. You spend less time walking back and forth between the sink and the stove. A clear, well-lit table makes even the most complex recipes feel simple.
Ingredients
5 lbs whole potatoes
Fresh green beans
Whole garlic bulbs
Fresh herbs
Equipment
Large dining table or kitchen island
Multiple cutting boards
Vegetable peeler
Sharp paring knife
Large bowls for scraps and finished produce
DIY Instructions
Clear all decorations and mail off your dining table to create a clean surface.
Lay down a clean tablecloth or placemats to protect the wood from moisture.
Set up a station for each vegetable you need to prepare for your meal.
Place a large “scrap bowl” in the center to collect peels and stems.
Position your cutting boards at each seat if family members are helping you.
Peel the potatoes over the scrap bowl to keep the table tidy.
Snap the ends off the green beans and place them in a clean rinse bowl.
Move the finished ingredients back to the kitchen only when they are ready for the pot.
Wipe the table down immediately after you finish to keep your home organized.
10. Under-Cabinet Mounted Storage
Small Kitchen Cooking Hacks
Installing a simple wooden frame or shelf under your upper cabinets creates a hidden nook for light items. This area is perfect for storing cutting boards, plastic wrap, or even small spice jars that usually clutter your drawers. It utilizes the “dead space” between your counters and the bottom of your cabinets.
Keeping your most-used cutting boards within arm’s reach makes transitions faster. You no longer have to dig through a heavy stack in a low cupboard while you are busy. This project is a quick way to add permanent storage without a full kitchen remodel.
A clean, minimalist look helps a small kitchen feel more professional. By lifting items off the counter, you create a sense of order that makes holiday cooking less chaotic. It is a smart solution for any home with limited cabinet space.
Ingredients
1×2 wooden slats
Wood glue
Small finishing nails
Wood stain or paint
Equipment
Electric drill
Screwdriver
Measuring tape
Sandpaper
DIY Instructions
Measure the depth and width of the underside of your chosen upper cabinet.
Cut your wooden slats to match the depth of the cabinet.
Sand the wood pieces until they are smooth to avoid splinters.
Apply wood glue to the edges of your slats to form a simple U-shaped bracket.
Secure the wood joints with finishing nails for extra strength.
Position the bracket under the cabinet and mark the screw holes.
Drill small pilot holes into the bottom of the cabinet, being careful not to go through the inside.
Screw the bracket firmly into the cabinet base.
Slide your cutting boards or baking sheets into the new slot to test the fit.
11. Vertical Reach Stool Strategy
Small Kitchen Cooking Hacks
Cooking in a tiny kitchen often means utilizing the highest shelves in your pantry. A sturdy, foldable step stool is a vital tool for reaching those rarely used holiday platters and specialty baking pans. Keeping a stool nearby allows you to treat your ceiling-height cabinets as active storage instead of a forgotten graveyard for cookware.
Small spaces require you to think vertically to keep your main counters clear. You can safely store heavy stockpots and extra bags of flour out of your direct line of sight until they are needed. This approach ensures that every inch of your kitchen contributes to the success of your holiday meal.
Organizing your kitchen this way prevents the frustration of climbing on chairs or stretching too far. You gain a massive amount of storage potential just by embracing the height of your room. It makes the entire cooking process feel much more organized and professional.
Ingredients
High-reach kitchen cabinets
Heavy stockpots
Bulk baking supplies
Holiday serving platters
Equipment
Two-step foldable stool
Non-slip rubber feet
Carrying handle
Level floor surface
DIY Instructions
Identify the items in your kitchen that you only use once a year for the holidays.
Clear out a space on the very top shelf of your upper cabinets.
Place your step stool on a flat, dry area of the floor directly in front of the cabinet.
Check that the stool is fully locked in the open position before stepping up.
Carry one heavy item at a time while keeping one hand free for balance.
Position the heaviest pots toward the back of the high shelf for safety.
Arrange lighter items like cake stands or mixing bowls toward the front.
Fold the stool flat once you are finished and slide it into a narrow gap next to the fridge.
Keep the stool accessible throughout the day for quick access to your holiday gear.
12. Vertical Plate Rack Organizer
Small Kitchen Cooking Hacks
Standard horizontal stacking often leads to a chaotic mess of dishes in a tiny kitchen. A vertical plate rack allows you to store your holiday dinnerware upright, making it much easier to grab a single plate without moving a whole pile. This method protects your delicate dishes from chips and scratches during the busy holiday rush.
Cabinets stay much tidier when you can see the edge of every dish at a glance. You save a significant amount of space by utilizing the full height of your cabinet shelves. This organized system makes setting the table a fast and stress-free task for your guests or family.
Tiered wire racks can even hold bowls and saucers on a separate level above the plates. This multi-level approach doubles your storage capacity in an instant. Your kitchen will feel more spacious and much better prepared for a large crowd.
Ingredients
Set of dinner plates
Salad plates
Holiday-themed bowls
Serving saucers
Equipment
Metal wire vertical plate rack
Measuring tape
Shelf liners (optional)
DIY Instructions
Empty the contents of your dish cabinet and wipe the shelves clean with a damp cloth.
Measure the height of your shelf to ensure the wire rack will fit comfortably inside.
Place a non-slip shelf liner down to prevent the metal rack from sliding.
Set the vertical rack in the center of the shelf with the open side facing you.
Slide your largest dinner plates into the individual wire slots one by one.
Place smaller salad plates in the remaining slots toward the end of the rack.
Stack your bowls on the top tier of the rack if it has an upper shelf.
Ensure there is enough clearance at the top so the cabinet door closes easily.
Organize the dishes by size or color to make the cabinet look professional and inviting.
13. Over-Door Pantry Pouch
Small Kitchen Cooking Hacks
Utilizing the back of your pantry or kitchen door is a classic move for cooking in a tiny kitchen. A clear hanging organizer creates dozens of new pockets for small items like spices, oils, and baking extracts. This setup keeps your primary shelves free for large boxes and heavy canned goods.
Clear pouches allow you to find exactly what you need without digging through a dark cupboard. You can group your holiday spices together in one row to keep your workflow fast. This system is especially helpful when you have multiple people helping you in a small space.
Everything stays at eye level and within easy reach at all times. You will spend less time searching for the vanilla or cinnamon and more time enjoying the process. It is an affordable way to add a huge amount of functional storage to any room.
Ingredients
Assorted spice jars
Bottles of olive oil
Baking extracts
Small kitchen gadgets like whisks or peelers
Equipment
Over-the-door clear pocket organizer
Sturdy door hooks (usually included)
Label maker (optional)
DIY Instructions
Clean the top edge of your pantry or closet door to remove any dust.
Place the metal hooks over the top of the door so they sit flat.
Hang the fabric or plastic organizer onto the hooks using the reinforced grommets.
Close the door slowly to make sure the hooks do not interfere with the door frame.
Sort your small kitchen items by category, such as “Baking” or “Seasonings.”
Slide each jar or bottle into a separate clear pocket for maximum visibility.
Place your most frequently used holiday items in the middle rows for easy access.
Use a label maker to mark the outside of the pockets if your jars are not easily identifiable.
Check the weight of the organizer periodically to ensure the door hinges stay aligned.
14. Magnetic Knife Strip
Small Kitchen Cooking Hacks
Countertop knife blocks take up valuable square footage that you desperately need for holiday prep. Installing a magnetic knife strip on your backsplash keeps your most important tools visible and safely out of the way. This sleek solution ensures your blades stay sharp and within arm’s reach while you work.
Small kitchens benefit from clear counters, and this wall-mounted strip helps achieve that minimalist look. You can quickly grab the right knife for chopping herbs or carving a turkey without searching through a drawer. It also keeps sharp edges away from curious hands or accidental bumps in a crowded room.
The magnetic pull is strong enough to hold even heavy shears or metal spatulas. This versatile tool turns a blank wall into a functional part of your cooking environment. Your kitchen will look modern and stay much more organized during the holiday rush.
Ingredients
Chef’s knife
Paring knife
Bread knife
Kitchen shears
Equipment
Magnetic knife bar
Electric drill
Screwdriver
Level tool
Wall anchors
DIY Instructions
Choose a spot on your wall or backsplash that is close to your main prep area.
Hold the magnetic bar against the wall and use a level to make sure it is perfectly straight.
Mark the mounting holes on the wall with a pencil through the bracket openings.
Drill small pilot holes into the wall at your marks.
Insert plastic wall anchors into the holes and tap them flush with a hammer.
Screw the mounting bracket or the bar itself firmly into the anchors.
Place your knives on the bar with the handles pointing downward for safety.
Space the knives out so they do not touch or overlap each other.
Test the strength of the magnet by gently pulling on the largest knife to ensure it stays secure.
15. Nesting Bowl and Tool Set
Small Kitchen Cooking Hacks
Investing in gear that fits inside itself is a survival tactic for cooking in a tiny kitchen. Nesting bowls and measuring sets take up the footprint of just one large item while providing a full range of sizes. This compact design is essential for holiday baking where you need multiple containers for different ingredients.
Colorful sets make it easy to remember which size you are using for each part of your recipe. You can keep all your prep tools in one small stack inside a single drawer or cabinet. This prevents the “tupperware avalanche” that often happens in crowded storage spaces.
Materials like stainless steel or high-quality plastic are durable and easy to clean. You will have everything you need to measure flour, mix dough, and store leftovers in one tidy package. It is the ultimate space-saving solution for a busy holiday home.
Ingredients
Large batch of cookie dough
Dry ingredients (flour, sugar)
Liquid ingredients (milk, oil)
Colorful nesting bowl set
Equipment
Graduated mixing bowls
Measuring cups
Measuring spoons
Colander or sieve
DIY Instructions
Select a nesting set that includes bowls, a colander, and measuring tools.
Wash all the components in warm, soapy water before your first use.
Use the smallest spoons for spices and the medium cups for liquids.
Mix your main dough in the largest bowl of the set.
Rinse the smaller bowls as you go to keep your workspace clear.
Stack the items back together starting with the smallest piece inside the next largest.
Place the measuring spoons inside the smallest bowl to keep the set complete.
Store the entire nested stack on a low shelf for easy access during your baking session.
Enjoy having a full kitchen setup that only takes up a few inches of shelf space.
16. Countertop Convection Oven
Small Kitchen Cooking Hacks
A small countertop oven acts as a powerful secondary workspace when your main oven is full of turkey. These compact units heat up quickly and are perfect for roasting vegetables or baking a side of stuffing. Using a second heat source allows you to finish multiple parts of the holiday meal at the same time.
Tiny kitchens often suffer from a “bottleneck” at the stove, but this portable oven solves that problem. You can place it on any flat, heat-safe surface to expand your cooking capacity. It is an excellent way to keep appetizers warm while the main course finishes cooking.
Modern convection models cook food evenly and often faster than traditional ovens. You can even use it for small batches of cookies without heating up the entire house. This flexibility is a lifesaver during a busy holiday schedule.
Ingredients
Whole pecans for roasting
Stuffed mushrooms
Miniature quiches
Seasoning salt
Equipment
Countertop convection oven
Small baking sheet
Oven mitts
Cooling rack
DIY Instructions
Place your countertop oven on a flat, stable surface away from flammable items.
Plug the unit into a grounded outlet and preheat it to the required temperature.
Arrange your pecans or appetizers in a single layer on the small baking tray.
Use oven mitts to slide the tray into the center rack of the oven.
Set the timer according to your recipe and watch through the glass door.
Rotate the tray halfway through the cooking time for the most even browning.
Remove the hot tray carefully once the food is golden and fragrant.
Let the appetizers cool for a few minutes before transferring them to a serving plate.
Unplug the oven and let it cool completely before wiping the interior clean.
17. Single-Pot Holiday Stew
Small Kitchen Cooking Hacks
Focusing on recipes that only require one large vessel is a brilliant move for cooking in a tiny kitchen. A heavy-duty Dutch oven can handle everything from browning meat to simmering a rich, hearty holiday stew. This strategy significantly reduces the number of dirty dishes taking up space in your sink.
One-pot meals allow you to spend more time hosting and less time managing multiple burners. The flavors meld together beautifully in a single pot, creating a deep and satisfying meal. You can even serve the dish directly from the pot to the table for a rustic, cozy feel.
Cleanup is a breeze when you only have one main item to wash at the end of the night. This approach keeps your small kitchen feeling calm and organized throughout the celebration. It is the most efficient way to feed a crowd with minimal equipment.
Ingredients
2 lbs beef or chicken chunks
4 large carrots, sliced
3 stalks celery, chopped
1 large onion, diced
4 cups savory broth
Fresh rosemary and thyme
Equipment
Large enameled Dutch oven or stockpot
Wooden stirring spoon
Chef’s knife
Cutting board
DIY Instructions
Chop all your vegetables into bite-sized pieces on a clean cutting board.
Heat a small amount of oil in the bottom of your large pot over medium heat.
Add the meat to the pot and cook until all sides are nicely browned.
Toss in the onions, carrots, and celery and stir for five minutes until softened.
Pour in the broth and add the fresh herbs for extra flavor.
Turn the heat down to low and put the lid on the pot.
Let the stew simmer gently for at least an hour until the meat is tender.
Season the dish with salt and pepper to your personal taste.
Bring the pot directly to the table and ladle the hot stew into individual bowls.
18. Insulated Turkey Rest Station
Small Kitchen Cooking Hacks
Freeing up your main oven is the biggest challenge when cooking in a tiny kitchen. Using a clean, insulated cooler to let your turkey rest is a professional trick that keeps the meat hot for hours. This move allows you to use your oven for the final browning of rolls and side dishes.
The meat actually becomes juicier when it has time to rest away from direct heat. You gain a massive amount of flexibility in your timing because the turkey will stay at a safe temperature for a long time. This organized approach prevents the “holiday panic” of trying to time everything perfectly.
A cooler acts as a temporary “holding oven” that requires no electricity. It is a smart use of an item you likely already have in storage. Your holiday bird will be the star of the show while your kitchen stays clear and manageable.
Ingredients
Whole roasted turkey
Heavy-duty aluminum foil
Large clean towels
Equipment
Large plastic cooler
Meat thermometer
Sturdy roasting pan
DIY Instructions
Wash the inside of your cooler with hot, soapy water and dry it completely.
Remove the turkey from the oven once it reaches an internal temperature of 165 degrees.
Wrap the entire turkey tightly in two layers of heavy aluminum foil.
Place a clean, dry towel in the bottom of the cooler to act as insulation.
Set the foil-wrapped turkey on top of the towel.
Cover the turkey with another thick towel to trap all the remaining heat.
Close the cooler lid tightly and do not open it until you are ready to carve.
Use this extra time to finish your gravy and heat up your side dishes in the oven.
Transfer the turkey to a platter and enjoy how moist and tender the meat has become.
19. The Centralized Scrap Bowl
Small Kitchen Cooking Hacks
Waste management is a major hurdle when you are cooking in a tiny kitchen for the holidays. Keeping one large “scrap bowl” on your counter prevents you from making constant trips to the trash can. This simple habit keeps your floor clear of spills and your workspace focused on the food.
Small kitchens get cluttered fast when peels and eggshells are scattered everywhere. You can easily dump the contents of the bowl once it is full or when you finish a specific task. This method helps you maintain a clean environment, which is vital for food safety and mental clarity.
Using a bowl also makes it easy to save vegetable scraps for homemade stock later. You can separate compostable items from trash in seconds. This organized system keeps your holiday prep moving smoothly without interruptions.
Ingredients
Potato peels
Onion skins
Eggshells
Vegetable ends
Fruit cores
Equipment
One large, deep mixing bowl
Compost bag (optional)
DIY Instructions
Place a large, empty bowl in the corner of your main cutting board area.
Peel your vegetables directly over the bowl so the scraps fall inside.
Drop eggshells and packaging scraps into the same container as you work.
Clear the board of any small bits by swiping them into the bowl with your knife.
Empty the bowl into your main trash or compost bin once it is full.
Rinse the bowl quickly if it becomes sticky from fruit or onion juices.
Keep the bowl in the same spot so you develop a rhythm while prepping.
Use a separate bowl if you plan to save specific scraps for a soup base.
Wash the bowl thoroughly once all your holiday cooking is complete.
20. The One-In One-Out Rule
Small Kitchen Cooking Hacks
Maintaining a clean kitchen requires a strict discipline called the “One-In, One-Out” rule. For every new pot you put on the stove, you must wash and dry one dirty dish from the sink. This practice prevents the overwhelming pile-up of dishes that can paralyze a tiny kitchen.
Small spaces feel much larger when the sink is empty and the counters are clear. You will always have the tools you need ready for the next step of your holiday recipe. This habit reduces stress and makes the final cleanup much faster at the end of the day.
Consistency is the key to making this rule work for you. You can even involve your family by asking them to dry dishes while you wash. Keeping the workflow moving ensures that your kitchen stays a productive and happy place.
Ingredients
Sink full of soapy water
Clean dish towels
Mild dish soap
Scrubbing sponge
Equipment
Drying rack or a clean towel on the counter
Hot water supply
DIY Instructions
Fill one side of your sink with hot, soapy water before you start cooking.
Set a timer for five minutes to do a quick “pre-wash” of any morning dishes.
Wash a mixing bowl immediately after you finish using it for a recipe.
Dry the bowl right away and put it back in the cabinet or drawer.
Clear a space on the counter for the next item you need to prepare.
Repeat this process every time you move from one dish to another.
Wipe down the faucet and the sink edges to keep the area looking tidy.
Hang your wet dish towels over the oven handle so they dry quickly.
Feel the satisfaction of having a clean kitchen even in the middle of a big feast.
21. The Foil-Lining Shortcut
Small Kitchen Cooking Hacks
Scrubbing pans is the last thing you want to do when cooking in a tiny kitchen. Lining your baking sheets with aluminum foil or parchment paper saves precious minutes of cleanup time. This simple barrier prevents burnt-on grease and sticky sugar from ruining your cookware.
Small sinks fill up quickly with bulky roasting pans and trays. By using a disposable liner, you can simply toss the mess away once the food is served. This keeps your washing station clear for smaller, more delicate items like wine glasses and silver.
Efficiency is essential for a peaceful holiday meal. You can transition from baking cookies to roasting vegetables without a deep scrub in between. Your pans stay looking new and your stress levels stay low.
Ingredients
1 roll heavy-duty aluminum foil
1 box parchment paper sheets
Non-stick cooking spray
Equipment
Standard baking sheet or roasting pan
Kitchen shears
DIY Instructions
Pull out a length of aluminum foil that is slightly longer than your baking pan.
Press the foil into the bottom of the pan, making sure to cover the corners tightly.
Fold the excess foil over the outer edges of the pan to lock it in place.
Smooth out any large wrinkles with your hand to create a flat cooking surface.
Lay a sheet of parchment paper over the foil if you are baking delicate pastries.
Spray a light coating of non-stick oil over the surface to prevent sticking.
Place your food items onto the lined tray and bake as directed by your recipe.
Lift the foil off carefully once the pan has cooled down after dinner.
Fold the dirty foil inward to trap any crumbs and throw it in the trash.
22. Vertical Buffet Service
Small Kitchen Cooking Hacks
Transforming your counter into a multi-level buffet is a smart way to manage a tiny kitchen. Using wooden risers or sturdy boxes under your tablecloth creates extra room for side dishes. This vertical layout allows guests to see every option without crowding the main prep area.
Cramped spaces often lead to plate collisions and spilled gravy. Elevating the main protein ensures it remains the centerpiece of your holiday spread. You can tuck extra napkins or serving spoons underneath the higher platters to save even more space.
Organization makes a huge difference in how your home feels to visitors. A tiered display looks professional and keeps the traffic flowing smoothly through the room. You will feel proud of how much food your small space can actually hold.
Ingredients
1 large tray of roasted vegetables
1 deep dish of holiday lasagna
Basket of fresh dinner rolls
Bowl of garden salad
Equipment
3 wooden crates or sturdy boxes of varying heights
1 large decorative tablecloth
Set of matching serving platters
Small menu cards
DIY Instructions
Clear your longest countertop or table of all non-essential items.
Place your tallest wooden crate at the back corner of the surface.
Set the medium and short boxes in a staggered line toward the front.
Drape a large tablecloth over all the boxes to hide them and create a uniform look.
Push the fabric into the gaps so the platters have a flat place to sit.
Set your heaviest dish on the lowest level to ensure the setup is stable.
Arrange the lighter sides and bread baskets on the higher tiers.
Place a small menu card in front of each dish so guests know what is inside.
Keep a stack of clean plates at the very beginning of the buffet line.
23. Mobile Beverage Station
Small Kitchen Cooking Hacks
Moving drinks out of the main cooking zone is a top tip for any tiny kitchen. A rolling bar cart or a small side table can hold your coffee maker, tea kettle, and glassware. This separate station prevents guests from wandering into your workspace while you handle hot pans.
Festive decorations like garland and ornaments make this cart a focal point of the room. You can stock it with mugs, spoons, and sweeteners so everyone can help themselves. This independence allows you to focus entirely on the stovetop without interruptions.
Small homes benefit from furniture that can move where it is needed most. You can roll the cart into the living room after dinner for easy dessert service. It keeps the party moving and your kitchen clear for the final cleanup phase.
Ingredients
Assorted holiday tea bags
Fresh coffee beans
Cocoa powder and marshmallows
Honey and cinnamon sticks
Equipment
Three-tier rolling metal or wood cart
Electric espresso machine or coffee maker
Porcelain teapot and warming base
Set of festive mugs
DIY Instructions
Roll your cart to a corner of the dining room or living area.
Place the heavy coffee machine on the top shelf near a power outlet.
Set the teapot and mugs on the middle shelf for easy reaching.
Arrange your spoons, napkins, and sugar jars in small baskets on the bottom.
Hang holiday mugs from the side hooks of the cart to save shelf space.
Drape a small piece of greenery or garland around the top handle for a festive touch.
Fill the jars with your dry ingredients and label them clearly.
Plug in the machines and ensure there is enough water in the reservoirs.
Encourage guests to create their own custom drinks throughout the evening.
24. Instant Leftover Condensing
Small Kitchen Cooking Hacks
Managing fridge space is just as hard as cooking in a tiny kitchen. Transferring leftovers from bulky roasting pans into stackable glass containers should happen immediately after the meal. This habit prevents large, half-empty pots from hogging all the shelf room in your refrigerator.
Clear containers allow you to see exactly what is inside without opening every lid. You can stack them high to use the vertical space often wasted in standard fridges. This organized approach makes it much easier to find ingredients for next-day sandwiches or stews.
Square or rectangular shapes fit better in corners than round bowls do. You can maximize every square inch of your cold storage with a uniform set. Your kitchen will stay tidy and your food will stay fresh for days.
Ingredients
Roasted chicken or turkey pieces
Cooked rice or grains
Sliced bell peppers and onions
Mixed roasted potatoes
Equipment
Set of glass storage containers with locking lids
Large metal serving spoon
Label maker or masking tape
DIY Instructions
Set out all your empty storage containers on a clean counter.
Use a large spoon to scoop individual portions of food out of the cooking pans.
Fill each container about three-quarters full to allow for easy lid closure.
Group similar items together, like all the roasted vegetables in one bin.
Press the locking lids down firmly to create an airtight seal.
Write the date and the name of the dish on a piece of tape or a label.
Stick the label on the side of the container so it is visible when stacked.
Place the heaviest containers at the bottom of your fridge shelf.
Stack the lighter bins on top to keep your refrigerator perfectly organized.
25. Cozy Small-Space Seating
Small Kitchen Cooking Hacks
Hosting a holiday dinner in a tiny kitchen requires a flexible seating plan. A round wooden table takes up less visual space and allows more people to squeeze in comfortably. Using a mix of chairs and adding soft textures like faux fur or blankets makes a cramped area feel intentional and cozy.
Bright natural light from a window helps a small dining nook feel much larger than it is. You can move the table closer to the wall when it is not in use to open up the floor. This versatility is key when your kitchen and dining area share the same small room.
Simple decorations like a vase of fresh flowers add a touch of elegance without clutter. You do not need a massive dining room to create a memorable holiday atmosphere. Focus on comfort and warmth to make your guests feel right at home.
Ingredients
Small bouquet of seasonal wildflowers
Glass vase with fresh water
Set of cloth napkins
Scented candle
Equipment
Round wooden dining table
Set of four mismatched chairs
Faux fur rug or wool throw blankets
Simple ceramic dinnerware
DIY Instructions
Position your round table in a spot with the best natural light.
Arrange your chairs around the table, ensuring there is enough room to pull them out.
Drape a soft blanket or fur rug over the back of each chair for added comfort.
Lay your cloth napkins across the center of each dinner plate.
Trim the flower stems and place the bouquet in a vase filled with water.
Set the vase in the center of the table as a simple focal point.
Place a candle nearby to add a warm glow during the evening hours.
Check that everyone has enough elbow room before the meal begins.
Enjoy the intimate and friendly feeling of a small-scale holiday gathering.
26. The Prep Tray Technique
Small Kitchen Cooking Hacks
Small kitchens often suffer from “ingredient sprawl” across every available surface. Gathering all your spices, oils, and chopped items onto a single metal baking sheet keeps your workspace contained. This “tray of truth” ensures you have everything for a recipe in one mobile unit.
You can easily move the entire tray from the counter to the stovetop as you cook. This prevents you from running back and forth to the pantry for a forgotten jar of salt. It also protects your countertops from oil drips and spice spills during the heavy prep phase.
Cleanup becomes much faster when the mess is limited to one tray. You can simply wipe it down or toss it in the dishwasher once the dish is simmering. This organized habit is a favorite among professional chefs working in tight quarters.
Ingredients
1 bottle of olive oil
1 jar of sea salt and black pepper
Fresh garlic cloves, peeled
Assorted ground spices (paprika, cumin, chili)
1 bottle of soy sauce or balsamic vinegar
Equipment
Standard aluminum rimmed baking sheet
Small glass prep bowls
Measuring spoons
DIY Instructions
Place a clean baking sheet on your main prep counter.
Set your primary oil and vinegar bottles on one side of the tray.
Measure out your dry spices into small glass bowls.
Position the spice bowls in the center of the tray for easy access.
Pile your peeled garlic or chopped aromatics in a dedicated corner.
Carry the entire tray to your stove when you are ready to start cooking.
Add ingredients to your pan directly from the tray as the recipe requires.
Place dirty measuring spoons back on the tray to keep your counter clean.
Wash the tray at the end of your cooking session for a tidy kitchen.
27. Maximizing the Dishwasher
Small Kitchen Cooking Hacks
A tiny kitchen stays functional only if you keep the sink clear of dirty pans. Learning to load your dishwasher efficiently is like playing a high-stakes game of Tetris. Placing large pots and pans on the bottom rack at a slight angle ensures water reaches every hidden corner.
Modern machines can handle heavy cookware if you arrange them without overlapping. You should face the dirtiest surfaces toward the center spray arm for the best results. This allows you to run a full load while you eat dinner, so you have clean tools for dessert.
Using the top rack for smaller items like mugs and bowls keeps them safe from high heat. You can save hours of hand-washing by trusting your machine to do the heavy lifting. A clear sink is the ultimate goal for a stress-free holiday host.
Ingredients
1 bottle of high-quality dish detergent
Rinse aid liquid
Large stack of dirty holiday dishes
Equipment
Standard built-in dishwasher
Mesh bag for small parts (optional)
DIY Instructions
Scrape all large food scraps off your plates and into the trash.
Pull out the bottom rack and place your heaviest pots in the back.
Tilt the pans so that the hollow interiors are facing the water jets.
Line up your dinner plates in the remaining slots, leaving space between each.
Slide the top rack out and arrange your mugs and glasses upside down.
Place small bowls between the glasses at a steep angle to prevent water pooling.
Fill the detergent dispenser with the recommended amount of soap.
Add rinse aid to the dedicated chamber to ensure your glasses shine.
Close the door firmly and select the “Heavy Duty” cycle for holiday loads.
28. Blue Tape Labeling Logic
Small Kitchen Cooking Hacks
Mistaking salt for sugar can ruin a holiday dessert in seconds. Using blue painter’s tape and a permanent marker to label every container is a simple but powerful organizational tool. This professional kitchen habit ensures that anyone helping you can find exactly what they need without asking.
Painter’s tape is excellent because it stays secure but peels off without leaving a sticky mess. You can quickly relabel jars as you refill them with different holiday baking staples. This system keeps your pantry looking neat and prevents expensive cooking mistakes.
Clear labels also help you track expiration dates or special storage instructions. You can mark “Day 1” or “Day 2” on prep containers to stay on schedule. It is an affordable way to bring professional-level order to your small home.
Ingredients
Large jar of granulated sugar
Container of coarse sea salt
Fresh orange zest
All-purpose flour
Equipment
1 roll of blue painter’s tape
1 black permanent marker
Clean glass or plastic storage jars
DIY Instructions
Ensure the outside of your storage jars is clean and completely dry.
Tear off a two-inch strip of blue painter’s tape for each jar.
Press the tape firmly onto the front of the container at eye level.
Use your permanent marker to write the name of the ingredient in large letters.
Add the date you opened the package underneath the name.
Repeat this process for all your holiday baking supplies.
Place the jars back on your shelf with the labels facing forward.
Peel the tape off and discard it once the jar is empty.
Apply a fresh label every time you switch the contents of a container.
29. The Pre-Mixed Drink Fridge
Small Kitchen Cooking Hacks
Opening and closing a large refrigerator for individual drinks can be a hassle in a tiny kitchen. Pre-mixing your holiday cocktails and storing them in labeled swing-top bottles saves a massive amount of time. You can keep a variety of options cold and ready for guests to pour their own glass.
Using the lower shelves of your fridge for these bottles keeps the top areas free for food. You can also store trays of large ice cubes and frozen berries nearby for easy garnishing. This organized beverage zone functions like a professional bar in a very small footprint.
Labeling each bottle with the drink name, like “Negroni” or “Margarita,” adds a fun touch. Guests will love the convenience of a “grab and go” drink station. It reduces the clutter of multiple half-empty soda and juice bottles in your main storage area.
Ingredients
1 batch of pre-mixed Negroni
1 batch of holiday Margarita
Fresh limes and lemons, sliced
Frozen berries (blueberries, raspberries)
Equipment
Set of clear glass swing-top bottles
Large ice cube trays
Stainless steel prep trays
Waterproof labels
DIY Instructions
Mix your favorite large-batch cocktails according to your recipes.
Use a funnel to pour the drinks into clean glass swing-top bottles.
Secure the lids tightly to keep the carbonation and flavor fresh.
Apply a waterproof label to each bottle so the names stay legible in the cold.
Fill your ice trays with water and freeze them until they are solid.
Place the finished ice cubes into flat metal trays for easy serving.
Arrange the bottles in rows on the bottom shelf of your refrigerator.
Tuck containers of frozen fruit in the gaps to keep them icy cold.
Set a small sign on the fridge door so guests know they can help themselves.
30. The Pro Chef’s Towel Trick
Small Kitchen Cooking Hacks
Keeping a clean, dry towel draped over your shoulder is the ultimate move for cooking in a tiny kitchen. You can instantly wipe your hands, grab a hot pan handle, or clean a small spill on the counter. This habit saves you from searching for a towel while your food is at risk of burning.
In a small space, every second counts when you are moving between the stove and the sink. Having your most important cleaning tool attached to your body keeps your hands free for complex tasks. It also prevents you from using a damp towel on a hot pot, which can cause steam burns.
Professional chefs use this method to maintain a clean workspace at all times. You will find that you move with more confidence and speed throughout the holiday rush. It is a simple adjustment that makes a huge difference in your cooking efficiency.
Ingredients
Freshly chopped carrots and celery
Seasoning salt
Cooking oil
Equipment
2 large, thick cotton kitchen towels
Heavy stainless steel frying pan
Chef’s knife and cutting board
DIY Instructions
Select a clean, dry towel that is long enough to hang comfortably.
Fold the towel in half lengthwise to create a narrow strip.
Drape the towel over your preferred shoulder or tuck it into your apron string.
Use the towel to dry your hands immediately after washing them at the sink.
Reach for the towel to shield your hand when grabbing a hot pan from the burner.
Wipe up any small water drops on your cutting board as you work.
Swap the towel for a fresh, dry one if it becomes damp or soiled.
Keep your second towel nearby on a hook for larger spills or heavy drying.
Enjoy the feeling of being prepared for any task in your busy holiday kitchen.
31. Small Bowl Prep Mastery
Small Kitchen Cooking Hacks
Cooking in a tiny kitchen requires a high level of organization to keep things moving. Using small bowls for every ingredient ensures that you never lose track of a recipe step during holiday prep. You can quickly see exactly what you need before you even start the active cooking phase.
Small areas become chaotic when open spice jars and large produce bags cover every surface. Staging your aromatics and seasonings in tiny ramekins allows you to stack or move them easily. This method ensures your main workspace stays clear and your stress levels remain low while hosting guests.
Digital or hand-drawn recipe guides work even better when paired with this system. They serve as a constant reminder of your plan so you never feel lost in the middle of a complex dish. Keeping your components separated and visible makes the entire process feel manageable and calm.
Ingredients
Freshly minced garlic
Coarse sea salt
Cracked black pepper
Sprigs of fresh thyme
Diced ginger or shallots
Equipment
Set of mismatched small glass or ceramic bowls
Mini wooden salt cellar
Sharp paring knife
Small whisk for blending
DIY Instructions
Clear a flat workspace where you can focus on your ingredient assembly.
Read your holiday recipe carefully to identify all the small seasonings needed.
Use a sharp knife to mince your garlic and herbs into tiny pieces.
Place each specific ingredient into its own small bowl or ramekin.
Group these bowls near your recipe card to visualize the cooking order.
Arrange the bowls from left to right based on when they enter the pan.
Use a small whisk to pre-mix any dry spices that go in at the same time.
Carry only the needed bowls to the stove when the pan is hot.
Wipe the prep area immediately after the bowls are emptied to stay on track.
32. Under-Cabinet Task Lighting
Small Kitchen Cooking Hacks
Managing a holiday feast means you must reclaim every inch of your workspace, including dark corners. Adding slim LED lights under your cabinets opens up vital territory for chopping and assembly. Clear surfaces provide a sense of calm when you can actually see the quality of your work.
Bright, open counters make the entire room feel much larger than it really is. This trick prevents the cramped feeling that often leads to kitchen accidents during the rush. You will find that a well-lit slate makes your creative process much more enjoyable and safe.
Strategic lighting highlights your colorful produce and helps you spot small messes before they spread. You can easily move from peeling vegetables to plating appetizers without squinting. Your kitchen will look modern and professional while remaining highly functional for the big meal.
Ingredients
Fresh red and yellow bell peppers
Head of broccoli
Ripe tomatoes
Assorted root vegetables
Equipment
Battery-powered or plug-in LED light strips
Adhesive mounting tape
Wooden cutting board
Chef’s knife
DIY Instructions
Look at every dark corner currently sitting on your kitchen counters.
Wipe the underside of your cabinets with a clean cloth to remove grease.
Measure the length of the cabinet bottom to ensure your light strip fits.
Peel the backing off the adhesive tape on the back of the LED strip.
Press the light bar firmly against the underside of the cabinet near the front.
Check that the light is level and does not tilt toward the wall.
Turn the lights on to reveal your newly brightened prep zone.
Place your cutting board directly under the strongest beam of light.
Return the tools to their spots only after the holiday cleanup is finished.
33. The Guest Contribution Go-Bag
Small Kitchen Cooking Hacks
Vertical space near your entryway is your best friend when guests arrive with holiday gifts. Setting up a dedicated shelf for “Guest Contributions” keeps your main kitchen counters from overflowing with wine and snacks. This setup allows you to see exactly what has arrived without cluttering your prep area.
Hosting becomes much faster when you can just hang a bag instead of clearing a spot for it. You eliminate the risk of spills that often happen when guests try to find space in a crowded kitchen. Keeping these items in the hallway frees up your kitchen shelves for heavy holiday platters.
Tidiness is easier to maintain when every visitor knows exactly where to put their things. Your home will look organized and welcoming even when the party gets busy. This system turns your entryway into a functional hub for the entire celebration.
Ingredients
Bottle of wine or sparkling cider
Bag of gourmet snacks
Holiday card or small gift
Fresh potted succulent
Equipment
Wall-mounted wooden shelf with sturdy hooks
Small storage boxes or baskets
Level tool
Screws and wall anchors
DIY Instructions
Choose a clear section of wall near your front door or entryway.
Hold the wooden shelf bracket against the wall and mark the holes with a pencil.
Use a level to ensure the marks are straight before you start drilling.
Drill holes into the wall and tap in plastic anchors if needed.
Screw the shelf and hooks firmly into the wall surface.
Place small baskets on the shelf to hold cards and smaller guest items.
Label the area with a small sign so visitors know it is for their bags.
Hang incoming coats and totes on the hooks as people arrive at your home.
Move the food items to the kitchen only when you are ready to serve.
34. The Sidekick Slow Cooker Station
Small Kitchen Cooking Hacks
Maximizing a small kitchen requires creative thinking about where you place your main heat sources. Placing a secondary slow cooker on a side table creates an instant extension of your stovetop. This clever hack allows you to simmer gravy or keep sides warm in space that would otherwise be wasted.
Counter space stays much tidier when bulky appliances are moved away from the active chopping zone. This method keeps your main counters free for rolling dough or cooling pies. You stay close to the table for quick refills without moving across a crowded room.
Small kitchens feel much larger when you add these temporary peripheral work zones. The slow cooker provides a stable and safe way to handle high-volume recipes without constant monitoring. You can easily store the unit away once the holiday season ends.
Ingredients
4 cups rich turkey or vegetable broth
2 tablespoons cornstarch
1 teaspoon poultry seasoning
Salt and pepper to taste
Equipment
Compact slow cooker or “Sidekick” unit
Metal ladle
Serving spoons
Small side table or buffet board
DIY Instructions
Identify a flat, stable surface away from the main kitchen traffic.
Set your slow cooker on the table near a reliable power outlet.
Pour your pre-mixed broth and seasonings into the ceramic insert.
Turn the unit to the “Warm” or “Low” setting to begin the process.
Cover the cooker with its lid to trap heat and moisture effectively.
Whisk in a cornstarch slurry if you need to thicken your gravy later.
Place a ladle inside the pot so guests can serve themselves easily.
Wipe any drips from the rim of the pot with a clean damp cloth.
Unplug the unit and let it cool completely before cleaning the interior.
35. Instant Pot Proofing Chamber
Small Kitchen Cooking Hacks
Baking fresh rolls can quickly overwhelm a tiny kitchen with many rising dough bowls. Using a multi-cooker as a proofing chamber allows you to stack or contain your dough vertically. This vertical approach saves a massive amount of space while ensuring a consistent temperature for your yeast.
Dough stays perfect when it is protected from cold drafts and fluctuating room temperatures. You can fit several buns in the same footprint usually taken up by a large countertop bowl. This organized look also makes it easier to track your baking schedule in one central spot.
Modern cookers are easy to clean after the holiday season ends. They take the place of several separate gadgets and slide easily into a pantry or cabinet. Investing in multi-purpose gear is the best way to handle large baking volumes in a small home.
Ingredients
3 cups all-purpose flour
1 packet active dry yeast
1 cup warm water
1 tablespoon honey
Pinch of sea salt
Equipment
Multi-cooker with a “Yogurt” or “Proof” setting
Round proofing basket or bowl
Cardboard box for secondary insulation
Measuring cups
DIY Instructions
Mix your flour, yeast, water, and honey together in a large bowl.
Knead the dough on a floured surface until it becomes smooth and elastic.
Shape the dough into small, round buns and place them in a proofing basket.
Set your multi-cooker to the lowest warm setting, often labeled as yogurt.
Place the basket inside the cooker to give the dough a warm environment.
Use a cardboard box over the unit if you need to keep the heat extra steady.
Watch the dough through the lid until it has doubled in size.
Remove the buns carefully once they are light and airy to the touch.
Bake the rolls in your main oven until they are golden brown on top.
36. The Pre-Start Dishwasher Empty
Small Kitchen Cooking Hacks
Maintaining a clean kitchen requires a strict discipline before you even start your holiday cooking. Ensuring your dishwasher is completely empty creates a hidden nook for every dirty tool you generate. This utilizes the “dead space” inside the machine to keep your counters and sink clear of clutter.
Keeping your sink empty during the rush makes transitions between recipes much faster. You no longer have to dig through a heavy stack of pots to find the faucet. This project is a quick way to add mental peace without a full kitchen remodel.
A clean, minimalist look helps a small kitchen feel more professional and less chaotic. By hiding dirty dishes as you go, you create a sense of order that makes holiday prep enjoyable. It is a smart solution for any home with very limited cabinet space.
Ingredients
1 fresh bunch of kale or greens
3 large carrots, diced
1 red onion
Fresh cherry tomatoes
Equipment
Standard built-in dishwasher
Wooden cutting board
Sharp kitchen knife
Mixing bowl
DIY Instructions
Check your dishwasher the night before your big holiday cooking session.
Remove all clean dishes and put them in their permanent storage spots.
Verify that the detergent dispenser is full and the filters are clear.
Leave the dishwasher door slightly ajar so it is ready for incoming items.
Start your food prep by chopping your vegetables on a clean counter.
Place every dirty whisk or bowl into the machine immediately after use.
Wipe the sink area every hour to maintain a high level of hygiene.
Run the full cycle once the machine is packed with holiday prep gear.
Enjoy having a clear workspace throughout the entire afternoon of cooking.
37. The Hourly Sink Reset
Small Kitchen Cooking Hacks
Waste management is a major hurdle when you are cooking in a tiny kitchen for the holidays. Cleaning your sink every hour prevents you from making constant trips to a distant trash can. This simple habit keeps your floor clear of spills and your workspace focused on the food.
Small kitchens get cluttered fast when water spots and food bits are scattered everywhere. You can easily spray the basin once it is empty to keep the area looking fresh. This method helps you maintain a clean environment, which is vital for food safety and mental clarity.
Using a spray bottle makes it easy to disinfect the area without using bulky cleaning buckets. You can maintain a professional kitchen standard in seconds with a quick wipe. This organized system keeps your holiday prep moving smoothly without messy interruptions.
Ingredients
1 bottle of multi-surface kitchen cleaner
1 pint of fresh water
Mild dish soap
Potted green plant for freshness
Equipment
Stainless steel kitchen sink
High-pressure spray nozzle
Microfiber cleaning cloth
Spray bottle
DIY Instructions
Set a timer on your phone to go off every sixty minutes.
Clear any lingering dishes out of the basin and into the dishwasher.
Spray the entire surface of the sink with your preferred cleaning solution.
Let the cleaner sit for a moment to break down any grease or food bits.
Use the spray nozzle to rinse the sink thoroughly with hot water.
Wipe the edges and the faucet with a dry microfiber cloth until they shine.
Check the drain for any scraps and toss them into the compost bin.
Place a small plant on the window sill to boost your mood while working.
Feel the satisfaction of a fresh start as you begin your next recipe.
38. Signature Holiday Punch Station
Small Kitchen Cooking Hacks
Moving drinks out of the main cooking zone is a top tip for any tiny kitchen. A large glass pitcher filled with holiday punch acts as a powerful centerpiece away from the stove. This separate station prevents guests from wandering into your workspace while you handle hot pans.
Festive ingredients like orange slices and rosemary make this pitcher a focal point of the room. You can stock it with ice and glasses so everyone can help themselves easily. This independence allows you to focus entirely on the main course without constant interruptions.
Small homes benefit from drink stations that can sit on a sideboard or dining table. You can move the pitcher to the living room after dinner for easy dessert service. It keeps the party moving and your kitchen clear for the final holiday cleanup phase.
Ingredients
4 cups cranberry or pomegranate juice
2 cups sparkling water or ginger ale
1 large orange, thinly sliced
1/2 cup fresh cranberries
3 sprigs of fresh rosemary
Equipment
Large glass pitcher with a sturdy handle
Set of clear drinking glasses
Small chalkboard sign
Long stirring spoon
DIY Instructions
Place your glass pitcher on a flat, stable surface away from the kitchen.
Pour the fruit juice into the pitcher first to establish the base color.
Add the orange slices and fresh cranberries to the liquid for a festive look.
Stir the mixture gently with a long spoon to combine the flavors.
Top the pitcher with sparkling water just before your guests arrive at the home.
Tuck a sprig of rosemary into the top for a beautiful and fragrant garnish.
Set out a small chalkboard sign that clearly labels the “Signature Punch.”
Arrange clean glasses in a semi-circle around the base of the pitcher.
Encourage guests to pour their own drinks throughout the holiday evening.
39. The Pasta Water Salvage
Small Kitchen Cooking Hacks
Reclaiming every resource is a game changer for holiday cooking in a tiny kitchen. Using a fine-mesh strainer to lift pasta out of the pot leaves the starchy water behind for sauces. This strategy significantly reduces the amount of heavy water you have to carry to the sink.
One-pot efficiencies allow you to spend more time hosting and less time straining heavy metal pots. The starchy liquid helps your holiday sauces cling beautifully to the pasta for a better meal. You can even use the remaining heat to steam vegetables right in the same vessel.
Cleanup is a breeze when you do not have to scrub a bulky, separate colander at night. This approach keeps your small kitchen feeling calm and organized throughout the entire celebration. It is the most efficient way to handle large volumes of food with minimal effort.
Ingredients
1 lb dried spaghetti or linguine
4 quarts filtered water
2 tablespoons sea salt
1 cup reserved cooking liquid
Equipment
Large stainless steel stockpot
Handheld fine-mesh spider strainer
Tongs for grabbing long noodles
Heat-safe measuring cup
DIY Instructions
Fill your large pot with water and bring it to a rolling boil.
Add a generous amount of salt to the water once it is bubbling.
Drop the pasta into the pot and stir occasionally to prevent sticking.
Cook the noodles until they are just firm to the bite, or al dente.
Use your spider strainer to lift the pasta directly out of the hot water.
Shake the strainer over the pot for a second to let excess liquid drip.
Place the hot pasta into a waiting bowl of sauce or a serving platter.
Scoop out one cup of the starchy water with your measuring cup for later.
Discard the remaining water only after you are sure the sauce is perfect.
40. The Infinite Trash Bag Hack
Small Kitchen Cooking Hacks
Maintaining a clean kitchen requires a steady supply of supplies for your heavy holiday cleanup. Storing a stack of fresh bags at the very bottom of your trash can saves you from hunting through dark cabinets. This practice prevents the overwhelming pile-up of waste that can paralyze a tiny kitchen.
Small spaces feel much larger when you can empty the bin and reset it in seconds. You will always have the tools you need ready for the next phase of your holiday event. This habit reduces stress and makes the final cleanup much faster for everyone involved.
Consistency is the key to making this organizational trick work for your home. You can even use different colors to separate recycling from standard kitchen waste. Keeping the workflow moving ensures that your kitchen stays a productive and happy holiday place.
Ingredients
Large pile of holiday food scraps
Packaging from baking supplies
Used paper towels and napkins
Equipment
Standard kitchen trash bin with a removable liner
One full roll of heavy-duty black trash bags
Decorative string lights for a festive touch
DIY Instructions
Remove the existing full bag of trash from your kitchen bin.
Wipe the inside of the bin with a disinfectant spray and let it dry.
Take five or six fresh trash bags and roll them into a compact cylinder.
Place the extra bags at the very bottom of the empty plastic bin.
Insert your active trash liner over the top of the extra bags.
Stretch the top of the bag over the rim of the bin to secure it.
Push the bag down into the corners to maximize the available space.
Lift the full bag out once it is packed with holiday cooking waste.
Grab the next fresh bag from the bottom and set it in place instantly.
Key Takeaways
Think Vertically: Use walls, cabinet doors, and tiered racks to move items off your counters.
Prep Early: Mixing sauces and chopping vegetables a day ahead prevents a bottleneck on the big day.
Reclaim Surfaces: Use sink bridges and stove covers to create temporary prep stations where none existed.
Clean as You Go: Follow strict rules like the “One-In, One-Out” method to prevent dish pile-ups.
Control Traffic: Move beverage stations and guest contributions out of the main cooking zone.
Cooking a massive holiday meal in a tiny kitchen is a challenge of logistics, not just talent. By implementing these 40 smart tips, you remove the physical obstacles that lead to frustration. You gain the freedom to focus on the textures and aromas that make holiday food so special.
Small kitchens often create a more intimate and warm atmosphere for guests. When you are organized, you can actually enjoy the company of your loved ones while you stir the gravy. Remember that your kitchen’s size does not define the quality of the memories you create around the table.
With the right mindset and a few clever hacks, you can out-cook any professional chef. Take these strategies into your next hosting event and watch how much smoother the process becomes. Your small space is now your greatest asset for a focused and successful holiday feast.
Spread the loveBoring dinners often stem from the same tired routines and lack of seasoning. You deserve a meal that excites your taste buds without leaving a mountain of dishes in the sink. Sheet pan…
Spread the loveChristmas dinner should be memorable, but preparing it doesn’t need to be stressful. Many people struggle with finding recipes that feel festive yet are genuinely simple to execute amidst the holiday rush. This…