Wasting fresh fruit feels like an unnecessary loss in any kitchen. You might have extra berries sitting in your fridge after a big grocery haul. Valentine celebrations offer a wonderful excuse to transform these leftovers into something special.
Valentines Day Chocolate Strawberries
Chocolate and strawberries represent a timeless pairing for a reason. This guide shows you 36 unique ways to upgrade a standard dipped fruit treat. You will find simple tricks that use common pantry staples to create stunning results.
Creating these snacks does not require professional pastry skills. Anyone can follow these easy steps to impress a loved one or a friend. Prepare to turn your kitchen into a romantic candy shop today.
Transform simple berries into romantic treats using a clever cutting trick. These morsels look like professional truffles once you bite into them. Dark chocolate creates a crisp shell around the juicy fruit center. Natural sweetness from the berry contrasts beautifully with the bitter cocoa.
Sea salt adds a sophisticated touch to the rich cocoa coating. Every bite offers a balance between sweet and savory notes. You can easily make these at home without expensive tools. This method ensures your dessert looks artisanal and high quality. Guests will appreciate the effort put into these tiny heart shaped treasures.
Ingredients Required
1 pound fresh large strawberries
10 ounces dark chocolate melting chips
1 tablespoon flaky sea salt
Equipment List
Small sharp paring knife
Microwave safe glass bowl
Baking sheet
Parchment paper
Paper towels
DIY Instructions
Wash the strawberries thoroughly under cool water.
Pat every berry completely dry with a paper towel because moisture ruins the chocolate.
Remove the green leafy stems by cutting a small V shape into the top of the fruit.
Place your chocolate chips into the glass bowl.
Heat the chocolate in the microwave for thirty seconds.
Stir the mixture and repeat the heating process until the liquid is smooth.
Line your baking sheet with a piece of parchment paper.
Dip each strawberry into the melted chocolate using a fork or toothpick.
Set the coated fruit onto the parchment paper.
Sprinkle a pinch of sea salt onto the top before the coating hardens.
Let the strawberries sit at room temperature for twenty minutes until firm.
2. Double Drizzled Banana and Berry Plate
Valentines Day Chocolate Strawberries
Leftover fruit often sits in the fridge until it loses its freshness. This simple plate combines sliced bananas and whole strawberries for a vibrant snack. You can use any remaining berries you have on hand to fill the gaps. Creamy milk chocolate and sweet white chocolate create a beautiful pattern across the fruit.
Every bite feels like a celebration of flavors. Mixing textures like soft banana and firm strawberry makes the dish interesting. Kids and adults alike will enjoy picking their favorite pieces from this colorful display. It serves as a great centerpiece for a casual Valentine gathering.
Ingredients Required
2 large bananas
1 cup fresh strawberries
1/2 cup milk chocolate chips
1/2 cup white chocolate chips
1/4 cup fresh raspberries
Equipment List
Large serving plate
Two microwave safe bowls
Spoons for drizzling
Sharp knife
Cutting board
DIY Instructions
Peel the bananas and slice them into thick coins using your knife.
Arrange the banana slices in a circular pattern on your serving plate.
Place whole or halved strawberries in between the banana pieces.
Scatter a few raspberries around the plate to add extra color.
Put the milk chocolate chips into one glass bowl.
Melt the chips in your microwave using short bursts of fifteen seconds.
Stir until the chocolate flows easily from your spoon.
Repeat this melting process with the white chocolate chips in the second bowl.
Use a spoon to wave the melted milk chocolate over the entire plate of fruit.
Follow up with the white chocolate drizzle to create a crisscross effect.
Serve the fruit immediately while the chocolate is still warm and gooey.
3. Frozen Berry Yogurt Chocolate Cups
Valentines Day Chocolate Strawberries
Blueberries and strawberries find a new home in these chilled treats. These cups feature a thick layer of creamy yogurt sandwiched between two chocolate shells. Freezing the fruit keeps it fresh and provides a satisfying crunch. This recipe is a wonderful way to use up the last few berries in the carton.
Dark chocolate provides a sturdy base for the soft filling. The white yogurt layer stands out against the rich cocoa colors. These snacks are refreshing on a warm afternoon or as a light evening dessert. You can prepare a large batch and keep them in the freezer for whenever a craving hits.
Ingredients Required
1 cup Greek yogurt
1/2 cup fresh blueberries
3 large strawberries diced small
1 cup semi sweet chocolate chips
1 teaspoon coconut oil
Equipment List
Silicone muffin tin or paper liners
Microwave safe bowl
Small spoon
Freezer space
DIY Instructions
Put the chocolate chips and coconut oil into your bowl.
Heat the chocolate in the microwave for thirty seconds and stir.
Continue heating until the mixture is completely liquid and shiny.
Pour one spoonful of melted chocolate into the bottom of each muffin cup.
Place the tray in the freezer for ten minutes to let the base harden.
Mix your yogurt with the blueberries and chopped strawberries in a separate container.
Spoon the yogurt and fruit mixture on top of the hardened chocolate base.
Pour another layer of melted chocolate over the yogurt to seal the cup.
Smooth the top with the back of your spoon.
Freeze the tray for at least two hours until the center is solid.
Pop the treats out of the mold and enjoy them immediately.
4. Gilded White Chocolate Berries
Valentines Day Chocolate Strawberries
White chocolate offers a smooth and buttery flavor that complements ripe fruit. These strawberries look elegant enough for a high end party or a romantic dinner. Applying gold leaf adds a touch of luxury without changing the taste of the dessert. Clear glassware helps show off the beautiful contrast between the red fruit and white coating.
Large berries work best for this specific style because they provide more surface area. The dripping chocolate effect creates a look of effortless decadence. Your partner will feel truly special when presented with such a fancy treat. It proves that simple ingredients can become something spectacular with the right presentation.
Ingredients Required
6 extra large strawberries with stems
1 cup premium white chocolate melting wafers
1 sheet edible gold leaf
Equipment List
Small tweezers for gold leaf
Narrow glass or champagne coupe
Microwave safe bowl
Parchment paper
DIY Instructions
Wash your fruit and ensure every berry is bone dry.
Melt the white chocolate wafers in a bowl until the liquid is thin and smooth.
Hold a strawberry by the green stem and lower it into the chocolate.
Lift the berry out and let the excess liquid drip back into the bowl.
Place the berry on parchment paper and let it sit for five minutes.
Use your tweezers to pick up a tiny piece of edible gold leaf.
Gently press the gold leaf onto the side of the white chocolate while it is still slightly tacky.
Repeat this for all your berries.
Place three berries inside a clear glass for a beautiful display.
Keep them in a cool spot until you are ready to serve.
5. Strawberry Pistachio Chocolate Log
Valentines Day Chocolate Strawberries
Transforming leftovers into a chocolate salami is a smart kitchen hack. This dense log contains crunchy pistachios and sweet strawberry slices tucked inside rich cocoa. Each slice reveals a mosaic of colors that looks like a work of art. Powdered sugar on the outside gives it a classic and rustic appearance.
Slicing this dessert allows you to see the beautiful cross section of ingredients. The saltiness of the nuts balances the sweet fruit and bitter chocolate perfectly. This treat is very portable and easy to share at a gathering. It keeps well in the fridge for several days if you have leftovers.
Ingredients Required
8 ounces dark chocolate
1/2 cup shelled pistachios
1/2 cup sliced strawberries
1/2 cup crushed butter cookies
1/4 cup powdered sugar
Equipment List
Plastic wrap
Large mixing bowl
Sharp knife
Cutting board
DIY Instructions
Chop the dark chocolate into small pieces and melt it until smooth.
Fold the pistachios and crushed cookies into the warm chocolate.
Gently add the strawberry slices so they do not get crushed.
Lay a large piece of plastic wrap on your counter.
Pour the chocolate mixture onto the center of the plastic wrap.
Use the plastic to roll the mixture into a long cylinder shape.
Twist the ends of the plastic wrap tightly like a candy wrapper.
Place the log in the refrigerator for four hours to firm up.
Remove the plastic and roll the cold log in powdered sugar.
Use a sharp knife to cut the log into thick round slices.
Serve the slices on a wooden board for a rustic look.
6. Berry and Marshmallow Star Skewers
Valentines Day Chocolate Strawberries
Feeding a crowd becomes easy with these fun fruit sticks. Marshmallows add a soft texture that pairs well with juicy fruit and crisp chocolate. Arranging the skewers in a star pattern on a plate creates an instant party decoration. Tiny heart sprinkles add a festive touch for Valentine celebrations.
Kids will love helping you assemble these colorful snacks. The chocolate drizzle helps hold the sprinkles in place and adds a bit of sweetness. Using bananas and strawberries ensures you get a good mix of flavors on every stick. This recipe is a great way to use up half a bag of marshmallows.
Ingredients Required
12 wooden skewers
12 large strawberries
2 bananas
12 heart shaped marshmallows
1/4 cup chocolate sauce
Valentine sprinkles
Equipment List
Large white plate
Small bowl for chocolate
Knife
DIY Instructions
Cut the bananas into thick rounds.
Slice the tops off the strawberries to create a flat surface.
Slide a heart marshmallow onto the top of a wooden skewer.
Add a strawberry slice and then a banana slice below the marshmallow.
Repeat this process until all twelve skewers are filled.
Lay the skewers on a large plate with the points facing the center to form a star.
Fill a small bowl with chocolate sauce.
Use a spoon to drizzle thin lines of chocolate over the fruit.
Shake a few heart sprinkles over the wet chocolate immediately.
Let the chocolate set for a few minutes before moving the plate.
Pick up a skewer and enjoy the mix of fruit and fluffy marshmallow.
7. Layered Strawberry Chocolate Bark
Valentines Day Chocolate Strawberries
Bark is one of the simplest ways to save leftover fruit from going to waste. This version uses layers of white and pink chocolate for a stunning visual effect. Freeze dried strawberries provide a concentrated burst of flavor and a nice crunch. Breaking the hardened sheets into jagged pieces makes the snack look professional.
Thin layers ensure the bark is easy to bite into without being too hard. The combination of different chocolate types provides a complex flavor profile. You can package these pieces in clear bags to give as handmade gifts. It is a versatile recipe that works with almost any topping you have.
Ingredients Required
1 cup dark chocolate chips
1/2 cup white chocolate chips
2 drops red food coloring
1/2 cup freeze dried strawberries
Equipment List
Baking sheet
Parchment paper
Two bowls
Spatula
DIY Instructions
Cover your baking sheet with a piece of parchment paper.
Melt the dark chocolate chips and spread them into a thin layer on the paper.
Place the tray in the fridge for five minutes to let it set slightly.
Melt the white chocolate in a separate bowl.
Add a tiny drop of food coloring to half of the white chocolate to make it pink.
Pour the white and pink chocolate over the dark chocolate layer in swirls.
Use a toothpick to drag the colors together for a marbled look.
Crumble the freeze dried strawberries over the top of the wet chocolate.
Press the fruit down gently with your fingers so it sticks.
Refrigerate the tray for thirty minutes until the whole sheet is solid.
Use your hands to snap the bark into uneven, rustic pieces.
8. Bursting Berry Lava Truffles
Valentines Day Chocolate Strawberries
Biting into these truffles reveals a surprising liquid center. The fruit filling mimics the look of a heart and provides a refreshing tang. A thick chocolate shell protects the soft interior and gives a satisfying snap. These treats are a more advanced version of a standard chocolate dipped berry.
Using fruit puree allows you to get a smooth and consistent texture inside. The ridged pattern on the outside makes the truffles look like they came from a luxury candy shop. These are best served chilled to keep the filling from becoming too runny. They are a true delight for any chocolate lover.
Ingredients Required
1 cup strawberry puree
1 cup white chocolate ganache
2 cups milk chocolate melting wafers
1 teaspoon honey
Equipment List
Round candy molds
Small piping bag
Chilled tray
DIY Instructions
Mix the strawberry puree with a little honey to thicken it.
Melt your milk chocolate until it is completely liquid.
Spoon enough chocolate into the round molds to coat the sides but leave the center empty.
Turn the mold upside down to let extra chocolate fall out.
Let the shells harden in the fridge for ten minutes.
Fill a piping bag with the fruit puree mixture.
Squeeze a small amount of puree into the center of each chocolate shell.
Cover the puree with a layer of white chocolate ganache.
Pour more melted milk chocolate over the top to seal the truffle completely.
Scrape away any excess chocolate with a flat knife.
Chill for one hour before popping the truffles out of the mold.
9. Romantic Fruit and Rose Bouquet
Valentines Day Chocolate Strawberries
Arranging fruit like a bouquet of flowers is a creative gift idea. This display mixes chocolate covered strawberries with stars made from leftover pineapple. Real pink roses add a soft fragrance and fill the gaps between the edible pieces. It looks much more expensive than it actually costs to make at home.
Gold dusted chocolate eggs add a unique element to the arrangement. This centerpiece stays fresh for several hours and provides a healthy alternative to traditional candy. Using a simple white mug as a base keeps the focus on the colorful fruit. It is a stunning way to decorate a brunch table.
Ingredients Required
10 chocolate dipped strawberries
1 fresh pineapple
5 pink roses
3 gold chocolate eggs
Wooden skewers
Equipment List
Large mug or vase
Floral foam or a head of lettuce
Star shaped cookie cutter
Scissors
DIY Instructions
Place a piece of floral foam or a small head of lettuce inside your mug to act as a base.
Cut the pineapple into thick slices and use the cookie cutter to make star shapes.
Push a wooden skewer into the bottom of each chocolate strawberry.
Stick the star shaped pineapple onto separate skewers.
Trim the rose stems so they are about six inches long.
Push the strawberry skewers into the foam base at different heights.
Add the pineapple stars in between the strawberries.
Tuck the roses into the empty spaces to hide the skewers and the foam.
Place the gold eggs on top of skewers and add them to the center.
Check the bouquet from all sides to ensure it looks full and balanced.
Keep the arrangement in a cool room until the party starts.
10. Rose Petal Matcha Strawberries
Valentines Day Chocolate Strawberries
Green tea powder creates a unique color and a slightly earthy flavor. These strawberries look modern and sophisticated compared to traditional brown chocolate. Dried rose petals add a floral note and a beautiful pink contrast. This hack is great for anyone who wants a less sugary dessert option.
The matcha coating is smooth and clings well to the fresh fruit. Using high grade powder ensures the green color remains bright and inviting. These berries look best when arranged in a clean diagonal line on a white plate. They are a wonderful conversation starter for a Valentine dinner.
Ingredients Required
12 firm strawberries
1 cup white chocolate chips
1 tablespoon matcha green tea powder
1 tablespoon dried edible rose petals
Equipment List
Small bowl
Whisk
Parchment paper
Sieve
DIY Instructions
Melt the white chocolate chips in a small bowl until smooth.
Sift the matcha powder through a sieve into the melted chocolate.
Whisk the powder into the chocolate until the color is a solid green.
Hold a strawberry by its green leaves and dip it into the matcha mixture.
Place the berry on a piece of parchment paper.
Sprinkle a pinch of crushed rose petals onto the wet chocolate immediately.
Repeat the dipping and sprinkling for the rest of the berries.
Let the coating harden at room temperature for fifteen minutes.
Move the berries to a clean white plate for serving.
Store any leftovers in the refrigerator in a single layer.
11. Tropical Pineapple Heart Stacks
Valentines Day Chocolate Strawberries
Fresh pineapple rings create a sturdy base for these tiered treats. Slicing strawberries into heart shapes adds a romantic touch to the yellow fruit. A thin layer of swirled chocolate provides a rich contrast against the juicy pineapple slices.
This combination brings a tropical flair to your Valentine table. Guests will love the bright colors and the mix of different fruit textures. You can assemble these in minutes using just a few simple items. These stacks offer a refreshing alternative to heavy cakes.
Ingredients Required
1 whole fresh pineapple
10 large strawberries
1/2 cup dark chocolate chips
1/4 cup white chocolate chips
Equipment List
Sharp kitchen knife
Heart shaped cookie cutter
Small microwave safe bowls
Serving platter
DIY Instructions
Slice the pineapple into thick rounds about one inch wide.
Use a circular cutter to remove the tough core from each pineapple slice.
Cut your strawberries into thick vertical slices.
Press the heart shaped cookie cutter into the strawberry slices to make fruit hearts.
Melt the dark and white chocolate in separate bowls using thirty second intervals.
Stir the two chocolates together gently to create a marbled look.
Place a pineapple ring on your serving platter.
Set a strawberry heart on top of the pineapple.
Spoon a small amount of the marbled chocolate over the strawberry.
Repeat the process to build a second layer if desired.
Let the chocolate set for ten minutes before serving to your guests.
12. Spiced Mexican Chocolate Berries
Valentines Day Chocolate Strawberries
Cinnamon and chili powder give these berries a warm kick. Dark chocolate shells protect the sweet fruit while a chocolate disc adds authentic flair. Sprinkling spice over the top makes each piece feel like a gourmet discovery.
Mexican chocolate offers a unique depth of flavor that standard bars lack. Orange zest provides a bright aroma that complements the spicy notes. Serve these as a bold finale to your romantic dinner. This hack is great for adults who prefer complex flavors over pure sugar.
Ingredients Required
12 large strawberries
1 cup dark chocolate melting wafers
1 tablespoon ground cinnamon
1/2 teaspoon cayenne pepper
1 Ibarra chocolate disc
Equipment List
Microwave safe glass bowl
Baking sheet
Parchment paper
Small sifter or spoon
DIY Instructions
Clean the strawberries and ensure they are dry.
Melt the dark chocolate wafers in your microwave until the liquid is smooth.
Stir the ground cinnamon and cayenne pepper into the melted chocolate.
Grate a small amount of the Ibarra chocolate disc into a separate bowl.
Dip a strawberry into the spiced chocolate until it is fully coated.
Place the berry onto the parchment paper.
Sprinkle the grated Ibarra chocolate over the wet coating.
Dust a tiny bit of extra cinnamon over the top for color.
Let the berries rest for twenty minutes until the shell is firm.
Arrange them on a dark plate to highlight the cocoa colors.
Keep them at room temperature to preserve the spice aromas.
13. Granola Crunch Strawberry Towers
Valentines Day Chocolate Strawberries
Crunchy granola and sliced almonds add texture to these stacked fruit bites. A round graham cracker acts as the foundation for the entire tower. Dipping the berries in dark chocolate allows the oats to stick firmly to the sides.
This snack provides a satisfying bite that feels like a breakfast treat. High protein nuts and fiber from the oats make this a smarter choice for snacking. You can use any leftover cereal or nuts found in your pantry. These towers look impressive when stacked high on a white plate.
Ingredients Required
6 large strawberries
1 cup dark chocolate
1/2 cup honey granola
1/4 cup sliced almonds
6 round graham crackers
Equipment List
Microwave safe bowl
Small plates for toppings
Baking sheet
DIY Instructions
Melt the dark chocolate in a bowl until it is thin and runny.
Place your granola and sliced almonds on two separate small plates.
Dip the bottom of a graham cracker into the chocolate.
Set the cracker on your baking sheet to act as the base.
Hold a strawberry and dip the bottom half into the chocolate.
Roll the wet chocolate area in the granola and almonds.
Press the coated berry onto the center of the graham cracker base.
Stack a second coated berry on top of the first one if the stack feels stable.
Drizzle a tiny bit of extra chocolate over the top to help everything stick.
Chill the towers in the fridge for fifteen minutes to lock the structure.
Serve them carefully to avoid toppling the fruit.
14. Gilded Ombre Rose Berries
Valentines Day Chocolate Strawberries
Three shades of chocolate create a beautiful gradient on these elegant fruits. White chocolate blends into pink and finishes with a deep dark cocoa base. Edible gold leaf provides a luxurious accent that catches the light beautifully.
These berries look like they belong in a professional pastry shop window. The smooth transition between colors makes each fruit a tiny work of art. Applying the gold in a vertical strip adds height and sophistication. This recipe is a great way to use up small amounts of different chocolate types.
Ingredients Required
10 uniform strawberries
1/2 cup white chocolate
1/2 cup milk chocolate
2 drops red food coloring
1 sheet edible gold leaf
Equipment List
Three small bowls
Tweezers
Parchment paper
DIY Instructions
Divide your white chocolate into two separate bowls.
Add a tiny drop of red coloring to one bowl to create a soft pink shade.
Melt the dark chocolate in the third bowl.
Dip the top third of a strawberry into the white chocolate.
Let the first layer dry for five minutes on parchment paper.
Dip the middle section of the berry into the pink chocolate.
Dip only the very bottom tip into the dark chocolate.
Allow all the colors to dry completely until the surface is matte.
Use your tweezers to tear off a thin strip of gold leaf.
Press the gold gently onto the center of the berry where the colors meet.
Store these in a cool, dry place to keep the gold shiny.
15. Nutty Caramel Filled Truffles
Valentines Day Chocolate Strawberries
Biting into this treat reveals a hidden layer of creamy nut butter. A whole strawberry sits inside a chocolate shell surrounded by gooey caramel. Crushed peanuts on top offer a salty finish that cuts through the sweetness.
This recipe transforms a simple fruit into a heavy and decadent candy. The mixture of textures provides a great sensory experience for anyone eating it. You can swap peanut butter for almond or cashew butter if you prefer. These are very filling and satisfy even the strongest sweet tooth.
Ingredients Required
8 strawberries
1/2 cup creamy peanut butter
1/2 cup caramel sauce
1 cup milk chocolate chips
1/4 cup crushed peanuts
Equipment List
Small spoon
Microwave safe bowl
Baking sheet
Toothpicks
DIY Instructions
Cut a small hole in the top of each strawberry using a knife.
Spoon a little bit of peanut butter into the hollow center.
Drizzle a tiny amount of caramel sauce over the peanut butter.
Freeze the stuffed berries for ten minutes so the filling stays put.
Melt your chocolate chips until the liquid is smooth.
Insert a toothpick into the side of a berry to use as a handle.
Lower the berry into the chocolate until the filling is sealed inside.
Place the berry on a baking sheet and remove the toothpick.
Drizzle extra caramel over the top in a zig zag pattern.
Sprinkle crushed peanuts over the wet caramel immediately.
Refrigerate for thirty minutes until the shell is hard.
16. White Cream Cookie Berries
Valentines Day Chocolate Strawberries
Fluffy whipped cream sits between two halves of a fresh strawberry. Crushed chocolate cookies create a topping that looks like a miniature cupcake. This clever hack uses fruit as the actual container for the dessert.
The dark cookie crumbs provide a nice crunch against the soft cream. These bite sized treats are easy to eat without making a mess. You can prepare the components ahead of time and assemble them right before serving. They look adorable when lined up on a gray stone platter.
Ingredients Required
12 large strawberries
1 cup heavy whipping cream
2 tablespoons powdered sugar
4 chocolate sandwich cookies
Equipment List
Hand mixer
Large bowl
Piping bag with a star tip
Plastic bag for crushing cookies
DIY Instructions
Slice the top third off each strawberry and set the tops aside.
Cut a tiny slice off the bottom so the berry can stand upright.
Put the heavy cream and sugar into a bowl and whip until stiff peaks form.
Place the cookies in a plastic bag and crush them into fine crumbs.
Spoon the whipped cream into your piping bag.
Squeeze a large swirl of cream onto the bottom half of the strawberry.
Place the strawberry top back onto the cream swirl like a hat.
Pipe a tiny dot of cream on the very top of the fruit.
Dip the top of the “cupcake” into the bowl of cookie crumbs.
Sprinkle more crumbs over the middle cream layer for extra detail.
Serve these chilled so the whipped cream stays firm.
17. Dark Balsamic Swirl Berries
Valentines Day Chocolate Strawberries
A thick ribbon of balsamic glaze adds a tangy twist to standard chocolate fruit. Dark cocoa provides a matte finish that highlights the glossy swirl on top. Small black seeds or garnish add an extra layer of visual interest.
This combination is a classic pairing in high end restaurants. The acidity of the vinegar brings out the natural sweetness of the strawberry. It offers a sophisticated flavor profile for those who enjoy savory notes in their desserts. These berries are best served at room temperature for the best taste.
Ingredients Required
10 large strawberries
1 cup dark chocolate melting wafers
2 tablespoons thick balsamic glaze
1 teaspoon black sesame seeds
Equipment List
Small bowl
Spoon for swirling
Parchment paper
DIY Instructions
Wash and dry your strawberries thoroughly.
Melt the dark chocolate wafers in a bowl until the mixture is smooth.
Dip each strawberry into the chocolate and place it on parchment paper.
Let the chocolate set for about five minutes until it is no longer runny.
Dip a spoon into the thick balsamic glaze.
Slowly wave the spoon over the berry to create a thick S shape swirl.
Sprinkle a few black sesame seeds onto the glaze while it is wet.
Allow the berries to sit until the glaze stops moving.
Use a spatula to carefully lift the berries from the paper.
Place them on a clean plate for a minimalist presentation.
Enjoy the unique balance of tart and sweet flavors.
18. Sweet Pretzel Butterfly Berries
Valentines Day Chocolate Strawberries
Salty pretzels transform into delicate wings for these whimsical strawberry creatures. Tiny chocolate antennae and edible eyes bring the little bugs to life. Sprinkling pink and white dots adds a festive Valentine touch to the brown shells.
Children will be delighted by these fun and edible characters. The combination of salty pretzel and sweet chocolate is always a crowd favorite. This hack is an easy way to make your dessert table look more playful. You can use different sprinkle colors to create a whole family of butterflies.
Ingredients Required
12 strawberries
1 cup milk chocolate
24 mini pretzels
24 edible candy eyes
1/4 cup pink and white sprinkles
12 thin chocolate sprinkles for antennae
Equipment List
Microwave safe bowl
Baking sheet
Parchment paper
DIY Instructions
Melt your milk chocolate in a bowl until it is liquid.
Dip a strawberry into the chocolate and place it on the parchment paper.
Press two mini pretzels into the sides of the wet chocolate to make wings.
Place two candy eyes on the top front of the berry.
Stick two long chocolate sprinkles above the eyes to act as antennae.
Shake a few pink and white sprinkles over the back of the butterfly.
Repeat this process for all twelve strawberries.
Let the butterflies rest for thirty minutes so the wings become secure.
Check that the pretzels are firmly attached before moving the fruit.
Serve these on a bright white platter to make the characters pop.
Store them in a cool spot to prevent the wings from drooping.
19. Salted Caramel Drip Berries
Valentines Day Chocolate Strawberries
Warm caramel flows down the side of these decadent chocolate dipped fruits. Flaky sea salt provides a sharp contrast to the sugary layers. This recipe feels like an elevated version of a classic fairground treat.
The dripping effect creates a look of pure indulgence that is hard to resist. Using high quality salt ensures the flavor is balanced rather than just salty. These berries are quite messy to eat so provide plenty of napkins. They are best made and eaten on the same day for the best texture.
Ingredients Required
8 extra large strawberries
1/2 cup milk chocolate
1/2 cup thick caramel sauce
1 tablespoon flaky sea salt
Equipment List
Two small bowls
Parchment paper
Small spoon
DIY Instructions
Melt the milk chocolate and dip each strawberry halfway.
Place the berries on parchment paper and let them harden in the fridge.
Warm your caramel sauce in a bowl until it is slightly thin.
Hold a chocolate covered berry by the stem.
Dip the very bottom of the chocolate shell into the caramel.
Use a spoon to add an extra drop of caramel to the side so it drips down.
Sprinkle a generous pinch of sea salt over the wet caramel.
Set the berry back onto the parchment paper.
Let the caramel set at room temperature for ten minutes.
Place the berries on a gold tray for a fancy look.
Serve these to someone who loves the mix of sweet and savory treats.
20. Popping Candy Surprise Berries
Valentines Day Chocolate Strawberries
Pink and blue rock candy creates a hidden explosion of flavor inside these berries. The chocolate coating keeps the candy dry until you take a big bite. This fun surprise makes the snack a hit with kids and adventurous eaters.
The bright colors of the candy contrast beautifully with the dark chocolate exterior. Every bite offers a crackling sound and a burst of fruity sugar. This is a great way to add excitement to a standard Valentine dessert. You can use this hack for a gender reveal party or a fun birthday surprise.
Ingredients Required
10 medium strawberries
1 cup dark chocolate chips
1/2 cup blue popping candy
1/2 cup pink popping candy
Equipment List
Small paring knife
Microwave safe bowl
Parchment paper
Small spoon
DIY Instructions
Use a small knife to cut a cone shape out of the top of each berry.
Fill the empty center of the strawberry with a mix of blue and pink candy.
Melt your dark chocolate chips until the liquid is smooth.
Dip the entire strawberry into the chocolate to seal the top hole.
Place the berry on parchment paper with the hole facing down.
Sprinkle more popping candy over the outside of the wet chocolate.
Press the candy pieces gently so they stay in place.
Let the coating harden completely at room temperature.
Do not put these in the fridge because moisture can make the candy pop early.
Serve the berries immediately to ensure the best popping effect.
Tell your guests to take a big bite for the full surprise.
21. Rose Petal White Chocolate Gems
Valentines Day Chocolate Strawberries
These elegant fruits use white chocolate to create a clean, bright look. Crushed dried rose petals add a delicate pink color and a floral scent. One bite reveals the bright red center of a fresh strawberry. This treat looks high end but is very easy to make in your own kitchen.
Natural beauty shines through this simple combination of ingredients. You can serve these at a fancy brunch or give them as a thoughtful gift. Every piece feels light and refreshing on the palate. The contrast between the creamy shell and juicy fruit is wonderful. Guests will appreciate the unique floral notes in every bite.
Ingredients Required
12 large fresh strawberries
1 cup white chocolate melting wafers
2 tablespoons dried edible rose petals
Equipment List
Microwave safe glass bowl
Baking sheet
Parchment paper
Small spoon
DIY Instructions
Wash your fruit and pat it completely dry with a paper towel.
Put the white chocolate wafers into the glass bowl.
Heat the bowl in the microwave for thirty seconds and then stir.
Repeat the heating until the liquid flows smoothly from your spoon.
Line a flat baking sheet with a piece of parchment paper.
Hold a strawberry by the green leaves and dip it into the white chocolate.
Place the coated berry onto the parchment paper.
Sprinkle a pinch of crushed rose petals over the wet chocolate immediately.
Let the berries sit for fifteen minutes until the coating is firm.
Move the finished gems to a clean plate for a beautiful display.
22. Midnight Poppy Seed Crunch
Valentines Day Chocolate Strawberries
Dark chocolate provides a striking contrast for these sophisticated treats. Tiny poppy seeds offer a unique texture and a subtle earthy flavor. A dusting of crushed nuts finishes the look with a salty touch. This combination turns a standard berry into a gourmet experience.
These berries look professional but are quite easy to assemble at home. Guests will enjoy the crunch and the deep cocoa notes. Use very ripe fruit to ensure the best flavor profile. The black and tan colors look great on a slate serving tray. Every piece is a small explosion of different textures.
Ingredients Required
10 firm strawberries
1 cup dark chocolate chips
2 tablespoons poppy seeds
1/4 cup crushed walnuts or peanuts
Equipment List
Small bowl for melting
Two flat plates for toppings
Baking sheet
Parchment paper
DIY Instructions
Rinse the strawberries and make sure they are bone dry.
Melt the dark chocolate chips in a bowl until the mixture is liquid.
Pour the poppy seeds onto one small plate.
Place the crushed nuts on a second small plate.
Dip a strawberry into the melted dark chocolate until it is halfway covered.
Roll the wet chocolate side in the poppy seeds first.
Dip the very tip of the berry into the crushed nuts for a layered look.
Set the fruit on a parchment lined baking sheet.
Repeat this for all the remaining strawberries.
Chill the tray in the refrigerator for ten minutes to set the shell.
23. Rainbow Cereal Fruit Bites
Valentines Day Chocolate Strawberries
Colorful cereal pieces bring a sense of fun to your dessert table. White chocolate acts as a sweet glue for the crunchy fruit flakes. These bites are a favorite for children and those who love nostalgic snacks. Bright hues make the platter look like a rainbow has landed in your kitchen.
The mix of textures keeps every mouthful interesting and sweet. You can use any leftover breakfast cereal for this creative hack. Arrange them on a plain plate to make the colors pop. This recipe is a great way to clear out the pantry after a long week. Everyone will reach for these eye catching treats first.
Ingredients Required
12 medium strawberries
1 cup white chocolate melting wafers
1 cup fruity flake cereal
Equipment List
Medium bowl
Shallow dish for cereal
Baking sheet
Parchment paper
DIY Instructions
Clean the strawberries and ensure no water remains on the surface.
Put the fruity cereal into a shallow dish and crush it slightly with your hands.
Melt the white chocolate wafers in your microwave until smooth.
Hold the strawberry by its stem and dip it into the white chocolate.
Lift the berry and let the extra chocolate drip back into the bowl.
Press the chocolate covered berry into the dish of crushed cereal.
Turn the fruit to ensure the cereal covers all the white areas.
Place the berry on a piece of parchment paper.
Let the treats rest at room temperature for twenty minutes.
Serve the rainbow berries on a bright white platter.
24. Gilded Dark Cocoa Hearts
Valentines Day Chocolate Strawberries
Real gold leaf elevates a basic snack into a luxury experience. Dark chocolate provides a smooth matte finish that highlights the metallic shine. These treats are the ultimate romantic gesture for a Valentine celebration. Gold accents catch the light and make the berries look like edible jewelry.
Handling the gold requires a bit of patience and a gentle touch. The results are stunning and look like they came from a high end boutique. Your partner will appreciate the extra effort in the presentation. These gems are a great choice for a very special evening. They add a touch of class to any dessert spread.
Ingredients Required
6 extra large strawberries
1 cup premium dark chocolate
1 sheet edible gold leaf
Equipment List
Small tweezers
Microwave safe bowl
Baking sheet
Parchment paper
DIY Instructions
Wash and dry your large strawberries very carefully.
Melt the dark chocolate in a bowl until it is thin and shiny.
Dip a strawberry into the chocolate and place it on the parchment paper.
Allow the chocolate to harden completely in a cool room.
Use your tweezers to pick up a tiny fragment of gold leaf.
Press the gold leaf gently onto the side of the dark chocolate shell.
Drag the tweezers down to create a jagged gold pattern.
Repeat the process for each strawberry until they all have gold accents.
Place the berries in a single layer inside a fancy gift box.
Keep them in a cool spot until you are ready to surprise your loved one.
25. Toasted S’mores Berry Towers
Valentines Day Chocolate Strawberries
Toasted marshmallows add a smoky sweetness to the juicy fruit base. Chocolate drizzles hold the fluffy topping in place on the berry. This hack tastes just like a campfire s’more but with a fresh twist. Graham cracker crumbs on the bottom provide the necessary crunch for this treat.
Browning the sugar creates a beautiful golden crust on the top. The warm marshmallow melts slightly into the cold strawberry. Use a kitchen torch for the best results and a controlled toast. This dessert is a fun conversation starter for a casual party. It brings back memories of summer nights in a bite sized form.
Ingredients Required
8 large strawberries
1/2 cup dark chocolate chips
8 jumbo marshmallows
1/4 cup graham cracker crumbs
Equipment List
Kitchen torch
Small spoon
Baking sheet
Parchment paper
DIY Instructions
Slice the bottom tip off each strawberry so it can stand upright.
Melt the dark chocolate until it is smooth and liquid.
Dip the bottom of the strawberry into the chocolate and then into the crumbs.
Set the berry on the parchment paper so it stays steady.
Spoon a small amount of melted chocolate onto the top of the fruit.
Press a jumbo marshmallow onto the chocolate on top of the berry.
Use your kitchen torch to carefully brown the outside of the marshmallow.
Drizzle more melted chocolate over the toasted marshmallow in a zig zag.
Sprinkle a few extra crumbs over the top while the drizzle is wet.
Serve these towers immediately while the marshmallow is still warm.
26. Tropical Frozen Fruit Bark
Valentines Day Chocolate Strawberries
Frozen chocolate bark is a smart way to preserve extra fruit. Whole berries and mango chunks provide a burst of natural sugar in every piece. Dark chocolate creates a sturdy base that holds the toppings firm. Blueberries add a deep color that contrasts with the bright yellow mango.
Breaking the sheet into jagged pieces makes the dessert look rustic and modern. This is a great choice for a healthy evening snack. Store the pieces in a cold container to keep them from melting. The mix of frozen fruit and chocolate is very refreshing. You can customize the toppings with whatever you have in the fridge.
Ingredients Required
2 dark chocolate bars (4 ounces each)
1/2 cup sliced strawberries
1/4 cup fresh blueberries
1/4 cup diced mango pieces
Equipment List
Baking sheet
Parchment paper
Spatula
Large knife
DIY Instructions
Cover your baking sheet with a clean piece of parchment paper.
Melt the dark chocolate bars in a bowl until the liquid is smooth.
Pour the chocolate onto the parchment paper and spread it thin with a spatula.
Press the strawberry slices and mango chunks into the wet chocolate.
Scatter the blueberries across the surface to fill the gaps.
Place the baking sheet into the freezer for at least one hour.
Check that the chocolate is completely solid and hard to the touch.
Lift the parchment paper and snap the chocolate into large uneven pieces.
Use a knife if you prefer clean edges for your bark.
Keep the bark in a sealed bag in the freezer until you want to eat it.
27. Melting Heart Cocoa Melt
Valentines Day Chocolate Strawberries
Hot milk transforms a chocolate heart into a creamy drink. A hidden strawberry waits at the bottom for a sweet surprise. Tiny pink marshmallows float to the surface as the shell dissolves. This interactive treat makes a cold evening feel warm and special.
Pouring the liquid is the most exciting part of the experience. Use a clear glass to watch the magic happen. The cocoa powder at the bottom ensures a rich flavor throughout the mug. Every sip is filled with melted chocolate and fruity notes. This is a wonderful way to enjoy a movie night with someone you love.
Ingredients Required
1 large hollow chocolate heart
1 large fresh strawberry
1 tablespoon hot cocoa mix
1/4 cup small pink marshmallows
1 cup steaming hot milk
Equipment List
Large mug or clear glass
Spoon
DIY Instructions
Place a spoonful of hot cocoa mix into the bottom of your mug.
Set a fresh strawberry on top of the powder.
Put the hollow chocolate heart over the strawberry to hide it.
Scatter the pink marshmallows around the heart shell.
Heat your milk until it is steaming but not boiling.
Pour the hot milk directly over the center of the chocolate heart.
Watch as the shell collapses and reveals the fruit inside.
Stir the mixture gently with a spoon to blend the flavors.
Let the drink cool for a minute so the strawberry softens.
Enjoy your warm cocoa and the juicy fruit treat at the end.
28. Roasted Mocha Espresso Berries
Valentines Day Chocolate Strawberries
Coffee grounds add a bold aroma and a bitter edge to the fruit. A whole roasted bean provides a professional look and a strong crunch. These mocha treats are a dream for anyone who loves an afternoon caffeine boost. Dark cocoa powder dusted over the shell adds a velvet appearance to the berry.
The dark coating looks elegant and sophisticated on a black platter. Fine grounds provide a textured finish that catches the light. Pair these with a hot cup of coffee for the best experience. The bitterness of the coffee balances the natural sweetness of the strawberry. It is a mature treat that feels very grown up and fancy.
Ingredients Required
10 large strawberries
1 cup dark chocolate chips
1 tablespoon fine espresso grounds
10 whole roasted coffee beans
Equipment List
Microwave safe bowl
Small sifter
Baking sheet
Parchment paper
DIY Instructions
Dry your strawberries thoroughly before you begin.
Melt the dark chocolate in a bowl until the mixture is thin.
Dip each strawberry into the chocolate and place it on parchment paper.
Put the espresso grounds into a small sifter.
Dust a light layer of coffee over the wet chocolate immediately.
Press one whole coffee bean into the top of each berry.
Allow the chocolate to set for twenty minutes at room temperature.
Use a soft brush to remove any excess coffee grounds from the paper.
Arrange the mocha berries in a circle on a dark plate.
Store them in a cool dry place to keep the coffee aroma fresh.
29. Clear Crystal Jelly Delights
Valentines Day Chocolate Strawberries
Clear jelly domes create a futuristic and high end appearance. The transparent bubble protects the fruit while showing off the red interior. Dark chocolate provides a stable base for the wobbly top. This hack looks like it came from a molecular gastronomy kitchen.
This recipe uses simple gelatin to create a professional look. The combination of textures is surprising and very satisfying. Serve these chilled to keep the jelly firm and clear. The glossy surface makes the fruit inside look even more vibrant. It is a stunning visual piece for any upscale gathering.
Ingredients Required
6 thick strawberry slices
1/2 cup dark chocolate
1 packet unflavored gelatin
1 cup clear fruit juice or sweetened water
Equipment List
Small semi sphere silicone mold
Sharp knife
Microwave safe bowl
Refrigerator space
DIY Instructions
Mix the gelatin with the clear liquid according to the package directions.
Pour the liquid into the semi sphere molds.
Place the mold in the fridge for two hours until the jelly is solid.
Melt your dark chocolate in a small bowl.
Cut your strawberries into round flat slices.
Dip the bottom of a strawberry slice into the dark chocolate.
Set the berry on a plate and let the chocolate harden.
Pop a clear jelly dome out of the silicone mold.
Place the jelly dome directly on top of the strawberry slice.
Keep these treats in the refrigerator until the very moment you serve them.
30. Nutty Pistachio Green Jewels
Valentines Day Chocolate Strawberries
Green chocolate and crushed pistachios create a vibrant and nutty treat. White chocolate provides the base for the colorful and earthy coating. Each bite offers a balance of salty nuts and sweet fruit. These berries look like rare jewels when stacked on a white plate.
The green tint is natural and very inviting for guests. Drizzle extra dark chocolate over the top for a final artistic touch. Slicing the berry open reveals a beautiful cross section of red and green. This treat is as delicious as it is pretty. It is a wonderful way to use up those extra nuts in the pantry.
Ingredients Required
12 firm strawberries
1 cup white chocolate chips
1 tablespoon pistachio paste or green food coloring
1/2 cup finely crushed pistachios
1/4 cup dark chocolate for drizzling
Equipment List
Two microwave safe bowls
Small food processor
Baking sheet
Parchment paper
DIY Instructions
Put the shelled pistachios in a food processor and pulse until they are fine crumbs.
Melt the white chocolate chips in a bowl until the liquid is smooth.
Stir in the pistachio paste or green coloring until the shade is even.
Dip a dry strawberry into the green chocolate until fully coated.
Roll the wet berry in the bowl of crushed pistachios.
Place the nutty berry on the parchment paper.
Melt the dark chocolate in a separate small bowl.
Use a spoon to drizzle thin lines of dark chocolate over the green berries.
Let the coating firm up in the fridge for fifteen minutes.
Cut one berry in half to show off the colorful layers inside.
31. Strawberry Sunday Waffle Cones
Valentines Day Chocolate Strawberries
These tiny cones offer a nostalgic boardwalk feel right in your kitchen. A whole berry acts as the “scoop” inside a crispy waffle shell. Warm chocolate cascades over the fruit like a classic sundae topping.
Colorful sprinkles add a playful touch that children will adore. A bright maraschino cherry sits on top to finish the look. This hack repurposes leftover ice cream cones for a mess free fruit dessert. It looks adorable on any Valentine party spread. Every bite gives you a mix of crunch and juice.
Ingredients Required
12 mini waffle cones
12 large strawberries
1/2 cup milk chocolate chips
12 maraschino cherries with stems
2 tablespoons rainbow sprinkles
Equipment List
Microwave safe glass bowl
Small spoon
Wire cooling rack
Paper towels
DIY Instructions
Rinse the strawberries and pat them until they are very dry.
Cut the green leaves off the top of each berry to make a flat surface.
Place your chocolate chips into a bowl and melt them in the microwave.
Stir the chocolate every fifteen seconds until it looks like a smooth syrup.
Place a strawberry into the opening of a mini waffle cone.
Press the berry down gently so it stays stuck inside the cone.
Use a spoon to pour a little melted chocolate over the top of the fruit.
Shake sprinkles over the wet chocolate immediately so they stick.
Set a cherry right in the middle of the chocolate while it is still soft.
Stand the cones up on a wire rack or inside small glasses.
Let the chocolate harden for twenty minutes before you serve them.
32. Neon Psychedelic Swirl Berries
Valentines Day Chocolate Strawberries
Bold colors make these fruits stand out from traditional red and white treats. Neon shades of blue, green, and pink swirl together in a trippy pattern. Every berry looks like a tiny planet floating on your serving tray.
This technique uses a marbling method to achieve such intricate detail. The vibrant hues are achieved through high quality food coloring mixed into white cocoa. These are a great choice for a modern or art themed Valentine bash. Your guests will spend more time taking photos than eating them.
Ingredients Required
10 large firm strawberries
1 cup white chocolate melting wafers
Pink, blue, and green oil based food coloring
1 teaspoon coconut oil
Equipment List
Wide shallow bowl
Toothpicks
Baking sheet
Parchment paper
DIY Instructions
Line your baking sheet with parchment paper so the berries do not stick.
Melt the white chocolate and coconut oil together until very thin.
Pour the melted white mixture into a wide shallow bowl.
Add one drop of each color of food coloring to the surface of the white chocolate.
Use a toothpick to gently drag the colors across the surface in a circle.
Stop stirring once you see a beautiful marbled pattern.
Hold a strawberry by the stem and lower it onto the surface of the colors.
Roll the berry across the top of the chocolate to pick up the swirl.
Lift the berry straight up and let the extra liquid drip off.
Place the fruit on the parchment paper.
Repeat the process for each berry, adding more color drops if needed.
33. Savory Thyme and Cheese Delights
Valentines Day Chocolate Strawberries
Most people only think of sugar when they imagine dipped berries. This recipe challenges those expectations with a sophisticated savory twist. A thin ribbon of aged cheese provides a salty bite that cuts through the rich cocoa.
Honey adds a floral sweetness that ties the herbs and fruit together. Fresh thyme provides a woody aroma that elevates the entire experience. These are excellent for serving alongside a glass of wine or a charcuterie board. They prove that fruit can be a complex part of a savory course.
Ingredients Required
8 extra large strawberries
1/2 cup dark chocolate chips
2 ounces hard white cheese like Parmesan or Manchego
1 tablespoon honey
4 sprigs of fresh thyme
Equipment List
Vegetable peeler
Small microwave safe bowl
Baking sheet
Parchment paper
DIY Instructions
Wash your fruit and ensure it is completely dry.
Melt the dark chocolate in a bowl until it is smooth.
Dip each strawberry halfway into the dark chocolate.
Set the berries on a parchment lined sheet to dry.
Use a vegetable peeler to cut very thin ribbons of the hard cheese.
Roll a cheese ribbon into a small curl.
Place the cheese curl on top of the chocolate shell before it sets.
Strip the tiny leaves off the thyme sprigs.
Sprinkle a few thyme leaves over the cheese and chocolate.
Use a toothpick to add a tiny drop of honey to the center of the cheese.
Let the berries rest until the chocolate is firm to the touch.
34. Shattered Chocolate Berry Salad
Valentines Day Chocolate Strawberries
Sometimes simple is better when you have a lot of leftover fruit. This salad mixes fresh berries with large jagged shards of dark and white chocolate. Mint leaves provide a refreshing burst of green color and cool flavor.
Tossing everything together creates a rustic and inviting look for a casual brunch. You can use whatever chocolate pieces you have remaining in your baking cabinet. It requires zero dipping or waiting for shells to harden. Serve it in a large white bowl to let the natural colors shine.
Ingredients Required
2 cups sliced strawberries
1 cup fresh blueberries
1 cup raspberries
4 ounces dark chocolate bar
2 ounces white chocolate bar
10 fresh mint leaves
Equipment List
Large serving bowl
Sharp knife
Cutting board
DIY Instructions
Slice the strawberries into thin even pieces.
Place the strawberries, blueberries, and raspberries into a large bowl.
Use a sharp knife to chop the dark chocolate into large uneven chunks.
Do the same with the white chocolate to create different sizes of shards.
Scatter the chocolate pieces over the fruit in the bowl.
Use your hands to tear the mint leaves into small bits.
Throw the mint on top of the fruit and chocolate.
Toss the mixture very gently with a large spoon so the berries do not crush.
Chill the salad for ten minutes before you serve it.
Add a few extra mint leaves on top for a pretty garnish.
Serve this alongside whipped cream if you want a richer treat.
35. Pressed Floral Pansy Berries
Valentines Day Chocolate Strawberries
Edible flowers transform these berries into a spring garden on a plate. Bright purple and yellow pansies are pressed into smooth white chocolate shells. Tiny flecks of gold leaf add a shimmer that highlights the delicate petals.
The white background makes the natural floral patterns look like fine porcelain. This style is incredibly popular for tea parties or garden weddings. Every berry is a unique piece of botanical art. Guests will feel truly pampered when they see these on the table.
Ingredients Required
12 medium strawberries
1 cup white chocolate melting wafers
12 small edible pansies or violas
1 sheet edible gold leaf
Equipment List
Tweezers
Small bowl
Baking sheet
Parchment paper
DIY Instructions
Dry your strawberries very well with a paper towel.
Melt the white chocolate in a bowl until it is thin and smooth.
Dip a strawberry into the chocolate and place it on your parchment paper.
Pick up an edible flower using your tweezers.
Press the flower gently onto the side of the wet chocolate.
Flatten the petals so they stick firmly to the surface.
Tear off a tiny piece of gold leaf with your tweezers.
Place the gold near the center of the flower for a bit of sparkle.
Repeat this process for all your strawberries.
Allow the chocolate to set for thirty minutes at room temperature.
Handle these berries carefully by the stem so you do not bruise the flowers.
36. Velvet Gold Ganache Hearts
Valentines Day Chocolate Strawberries
This final hack is the ultimate in rich and heavy decadence. A velvet cocoa coating hides a center filled with smooth liquid ganache. Gold dust creates a shimmering heart shape on the front of the berry.
Slicing into the fruit reveals the thick chocolate flowing from the center. It mimics the experience of a lava cake but in a bite sized form. This treat serves as the grand finale for your Valentine dessert collection. It is the most luxurious way to end a romantic meal.
Ingredients Required
6 extra large strawberries
1/2 cup heavy cream
1 cup dark chocolate chips
1/2 cup unsweetened cocoa powder
1 teaspoon edible gold luster dust
Equipment List
Small saucepan
Small knife
Fine mesh strainer
Small paintbrush
DIY Instructions
Cut the center out of the strawberry to create a small hollow space.
Heat the heavy cream in a saucepan until it starts to simmer.
Pour the hot cream over the chocolate chips in a bowl and let it sit.
Stir the cream and chocolate until it becomes a thick glossy ganache.
Spoon the ganache into the hollow center of each strawberry.
Place the berries in the fridge for one hour so the filling thickens.
Roll the cold berries in a bowl of cocoa powder until they look like velvet.
Shake off any extra powder using a fine mesh strainer.
Dip a small paintbrush into the gold luster dust.
Paint a shimmering heart shape onto the side of the cocoa coating.
Serve the berries on a dark plate to make the gold stand out.
Key Takeaways
Dry your fruit completely so the cocoa coating sticks.
Melt chocolate in short bursts to prevent burning the liquid.
Add crunchy elements like nuts for a better texture.
Decorate with gold leaf or flowers for a luxury appearance.
Keep berries in a cool area to maintain a firm shell.
Making handmade treats brings a personal touch to any holiday. These 36 hacks provide endless inspiration for using up every last berry. You can mix and match different toppings to find your favorite flavor combinations.
Sharing these morsels with others makes the effort feel worthwhile. Homemade gifts often carry more meaning than store bought candy boxes. Your kitchen skills will shine through every dipped and drizzled piece.
Enjoy the process of crafting these beautiful fruit treasures. Happy snacking and have a wonderful Valentine celebration with your favorite people.
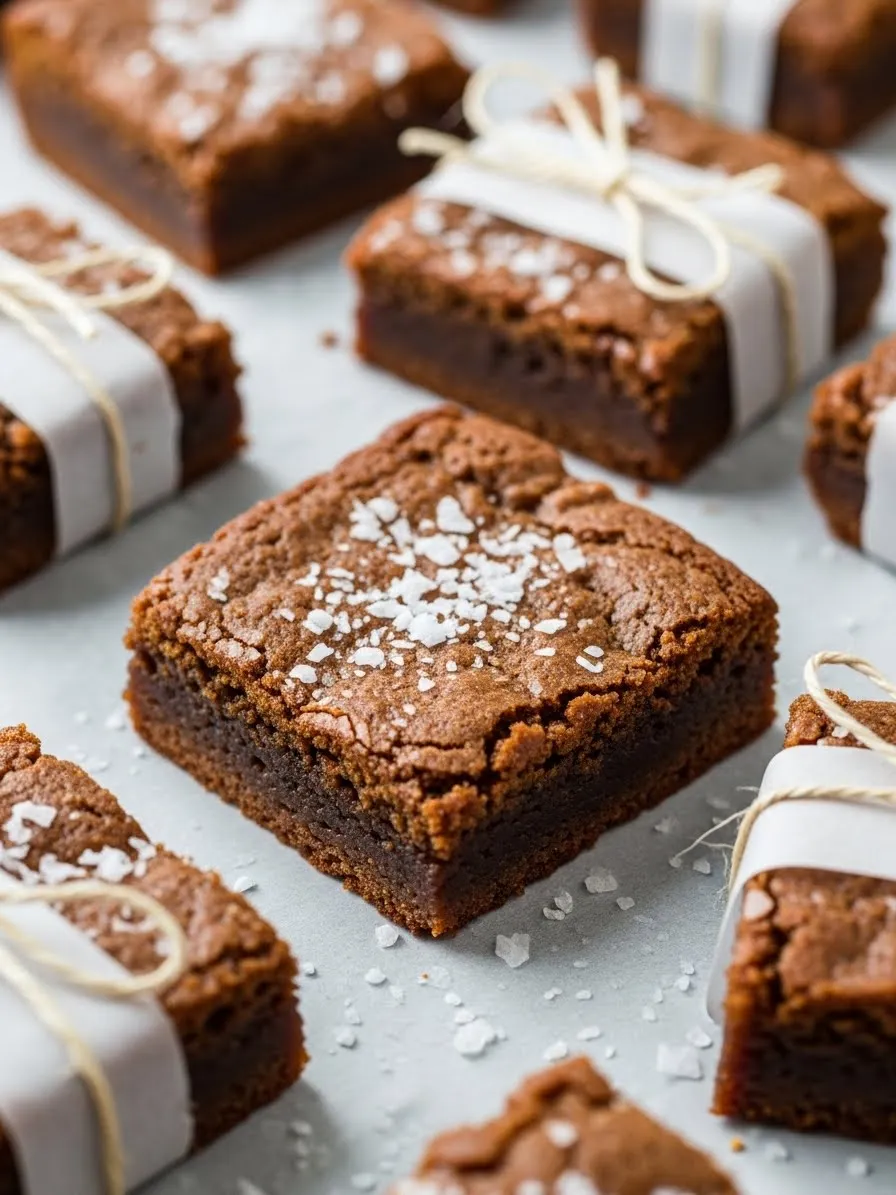
Spread the loveThe holiday rush often leaves very little time for complicated baking projects. You might find yourself needing a quick gift or a sweet addition to a party platter at the final hour. These…
Spread the loveIs your holiday baking done? Sharing homemade food is a beautiful way to show you care during the busy winter season. These 40 simple recipes help you create thoughtful gifts without spending days…
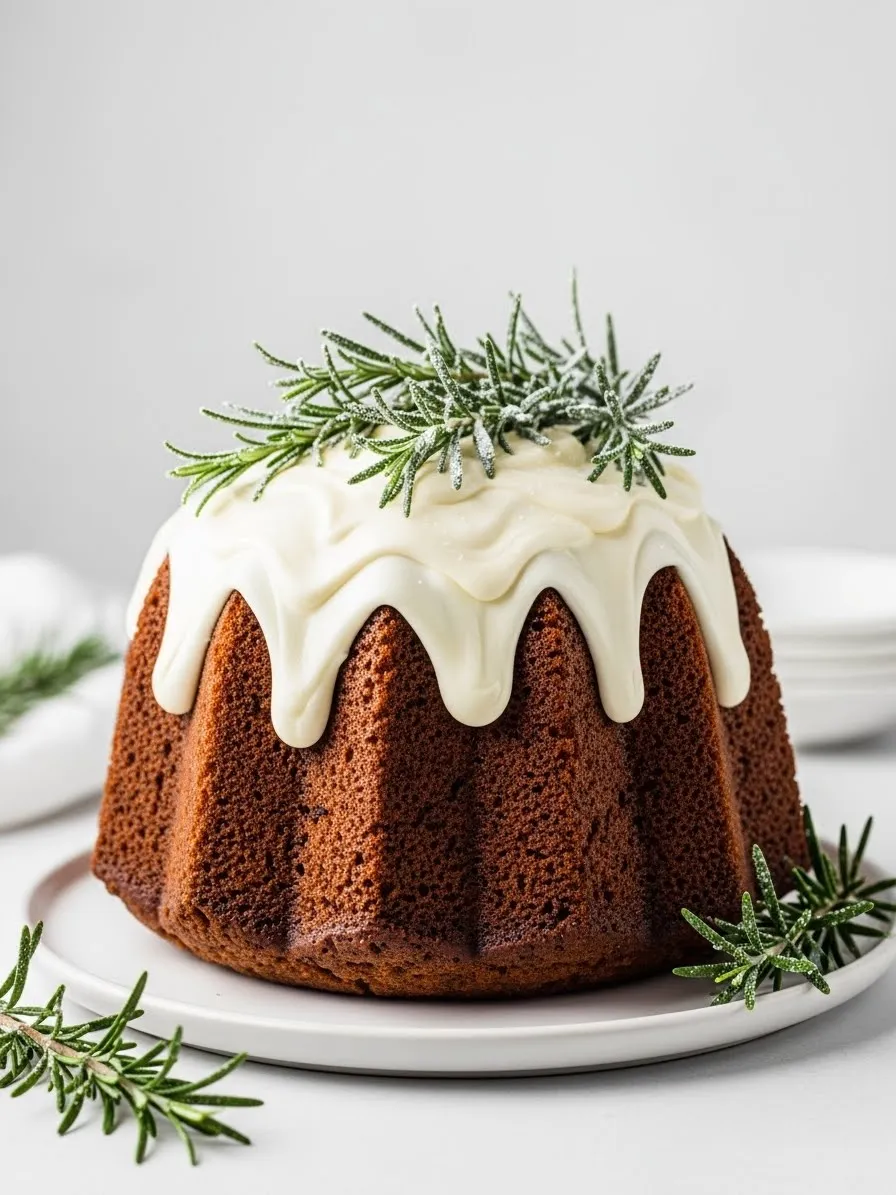
Spread the loveImagine your guests walking into a room filled with the warm, spicy scent of cinnamon and the bright, fresh aroma of rosemary. The holiday table sits ready, anchored by a dessert so stunning…